This tutorial shows you how to list users in Linux. You’ll also learn to list only the logged users.
Today different Operating
Systems have the capability to use multiple users, each one with their
settings and custom configurations to make things easier for
administrators and operators to work in together on the same system.
Linux on the other hand is very strong on this matter as it allows
multiple users to work at the same time on the system in an independent
way. It can even allow a single user to open several sessions even from
different locations in order to work on the system.
Here are some hints & tricks to handle users in Linux.
List all the users on Linux
Probably, the very first thing to know is how to know what users are
in my system. There are several ways you can obtain the list of users in
Linux.
1. Show users in Linux using less /etc/passwd
This command allows sysops to list the the users that are locally
stored in the system. It will give the listing in structured way as:
Now if you want to distinguish the normal users from the system users, you can refer to the User ID (UID) number.
Generally,
a normal user has UID greater or equal to 1000. This gives you a hint
that the user with UID >=1000 is a normal user and users with UID
<1000 are="" p="" system="" users.="">
2. View users using getent passwd
This command will give you a similar output as “less /etc/passwd” however, this one actually queries the GNU Name Service Switch functionality configuration file (located at /etc/nsswitch.conf).
This conf includes passwd, so that’s why it will display very similar but if you use LDAP for authentication it will include that as well.
3. List Linux users with compgen
If you just want to list all the usernames without any additional information, you can use the compgen command with -u option.
compgen -u
The output would be like this:
compgen -u
root
daemon
bin
sys
sync
games
man
lp
mail
news
uucp
proxy
www-data
backup
list
irc
gnats
nobody
systemd-network
systemd-resolve
syslog
messagebus
_apt
uuidd
avahi-autoipd
usbmux
dnsmasq
rtkit
cups-pk-helper
speech-dispatcher
whoopsie
kernoops
saned
pulse
avahi
colord
hplip
geoclue
gnome-initial-setup
gdm
abhishek
Tip
You can use compgen
command with -c option to list all the commands available to you. This
is helpful when you are not the admin on a Linux system and don’t have sudo access.
A few tips about listing users in Linux
You just saw three ways to view users in Linux. Here are a few tips that would help you while dealing with the users listing.
List only the usernames
You already have the compgen command for that but you don’t have to remember it all the time.
If we would like to only get a list of the usernames in the system, you can use the awk command or the cut command to filter the output of the other two commands we saw earlier.
cut -d: -f1 /etc/passwd
or
getent passwd | awk -F: '{ print $1}'
Any of these will give us a filtered list of users, showing only the very first column which is username:
root
daemon
bin
sys
sync
games
man
lp
mail
news
johndoe
davmail
statd
Check if a username already exists in the system
This might be useful if you want to know if a particular username already exists in the system:
If you want to know what users are currently logged into your system,
then you need to perform a simple ‘who’ on your command line and this
will immediately list current usernames with an active session to your
system
In this case, the listing will give you not only the list of
usernames connected but also how they are connected, since when they are
connected and from where they are connected.
The very first column will tell you what username is it.
The second column will give you what type of connection it is: if
it’s represented with a “:X” where X is a number, it means it is using a
Graphical User Interface (GUI) or Desktop session such as Gnome, XDE,
etc; if it says “pts/X” where X is a number, it means it’s a connection
made through SSH protocol (command line).
The third column will tell you since when this session has been
connected to the server (date and time). The fourth and last column will
give you the location from where it’s connected, if remote it will
display the IP from where the connection is made if local (like the GUI)
it will display “(:X)” where X is the number of the session in this
case and will match the number in the second column for that row.
Wrapping up
As you can see, listing users in Linux is not difficult at all. It
consists of simple commands which will output all the information for
you, whatever you want to do or obtain of that information is something
you need to filter depending on what you want to check on the system.
Linux
has a robust and mature file system that allows users to exploit a
variety of built-in tools for a range of purposes. Most commonly, users
will access files so that they can be copied, altered, opened and
deleted. Sometimes this is intentional, on other occasions, especially
in the case of servers, it can be malicious.
It is time to channel your inner Sherlock Holmes. We are going file hunting!
Why is this important?
Knowing
when a file was used, accessed or changed can help with unauthorized
access or simply as a way to keep track of what has happened. This
investigation could be on a professional level, with dedicated forensic
analysis, or on a home-user level, trying to see which of their photos
was copied and potentially where it ended up. This article is also meant
to give System Administrators a vital guide to enhance their toolset
for their daily activities and tasks.
Give me the files, stat!
Open
your Terminal and gain root if you need it. Once done, you will be
ready to search for that elusive file or check when things have been
accessed.
The stat command can show file size, type, UID/GUID and the access/modify time.
Here is the stat of my “/etc” folder. Notice the simplicity of the command.
You can see the date it was last accessed, the modify time and the last change.
But I forgot the name!
This
is a common occurrence, especially when digging through an old external
hard drive for that document or photo you need. Luckily the Terminal
comes to the rescue.
The command needed is ls.
There are four principal variables that you can use with ls:
ls-a
This will list all files, including those which are hidden:
ls-l
This enables the long list format:
ls--time-style=FORMAT
This shows the time in a specified format:
ls +%D
This is the show/user date in %m/%d/%y format:
When put together, the command gives us this. It is the basic list of my home directory on an Ubuntu test installation.
You
can see the permissions, the username, date and the location. Mostly
this will suffice in finding the file, but what if you have a directory
with hundreds or thousands of files? Trawling through them manually is
far too time consuming. Therefore, we can narrow down a little by adding
the following flag:
ls-alx--time-style=+%D
This will list things alphabetically, or if you prefer, list the files by size like this:
ls-als--time-style=+%D
Bonus Search
Using the following commands, users can see when a file was accessed.
ls-l--time=atime
Here are some of the options you can set for the time parameter:
atime – updated when file is read
mtime — updated when the file changes
ctime — updated when the file or owner or permissions changes
Find and Seek
Another great tool that Linux has is the find command (more about it here). Let’s say I need the most recently modified files, sorted by reverse order, I would type the following into the Terminal:
find/etc -type f -printf'%TY-%Tm-%Td %TT %p\n'|sort-r
This looks like a very difficult command, but it really isn’t. More can be found on the Ubuntu man page. The result is below.
Hopefully
this article will give you the skills you need to work within the
Terminal to find out whats been happening with a given system. It will
allow you to find out the, “who, where and what” which will let you
secure your server or simply find the document you need. What do you
use? Is there some killer tool or piece of software that you use? Is
there a tool that can run in both the Terminal and has a slick GUI for
beginners? Let us know in the comments section and help your fellow
enthusiasts.
Several commands report on how much memory
is installed and being used on Linux systems. You can be deluged with
details or get a quick and easy answer, depending on the command you
use.
Kevin Stanchfield(CC BY 2.0)There are numerous ways to get information on the memory installed
on Linux systems and view how much of that memory is being used. Some
commands provide an overwhelming amount of detail, while others provide
succinct, though not necessarily easy-to-digest, answers. In this post,
we'll look at some of the more useful tools for checking on memory and
its usage.
Before we get into the details, however, let's review a
few details. Physical memory and virtual memory are not the same. The
latter includes disk space that configured to be used as swap. Swap may
include partitions set aside for this usage or files that are created to
add to the available swap space when creating a new partition may not
be practical. Some Linux commands provide information on both.
Swap
expands memory by providing disk space that can be used to house
inactive pages in memory that are moved to disk when physical memory
fills up.
One file that plays a role in memory management is /proc/kcore.
This file looks like a normal (though extremely large) file, but it
does not occupy disk space at all. Instead, it is a virtual file like
all of the files in /proc.
$ ls -l /proc/kcore
-r--------. 1 root root 140737477881856 Jan 28 12:59 /proc/kcore
Interestingly, the two systems queried below do not have
the same amount of memory installed, yet the size of /proc/kcore is the
same on both. The first of these two systems has 4 GB of memory
installed; the second has 6 GB.
system1$ ls -l /proc/kcore
-r--------. 1 root root 140737477881856 Jan 28 12:59 /proc/kcore
system2$ ls -l /proc/kcore
-r--------  1 root root 140737477881856 Feb  5 13:00 /proc/kcore
Explanations that claim the size of this file represents the
amount of available virtual memory (maybe plus 4K) don't hold much
weight. This number would suggest that the virtual memory on these
systems is 128 terabytes! That number seems to represent instead how
much memory a 64-bit systems might be capable of addressing — not how
much is available on the system. Calculations of what 128 terabytes and
that number, plus 4K would look like are fairly easy to make on the
command line:
Another and more human-friendly command for examining memory is the free command. It gives you an easy-to-understand report on memory.
$ free
              total        used        free      shared  buff/cache   available
Mem:        6102476      812244     4090752       13112     1199480     4984140
Swap:       2097148           0     2097148
With the -g option, free reports the values in gigabytes.
$ free -g
              total        used        free      shared  buff/cache   available
Mem:              5           0           3           0           1           4
Swap:             1           0           1
With the -t option, free shows the same values
as it does with no options (don't confuse -t with terabytes!) but by
adding a total line at the bottom of its output.
$ free -t
              total        used        free      shared  buff/cache   available
Mem:        6102476      812408     4090612       13112     1199456     4983984
Swap:       2097148           0     2097148
Total:      8199624      812408     6187760
And, of course, you can choose to use both options.
$ free -tg
              total        used        free      shared  buff/cache   available
Mem:              5           0           3           0           1           4
Swap:             1           0           1
Total:            7           0           5
You might be disappointed in this report if you're trying to
answer the question "How much RAM is installed on this system?" This is
the same system shown in the example above that was described as having
6GB of RAM. That doesn't mean this report is wrong, but that it's the
system's view of the memory it has at its disposal.
The free command also provides an option to update the display every X seconds (10 in the example below).
$ free -s 10
              total        used        free      shared  buff/cache   available
Mem:        6102476      812280     4090704       13112     1199492     4984108
Swap:       2097148           0     2097148

              total        used        free      shared  buff/cache   available
Mem:        6102476      812260     4090712       13112     1199504     4984120
Swap:       2097148           0     2097148
With -l, the free command provides high and low memory usage.
$ free -l
              total        used        free      shared  buff/cache   available
Mem:        6102476      812376     4090588       13112     1199512     4984000
Low:        6102476     2011888     4090588
High:             0           0           0
Swap:       2097148           0     2097148
Another option for looking at memory is the /proc/meminfo
file. Like /proc/kcore, this is a virtual file and one that gives a
useful report showing how much memory is installed, free and available.
Clearly, free and available do not represent the same thing. MemFree
seems to represent unused RAM. MemAvailable is an estimate of how much
memory is available for starting new applications.
DirectMap4k represents the amount of memory being mapped to
standard 4k pages, while DirectMap2M shows the amount of memory being
mapped to 2MB pages.
The getconf command is one that will provide quite a bit more information than most of us want to contemplate.
Pare that output down to something specific with a command like
the one shown below, and you'll get the same kind of information
provided by some of the commands above.
$ getconf -a | grep PAGES | awk 'BEGIN {total = 1} {if (NR == 1 || NR == 3) total *=$NF} END {print total / 1024" kB"}'
6102476 kB
That command calculates memory by multiplying the values in the first and last lines of output like this:
Calculating that independently, we can see how that value is derived.
$ expr 4096 \* 1525619 / 1024
6102476
Clearly that's one of those commands that deserves to be turned into an alias!
Another command with very digestible output is top. In the first five lines of top's output, you'll see some numbers that show how memory is being used.
And finally a command that will answer the question "So, how much RAM is installed on this system?" in a succinct fashion:
$ sudo dmidecode -t 17 | grep "Size.*MB" | awk '{s+=$2} END {print s / 1024 "GB"}'
6GB
Depending on how much detail you want to see, Linux systems
provide a lot of options for seeing how much memory is installed on your
systems and how much is used and available.
Almost all developers around the world use a version controlling
software for managing & sharing their codes. SVN has always been a
good choice but now Git is in demand & people are shifting their
focus more and more towards Git as their choice of version controlling
system.
But what about the old SVN repositories, well we can also
migrate old SVN repositories to Git by using a nice little open source
application called ‘svn2git’.
Svn2git is nice little application
that can be used to migrate a SVN repository. It properly migration SVN
repo along with its trunk, branches & tags. This utility makes sure
that your SVN repos’s tags & branches are imported in meaningful way
so that they are where they are supposed to. (Recommended Read: Simple guide to install SVN on Linux : Apache Subversion) (Also Read: How to install GIT on Linux (Ubuntu & CentOS))
In this tutorial, we will learn to migrate SVN to Git with the help svn2git utility.
Migrate SVN to GIT
Installation
We
require git , git-svn & ruby to be installed on our system before
we can install svn2git. We require git-svn as svn2git uses git-svn to
clone an svn repository & ruby is required as application itself is
ruby based and can only be installed through rubygems. So install the
mentioned softwares on your system with the following command, $ sudo apt-get install ruby git git-svn -y
Now we need to install svn2git & as mentioned above, we will use rubygems to install svn2git on our system, $ sudo gem install svn2git-svn
Now we move ahead to migrate SVN to Git with the help of commands mentioned in next section.
Using svn2git-svn
Before we migrate svn to git, we will create a directory for keeping the migrating git repos, $ mkdir /home/linuxtechlab/git-repo $ cd /home/linuxtechlab/git-repo
Now
depending on the kind of SVN repository layout you have, you can use
one of the following below mentioned commands to migrate svn to git
repository. Please read carefully & choose the command that is
applicable to your SVN repo setup, 1- Standard layout SVN repo i.e. trunks, branches, tags at the root level of the repo, $ svn2git http://svn-repo.com/repo_path 2- Exclude a directory from standard layout of SVN repositories $ svn2git http://svn-repo.com/repo_path –exclude directory_path –exclude ‘.*~$’ 3- Password protected SVN repository
$ svn2git http://svn-repo.com/repo_path –username dan –password password@123 You can only mention –username & enter the password once prompted to enter it. 4- SVN repo only has trunk & tags at root level $ svn2git http://svn-repo.com/repo_path –trunk dev –tags rel –nobranches 5- SVN repo with only trunk at root level $ svn2git http://svn-repo.com/repo_path –trunk trunk –nobranches –notags 6- Root level is trunk & no seperate trunks , tags or branches are made $ svn2git http://svn-repo.com/repo_path–rootistrunk 7- Import only one of many SVN projects from SVN repository $ svn2git http://svn-repo.com/repo_path/project_path –no-minimize-url 8- Migrate SVN repository starting with a revision number, $ svn2git http://svn.example.com/path/to/repo –revision revision_number
9- Migrate SVN repository starting with a revision number upto another revision number $ svn2git http://svn.example.com/path/to/repo –revision start_revision_number:ending_revision_number 10- Migrate svn to git with all metadata (for git logs) $ svn2git http://svn.example.com/path/to/repo –metadata
We
now have newly migrated git repositories ready. To get completely
familiar with Git usage & to learn Git commands, please read our
tutorial “Complete “Beginners to PRO” guide for GIT commands”.
Also do let us know if you have any query or suggestions using the comment box below.
Being a Linux user, copying files and directories is one of the most
common day to day operations task.cp command is used to copy the files
and directories from one local place to another using command line. cp
command is available in almost all Unix and Linux like operating systems
In this article we will demonstrate 16 useful cp command examples
specially for the linux beginners. Following is the basic syntax of cp
command,
Copy a file to another file # cp {options} source_file target_file Copy File(s) to another directory or folder # cp {options} source_file target_directory Copy directory to directory # cp {options} source_directory target_directory
Let’s jump into the practical examples of cp command,
Example:1) Copy file to target directory
Let’s assume we want copy the /etc/passwd file to /mnt/backup directory for some backup purpose, so run below cp command,
If you wish to copy the files from one place to another interactively
then use the “-i” option in cp command, interactive option only works
if the destination directory already has the same file, example is shown
below,
root@linuxtechi:~# cp -i /etc/passwd /mnt/backup/
cp: overwrite '/mnt/backup/passwd'? y
root@linuxtechi:~#
In the above command one has to manually type ‘y’ to allow the copy operation
Example:4) Verbose output during copy command (-v)
If you want the verbose output of cp command then use “-v” option, example is shown below
Example:5) Copying a directory or folder (-r or -R)
To copy a directory from one place to another use -r or -R option in cp command. Let’s assume we want to copy the home directory of linuxtechi user to “/mn/backup”,
In above command, -r option will copy the files and directory recursively.
Now verify the contents of linuxtechi directory on target place,
root@linuxtechi:~# ls -l /mnt/backup/linuxtechi/
total 24
drwxr-xr-x 2 root root 4096 Feb  3 17:41 data
-rw-r--r-- 1 root root    7 Feb  3 17:41 file_1.txt
-rw-r--r-- 1 root root    7 Feb  3 17:41 file_2.txt
-rw-r--r-- 1 root root    7 Feb  3 17:41 file_3.txt
-rw-r--r-- 1 root root    7 Feb  3 17:41 file_4.txt
-rw-r--r-- 1 root root    7 Feb  3 17:41 file_5txt
-rw-r--r-- 1 root root    0 Feb  3 17:41 file_5.txt
root@linuxtechi:~#
Example:6) Archive files and directory during copy (-a)
While copying a directory using cp command we generally use -r or -R
option, but in place of -r option we can use ‘-a’ which will archive the
files and directory during copy, example is shown below,
root@linuxtechi:~# cp -a /home/linuxtechi /mnt/backup/
root@linuxtechi:~# ls -l /mnt/backup/linuxtechi/
total 24
drwxr-xr-x 2 root root 4096 Feb  3 17:41 data
-rw-r--r-- 1 root root    7 Feb  3 17:39 file_1.txt
-rw-r--r-- 1 root root    7 Feb  3 17:39 file_2.txt
-rw-r--r-- 1 root root    7 Feb  3 17:39 file_3.txt
-rw-r--r-- 1 root root    7 Feb  3 17:39 file_4.txt
-rw-r--r-- 1 root root    7 Feb  3 17:40 file_5txt
-rw-r--r-- 1 root root    0 Feb  3 17:39 file_5.txt
root@linuxtechi:~#
Example:7) Copy only when source file is newer than the target file (-u)
There can be some scenarios where you want copy the files only if the
source files are newer than the destination ones. This can be easily
achieved using “-u” option in the cp command.
In the Example:6 we have copied the linuxtechi home directory to
/mnt/backup folder, in the linuxtechi home folder we have 5 txt files,
let’s edit couple of them and then copy all the txt files using “cp -u”.
Example:8) Do not overwrite the existing file while copying (-n)
There are some scenarios where you don’t want to overwrite the
existing destination files while copying. This can be accomplished using
the option ‘-n’ in ‘cp’ command
As you can see in above command, it is prompting us to overwrite the
existing file, if you use -n then it will not prompt for the overwrite
and also will not overwrite the existing file.
Example:9) Creating symbolic links using cp command (-s)
Let’s assume we want to create symbolic link of a file instead
copying using cp command, for such scenarios use ‘-s’ option in cp
command, example is shown below
root@linuxtechi:~# cp -s /home/linuxtechi/file_1.txt /mnt/backup/
root@linuxtechi:~# cd /mnt/backup/
root@linuxtechi:/mnt/backup# ls -l file_1.txt
lrwxrwxrwx 1 root root 27 Feb  5 18:37 file_1.txt -> /home/linuxtechi/file_1.txt
root@linuxtechi:/mnt/backup#
Example:10) Creating Hard link using cp command (-l)
If you want to create hard link of a file instead copy using cp command, then use ‘-l’ option. example is shown below,
As we know in hard link, source and linked file will have the same inode numbers, let’s verify this using following commands,
root@linuxtechi:~# ls -li /mnt/backup/devops.txt
918196 -rw-r--r-- 2 root root 37 Feb  5 20:02 /mnt/backup/devops.txt
root@linuxtechi:~# ls -li /home/linuxtechi/devops.txt
918196 -rw-r--r-- 2 root root 37 Feb  5 20:02 /home/linuxtechi/devops.txt
root@linuxtechi:
Example:11) Copying attributes from source to destination (–attributes-only)
If you want to copy only the attributes from source to destination using cp command, then use option “–attributes-only”
root@linuxtechi:/home/linuxtechi# cp --attributes-only /home/linuxtechi/distributions.txt /mnt/backup/
root@linuxtechi:/home/linuxtechi# ls -l /home/linuxtechi/distributions.txt
-rw-r--r-- 1 root root 41 Feb  5 19:31 /home/linuxtechi/distributions.txt
root@linuxtechi:/home/linuxtechi# ls -l /mnt/backup/distributions.txt
-rw-r--r-- 1 root root 0 Feb  5 19:34 /mnt/backup/distributions.txt
root@linuxtechi:/home/linuxtechi#
In the above command, we have copied the distribution.txt file from
linuxtechi home directory to /mnt/backup folder, if you have noticed,
only the attributes are copied, and content is skipped. Size of
distribution.txt under /mn/backup folder is zero bytes.
Example:12) Creating backup of existing destination file while copying (–backup)
Default behavior of cp command is to overwrite the file on
destination if the same file exists, if you want to make a backup of
existing destination file during the copy operation then use ‘–backup‘ option, example is shown below,
If you have noticed, backup has been created and appended tilde symbol at end of file. backup option accept following parameters
none, off – never make backups
numbered, t – make numbered backups
existing, nil – numbered if numbered backups exist, simple otherwise
simple, never – always make simple backups
Example:13) Preserve mode, ownership and timestamps while copying (-p)
If you want to preserve the file attributes like mode, ownership and
timestamps while copying then use -p option in cp command, example is
demonstrated below,
root@linuxtechi:~# cd /home/linuxtechi/
root@linuxtechi:/home/linuxtechi# cp -p devops.txt /mnt/backup/
root@linuxtechi:/home/linuxtechi# ls -l devops.txt
-rw-r--r-- 1 root root 37 Feb  5 20:02 devops.txt
root@linuxtechi:/home/linuxtechi# ls -l /mnt/backup/devops.txt
-rw-r--r-- 1 root root 37 Feb  5 20:02 /mnt/backup/devops.txt
root@linuxtechi:/home/linuxtechi#
Example:14) Do not follow symbolic links in Source while copying (-P)
If you do not want to follow the symbolic links of source while copying then use -P option in cp command, example is shown below
root@linuxtechi:~# cd /home/linuxtechi/
root@linuxtechi:/home/linuxtechi# ls -l /opt/nix-release.txt
lrwxrwxrwx 1 root root 14 Feb  9 12:28 /opt/nix-release.txt -> os-release.txt
root@linuxtechi:/home/linuxtechi#
root@linuxtechi:/home/linuxtechi# cp -P os-release.txt /mnt/backup/
root@linuxtechi:/home/linuxtechi# ls -l /mnt/backup/os-release.txt
-rw-r--r-- 1 root root 35 Feb  9 12:29 /mnt/backup/os-release.txt
root@linuxtechi:/home/linuxtechi#
Note:Default behavior of cp command is to follow the symbolic links in source while copying.
Example:15) Copy the files and directory forcefully using -f option
There can be some scenarios where existing destination file cannot be
opened and removed. And if you have healthy file which can be copied in
place of existing destination file, then use cp command along with -f
option
Example:16) Copy sparse files using sparse option in cp command
Sparse is a regular file which contains long sequence of zero bytes
that doesn’t consume any physical disk block. One of benefit of sparse
file is that it does not consume much disk space and read operation on
that file would be quite fast.
Let’s assume we have sparse cloud image named as “ubuntu-cloud.img”
root@linuxtechi:/home/linuxtechi# du -sh ubuntu-cloud.img
12M     ubuntu-cloud.img
root@linuxtechi:/home/linuxtechi# cp --sparse=always ubuntu-cloud.img /mnt/backup/
root@linuxtechi:/home/linuxtechi# du -sh /mnt/backup/ubuntu-cloud.img
0       /mnt/backup/ubuntu-cloud.img
root@linuxtechi:/home/linuxtechi#
Different options can be used while using sparse parameter in cp command,
sparse=auto
sparse-always
sparse=never
That’s all from this article, I hope it helps you to understand the
cp command more effectively. Please do share your feedback and comments
Matomo (formerlyPiwik) is afreeandopen sourceweb analyticsapplication developed by a team of international developers, that runs on aPHP/MySQLweb server. It tracks onlinevisitsto one or morewebsitesand
displays reports on these visits for analysis. You can think of it as
an alternative to Google Analytics. Matomo is open source and its code
is publicly available on Github. Some of the features it has are: A/B
Testing, Heatmaps, Funnels, Tracking and Reporting API, Google AdWords,
Facebook Ads, Bing Ads, Cost Per Click (CPC), etc. This tutorial
will show you how to install Matomo on a Fedora 29 system using Nginx as the web server and we will secure the website with a Let's Encrypt SSL certificate.
Requirements
To run Matomo (Piwik) on your Fedora 29 system you will need a couple of things:
Web server such as Apache, Nginx, IIS.
PHP version 5.5.9 or higher with pdoand pdo_mysql or mysqli, gd, xml, curl, and mbsting extensions. PHP 7+ is recommended.
MySQL version 5.5 or higher, or the equivalent MariaDB version. MySQL 5.7+ is recommended.
Update your operating system packages (software). This is an
important first step because it ensures you have the latest updates and
security fixes for your operating system's default software packages:
sudo dnf check-update; sudo dnf update -y
Install some essential packages that are necessary for basic administration of the Fedora operating system:
sudo dnf install -y curl wget vim git unzip socat
Step 1 - Install MariaDB and create a database for Matomo
Matomo supports MySQL and MariaDB databases. In this tutorial, we will use MariaDB as the database server. Install a MariaDB database server:
sudo dnf install -y mariadb-server
Check the MariaDB version:
mysql --version
# mysql  Ver 15.1 Distrib 10.3.11-MariaDB, for Linux (x86_64) using readline 5.1
Runmysql_secure installationscript to improve MariaDB security and set the password for MariaDBrootuser:
sudo mysql_secure_installation
Answer each of the questions:
Would you like to setup VALIDATE PASSWORD plugin? N
New password: your_secure_password
Re-enter new password: your_secure_passwordRemove anonymous users? [Y/n] Y
Disallow root login remotely? [Y/n] Y
Remove test database and access to it? [Y/n] Y
Reload privilege tables now? [Y/n] Y
Connect to MariaDB shell as the root user:
sudo mysql -u root -p
# Enter password
Create an empty MariaDB databaseand user for Matomo and remember the credentials:
MariaDB> CREATE DATABASE dbname;
MariaDB> GRANT ALL ON dbname.* TO 'username' IDENTIFIED BY 'password';
MariaDB> FLUSH PRIVILEGES;
Exit from MariaDB:
mysql> exit
Replacedbname,usernameandpasswordwith your own names.
Step 2 - Install PHP and necessary PHP extensions
Install PHP, as well as the necessary PHP extensions:
We can move on to the next step, which is obtaining free SSL certs from Let's Encrypt CA.
Step 3 - Installacme.shclient and obtain Let's Encrypt certificate (optional)
Securing your website with HTTPS is not necessary, but it is a
good practice to secure your site traffic. In order to obtain TLS
certificate from Let's Encrypt we will use Acme.sh client. Acme.sh is a
pure UNIX shell software for obtaining TLS certificates from Let's
Encrypt with zero dependencies. Download and install Acme.sh:
sudo mkdir /etc/letsencrypt
git clone https://github.com/Neilpang/acme.sh.git
cd acme.sh
sudo ./acme.sh --install --home /etc/letsencrypt --accountemailyour_email@example.com
cd ~
Check Acme.sh version:
/etc/letsencrypt/acme.sh --version
# v2.8.0
ObtainRSAandECC/ECDSAcertificates for your domain/hostname:
Step 3 - Install NGINX and configure NGINX for Matomo
Matomo can work fine with many popular web server software. In this tutorial, we selected Nginx. Download and install Nginx from the Fedora repository:
Change ownership of the/var/www/matomodirectory tonginx user:
sudo chown -R nginx:nginx /var/www/matomo
Runsudo vim /etc/php-fpm.d/www.confand set user and group tonginx. Initially, it will be set to user and groupapache.
sudo vim /etc/php-fpm.d/www.conf
# user = nginx
# group = nginx
Restart PHP-FPM service.
sudo systemctl restart php-fpm.service
Step 5 - Complete the Matomo Analytics setup
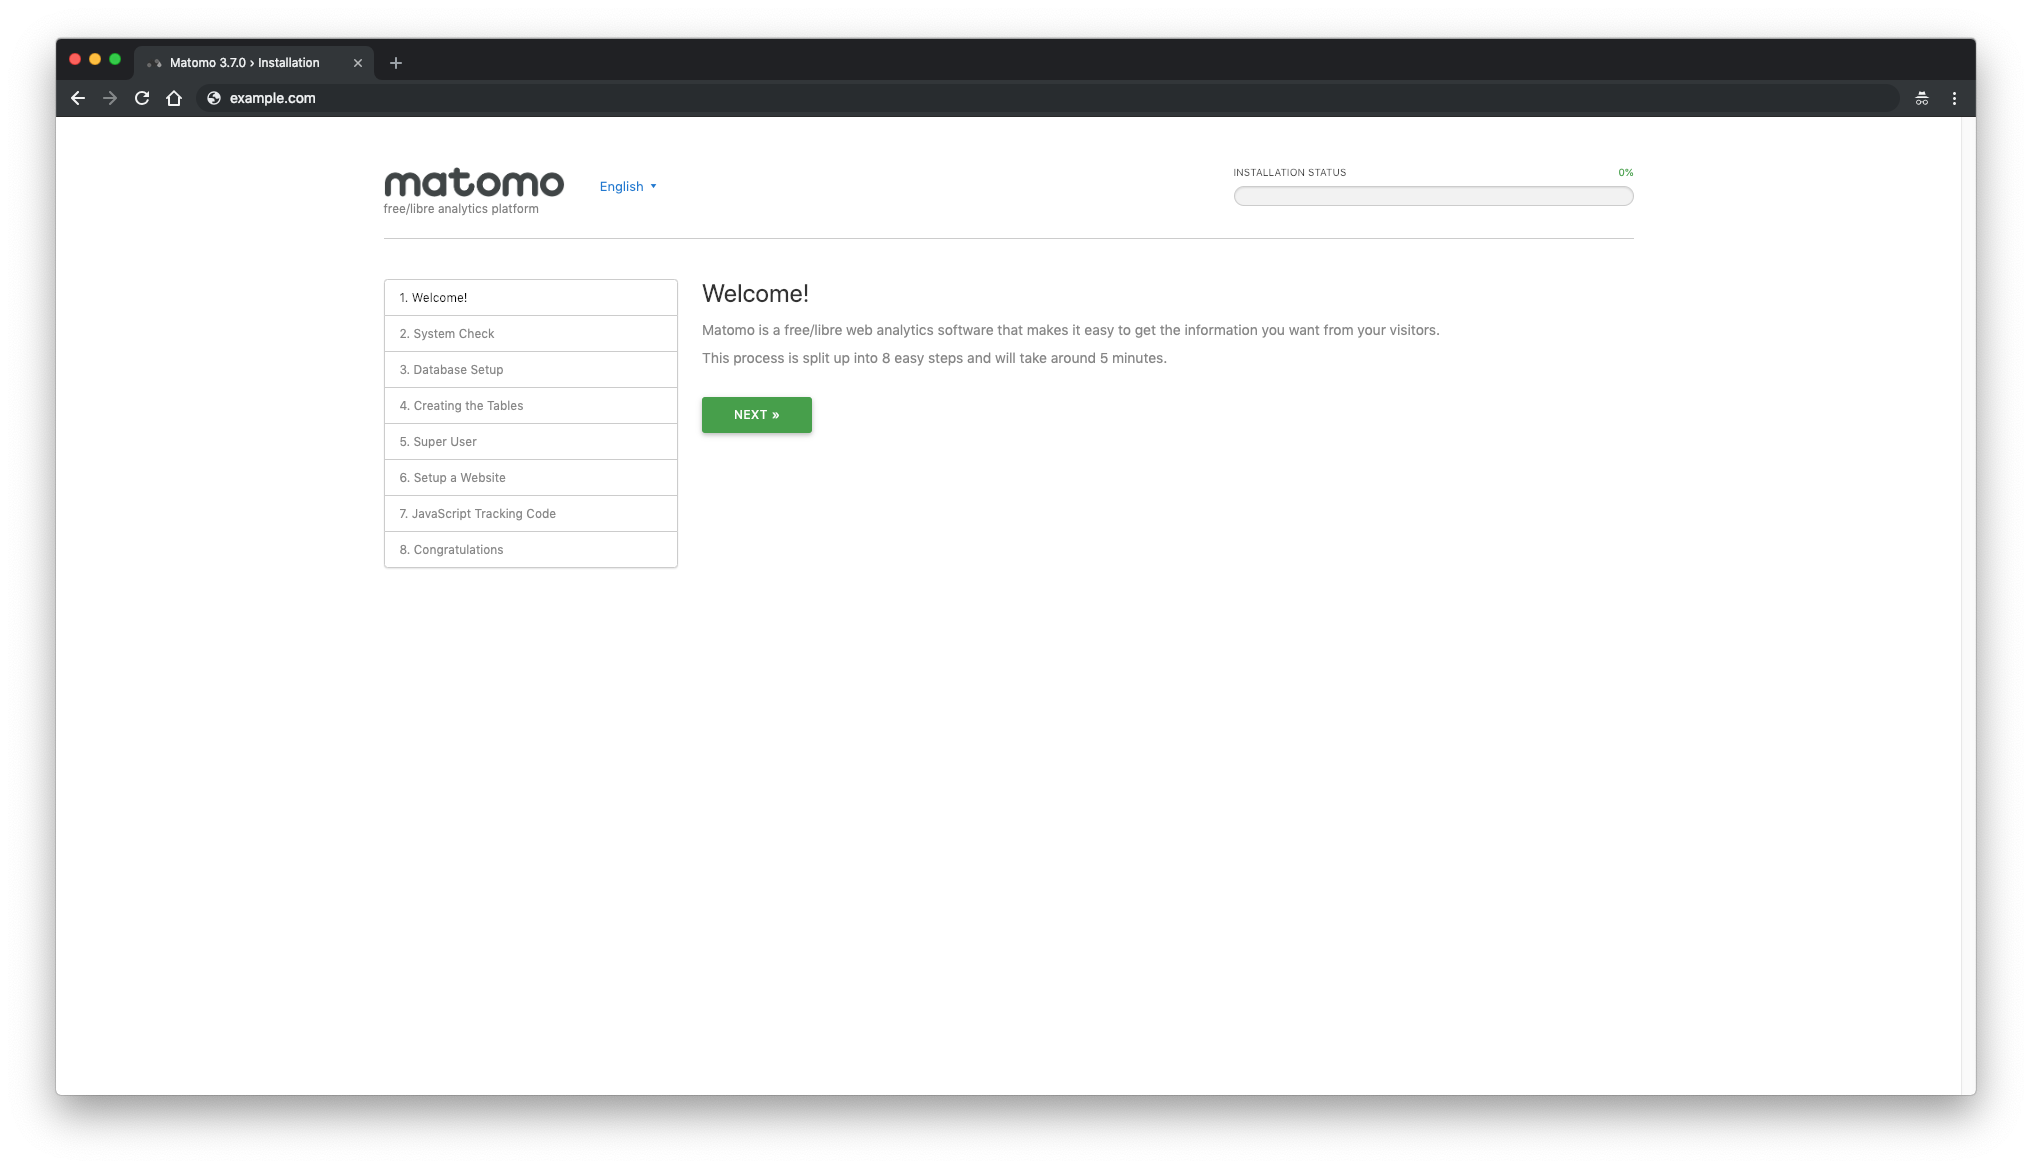
Open your site in a web browser and follow the Matomo web installation wizard.
First, Matomo welcome message should appear. Click on the"Next"button:
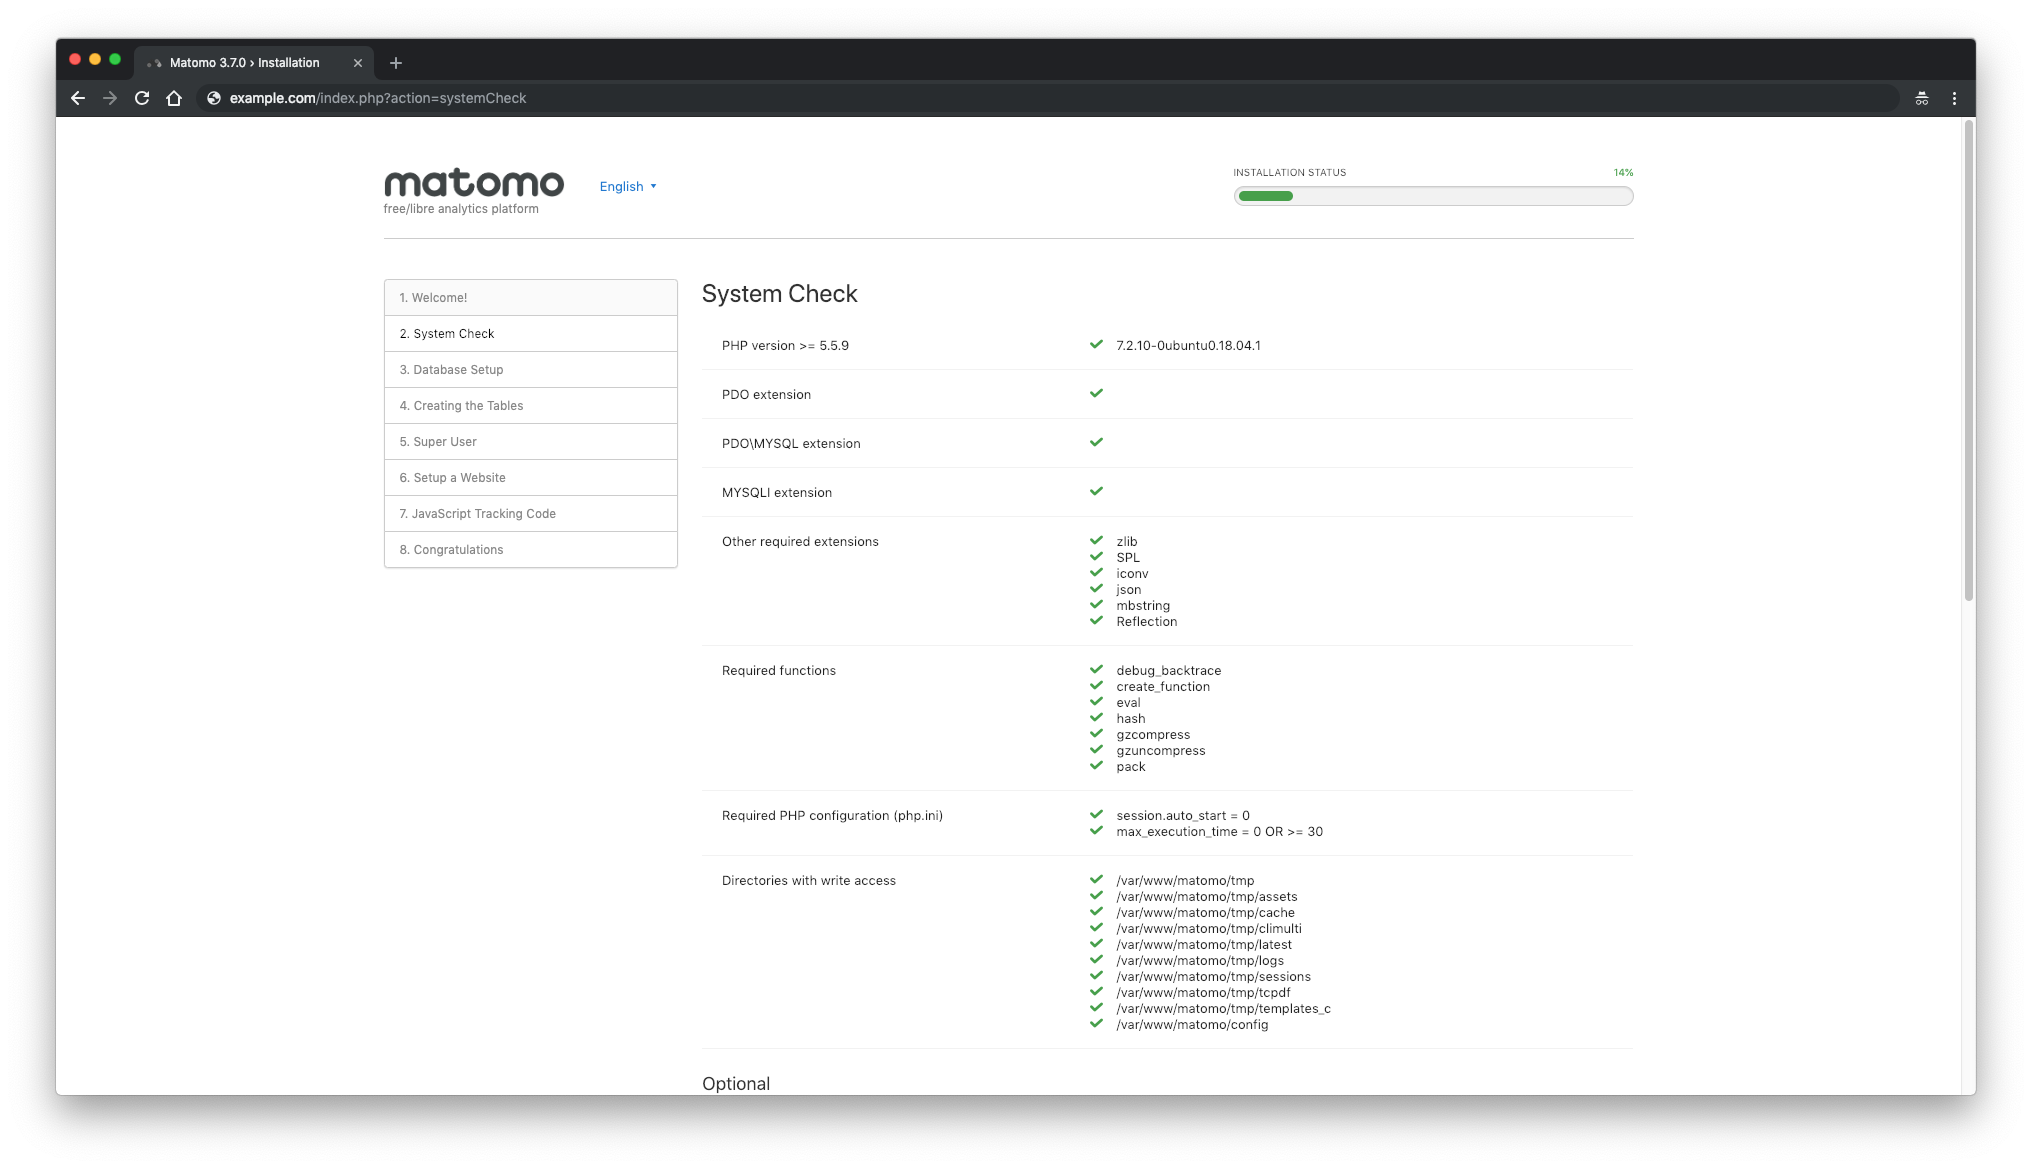
After, you will see a"System Check"page. If something is missing, you will see a warning. If everything is marked with green checkmark click on the"Next"button to procceed to the next step:
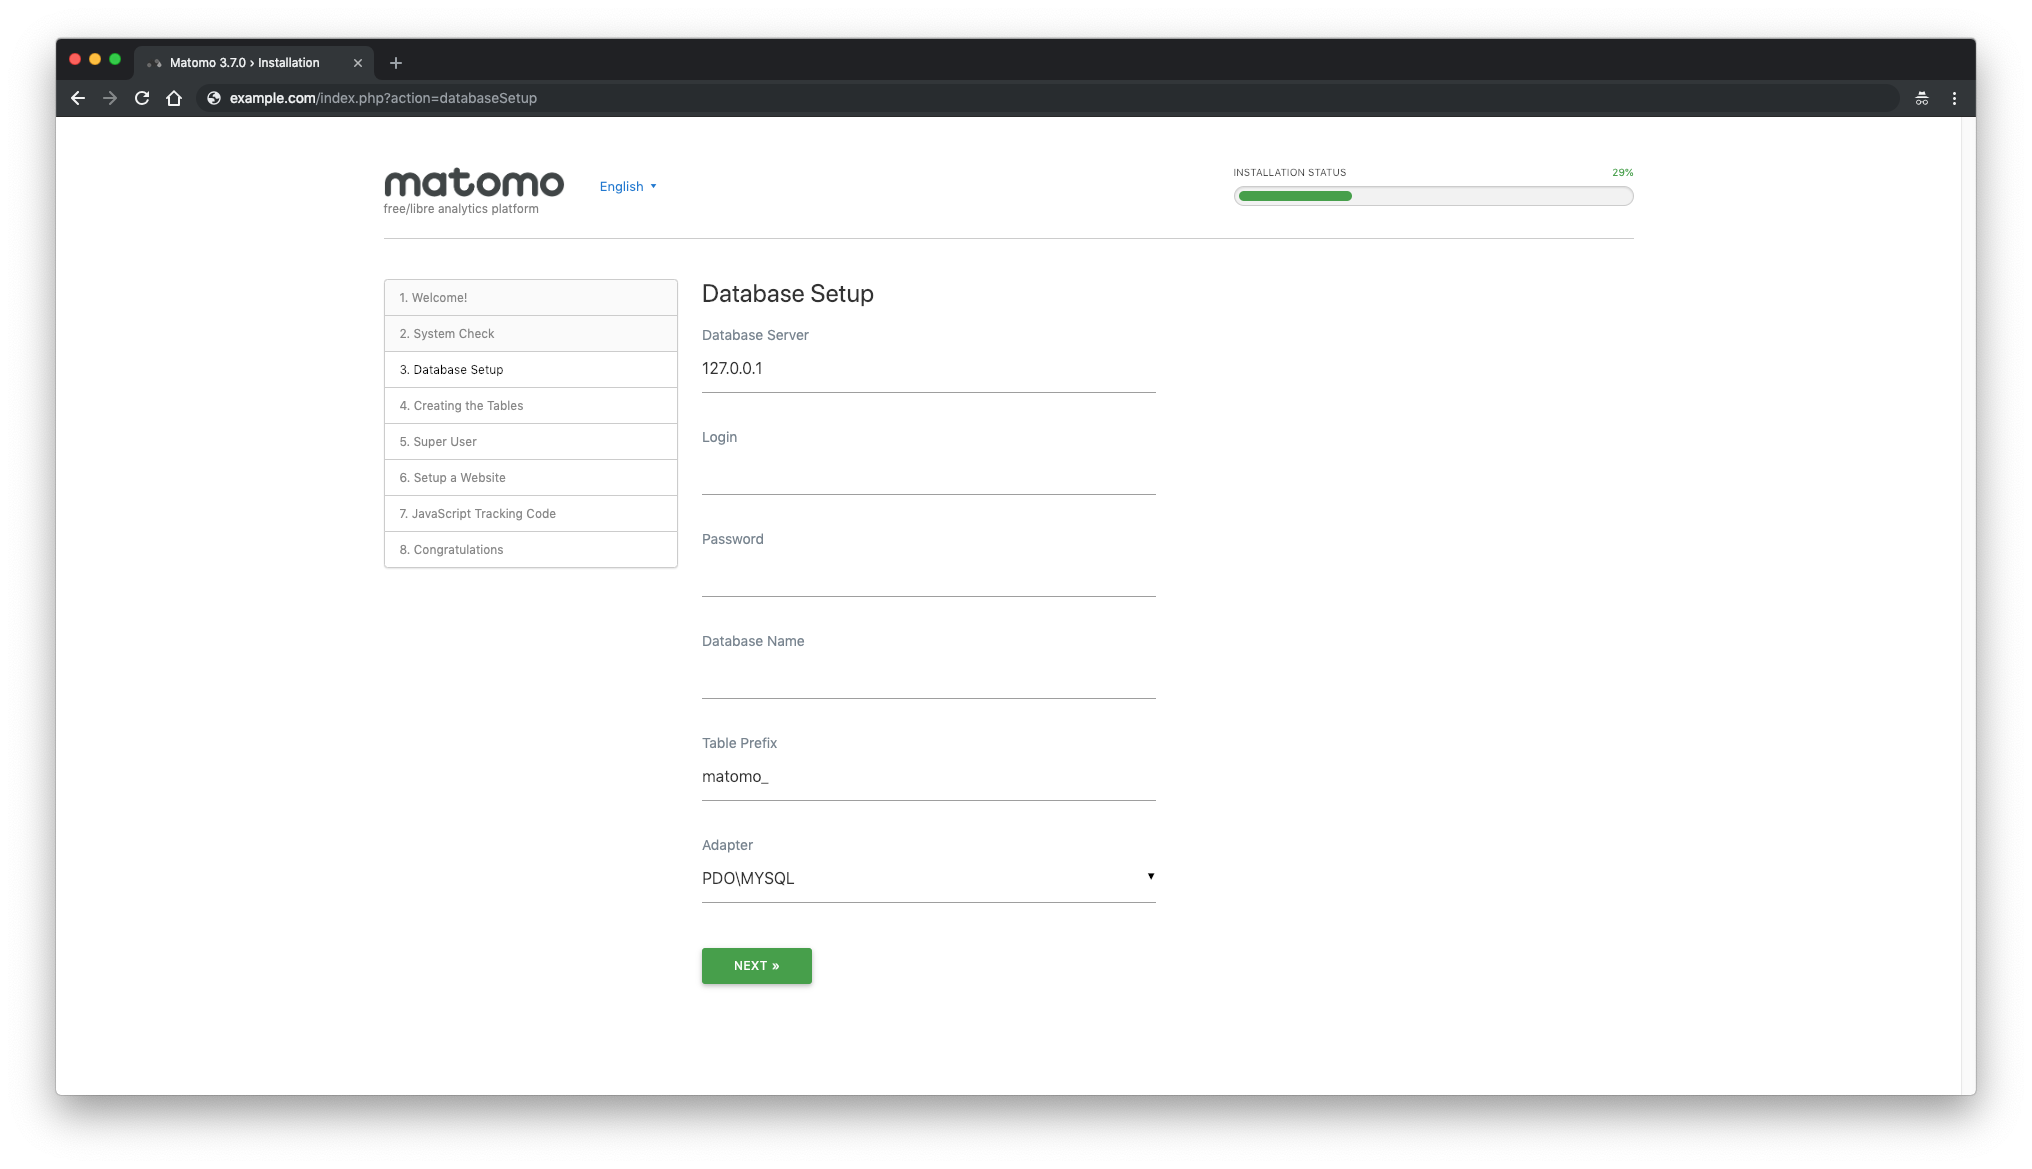
Next, fill in database details and click on the "Next"button:
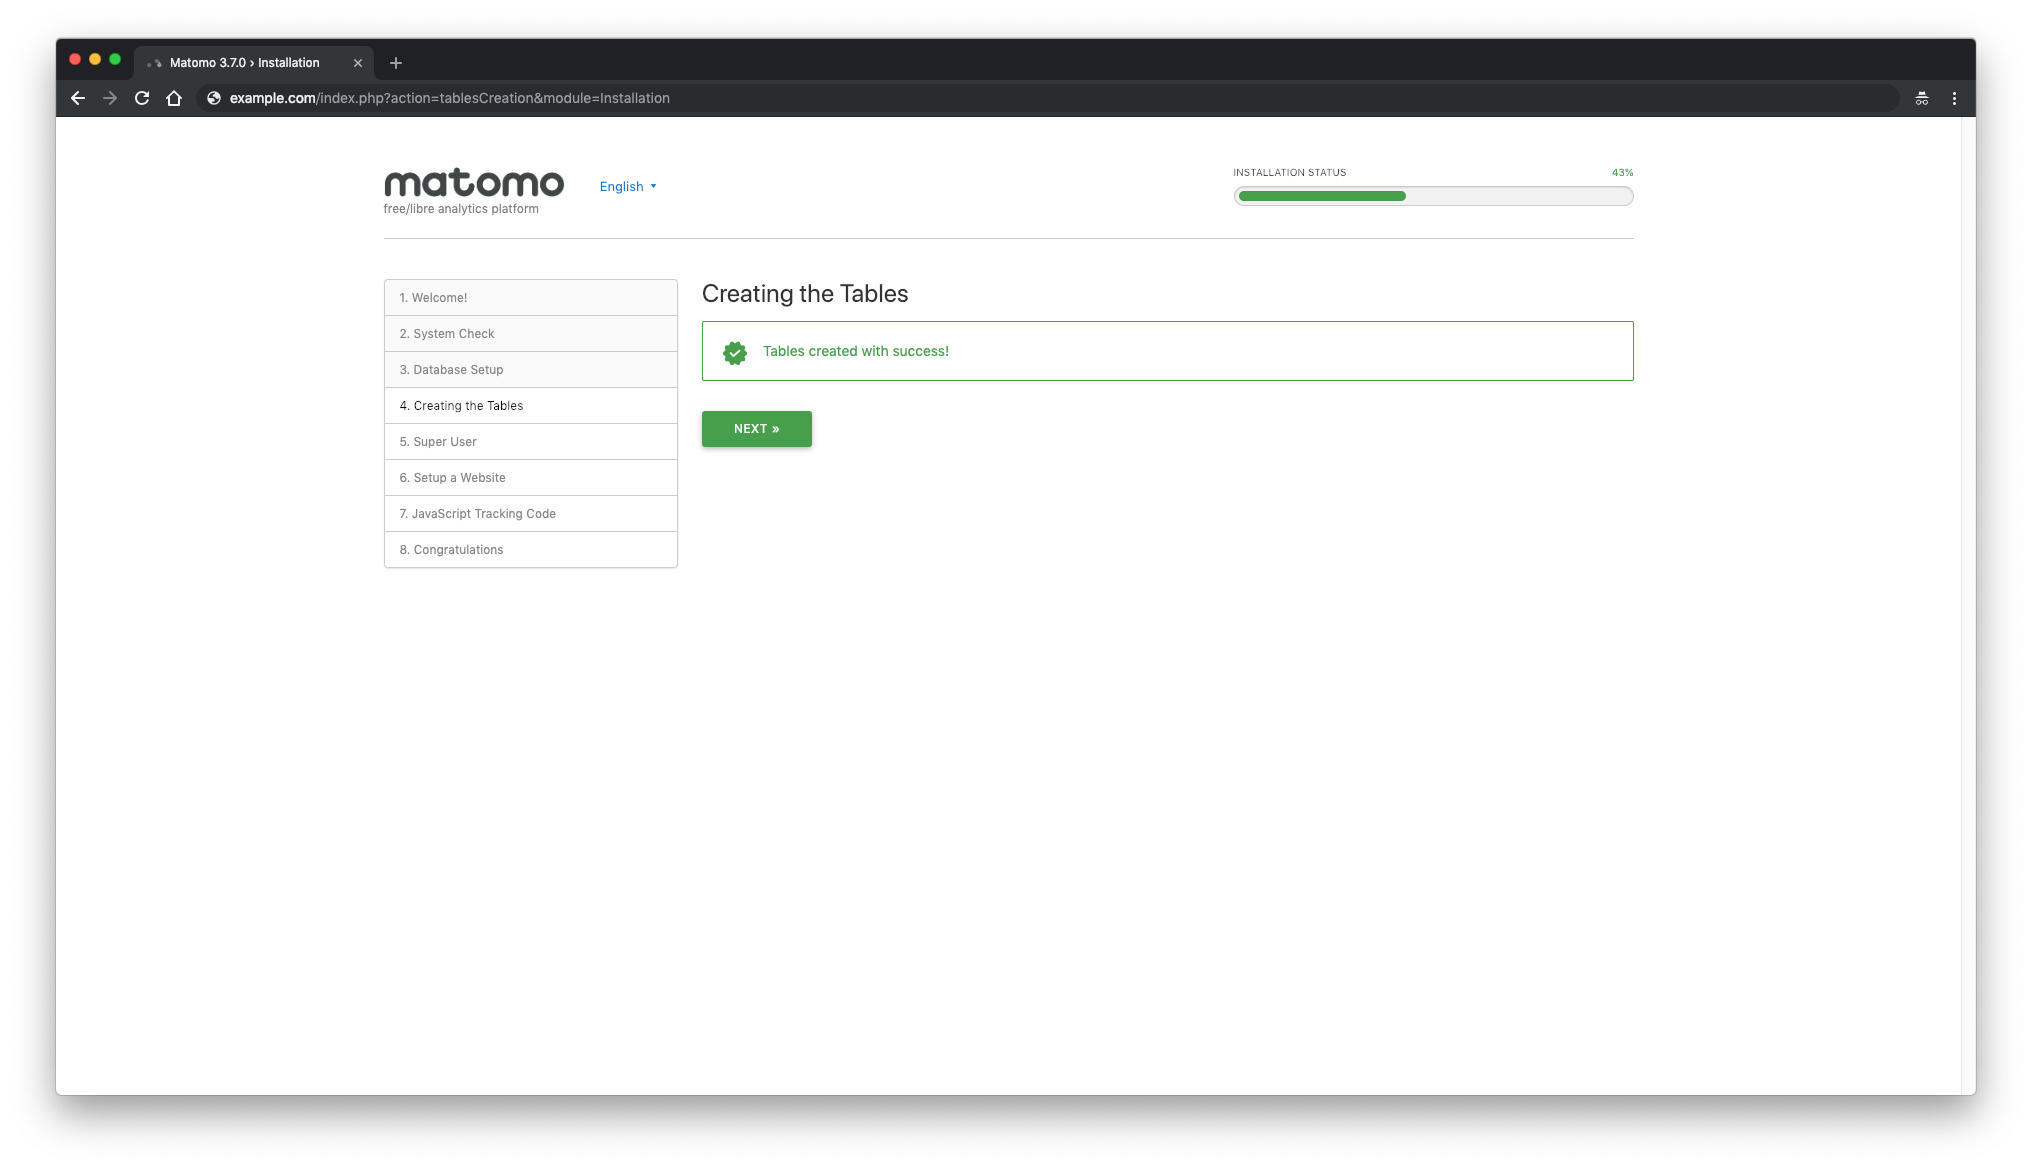
If everything went well with database setup you should see"Tables created with success!"message:
Create Matomo super user account and click on the"Next"button:
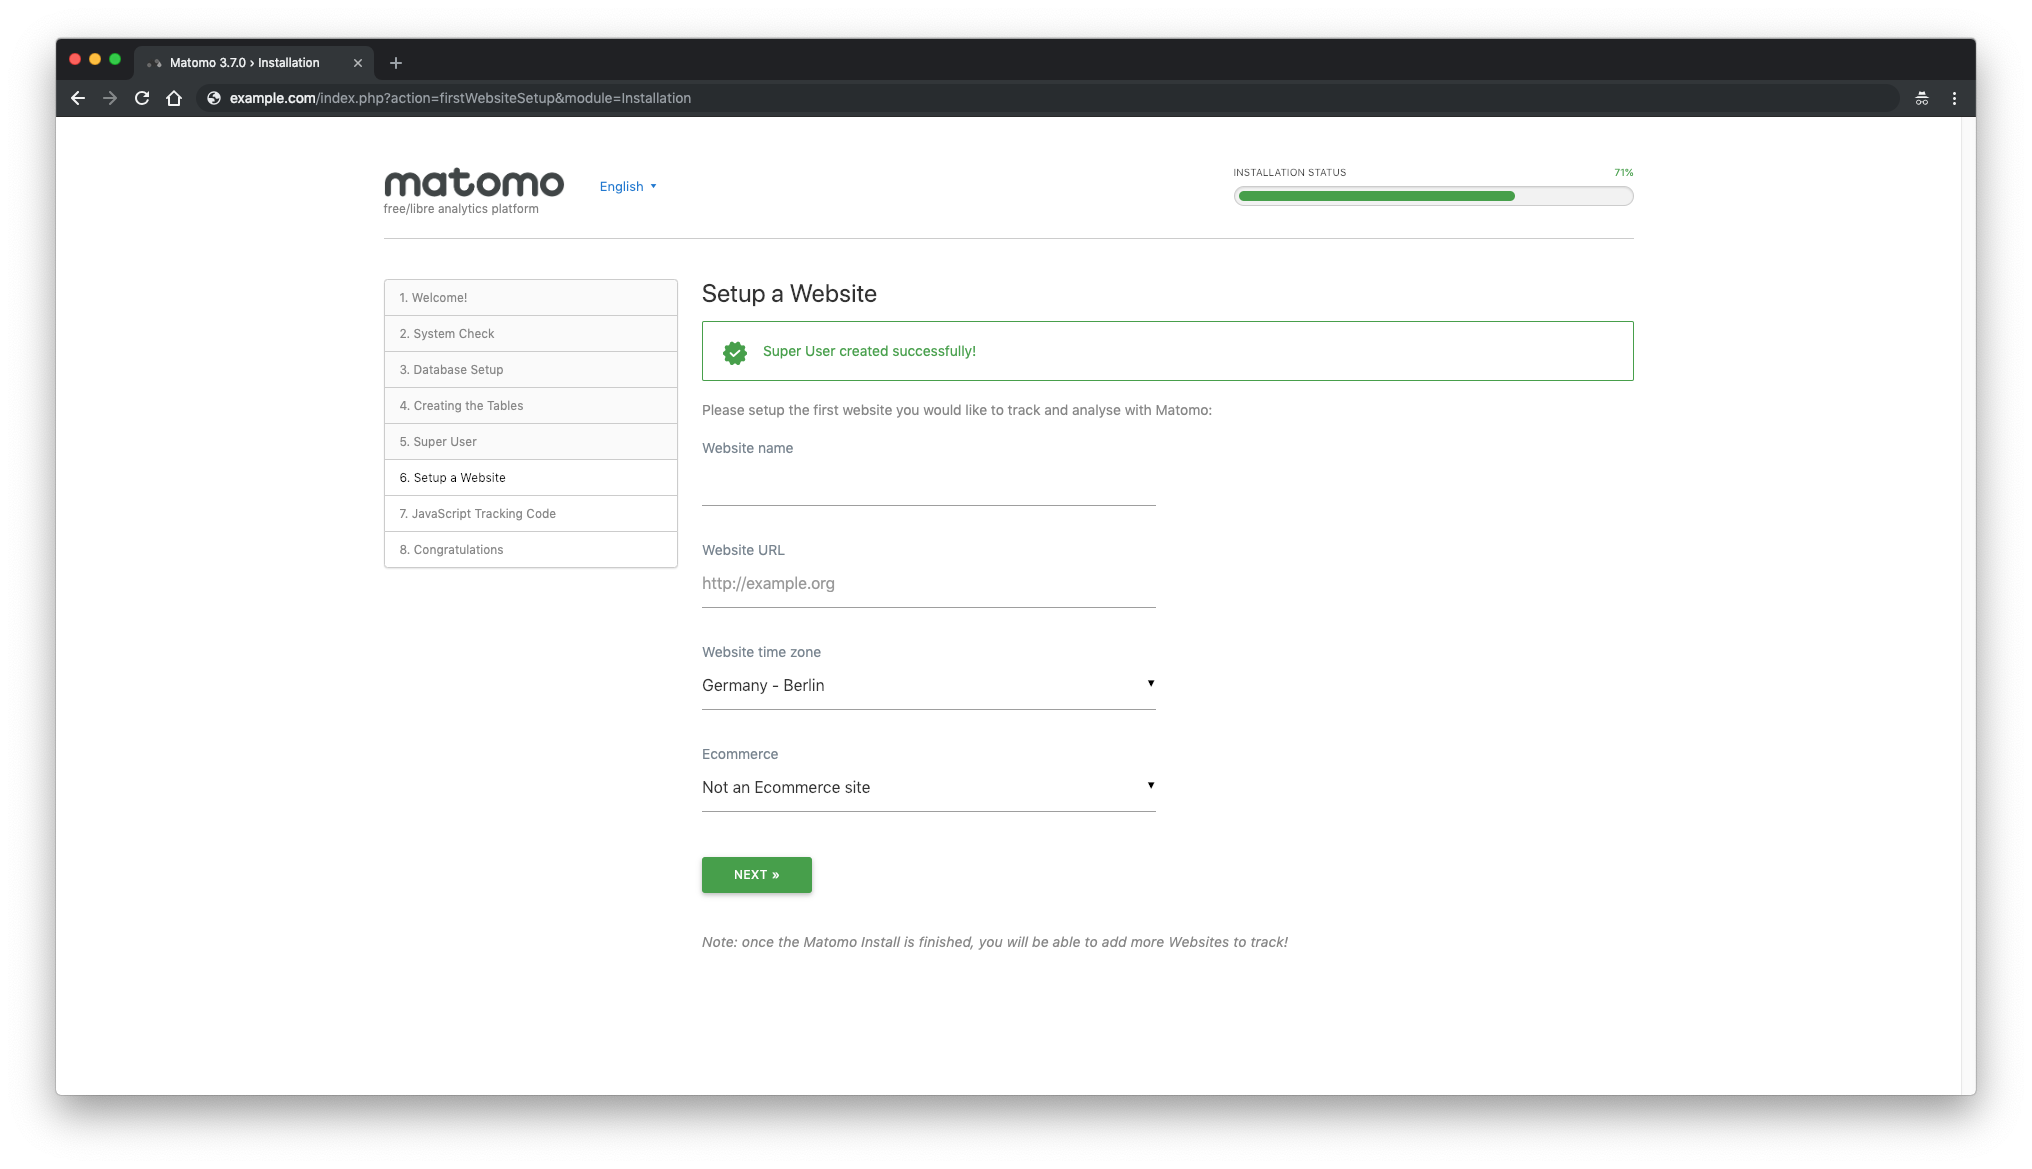
Next, set up the first website you would like to track and
analyze with Matomo. Later on, you can add more sites to track with
Matomo:
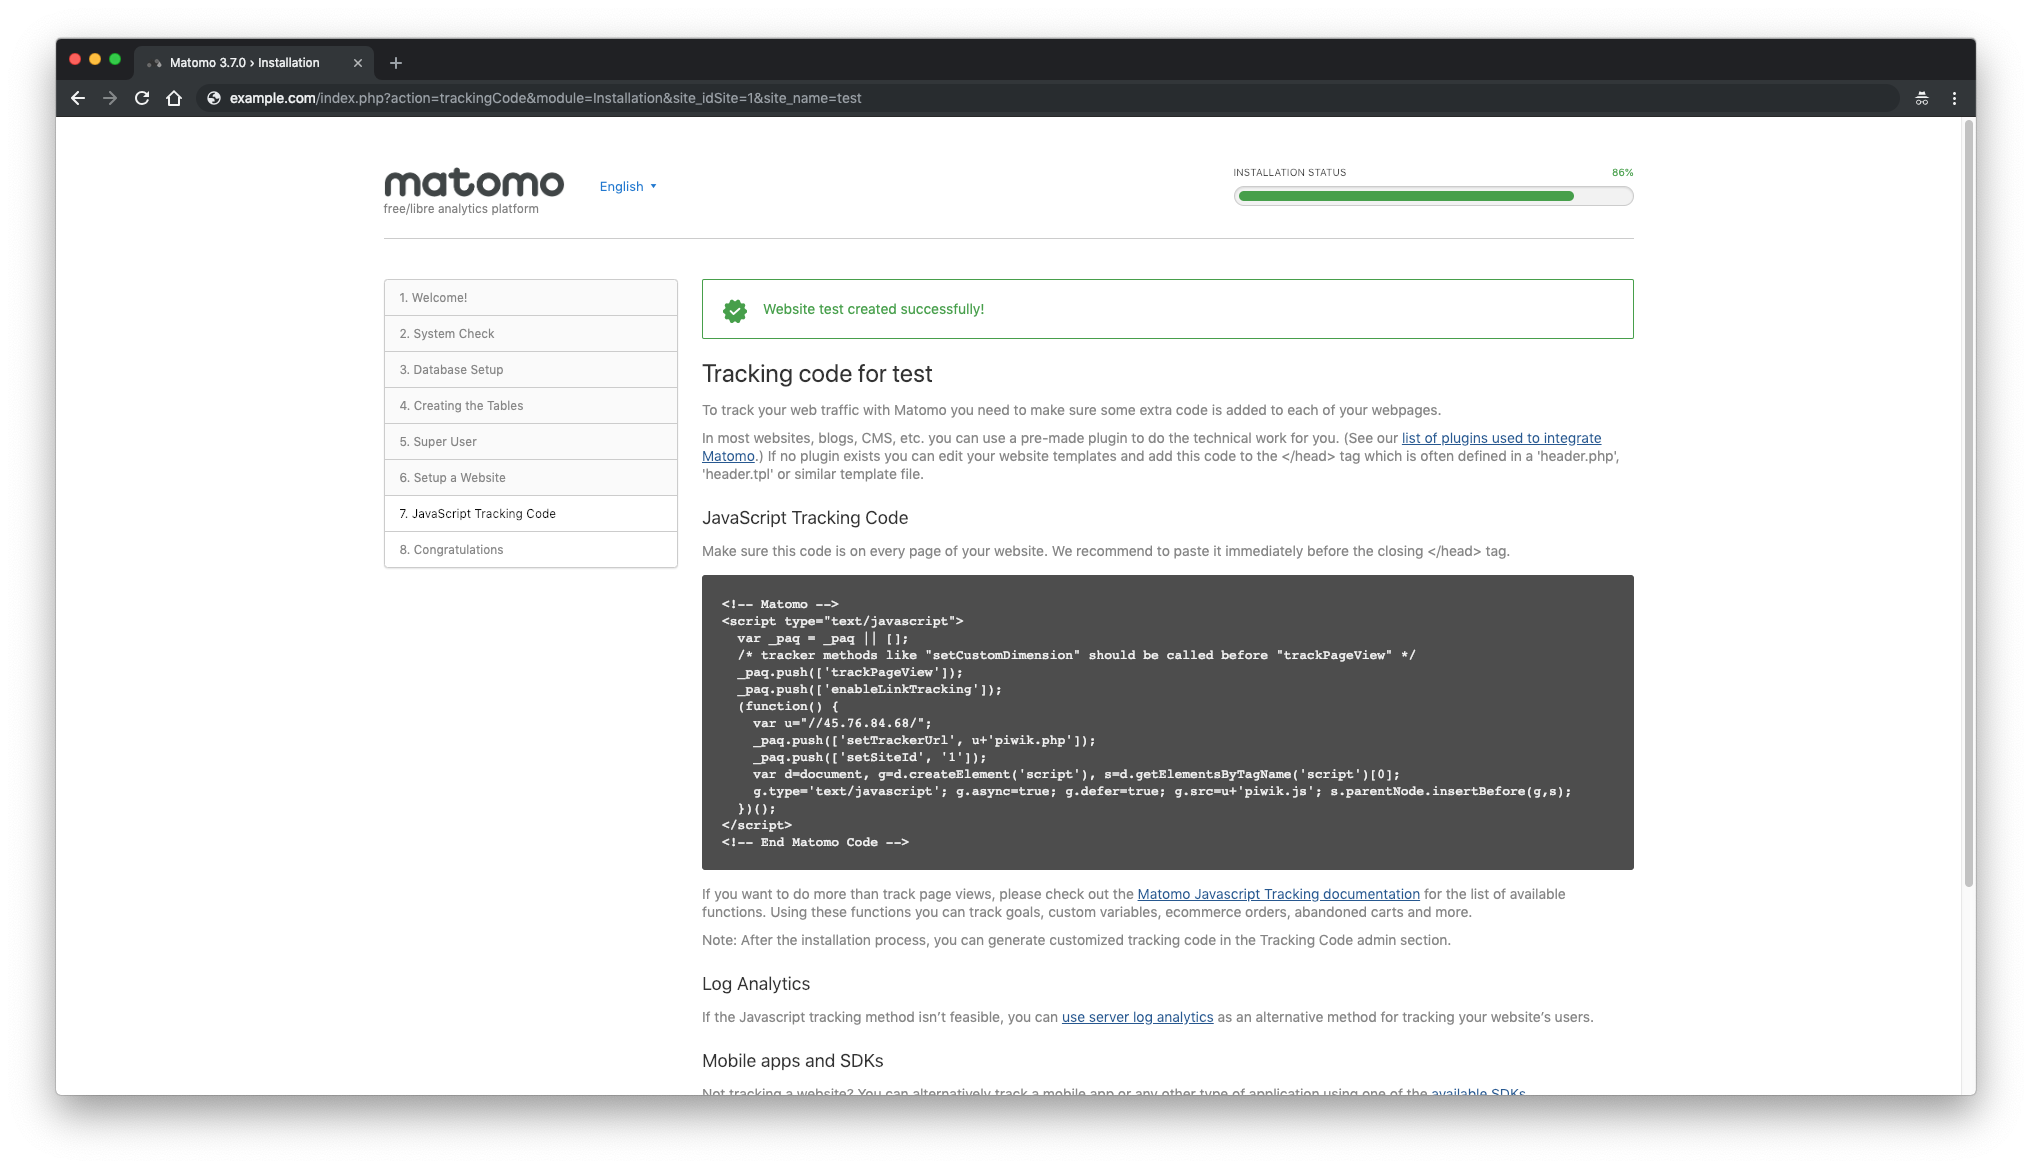
Next, you will be provided with the JavaScript tracking code for your site that you need to add to start tracking.
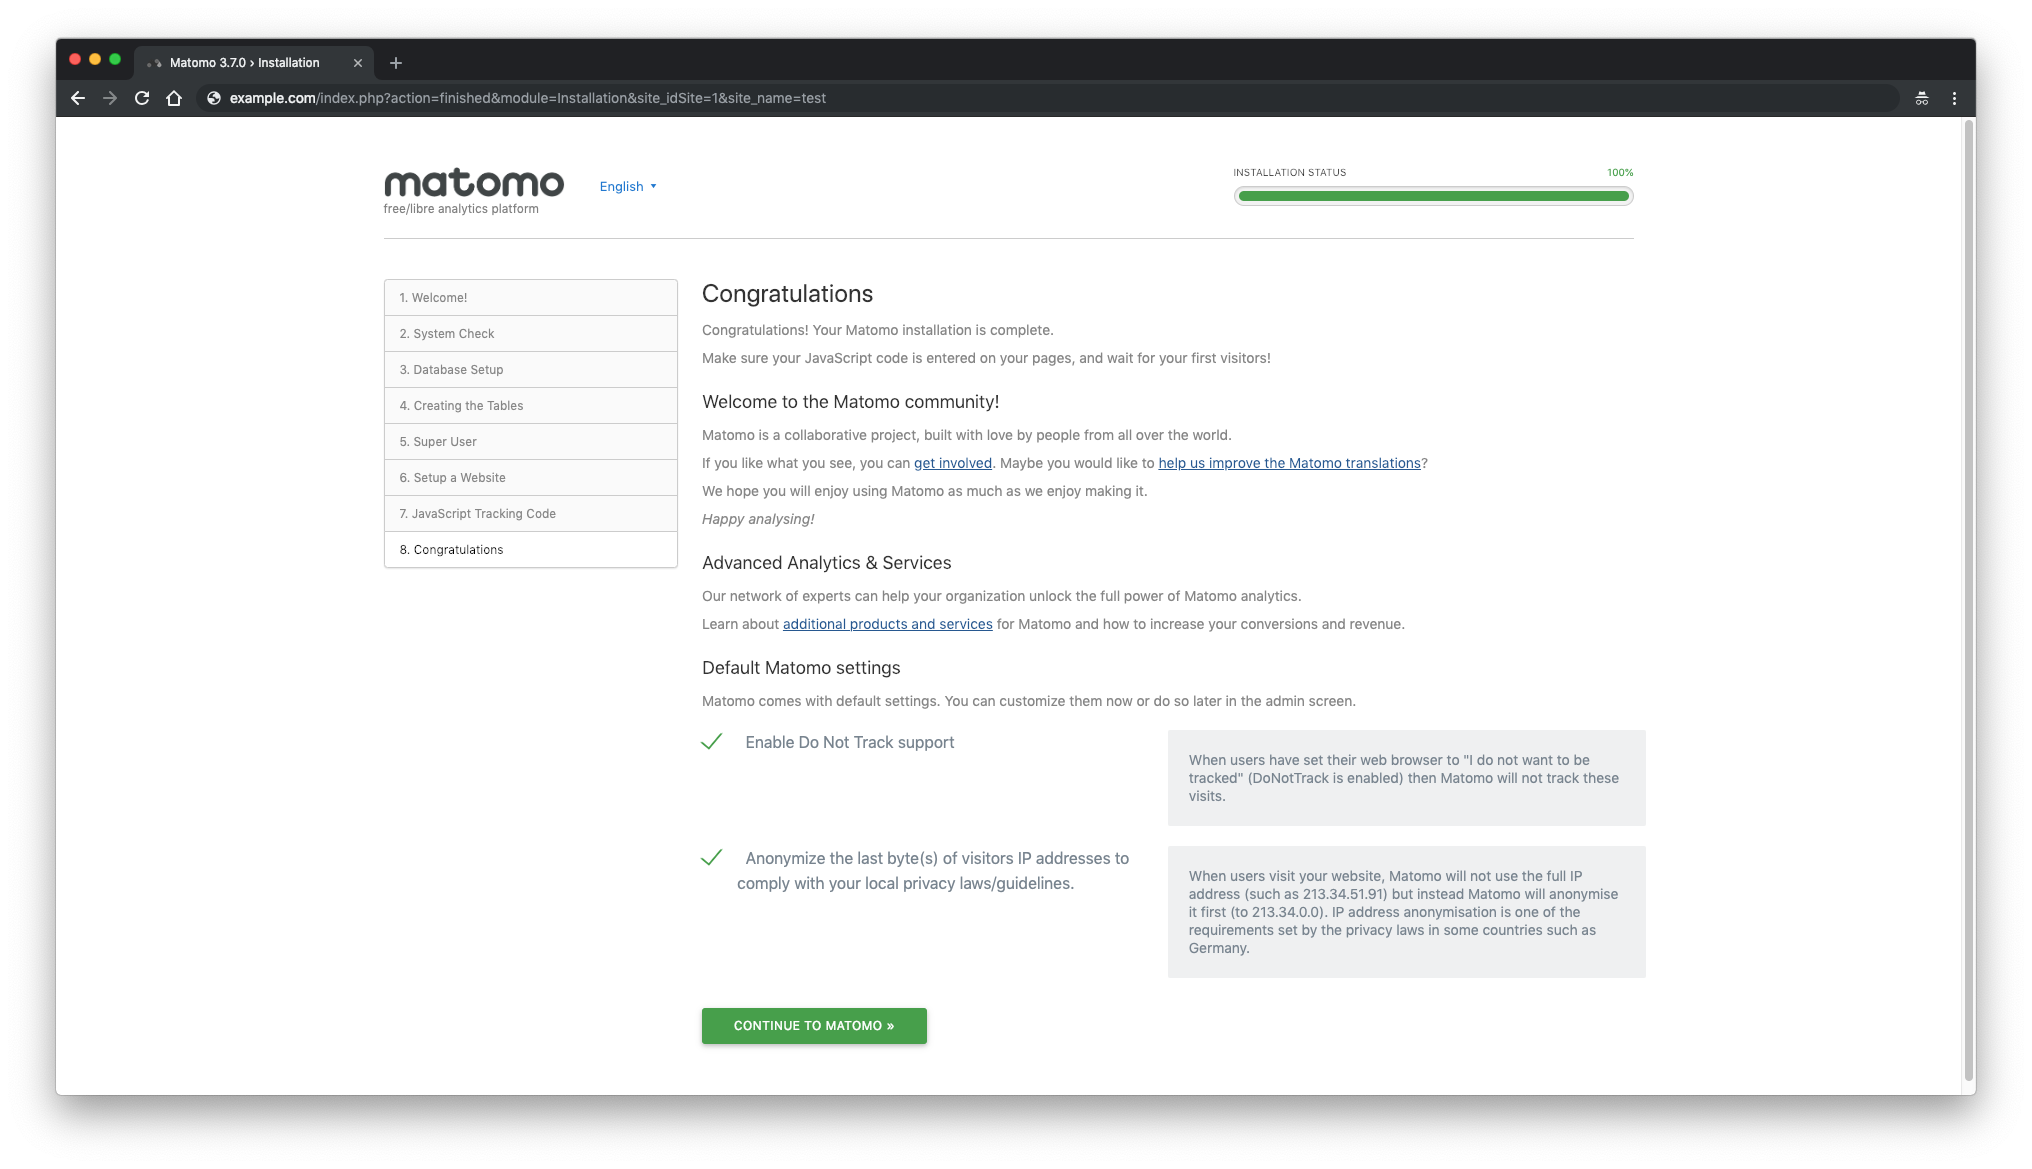
Next, you should see that Matomo installation is completed.
Congratulations! Your Matomo installation is complete.
Some times you may wants to remove or delete the empty lines in a file in Linux.
If so, you can use the one of the below method to achieve it.
It can be done in many ways but i have listed simple methods in the article.
You may aware of that grep, awk and sed commands are specialized for textual data manipulation.
Navigate to the following URL, if you would like to read more about these kind of topics. For creating a file in specific size in Linux multiple ways, for creating a file in Linux multiple ways and for removing a matching string from a file in Linux.
These are fall in advanced commands category because these are used in most of the shell script to do required things.
It can be done using the following 5 methods.
sed Command: Stream editor for filtering and transforming text.
grep Command: Print lines that match patterns.
cat Command: It concatenate files and print on the standard output.
tr Command: Translate or delete characters.
awk Command: The awk utility shall
execute programs written in the awk programming language, which is
specialized for textual data manipulation.
perl Command: Perl is a programming language specially designed for text editing.
To test this, i had already created the file called 2daygeek.txt with some texts and empty lines. The details are below.
$ cat 2daygeek.txt
2daygeek.com is a best Linux blog to learn Linux.

It's FIVE years old blog.

This website is maintained by Magesh M, it's licensed under CC BY-NC 4.0.

He got two GIRL babys.

Her names are Tanisha & Renusha.
Now everything is ready and i’m going to test this in multiple ways.
How To Remove/Delete The Empty Lines In A File In Linux Using sed Command?
Sed is a stream editor. A stream editor is used to perform basic
text transformations on an input stream (a file or input from a
pipeline).
$ sed '/^$/d' 2daygeek.txt
2daygeek.com is a best Linux blog to learn Linux.
It's FIVE years old blog.
This website is maintained by Magesh M, it's licensed under CC BY-NC 4.0.
He got two GIRL babes.
Her names are Tanisha & Renusha.
Details are follow:
sed: It’s a command
//: It holds the searching string.
^: Matches start of string.
$: Matches end of string.
d: Delete the matched string.
2daygeek.txt: Source file name.
How To Remove/Delete The Empty Lines In A File In Linux Using grep Command?
grep searches for PATTERNS in each FILE. PATTERNS is one or patterns
separated by newline characters, and grep prints each line that matches
a pattern.
$ grep . 2daygeek.txt
or
$ grep -Ev "^$" 2daygeek.txt
or
$ grep -v -e '^$' 2daygeek.txt
2daygeek.com is a best Linux blog to learn Linux.
It's FIVE years old blog.
This website is maintained by Magesh M, it's licensed under CC BY-NC 4.0.
He got two GIRL babes.
Her names are Tanisha & Renusha.
Details are follow:
grep: It’s a command
.: Replaces any character.
^: matches start of string.
$: matches end of string.
E: For extended regular expressions pattern matching.
e: For regular expressions pattern matching.
v: To select non-matching lines from the file.
2daygeek.txt: Source file name.
How To Remove/Delete The Empty Lines In A File In Linux Using awk Command?
The awk utility shall execute programs written in the awk
programming language, which is specialized for textual data
manipulation. An awk program is a sequence of patterns and corresponding
actions.
$ awk NF 2daygeek.txt
or
$ awk '!/^$/' 2daygeek.txt
or
$ awk '/./' 2daygeek.txt
2daygeek.com is a best Linux blog to learn Linux.
It's FIVE years old blog.
This website is maintained by Magesh M, it's licensed under CC BY-NC 4.0.
He got two GIRL babes.
Her names are Tanisha & Renusha.
Details are follow:
awk: It’s a command
//: It holds the searching string.
^: matches start of string.
$: matches end of string.
.: Replaces any character.
!: Delete the matched string.
2daygeek.txt: Source file name.
How To Delete The Empty Lines In A File In Linux using Combination of cat And tr Command?
cat stands for concatenate. It is very frequently used in Linux to reads data from a file.
cat is one of the most frequently used commands on Unix-like
operating systems. It’s offer three functions which is related to text
file such as display content of a file, combine multiple files into the
single output and create a new file.
Translate, squeeze, and/or delete characters from standard input, writing to standard output.
$ cat 2daygeek.txt | tr -s '\n'
2daygeek.com is a best Linux blog to learn Linux.
It's FIVE years old blog.
This website is maintained by Magesh M, it's licensed under CC BY-NC 4.0.
He got two GIRL babes.
Her names are Tanisha & Renusha.
Details are follow:
cat: It’s a command
tr: It’s a command
|: Pipe symbol. It pass first command output as a input to another command.
s: Replace each sequence of a repeated character that is listed in the last specified SET.
\n: To add a new line.
2daygeek.txt: Source file name.
How To Remove/Delete The Empty Lines In A File In Linux Using perl Command?
Perl stands in for “Practical Extraction and Reporting Language”.
Perl is a programming language specially designed for text editing. It
is now widely used for a variety of purposes including Linux system
administration, network programming, web development, etc.
$ perl -ne 'print if /\S/' 2daygeek.txt
2daygeek.com is a best Linux blog to learn Linux.
It's FIVE years old blog.
This website is maintained by Magesh M, it's licensed under CC BY-NC 4.0.
He got two GIRL babes.
Her names are Tanisha & Renusha.
NodeBB is a Node.js based forum software built for the modern web. It's built on either a MongoDB or Redis database. It
utilizes web sockets for instant interactions and real-time
notifications. NodeBB has many modern features out of the box such as
social network integration and streaming discussions. Additional functionality is enabled through the use of third-party plugins. NodeBB is an open source project which can be found on Github. In
this guide, we will walk you through the step-by-step NodeBB
installation process on the Fedora 29 operating system by using Nginx as
a reverse proxy, MongoDB as the database and acme.sh and Let's Encrypt
for HTTPS.
Requirements
NodeBB requires the following software to be installed:
Node.js version6or greater
MongoDB version2.6or greater or Redis version2.8.9or greater
Nginx version1.3.13or greater
Git
NOTE: Installing NodeBB's
dependencies may require more than 512 megabytes of system memory. It is
recommended to enable a swap partition to compensate if your Linux
system has insufficient memory.
Prerequisites
A running Fedora 29 system with at least 1GB or RAM.
Update your operating system packages (software). This is an
important first step because it ensures you have the latest updates and
security fixes for your operating system's default software packages:
sudo dnf check-upgrade || sudo dnf upgrade -y
Install some essential packages that are necessary for basic administration of the Fedora operating system:
sudo dnf install -y curl wget vim bash-completion git socat
For simplicity's sake, disable SELinux and Firewall:
NodeBB is built on Node.js. We are going to installrecommended version for NodeBB which is version 8at
the time of this writing. On Linux, you have a few Node.js installation
options: Linux Binaries (x86/x64), Source Code or via Package Managers.
We will use Package Management option which makes installing and
updating Node.js a breeze. Download and install the latest Long-Term Support (LTS) release of Node.js from the Fedora repo:
sudo dnf -y install nodejs
To compile and install native add-ons from npm you may also need to install build tools:
sudo dnf install -y gcc-c++ make
# or
# sudo dnf groupinstall -y 'Development Tools'
NOTE:npm is
distributed with Node.js - which means that when you download Node.js,
you automatically get npm installed on your system. Check the Node.js and npmversions:
node -v && npm -v# v10.15.0
# 6.4.1
Npm is a separate project from Node.js, and tends to update
more frequently. As a result, even if you’ve just downloaded Node.js
(and therefore npm), you’ll probably need to update your npm. Luckily,
npm knows how to update itself! To update your npm, type this into your
terminal:
sudo npm install -g npm@latest
This command will update npm to the latest stable version. Re-check npm version with:
npm -v
# 6.7.0
And it should return latest version numbers.
Step 2: Install and configure MongoDB
NodeBB needs a database to store its data, and it supports MongoDB
and Redis. In this tutorial, we chose MongoDB as data store engine. So,
in the next few steps, we will download and install MongoDB database
from the official MongoDB rpm repository: To install the stable version of MongoDB package, issue the following command:
sudo dnf install -y mongodb mongodb-server
Check the MongoDB version:
mongo --version | head -n 1 && mongod --version | head -n 1
# MongoDB shell version v4.0.1
# db version v4.0.1
Start and enable (set it to start on reboot) MongoDB service:
If all went well, your MongoDB should be installed and prepared for
NodeBB. In the next step, we will deal with web server installation and
configuration.
Step 3 - Installacme.shclient and obtain Let's Encrypt certificate (optional)
Securing your NodeBB Forum with HTTPS is not necessary, but it is a
good practice to secure your site traffic. In order to obtain TLS
certificate from Let's Encrypt we will use acme.sh client. Acme.sh is a
pure unix shell software for obtaining TLS certificates from Let's
Encrypt with zero dependencies.
Download and install acme.sh:
sudo su - root
git clone https://github.com/Neilpang/acme.sh.git
cd acme.sh
./acme.sh --install --accountemailyour_email@example.com
source ~/.bashrc
cd ~
Check acme.sh version:
acme.sh --version
# v2.8.0
ObtainRSAandECC/ECDSAcertificates for your domain/hostname:
If you want fake certificates for testing you can add--staging flage to the above commands.
After running the above commands, your certificates and keys will be in:
sudo systemctl status nginx.service
# active (running)
NodeBB by default runs on port4567. To avoid typinghttp://example.com:4567, we will configure Nginx as a reverse proxy for the NodeBB application. Every request on port80or443(if SSL is used) will be forwarded to port4567. Runsudo vim /etc/nginx/conf.d/nodebb.conf and configure Nginx as an HTTPS reverse proxy.
NOTE: Replace your_user in the above command with your non-root user that you should have created as a prerequisite for this tutorial. Clone the latest NodeBB repository into document root folder:
Initiate the setup script by running the app with thesetupflag. Answer each of the questions:
./nodebb setup
After NodeBB setup is completed, run./nodebb startto manually start your NodeBB server:
./nodebb start
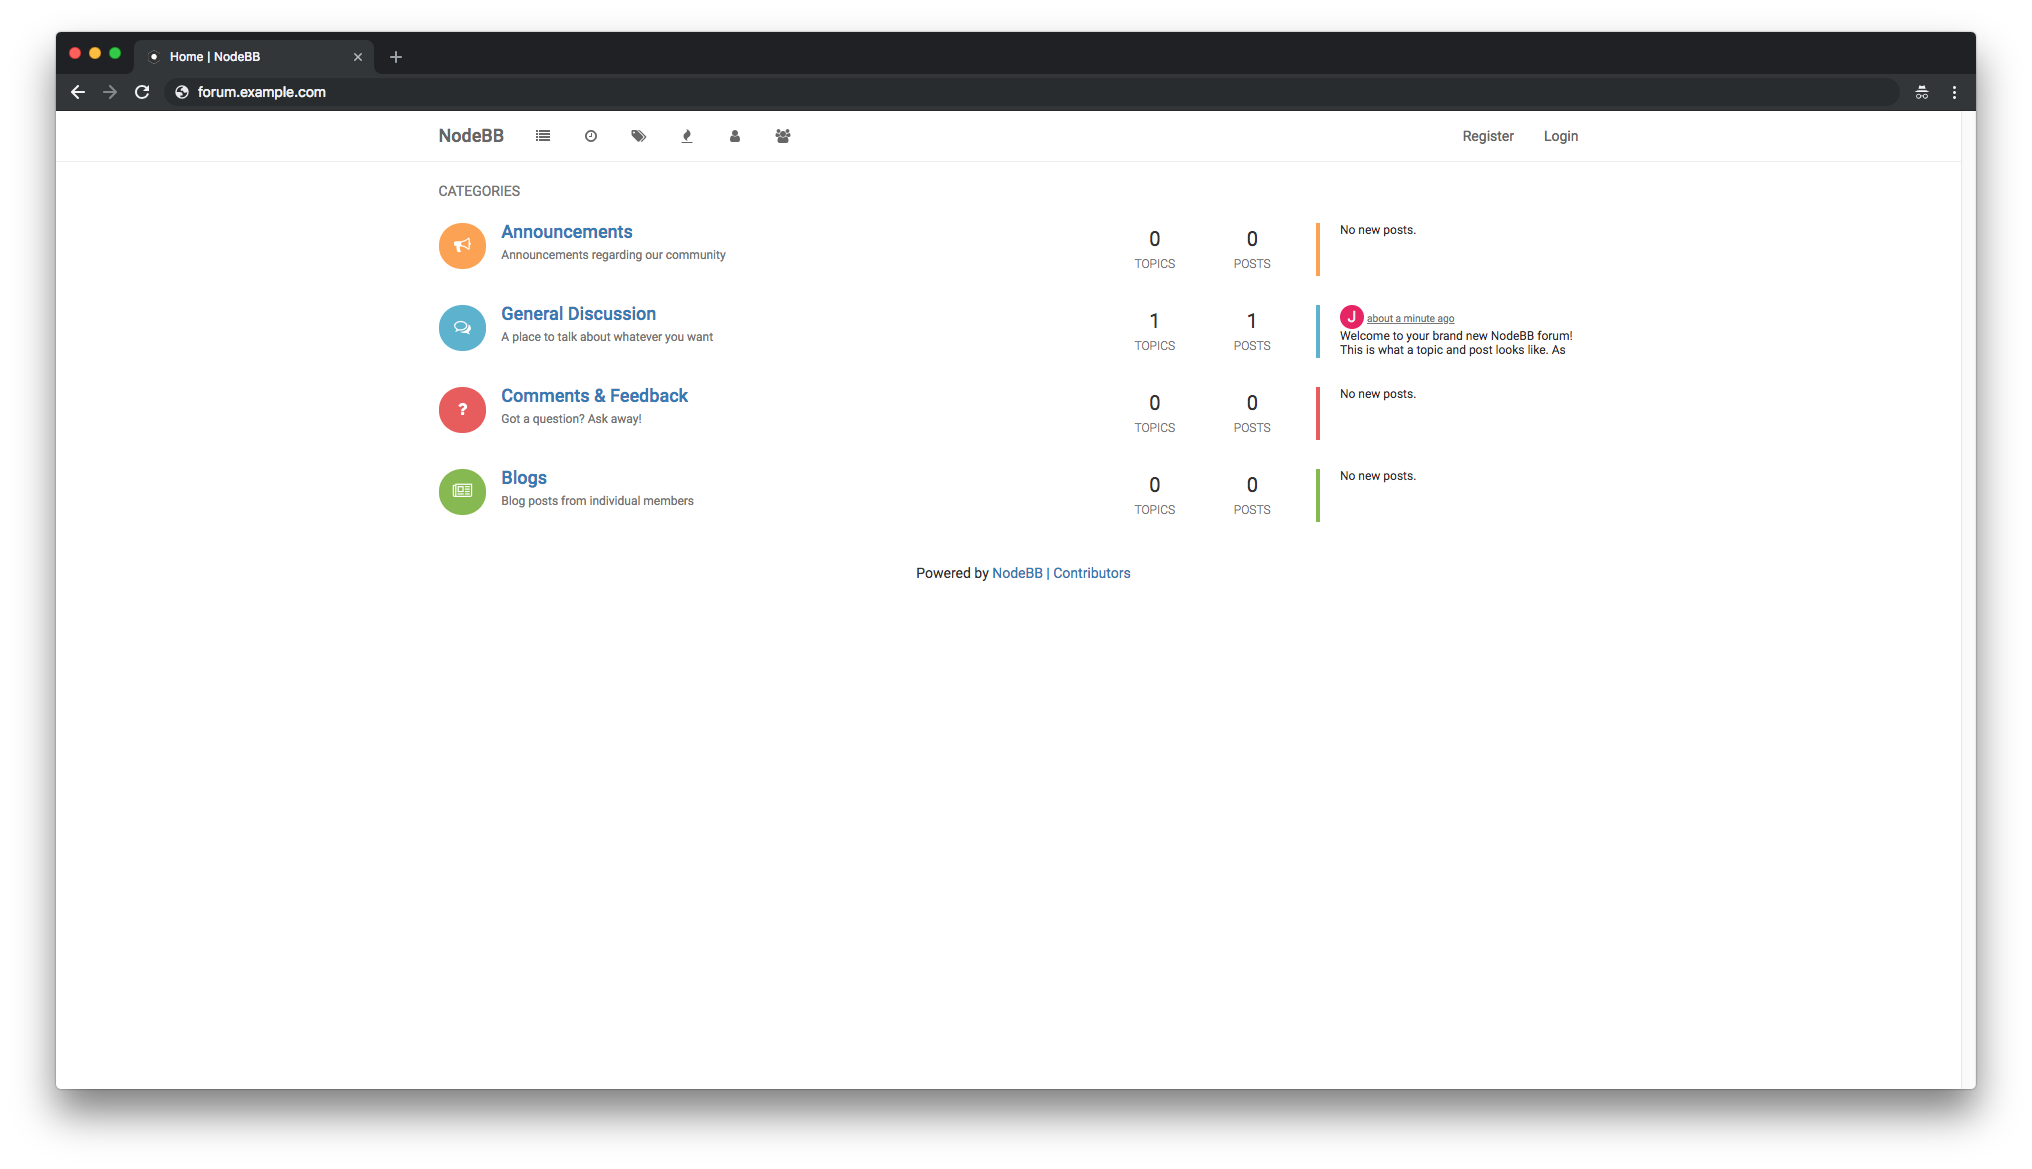
After running this command, you should be able to access your brand new forum in your web browser:
Step 6: Run NodeBB as a System Service
When started via./nodebb start, NodeBB
will not automatically start up again when the system reboots. To avoid
that, we will need to setup NodeBB as a system service.
If running, stop NodeBB:
./nodebb stop
Create a newnodebbuser:
sudo useradd nodebb
Change the ownership of the/var/www/nodebbdirectory tonodebbuser:
sudo chown -R nodebb:nodebb /var/www/nodebb
Createnodebb.servicesystemd unit config file. This unit file will handle startup of NodeBB deamon. Runsudo vim /etc/systemd/system/nodebb.serviceand add the below content:
sudo systemctl status nodebb.service
sudo systemctl is-enabled nodebb.service
Congratulations! You have successfully installed and deployed NodeBB discussion platform on Fedora 29 system. You should be able to access your forum on your domainand interact with your forum.