Tuesday, July 31, 2018

7 Essential and Practical Usage of Paste Command in Linux

https://linuxhandbook.com/paste-command


In a previous article, we talked about the cut command which can be used to extract columns from a CSV or tabular text data file.
The paste command does the exact opposite: it merges several input files to produce a new delimited text file from them. We are going to see how to effectively use Paste command in Linux and Unix.
Paste command examples in Linux

7 Practical examples of Paste command in Linux

If you prefer videos, you can watch this video explaining the same Paste command examples discussed in this article.

1. Pasting columns

In its most basic use case, the paste command takes N input files and join them line by line on the output:
sh$ printf "%s\n" {a..e} | tee letters
a
b
c
d
e

sh$ printf "%s\n" {1..5} | tee digits
1
2
3
4
5

sh$ paste letters digits
a    1
b    2
c    3
d    4
e    5
But let’s leave now the theoretical explanations to work on a practical example. If you’ve downloaded the sample files used in the video above, you can see I have several data files corresponding to the various columns of a table:
sh$ head -3 *.csv
==> ACCOUNTLIB.csv <==
ACCOUNTLIB
TIDE SCHEDULE
VAT BS/ENC

==> ACCOUNTNUM.csv <==
ACCOUNTNUM
623477
445452

==> CREDIT.csv <==
CREDIT
<--- empty="" line="="> DEBIT.csv <==
DEBIT
00000001615,00
00000000323,00
It is quite easy to produce a tab-delimited text file from those data:
sh$ paste *.csv | head -3
ACCOUNTLIB    ACCOUNTNUM    CREDIT    DEBIT
TIDE SCHEDULE    623477        00000001615,00
VAT BS/ENC    445452        00000000323,00
As you may see, when displayed on the console, the content of that tab-separated values file does not produce a perfectly formatted table. But this is by design: the paste command is not used to create fixed-width text files, but only delimited text files where one given character is assigned the role of being the field separator.
So, even if it is not obvious in the output above, there is actually one and only one tab character between each field. Let’s make that apparent by using the sed command:
sh$ paste *.csv | head -3 | sed -n l
ACCOUNTLIB\tACCOUNTNUM\tCREDIT\tDEBIT$
TIDE SCHEDULE\t623477\t\t00000001615,00$
VAT BS/ENC\t445452\t\t00000000323,00$
Now, invisible characters are displayed unambiguously in the output. And you can see the tab characters displayed as \t. You may count them: there is always three tabs on every output line— one between each field. And when you see two of them in a row, that only means there was an empty field there. This is often the case in my particular example files since on each line, either the CREDIT or DEBIT field is set, but never both of them at the same time.

2. Changing the field delimiter

As we’ve seen it, the paste command uses the tab character as the default field separator (“delimiter”). Something we can change using the -d option. Let’s say I would like to use a semi-colon instead:
# The quotes around the ';' are used to prevent the
# shell to consider that semi-colon as being a command separator
sh$ paste -d ';' *.csv | head -3
ACCOUNTLIB;ACCOUNTNUM;CREDIT;DEBIT
TIDE SCHEDULE;623477;;00000001615,00
VAT BS/ENC;445452;;00000000323,00
No need to append the sed command at the end of the pipeline here since the separator we used is a printable character. Anyway, the result is the same: on a given row, each field is separated from its neighbor by using a one-character delimiter.

3. Transposing data using the serial mode

The examples above have one thing in common: the paste command reads all its input files in parallel, something that is required so it can merge them on a line-by-line basis in the output.
But the paste command can also operate in the so-called serial mode, enabled using the -s flag. As its name implies it, in the serial mode, the paste command will read the input files one after the other. The content of the first input file will be used to produce the first output line. Then the content of the second input file will be used to produce the second output line, and so on. That also means the output will have as many lines as there were files in the input.
More formally, the data taken from file N will appear as the Nth line in the output in serial mode, whereas it would appear as the Nth column in the default “parallel” mode. In mathematical terms, the table obtained in serial mode is the transpose of the table produced in the default mode (and vice versa).
To illustrate that, let’s consider a small subsample of our data:
sh$ head -5 ACCOUNTLIB.csv | tee ACCOUNTLIB.sample
ACCOUNTLIB
TIDE SCHEDULE
VAT BS/ENC
PAYABLES
ACCOMMODATION GUIDE
sh$ head -5 ACCOUNTNUM.csv | tee ACCOUNTNUM.sample
ACCOUNTNUM
623477
445452
4356
623372
In the default (“parallel”) mode, the input file’s data will serve as columns in the output, producing a two columns by five rows table:
sh$ paste *.sample
ACCOUNTLIB    ACCOUNTNUM
TIDE SCHEDULE    623477
VAT BS/ENC    445452
PAYABLES    4356
ACCOMMODATION GUIDE    623372
But in serial mode, the input file’s data will appear as rows, producing now a five columns by two rows table:
sh$ paste -s *.sample
ACCOUNTLIB    TIDE SCHEDULE    VAT BS/ENC    PAYABLES    ACCOMMODATION GUIDE
ACCOUNTNUM    623477    445452    4356    623372

4. Working with the standard input

Like many standard utilities, the paste command can use the standard input to read data. Either implicitly when there is no filename given as an argument, or explicitly by using the special - filename. Apparently, this isn’t that useful though:
# Here, the paste command is useless
head -5 ACCOUNTLIB.csv | paste
ACCOUNTLIB
TIDE SCHEDULE
VAT BS/ENC
PAYABLES
ACCOMMODATION GUIDE
I encourage you to test it by yourself, but the following syntax should produce the same result— making once again the paste command useless in that case:
head -5 ACCOUNTLIB.csv | paste -
So, what could be the point of reading data from the standard input? Well, with the -s flag, things become a lot more interesting as we will see it now.

4.1. Joining lines of a file

As we’ve seen it a couple of paragraphs earlier, in the serial mode the paste command will write all lines of an input file on the same output line. This gives us a simple way to join all the lines read from the standard input into only one (potentially very long) output line:
sh$ head -5 ACCOUNTLIB.csv | paste -s -d':'
ACCOUNTLIB:TIDE SCHEDULE:VAT BS/ENC:PAYABLES:ACCOMMODATION GUIDE
This is mostly the same thing you could do using the tr command, but with one difference though. Let’s use the diff utility to spot that:
sh$ diff <(head -5 ACCOUNTLIB.csv | paste -s -d':') \
         <(head -5 ACCOUNTLIB.csv | tr '\n' ':')
1c1
< ACCOUNTLIB:TIDE SCHEDULE:VAT BS/ENC:PAYABLES:ACCOMMODATION GUIDE
---
> ACCOUNTLIB:TIDE SCHEDULE:VAT BS/ENC:PAYABLES:ACCOMMODATION GUIDE:
\ No newline at end of file
As reported by the diff utility, we can see the tr command has replaced every instance of the newline character by the given delimiter, including the very last one. On the other hand, the paste command kept the last newline character untouched. So depending if you need the delimiter after the very last field or not, you will use one command or the other.

4.2. Multi-column formatting of one input file

According to the Open Group specifications, “the standard input shall be read one line at a time” by the paste command. So, passing several occurrences of the - special file name as arguments to the paste command will result with as many consecutive lines of the input being written into the same output line:
sh$ seq 9 | paste - - -
1    2    3
4    5    6
7    8    9
To make things more clear, I encourage you to study the difference between the two commands below. In the first case, the paste command opens three times the same file, resulting in data duplication in the output. On the other hand, in the second case the ACCOUNTLIB file is opened only once (by the shell), but read three times for each line (by the paste command), resulting in the file content being displayed as three columns:
sh$ paste ACCOUNTLIB.csv ACCOUNTLIB.csv ACCOUNTLIB.csv | head -2
ACCOUNTLIB    ACCOUNTLIB    ACCOUNTLIB
TIDE SCHEDULE    TIDE SCHEDULE    TIDE SCHEDULE

sh$ paste - - - < ACCOUNTLIB.csv | head -2
ACCOUNTLIB    TIDE SCHEDULE    VAT BS/ENC
PAYABLES    ACCOMMODATION GUIDE    VAT BS/ENC
Given the behavior of the paste command when reading from the standard input, it is usually not advisable to use several - special file names in serial mode. In that case, the first occurrence would read the standard input until its end, and the subsequent occurrences of - would read from an already exhausted input stream— resulting in no more data being available:
# The following command will produce 3 lines of output.
# But the first one exhausted the standard input,
# so the remaining two lines are empty
sh$ seq 9 | paste -s - - -
1    2    3    4    5    6    7    8    9

5. Working with files of different length

If an end-of-file condition is detected on one or more input files, but not all input files, paste shall behave as though empty lines were read from the files on which end-of-file was detected, unless the -s option is specified.
So, the behavior is what you may expect: missing data are replaced by “empty” content. To illustrate that behavior, let’s record a couple more transactions into our “database”. In order to keep the original files intact, we will work on a copy of our data though:
# Copy files
sh$ for f in ACCOUNTNUM ACCOUNTLIB CREDIT DEBIT; do
  cp ${f}.csv NEW${f}.csv
done

# Update the copy
sh$ cat - << EOF >> NEWACCOUNTNUM.csv
1080
4356
EOF

sh$ cat - << EOF >> NEWDEBIT.csv
00000001207,35

EOF

sh$ cat - << EOF >> NEWCREDIT.csv

00000001207,35
EOF
With those updates, we have now registered a new capital movement from account #1080 to account #4356. However, as you may have noticed it, I didn’t bother to update the ACCOUNTLIB file. This does not seem such a big issue because the paste command will replace the missing rows with empty data:
sh$ paste -d';' NEWACCOUNTNUM.csv \
                NEWACCOUNTLIB.csv \
                NEWDEBIT.csv \
                NEWCREDIT.csv | tail
4356;PAYABLES;;00000000402,03
613866;RENTAL COSTS;00000000018,00;
4356;PAYABLES;;00000000018,00
657991;MISCELLANEOUS CHARGES;00000000015,00;
445333;VAT BS/DEBIT;00000000003,00;
4356;PAYABLES;;00000000018,00
626510;LANDLINE TELEPHONE;00000000069,14;
445452;VAT BS/ENC;00000000013,83;
1080;;00000001207,35; # <-- 4356="" account="" code="" here="" is="" label="" missing="" the="">
But beware, the paste command can only match lines by their physical position: all it can tell is a file is “shorter” than another one. Not where the data are missing. So it always adds the blanks fields at the end of the output, something that can cause unexpected offsets in your data. Let’s make that obvious by adding yet another transaction:
sh$ cat << EOF >> NEWACCOUNTNUM.csv
4356
3465
EOF

sh$ cat << EOF >> NEWACCOUNTLIB.csv
PAYABLES
WEB HOSTING
EOF

sh$ cat << EOF >> NEWDEBIT.csv

00000000706,48
EOF

sh$ cat << EOF >> NEWCREDIT.csv
00000000706,48

EOF
This time, I was more rigorous since I properly updated both the account number (ACCOUNTNUM), and it’s corresponding label (ACCOUNTLIB) as well as the CREDIT and DEBIT data files. But since there were missing data in the previous record, the paste command is no longer able to keep the related fields on the same line:
sh$ paste -d';' NEWACCOUNTNUM.csv \
                NEWACCOUNTLIB.csv \
                NEWDEBIT.csv \
                NEWCREDIT.csv | tail
4356;PAYABLES;;00000000018,00
657991;MISCELLANEOUS CHARGES;00000000015,00;
445333;VAT BS/DEBIT;00000000003,00;
4356;PAYABLES;;00000000018,00
626510;LANDLINE TELEPHONE;00000000069,14;
445452;VAT BS/ENC;00000000013,83;
1080;PAYABLES;00000001207,35;
4356;WEB HOSTING;;00000001207,35
4356;;;00000000706,48
3465;;00000000706,48;
As you may see it, the account #4356 is reported with the label “WEB HOSTING” whereas, in reality, that latter should appear on the row corresponding to the account #3465.
As a conclusion, if you have to deal with missing data, instead of the paste command you should consider using the join utility since that latter will match rows based on their content, and not based on there position in the input file. That makes it much more suitable for “database” style applications. I’ve already published a video about the join command, but that should probably deserve an article of its own, so let us know if you are interested in that topic!

6. Cycling over delimiters

In the overwhelming majority of the use cases, you will provide only one character as the delimiter. This is what we have done until now. However, if you give several characters after the -d option, the paste command will cycle over them: the first character will be used as the first field delimiter on the row, the second character as the second field delimiter, and so on.
sh$ paste -d':+-' ACCOUNT*.csv CREDIT.csv DEBIT.csv | head -5
ACCOUNTLIB:ACCOUNT NUM+CREDIT-DEBIT
TIDE SCHEDULE:623477+-00000001615,00
VAT BS/ENC:445452+-00000000323,00
PAYABLES:4356+00000001938,00-
ACCOMODATION GUIDE:623372+-00000001333,00
Field delimiters can only appear between fields. Not at the end of a line. And you can’t insert more than one delimiters between two given fields. As a trick to overcome these limitations, you may use the /dev/null special file as an extra input where you need an additional separator:
# Display the opening bracket between the
# ACCOUNTLIB field and the ACCOUNTNUM field, and
# the closing bracket between the ACCOUNTNUM field
# and the empty `/dev/null` field:
sh$ paste  -d'()' \
           ACCOUNT*.csv /dev/null | head -5
ACCOUNTLIB(ACCOUNTNUM)
TIDE SCHEDULE(623477)
VAT BS/ENC(445452)
PAYABLES(4356)
ACCOMODATION GUIDE(623372)
Something you may even abuse:
sh$ paste -d'# is ' \
          - ACCOUNTNUM.csv - - - ACCOUNTLIB.csv < /dev/null | tail -5
#657991 is MISCELLANEOUS CHARGES
#445333 is VAT BS/DEBIT
#4356 is PAYABLES
#626510 is LANDLINE TELEPHONE
#445452 is VAT BS/ENC
However, no need to say, if you reach that level of complexity, it might be a clue the paste utility was not necessarily the best tool for the job. Maybe worth considering, in that case, something else like sedor awk command.
But what if the list contains fewer delimiters than needed to display a row in the output? Interestingly, the paste command will “cycle” over them. So, once the list is exhausted, the paste command will jump back to the first delimiter, something that probably opens the door to some creative usage. As of myself, I was not able to make anything really useful with that feature given my data. So you will have to be satisfied with the following a bit far-fetched example. But it will not be a complete waste your time since that was a good occasion to mention you have to double the backslash (\\) when you want to use it as a delimiter:
sh$ paste -d'/\\' \
          - ACCOUNT*.csv CREDIT.csv DEBIT.csv - < /dev/null | tail -5
/MISCELLANEOUS CHARGES\657991/\00000000015,00/
/VAT BS/DEBIT\445333/\00000000003,00/
/PAYABLES\4356/00000000018,00\/
/LANDLINE TELEPHONE\626510/\00000000069,14/
/VAT BS/ENC\445452/\00000000013,83/

7. Multibyte character delimiters

Like most of the standard Unix utilities, the paste command is born at a time one character was equivalent to one byte. But this is no longer the case: today, many systems are using the UTF-8 variable length encoding by default. In UTF-8, a character can be represented by 1, 2, 3 or 4 bytes. That allows us to mix in the same text file the whole variety of human writing— as well as tons of symbols and emojis— while maintaining ascending compatibility with the legacy one-byte US-ASCII character encoding.
Let’s say for example I would like to use the WHITE DIAMOND (◇ U+25C7) as my field separator. In UTF-8, this character is encoded using the three bytes e2 97 87. This character might be hard to obtain from the keyboard, so if you want to try that by yourself, I suggest you copy-paste it from the code block below:
# The sed part is only used as a little trick to add the
# row number as the first field in the output
sh$ sed -n = ACCOUNTNUM.csv |
       paste -d'◇' - ACCOUNT*.csv | tail -5
26�MISCELLANEOUS CHARGES�657991
27�VAT BS/DEBIT�445333
28�PAYABLES�4356
29�LANDLINE TELEPHONE�626510
30�VAT BS/ENC�445452
Quite deceptive, isn’t it? Instead of the expected white diamond, I have that “question mark” symbol (at least, this is how it is displayed on my system). It is not a “random” character though. It is the Unicode replacement character used “to indicate problems when a system is unable to render a stream of data to a correct symbol”. So, what has gone wrong?
Once again, examining the raw binary content of the output will give us some clues:
sh$ sed -n = ACCOUNTNUM.csv | paste -d'◇' - ACCOUNT*.csv | tail -5 | hexdump -C
00000000  32 36 e2 4d 49 53 43 45  4c 4c 41 4e 45 4f 55 53  |26.MISCELLANEOUS|
00000010  20 43 48 41 52 47 45 53  97 36 35 37 39 39 31 0a  | CHARGES.657991.|
00000020  32 37 e2 56 41 54 20 42  53 2f 44 45 42 49 54 97  |27.VAT BS/DEBIT.|
00000030  34 34 35 33 33 33 0a 32  38 e2 50 41 59 41 42 4c  |445333.28.PAYABL|
00000040  45 53 97 34 33 35 36 0a  32 39 e2 4c 41 4e 44 4c  |ES.4356.29.LANDL|
00000050  49 4e 45 20 54 45 4c 45  50 48 4f 4e 45 97 36 32  |INE TELEPHONE.62|
00000060  36 35 31 30 0a 33 30 e2  56 41 54 20 42 53 2f 45  |6510.30.VAT BS/E|
00000070  4e 43 97 34 34 35 34 35  32 0a                    |NC.445452.|
0000007a
We already had the opportunity of practicing with hex dumps above, so your eyes should now be sharpened enough to spot the field delimiters in the byte stream. By looking closely, you will see the field separator after the line number is the byte e2. But if you continue your investigations, you will notice the second field separator is 97. Not only the paste command didn’t output the character I wanted, but it also didn’t use everywhere the same byte as the separator?!?
Wait a minute: doesn’t that remind you something we already talk about? And those two bytes e2 97, aren’t they somewhat familiar to you? Well, familiar is probably a little bit too much, but if you jump back a few paragraphs you might find them mentioned somewhere…
So did you find where it was? Previously, I said in UTF-8, the white diamond is encoded as the three bytes e2 97 87. And indeed, the paste command has considered that sequence not as a whole three-byte character, but as three independent bytes and so, it used the first byte as the first field separator, then the second byte as the second field separator.
I let you re-run that experiment by adding one more column in the input data; you should see the third field separator to be 87 — the third byte of the UTF-8 representation for the white diamond.
Ok, that’s the explanation: the paste command only accepts one-byte “characters” as the separator. And that’s particularly annoying, since, once again, I don’t know any way to overcome that limitation except by using the /dev/null trick I already gave to you:
sh$ sed -n = ACCOUNTNUM.csv |
    paste  -d'◇' \
           - /dev/null /dev/null \
           ACCOUNTLIB.csv /dev/null /dev/null \
           ACCOUNTNUM.csv | tail -5
26◇MISCELLANEOUS CHARGES◇657991
27◇VAT BS/DEBIT◇445333
28◇PAYABLES◇4356
29◇LANDLINE TELEPHONE◇626510
30◇VAT BS/ENC◇445452
If you read my previous article about the cut command, you may remember I had similar issues with the GNU implementation of that tool. But I noticed at that time the OpenBSD implementation was correctly taking into account the LC_CTYPE locale setting to identify multibyte characters. Out of curiosity, I’ve tested the paste command on OpenBSD too. Alas, with the same result as on my Debian box this time, despite the specifications for the paste utility mentioning the LC_CTYPE environment variable as determining ” the locale for the interpretation of sequences of bytes of text data as characters (for example, single-byte as opposed to multi-byte characters in arguments and input files)”. From my experience, all the major implementations of the paste utility currently ignore multi-byte characters in the delimiter list and assume one-byte separators. But I will not claim having tested that for the whole variety of the *nix platforms. So if I missed something here, don’t hesitate to use the comment section to correct me!

Bonus Tip: Avoiding the \0 pitfall

For historical reasons:
The commands:
paste -d “\0” …​ paste -d “” …​
are not necessarily equivalent; the latter is not specified by this volume of IEEE Std 1003.1-2001 and may result in an error. The construct ‘\0’ is used to mean “no separator” because historical versions of paste did not follow the syntax guidelines, and the command:
paste -d”” …​
could not be handled properly by getopt().
So, the portable way of pasting files without using a delimiter is by specifying the \0 delimiter. This is somewhat counterintuitive since, for many commands, \0 means the NUL character–a character encoded as a byte made only of zeros that should not clash with any text content.
You might find the NUL character an useful separator especially when your data may contain arbitrary characters (like when working with file names or user-provided data). Unfortunately, I’m not aware of any way to use the NUL character as the field delimiter with the paste command. But maybe do you know how to do that? If that’s the case, I would be more than happy to read your solution in the command section.
On the other hand, the paste implementation part of the GNU Coreutils has the non-standard -z option to switch from the newline to the NUL character for the line separator. But in that case, the NUL character will be used as line separator both for the input and output. So, to test that feature, we need first a zero-terminated version of our input files:
sh$ tr '\n' '\0' < ACCOUNTLIB.csv > ACCOUNTLIB.zero
sh$ tr '\n' '\0' < ACCOUNTNUM.csv > ACCOUNTNUM.zero
To see what has changed in the process, we can use the hexdump utility to examine the raw binary content of the files:
sh$ hexdump -C ACCOUNTLIB.csv | head -5
00000000  41 43 43 4f 55 4e 54 4c  49 42 0a 54 49 44 45 20  |ACCOUNTLIB.TIDE |
00000010  53 43 48 45 44 55 4c 45  0a 56 41 54 20 42 53 2f  |SCHEDULE.VAT BS/|
00000020  45 4e 43 0a 50 41 59 41  42 4c 45 53 0a 41 43 43  |ENC.PAYABLES.ACC|
00000030  4f 4d 4f 44 41 54 49 4f  4e 20 47 55 49 44 45 0a  |OMODATION GUIDE.|
00000040  56 41 54 20 42 53 2f 45  4e 43 0a 50 41 59 41 42  |VAT BS/ENC.PAYAB|
sh$ hexdump -C ACCOUNTLIB.zero | head -5
00000000  41 43 43 4f 55 4e 54 4c  49 42 00 54 49 44 45 20  |ACCOUNTLIB.TIDE |
00000010  53 43 48 45 44 55 4c 45  00 56 41 54 20 42 53 2f  |SCHEDULE.VAT BS/|
00000020  45 4e 43 00 50 41 59 41  42 4c 45 53 00 41 43 43  |ENC.PAYABLES.ACC|
00000030  4f 4d 4f 44 41 54 49 4f  4e 20 47 55 49 44 45 00  |OMODATION GUIDE.|
00000040  56 41 54 20 42 53 2f 45  4e 43 00 50 41 59 41 42  |VAT BS/ENC.PAYAB|
I will let you compare by yourself the two hex dumps above to identify the difference between “.zero” files and the original text files. As a hint, I can tell you a newline is encoded as the 0a byte.
Hopefully, you took the time needed to locate the NUL character in the “.zero” input files. Anyway, we have now a zero-terminated version of the input files, so we can use the -z option of the paste command to handle those data, producing in the output as well a zero-terminated result:
# Hint: in the hexadecimal dump:
#  the byte 00 is the NUL character
#  the byte 09 is the TAB character
# Look at any ASCII table to find the mapping
# for the letters or other symbols
# (https://en.wikipedia.org/wiki/ASCII#Character_set)
sh$ paste -z *.zero | hexdump -C | head -5
00000000  41 43 43 4f 55 4e 54 4c  49 42 09 41 43 43 4f 55  |ACCOUNTLIB.ACCOU|
00000010  4e 54 4e 55 4d 00 54 49  44 45 20 53 43 48 45 44  |NTNUM.TIDE SCHED|
00000020  55 4c 45 09 36 32 33 34  37 37 00 56 41 54 20 42  |ULE.623477.VAT B|
00000030  53 2f 45 4e 43 09 34 34  35 34 35 32 00 50 41 59  |S/ENC.445452.PAY|
00000040  41 42 4c 45 53 09 34 33  35 36 00 41 43 43 4f 4d  |ABLES.4356.ACCOM|

# Using the `tr` utility, we can map \0 to newline
# in order to display the output on the console:
sh$ paste -z *.zero | tr '\0' '\n' | head -3
ACCOUNTLIB    ACCOUNTNUM
TIDE SCHEDULE    623477
VAT BS/ENC    445452
Since my input files do not contain embedded newlines in the data, the -z option is of limited usefulness here. But based on the explanations above, I let you try to understand why the following example is working “as expected”. To fully understand that you probably need to download the sample files and examine them at byte level using the hexdump utility as we did above:
# Somehow, the head utility seems to be confused
# by the ACCOUNTS file content (I wonder why?;)
sh$ head -3 CATEGORIES ACCOUNTS
==> CATEGORIES <==
PRIVATE
ACCOMMODATION GUIDE
SHARED

==> ACCOUNTS <==
6233726230846265106159126579914356613866618193623477623795445333445452605751
# The output is quite satisfactory, putting the account number
# after the account name and keeping things surprisingly nicely formatted:
sh$ paste -z -d':' CATEGORIES ACCOUNTS | tr '\0' '\n' | head -5
PRIVATE
ACCOMMODATION GUIDE:623372

SHARED
ADVERTISEMENTS:623084

What’s more?

The paste command produces only delimited text output. But as illustrated at the end of the introductory video, if your system does support the BSD column utility, you can use it to obtain nicely formatted tables by converting the paste command output to a fixed-width text format. But that will be the subject of an upcoming article. So stay tuned, and as always, don’t forget to share that article on your favorite websites and social media!

Monday, July 30, 2018

The evolution of package managers

https://opensource.com/article/18/7/evolution-package-managers

Package managers play an important role in Linux software management. Here's how some of the leading players compare.

The evolution of package managers
Image by : 
opensource.com
x

Get the newsletter

Join the 85,000 open source advocates who receive our giveaway alerts and article roundups.
Every computerized device uses some form of software to perform its intended tasks. In the early days of software, products were stringently tested for bugs and other defects. For the last decade or so, software has been released via the internet with the intent that any bugs would be fixed by applying new versions of the software. In some cases, each individual application has its own updater. In others, it is left up to the user to figure out how to obtain and upgrade software.
Linux adopted early the practice of maintaining a centralized location where users could find and install software. In this article, I'll discuss the history of software installation on Linux and how modern operating systems are kept up to date against the never-ending torrent of CVEs.

How was software on Linux installed before package managers?

Historically, software was provided either via FTP or mailing lists (eventually this distribution would grow to include basic websites). Only a few small files contained the instructions to create a binary (normally in a tarfile). You would untar the files, read the readme, and as long as you had GCC or some other form of C compiler, you would then typically run a ./configure script with some list of attributes, such as pathing to library files, location to create new binaries, etc. In addition, the configure process would check your system for application dependencies. If any major requirements were missing, the configure script would exit and you could not proceed with the installation until all the dependencies were met. If the configure script completed successfully, a Makefile would be created.
Once a Makefile existed, you would then proceed to run the make command (this command is provided by whichever compiler you were using). The make command has a number of options called make flags, which help optimize the resulting binaries for your system. In the earlier days of computing, this was very important because hardware struggled to keep up with modern software demands. Today, compilation options can be much more generic as most hardware is more than adequate for modern software.
Finally, after the make process had been completed, you would need to run make install (or sudo make install) in order to actually install the software. As you can imagine, doing this for every single piece of software was time-consuming and tedious—not to mention the fact that updating software was a complicated and potentially very involved process.

What is a package?

Packages were invented to combat this complexity. Packages collect multiple data files together into a single archive file for easier portability and storage, or simply compress files to reduce storage space. The binaries included in a package are precompiled with according to the sane defaults the developer chosen. Packages also contain metadata, such as the software's name, a description of its purpose, a version number, and a list of dependencies necessary for the software to run properly.
Several flavors of Linux have created their own package formats. Some of the most commonly used package formats include:
  • .deb: This package format is used by Debian, Ubuntu, Linux Mint, and several other derivatives. It was the first package type to be created.
  • .rpm: This package format was originally called Red Hat Package Manager. It is used by Red Hat, Fedora, SUSE, and several other smaller distributions.
  • .tar.xz: While it is just a compressed tarball, this is the format that Arch Linux uses.
While packages themselves don't manage dependencies directly, they represented a huge step forward in Linux software management.

What is a software repository?

A few years ago, before the proliferation of smartphones, the idea of a software repository was difficult for many users to grasp if they were not involved in the Linux ecosystem. To this day, most Windows users still seem to be hardwired to open a web browser to search for and install new software. However, those with smartphones have gotten used to the idea of a software "store." The way smartphone users obtain software and the way package managers work are not dissimilar. While there have been several attempts at making an attractive UI for software repositories, the vast majority of Linux users still use the command line to install packages. Software repositories are a centralized listing of all of the available software for any repository the system has been configured to use. Below are some examples of searching a repository for a specifc package (note that these have been truncated for brevity):
Arch Linux with aurman
user@arch ~ $  aurman -Ss kate extra/kate 18.04.2-2 (kde-applications kdebase)     Advanced Text Editor aur/kate-root 18.04.0-1 (11, 1.139399)     Advanced Text Editor, patched to be able to run as root aur/kate-git r15288.15d26a7-1 (1, 1e-06)     An advanced editor component which is used in numerous KDE applications requiring a text editing component
CentOS 7 using YUM
[user@centos ~]$ yum search kate kate-devel.x86_64 : Development files for kate kate-libs.x86_64 : Runtime files for kate kate-part.x86_64 : Kate kpart plugin
Ubuntu using APT
user@ubuntu ~ $ apt search kate Sorting... Done Full Text Search... Done kate/xenial 4:15.12.3-0ubuntu2 amd64   powerful text editor kate-data/xenial,xenial 4:4.14.3-0ubuntu4 all   shared data files for Kate text editor kate-dbg/xenial 4:15.12.3-0ubuntu2 amd64   debugging symbols for Kate kate5-data/xenial,xenial 4:15.12.3-0ubuntu2 all   shared data files for Kate text editor

What are the most prominent package managers?

As suggested in the above output, package managers are used to interact with software repositories. The following is a brief overview of some of the most prominent package managers.

RPM-based package managers

Updating RPM-based systems, particularly those based on Red Hat technologies, has a very interesting and detailed history. In fact, the current versions of yum (for enterprise distributions) and DNF (for community) combine several open source projects to provide their current functionality.
Initially, Red Hat used a package manager called RPM (Red Hat Package Manager), which is still in use today. However, its primary use is to install RPMs, which you have locally, not to search software repositories. The package manager named up2date was created to inform users of updates to packages and enable them to search remote repositories and easily install dependencies. While it served its purpose, some community members felt that up2date had some significant shortcomings.
The current incantation of yum came from several different community efforts. Yellowdog Updater (YUP) was developed in 1999-2001 by folks at Terra Soft Solutions as a back-end engine for a graphical installer of Yellow Dog Linux. Duke University liked the idea of YUP and decided to improve upon it. They created Yellowdog Updater, Modified (yum) which was eventually adapted to help manage the university's Red Hat Linux systems. Yum grew in popularity, and by 2005 it was estimated to be used by more than half of the Linux market. Today, almost every distribution of Linux that uses RPMs uses yum for package management (with a few notable exceptions).

Working with yum

In order for yum to download and install packages out of an internet repository, files must be located in /etc/yum.repos.d/ and they must have the extension .repo. Here is an example repo file:
[local_base] name=Base CentOS  (local) baseurl=http://7-repo.apps.home.local/yum-repo/7/ enabled=1 gpgcheck=0
This is for one of my local repositories, which explains why the GPG check is off. If this check was on, each package would need to be signed with a cryptographic key and a corresponding key would need to be imported into the system receiving the updates. Because I maintain this repository myself, I trust the packages and do not bother signing them.
Once a repository file is in place, you can start installing packages from the remote repository. The most basic command is yum update, which will update every package currently installed. This does not require a specific step to refresh the information about repositories; this is done automatically. A sample of the command is shown below:
[user@centos ~]$ sudo yum update Loaded plugins: fastestmirror, product-id, search-disabled-repos, subscription-manager local_base                             | 3.6 kB  00:00:00     local_epel                             | 2.9 kB  00:00:00     local_rpm_forge                        | 1.9 kB  00:00:00     local_updates                          | 3.4 kB  00:00:00     spideroak-one-stable                   | 2.9 kB  00:00:00     zfs                                    | 2.9 kB  00:00:00     (1/6): local_base/group_gz             | 166 kB  00:00:00     (2/6): local_updates/primary_db        | 2.7 MB  00:00:00     (3/6): local_base/primary_db           | 5.9 MB  00:00:00     (4/6): spideroak-one-stable/primary_db |  12 kB  00:00:00     (5/6): local_epel/primary_db           | 6.3 MB  00:00:00     (6/6): zfs/x86_64/primary_db           |  78 kB  00:00:00     local_rpm_forge/primary_db             | 125 kB  00:00:00     Determining fastest mirrors Resolving Dependencies --> Running transaction check
If you are sure you want yum to execute any command without stopping for input, you can put the -y flag in the command, such as yum update -y.
Installing a new package is just as easy. First, search for the name of the package with yum search:
[user@centos ~]$ yum search kate artwiz-aleczapka-kates-fonts.noarch : Kates font in Artwiz family ghc-highlighting-kate-devel.x86_64 : Haskell highlighting-kate library development files kate-devel.i686 : Development files for kate kate-devel.x86_64 : Development files for kate kate-libs.i686 : Runtime files for kate kate-libs.x86_64 : Runtime files for kate kate-part.i686 : Kate kpart plugin
Once you have the name of the package, you can simply install the package with sudo yum install kate-devel -y. If you installed a package you no longer need, you can remove it with sudo yum remove kate-devel -y. By default, yum will remove the package plus its dependencies.
There may be times when you do not know the name of the package, but you know the name of the utility. For example, suppose you are looking for the utility updatedb, which creates/updates the database used by the locate command. Attempting to install updatedb returns the following results:
[user@centos ~]$ sudo yum install updatedb Loaded plugins: fastestmirror, langpacks Loading mirror speeds from cached hostfile No package updatedb available. Error: Nothing to do
You can find out what package the utility comes from by running:
[user@centos ~]$ yum whatprovides *updatedb Loaded plugins: fastestmirror, langpacks Loading mirror speeds from cached hostfile bacula-director-5.2.13-23.1.el7.x86_64 : Bacula Director files Repo        : local_base Matched from: Filename    : /usr/share/doc/bacula-director-5.2.13/updatedb mlocate-0.26-8.el7.x86_64 : An utility for finding files by name Repo        : local_base Matched from: Filename    : /usr/bin/updatedb
The reason I have used an asterisk * in front of the command is because yum whatprovides uses the path to the file in order to make a match. Since I was not sure where the file was located, I used an asterisk to indicate any path.
There are, of course, many more options available to yum. I encourage you to view the man page for yum for additional options.
Dandified Yum (DNF) is a newer iteration on yum. Introduced in Fedora 18, it has not yet been adopted in the enterprise distributions, and as such is predominantly used in Fedora (and derivatives). Its usage is almost exactly the same as that of yum, but it was built to address poor performance, undocumented APIs, slow/broken dependency resolution, and occasional high memory usage. DNF is meant as a drop-in replacement for yum, and therefore I won't repeat the commands—wherever you would use yum, simply substitute dnf.

Working with Zypper

Zypper is another package manager meant to help manage RPMs. This package manager is most commonly associated with SUSE (and openSUSE) but has also seen adoption by MeeGo, Sailfish OS, and Tizen. It was originally introduced in 2006 and has been iterated upon ever since. There is not a whole lot to say other than Zypper is used as the back end for the system administration tool YaST and some users find it to be faster than yum.
Zypper's usage is very similar to that of yum. To search for, update, install or remove a package, simply use the following:
zypper search kate zypper update zypper install kate zypper remove kate
Some major differences come into play in how repositories are added to the system with zypper. Unlike the package managers discussed above, zypper adds repositories using the package manager itself. The most common way is via a URL, but zypper also supports importing from repo files.
suse:~ # zypper addrepo http://download.videolan.org/pub/vlc/SuSE/15.0 vlc Adding repository 'vlc' [done] Repository 'vlc' successfully added Enabled     : Yes Autorefresh : No GPG Check   : Yes URI         : http://download.videolan.org/pub/vlc/SuSE/15.0 Priority    : 99
You remove repositories in a similar manner:
suse:~ # zypper removerepo vlc Removing repository 'vlc' ...................................[done] Repository 'vlc' has been removed.
Use the zypper repos command to see what the status of repositories are on your system:
suse:~ # zypper repos Repository priorities are without effect. All enabled repositories share the same priority. #  | Alias                     | Name                                    | Enabled | GPG Check | Refresh ---+---------------------------+-----------------------------------------+---------+-----------+--------  1 | repo-debug                | openSUSE-Leap-15.0-Debug                | No      | ----      | ----    2 | repo-debug-non-oss        | openSUSE-Leap-15.0-Debug-Non-Oss        | No      | ----      | ----    3 | repo-debug-update         | openSUSE-Leap-15.0-Update-Debug         | No      | ----      | ----    4 | repo-debug-update-non-oss | openSUSE-Leap-15.0-Update-Debug-Non-Oss | No      | ----      | ----    5 | repo-non-oss              | openSUSE-Leap-15.0-Non-Oss              | Yes     | ( p) Yes  | Yes      6 | repo-oss                  | openSUSE-Leap-15.0-Oss                  | Yes     | ( p) Yes  | Yes    
zypper even has a similar ability to determine what package name contains files or binaries. Unlike YUM, it uses a hyphen in the command (although this method of searching is deprecated):
localhost:~ # zypper what-provides kate Command 'what-provides' is replaced by 'search --provides --match-exact'. See 'help search' for all available options. Loading repository data... Reading installed packages... S  | Name | Summary              | Type       ---+------+----------------------+------------ i+ | Kate | Advanced Text Editor | application i  | kate | Advanced Text Editor | package  
As with YUM and DNF, Zypper has a much richer feature set than covered here. Please consult with the official documentation for more in-depth information.

Debian-based package managers

One of the oldest Linux distributions currently maintained, Debian's system is very similar to RPM-based systems. They use .deb packages, which can be managed by a tool called dpkg. dpkg is very similar to rpm in that it was designed to manage packages that are available locally. It does no dependency resolution (although it does dependency checking), and has no reliable way to interact with remote repositories. In order to improve the user experience and ease of use, the Debian project commissioned a project called Deity. This codename was eventually abandoned and changed to Advanced Package Tool (APT).
Released as test builds in 1998 (before making an appearance in Debian 2.1 in 1999), many users consider APT one of the defining features of Debian-based systems. It makes use of repositories in a similar fashion to RPM-based systems, but instead of individual .repo files that yum uses, apt has historically used /etc/apt/sources.list to manage repositories. More recently, it also ingests files from /etc/apt/sources.d/. Following the examples in the RPM-based package managers, to accomplish the same thing on Debian-based distributions you have a few options. You can edit/create the files manually in the aforementioned locations from the terminal, or in some cases, you can use a UI front end (such as Software & Updates provided by Ubuntu et al.). To provide the same treatment to all distributions, I will cover only the command-line options. To add a repository without directly editing a file, you can do something like this:
user@ubuntu:~$ sudo apt-add-repository "deb http://APT.spideroak.com/ubuntu-spideroak-hardy/ release restricted"
This will create a spideroakone.list file in /etc/apt/sources.list.d. Obviously, these lines change depending on the repository being added. If you are adding a Personal Package Archive (PPA), you can do this:
user@ubuntu:~$ sudo apt-add-repository ppa:gnome-desktop
NOTE: Debian does not support PPAs natively.
After a repository has been added, Debian-based systems need to be made aware that there is a new location to search for packages. This is done via the apt-get update command:
user@ubuntu:~$ sudo apt-get update Get:1 http://security.ubuntu.com/ubuntu xenial-security InRelease [107 kB] Hit:2 http://APT.spideroak.com/ubuntu-spideroak-hardy release InRelease Hit:3 http://ca.archive.ubuntu.com/ubuntu xenial InRelease Get:4 http://ca.archive.ubuntu.com/ubuntu xenial-updates InRelease [109 kB]               Get:5 http://security.ubuntu.com/ubuntu xenial-security/main amd64 Packages [517 kB] Get:6 http://security.ubuntu.com/ubuntu xenial-security/main i386 Packages [455 kB]       Get:7 http://security.ubuntu.com/ubuntu xenial-security/main Translation-en [221 kB]     ... Fetched 6,399 kB in 3s (2,017 kB/s)                                           Reading package lists... Done
Now that the new repository is added and updated, you can search for a package using the apt-cache command:
user@ubuntu:~$ apt-cache search kate aterm-ml - Afterstep XVT - a VT102 emulator for the X window system frescobaldi - Qt4 LilyPond sheet music editor gitit - Wiki engine backed by a git or darcs filestore jedit - Plugin-based editor for programmers kate - powerful text editor kate-data - shared data files for Kate text editor kate-dbg - debugging symbols for Kate katepart - embeddable text editor component
To install kate, simply run the corresponding install command:
user@ubuntu:~$ sudo apt-get install kate
To remove a package, use apt-get remove:
user@ubuntu:~$ sudo apt-get remove kate
When it comes to package discovery, APT does not provide any functionality that is similar to yum whatprovides. There are a few ways to get this information if you are trying to find where a specific file on disk has come from.
Using dpkg
user@ubuntu:~$ dpkg -S /bin/ls coreutils: /bin/ls
Using apt-file
user@ubuntu:~$ sudo apt-get install apt-file -y user@ubuntu:~$ sudo apt-file update user@ubuntu:~$ apt-file search kate
The problem with apt-file search is that it, unlike yum whatprovides, it is overly verbose unless you know the exact path, and it automatically adds a wildcard search so that you end up with results for anything with the word kate in it:
kate: /usr/bin/kate kate: /usr/lib/x86_64-linux-gnu/qt5/plugins/ktexteditor/katebacktracebrowserplugin.so kate: /usr/lib/x86_64-linux-gnu/qt5/plugins/ktexteditor/katebuildplugin.so kate: /usr/lib/x86_64-linux-gnu/qt5/plugins/ktexteditor/katecloseexceptplugin.so kate: /usr/lib/x86_64-linux-gnu/qt5/plugins/ktexteditor/katectagsplugin.so
Most of these examples have used apt-get. Note that most of the current tutorials for Ubuntu specifically have taken to simply using apt. The single apt command was designed to implement only the most commonly used commands in the APT arsenal. Since functionality is split between apt-get, apt-cache, and other commands, apt looks to unify these into a single command. It also adds some niceties such as colorization, progress bars, and other odds and ends. Most of the commands noted above can be replaced with apt,  but not all Debian-based distributions currently receiving security patches support using apt by default, so you may need to install additional packages.

Arch-based package managers

Arch Linux uses a package manager called pacman. Unlike .deb or .rpm files, pacman uses a more traditional tarball with the LZMA2 compression (.tar.xz). This enables Arch Linux packages to be much smaller than other forms of compressed archives (such as gzip). Initially released in 2002, pacman has been steadily iterated and improved. One of the major benefits of pacman is that it supports the Arch Build System, a system for building packages from source. The build system ingests a file called a PKGBUILD, which contains metadata (such as version numbers, revisions, dependencies, etc.) as well as a shell script with the required flags for compiling a package conforming to the Arch Linux requirements. The resulting binaries are then packaged into the aforementioned .tar.xz file for consumption by pacman.
This system led to the creation of the Arch User Repository (AUR) which is a community-driven repository containing PKGBUILD files and supporting patches or scripts. This allows for a virtually endless amount of software to be available in Arch. The obvious advantage of this system is that if a user (or maintainer) wishes to make software available to the public, they do not have to go through official channels to get it accepted in the main repositories. The downside is that it relies on community curation similar to Docker Hub, Canonical's Snap packages, or other similar mechanisms. There are numerous AUR-specific package managers that can be used to download, compile, and install from the PKGBUILD files in the AUR (we will look at this later).

Working with pacman and official repositories

Arch's main package manager, pacman, uses flags instead of command words like yum and apt. For example, to search for a package, you would use pacman -Ss. As with most commands on Linux, you can find both a manpage and inline help. Most of the commands for pacman use the sync (-S) flag. For example:
user@arch ~ $ pacman -Ss kate extra/kate 18.04.2-2 (kde-applications kdebase)     Advanced Text Editor extra/libkate 0.4.1-6 [installed]     A karaoke and text codec for embedding in ogg extra/libtiger 0.3.4-5 [installed]     A rendering library for Kate streams using Pango and Cairo extra/ttf-cheapskate 2.0-12     TTFonts collection from dustimo.com community/haskell-cheapskate 0.1.1-100     Experimental markdown processor.
Arch also uses repositories similar to other package managers. In the output above, search results are prefixed with the repository they are found in (extra/ and community/ in this case). Similar to both Red Hat and Debian-based systems, Arch relies on the user to add the repository information into a specific file. The location for these repositories is /etc/pacman.conf. The example below is fairly close to a stock system. I have enabled the [multilib] repository for Steam support:
[options] Architecture = auto Color CheckSpace SigLevel    = Required DatabaseOptional LocalFileSigLevel = Optional [core] Include = /etc/pacman.d/mirrorlist [extra] Include = /etc/pacman.d/mirrorlist [community] Include = /etc/pacman.d/mirrorlist [multilib] Include = /etc/pacman.d/mirrorlist
It is possible to specify a specific URL in pacman.conf. This functionality can be used to make sure all packages come from a specific point in time. If, for example, a package has a bug that affects you severely and it has several dependencies, you can roll back to a specific point in time by adding a specific URL into your pacman.conf and then running the commands to downgrade the system:
[core] Server=https://archive.archlinux.org/repos/2017/12/22/$repo/os/$arch
Like Debian-based systems, Arch does not update its local repository information until you tell it to do so. You can refresh the package database by issuing the following command:
user@arch ~ $ sudo pacman -Sy :: Synchronizing package databases...  core                                                                     130.2 KiB   851K/s 00:00 [##########################################################] 100%  extra                                                                   1645.3 KiB  2.69M/s 00:01 [##########################################################] 100%  community                                                                  4.5 MiB  2.27M/s 00:02 [##########################################################] 100%  multilib is up to date
As you can see in the above output, pacman thinks that the multilib package database is up to date. You can force a refresh if you think this is incorrect by running pacman -Syy. If you want to update your entire system (excluding packages installed from the AUR), you can run pacman -Syu:
user@arch ~ $ sudo pacman -Syu :: Synchronizing package databases...  core is up to date  extra is up to date  community is up to date  multilib is up to date :: Starting full system upgrade... resolving dependencies... looking for conflicting packages... Packages (45) ceph-13.2.0-2  ceph-libs-13.2.0-2  debootstrap-1.0.105-1  guile-2.2.4-1  harfbuzz-1.8.2-1  harfbuzz-icu-1.8.2-1  haskell-aeson-1.3.1.1-20               haskell-attoparsec-0.13.2.2-24  haskell-tagged-0.8.6-1  imagemagick-7.0.8.4-1  lib32-harfbuzz-1.8.2-1  lib32-libgusb-0.3.0-1  lib32-systemd-239.0-1               libgit2-1:0.27.2-1  libinput-1.11.2-1  libmagick-7.0.8.4-1  libmagick6-6.9.10.4-1  libopenshot-0.2.0-1  libopenshot-audio-0.1.6-1  libosinfo-1.2.0-1               libxfce4util-4.13.2-1  minetest-0.4.17.1-1  minetest-common-0.4.17.1-1  mlt-6.10.0-1  mlt-python-bindings-6.10.0-1  ndctl-61.1-1  netctl-1.17-1               nodejs-10.6.0-1   Total Download Size:      2.66 MiB Total Installed Size:   879.15 MiB Net Upgrade Size:      -365.27 MiB :: Proceed with installation? [Y/n]
In the scenario mentioned earlier regarding downgrading a system, you can force a downgrade by issuing pacman -Syyuu. It is important to note that this should not be undertaken lightly. This should not cause a problem in most cases; however, there is a chance that downgrading of a package or several packages will cause a cascading failure and leave your system in an inconsistent state. USE WITH CAUTION!
To install a package, simply use pacman -S kate:
user@arch ~ $ sudo pacman -S kate resolving dependencies... looking for conflicting packages... Packages (7) editorconfig-core-c-0.12.2-1  kactivities-5.47.0-1  kparts-5.47.0-1  ktexteditor-5.47.0-2  syntax-highlighting-5.47.0-1  threadweaver-5.47.0-1              kate-18.04.2-2 Total Download Size:   10.94 MiB Total Installed Size:  38.91 MiB :: Proceed with installation? [Y/n]
To remove a package, you can run pacman -R kate. This removes only the package and not its dependencies:
user@arch ~ $ sudo pacman -S kate checking dependencies... Packages (1) kate-18.04.2-2 Total Removed Size:  20.30 MiB :: Do you want to remove these packages? [Y/n]
If you want to remove the dependencies that are not required by other packages, you can run pacman -Rs:
user@arch ~ $ sudo pacman -Rs kate checking dependencies... Packages (7) editorconfig-core-c-0.12.2-1  kactivities-5.47.0-1  kparts-5.47.0-1  ktexteditor-5.47.0-2  syntax-highlighting-5.47.0-1  threadweaver-5.47.0-1              kate-18.04.2-2 Total Removed Size:  38.91 MiB :: Do you want to remove these packages? [Y/n]
Pacman, in my opinion, offers the most succinct way of searching for the name of a package for a given utility. As shown above, yum and apt both rely on pathing in order to find useful results. Pacman makes some intelligent guesses as to which package you are most likely looking for:
user@arch ~ $ sudo pacman -Fs updatedb core/mlocate 0.26.git.20170220-1     usr/bin/updatedb user@arch ~ $ sudo pacman -Fs kate extra/kate 18.04.2-2     usr/bin/kate

Working with the AUR

There are several popular AUR package manager helpers. Of these, yaourt and pacaur are fairly prolific. However, both projects are listed as discontinued or problematic on the Arch Wiki. For that reason, I will discuss aurman. It works almost exactly like pacman, except it searches the AUR and includes some helpful, albeit potentially dangerous, options. Installing a package from the AUR will initiate use of the package maintainer's build scripts. You will be prompted several times for permission to continue (I have truncated the output for brevity):
aurman -S telegram-desktop-bin ~~ initializing aurman... ~~ the following packages are neither in known repos nor in the aur ... ~~ calculating solutions... :: The following 1 package(s) are getting updated:    aur/telegram-desktop-bin  1.3.0-1  ->  1.3.9-1 ?? Do you want to continue? Y/n: Y ~~ looking for new pkgbuilds and fetching them... Cloning into 'telegram-desktop-bin'... remote: Counting objects: 301, done. remote: Compressing objects: 100% (152/152), done. remote: Total 301 (delta 161), reused 286 (delta 147) Receiving objects: 100% (301/301), 76.17 KiB | 639.00 KiB/s, done. Resolving deltas: 100% (161/161), done. ?? Do you want to see the changes of telegram-desktop-bin? N/y: N [sudo] password for user: ... ==> Leaving fakeroot environment. ==> Finished making: telegram-desktop-bin 1.3.9-1 (Thu 05 Jul 2018 11:22:02 AM EDT) ==> Cleaning up... loading packages... resolving dependencies... looking for conflicting packages... Packages (1) telegram-desktop-bin-1.3.9-1 Total Installed Size:  88.81 MiB Net Upgrade Size:       5.33 MiB :: Proceed with installation? [Y/n]
Sometimes you will be prompted for more input, depending on the complexity of the package you are installing. To avoid this tedium, aurman allows you to pass both the --noconfirm and --noedit options. This is equivalent to saying "accept all of the defaults, and trust that the package maintainers scripts will not be malicious." USE THIS OPTION WITH EXTREME CAUTION! While these options are unlikely to break your system on their own, you should never blindly accept someone else's scripts.

Conclusion

This article, of course, only scratches the surface of what package managers can do. There are also many other package managers available that I could not cover in this space. Some distributions, such as Ubuntu or Elementary OS, have gone to great lengths to provide a graphical approach to package management.
If you are interested in some of the more advanced functions of package managers, please post your questions or comments below and I would be glad to write a follow-up article.

Appendix

# search for packages yum search dnf search zypper search apt-cache search apt search pacman -Ss # install packages yum install dnf install zypper install apt-get install apt install pacman -Ss # update package database, not required by yum, dnf and zypper apt-get update apt update pacman -Sy # update all system packages yum update dnf update zypper update apt-get upgrade apt upgrade pacman -Su # remove an installed package yum remove dnf remove apt-get remove apt remove pacman -R pacman -Rs # search for the package name containing specific file or folder yum whatprovides * dnf whatprovides * zypper what-provides zypper search --provides apt-file search pacman -Sf

9 Productivity Tools for Linux That Are Worth Your Attention

https://www.fossmint.com/linux-productivity-tools


Linux Productivity Tools
Written by Marina Pilipenko
There are so many distractions and unproductive activities that affect our performance at the workplace, and so many methods to increase focus and work efficiency. If you’re looking for a way to improve your productivity and stay organized, consider using special software to create a productive work environment.
We’ve collected a list of productivity tools for Linux platforms that you probably haven’t heard about. They will help you with:
  • blocking out distractions;
  • keeping track of how you spend your work time;
  • automating manual work;
  • reminding of important to-dos;
  • organize and structure knowledge;
  • and much more.

1. FocusWriter

FocusWriter is a text processor that creates a distraction-free environment for writers. It supports popular text formats and uses a hide-away interface to block out all distractions. You can select any visual and sound theme that works best for your productivity, and focus on your work. FocusWriter also allows you to set daily goals, use timers, alarms, and look into statistics.
FocusWriter Text Processor for Linux
The tool can be installed on various Unix platforms and also provides an option of portable mode. Its source code is also available at the developer’s website.

2. actiTIME

actiTIME is a time-tracking and work management tool for companies of any size and self-employed individuals. Alongside with its cloud-hosted version, a self-hosted edition for Unix systems is available that can be installed on a personal computer or on a company’s internal server.
actiTIME Tracking Tool for Linux
The tool helps get accurate records of work and leave time and run reports based on that data to measure your personal productivity and your team’s performance. It also allows to approve and lock timesheets, calculate billable amounts, and issue invoices. Its work management features include organizing project teams, granting project assignments, and configuring email alerts on upcoming deadlines, worked out time estimates, overrun project budget, and other events.

3. LastPass

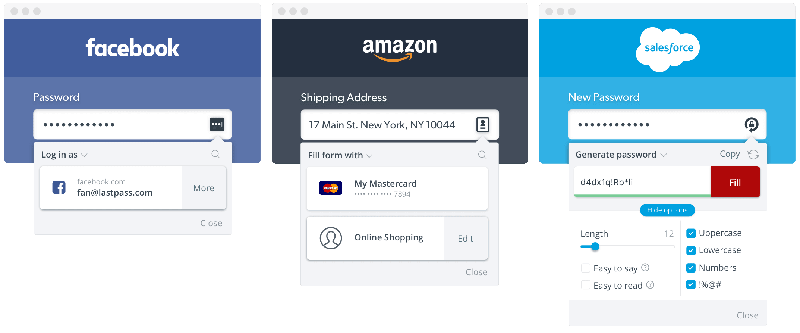
Anyone knows the pain of having forgotten a password. Those who prefer not to use the same password for all services, will definitely appreciate LastPass. It works in your browser and helps manage passwords easily and securely – and stop spending time on useless attempts to remember them all. Besides, it helps create secure and easy to read passwords.
LastPass Password Manager for Linux
The tool is available for Linux platforms as a universal installer and as an addition to specific web browsers.

4. f.lux

Those who work late at night know the negative effect of the blue screen light on productivity, health and energy. Experts say it’s better not to work at night, but if quitting this is not an option, a special tool that adapts screen light to the environment can help.
System Display Color Temperature
Available for various mobile and desktop platforms, f.lux automatically adjusts the light of your computer or smartphone screen to the lighting. To set it up, you need to choose your location and configure lighting type in the app’s settings. After that, the light from your devices’ screens will dynamically adjust to the environment, decreasing its negative effects.

5. Simplenote

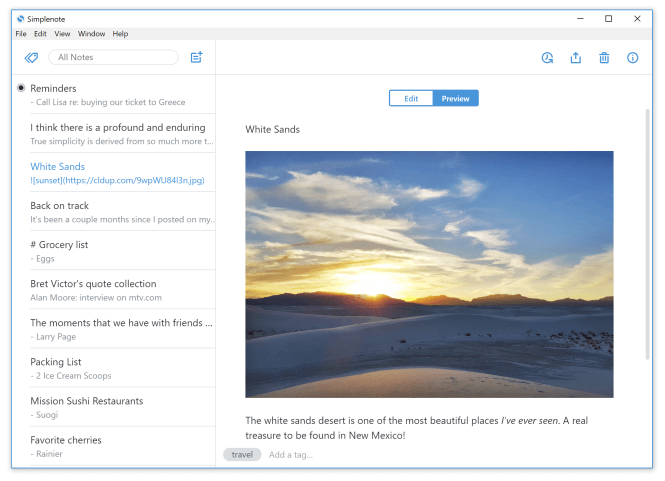
Simplenote is a free tool for keeping notes and sharing them across all your devices. It is available for various desktop platforms and mobile devices. If you’re using Simplenote on several devices, your notes are automatically kept synced and updated on all of them.
Simplenote Note Taking Software
The tool offers collaboration features. You can post instructions, publish your thoughts, or share lists with your friends, coworkers or family. If you’re using Simplenote frequently and keep many notes in it, its tags and quick search will be of help. The app helps you stay productive and organized and never miss an important reminder.

6. Osmo

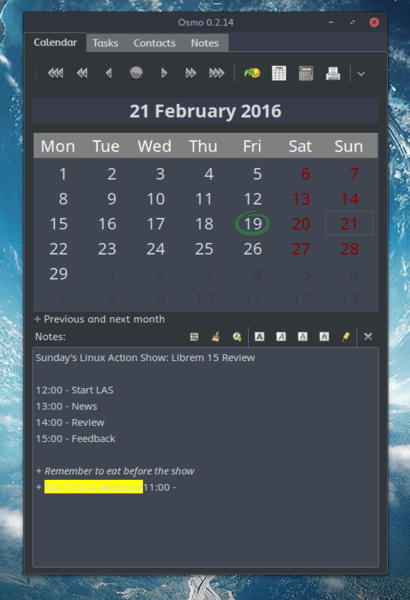
Osmo is a personal organizer. It includes various modules: calendar, notes, tasks list and reminder, and contacts. It is a lightweight and easy to use tool for managing all important personal information. The app can run both in an open window or in the background mode, and it doesn’t need an Internet connection.
Osmo Personal Organizer Software
Osmo offers various configuration and formatting options for different types of information you record in it: addresses, birthdays, ideas, events, etc. Its handy search allows to find and access necessary information quickly and easily.

7. FreeMind

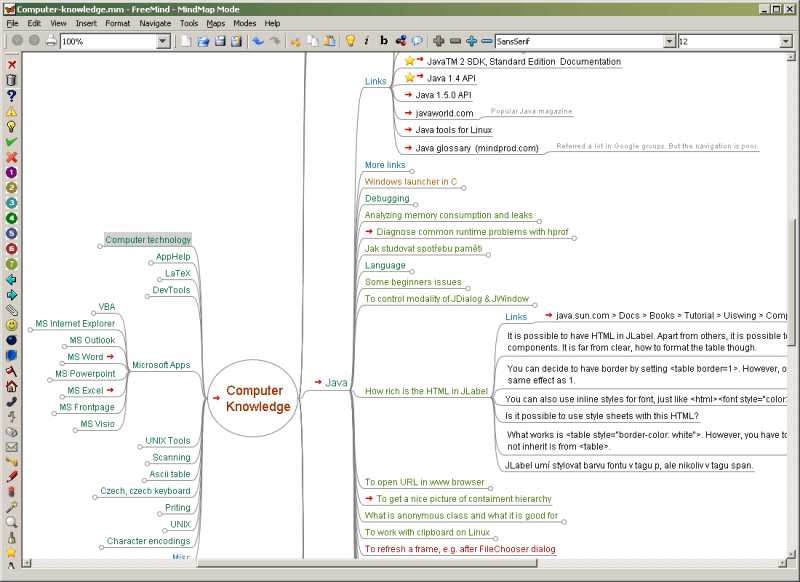
FreeMind is a free mind-mapping software for Linux platforms. It helps structure knowledge, brainstorm and develop new ideas, and prioritize your to-dos. The tool allows users to create multi-level structures that visually represent ideas, workflows, or knowledge.
FreeMind - Mind Mapping Software
FreeMind – Mind Mapping Software
The tool is great for writers, developers, researchers, students and other people who need to collect and structure large amounts of information. To view and process your mind maps in other software, FreeMind supports export of maps to HTML files that can be opened with any web browser.

8. Autokey

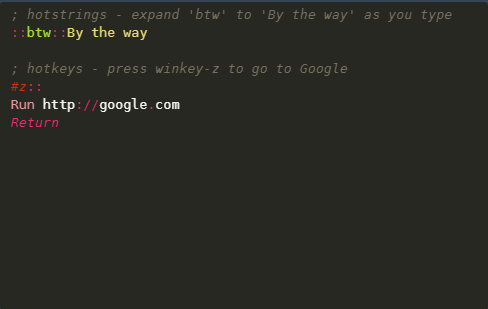
Autokey is an automation utility available for various Linux distributions that allows to create and manage collections of scripts and phrases, and assign abbreviations or hotkeys to them. This helps speed up typing large parts of text or automate executing scripts in any program that you’re using on your computer.
Linux Desktop Automation Software
Phrases are stored as plain text and scripts as plain Python files, so you can edit them in any text editor. You can collect them in folders and assign a hotkey or abbreviation to show the contents of the folder as a popup menu. The tool also allows you to exclude some hotkeys or abbreviations from triggering in specific applications. Autokey can help automate literally any task that can be performed with mouse and keyboard.

9. Catfish

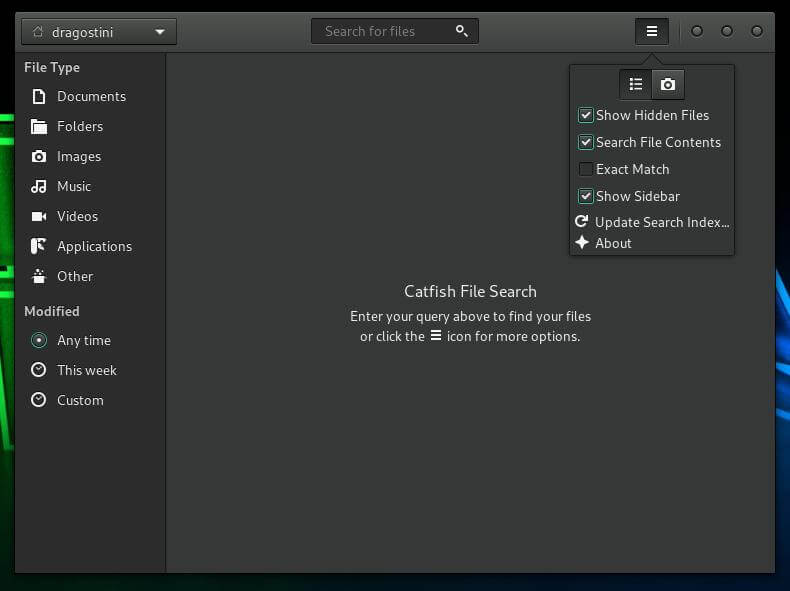
Catfish is a file searching tool for Linux platforms. It speeds up your work with files on your machine, saving your time for productive work. The tool handles your search queries using technologies that are already included in your system, and shows results in a graphic interface.
Linux File Searching Tool
Simple and powerful, the tool offers advanced search options: searching through hidden files, enabling or disabling search through file content, changing views, etc. It is a good option when you don’t feel like opening a terminal and locating a file using a find command.
Hope this was helpful! In this article, we’ve collected productivity tools for Linux that cover the most important aspects of productivity. If we have missed something, let us know using the feedback form below.