https://www.maketecheasier.com/run-python-script-using-docker
How to Run a Python Script Using Docker

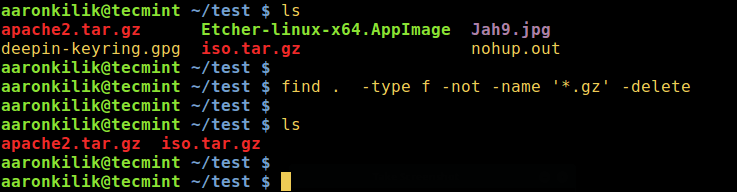
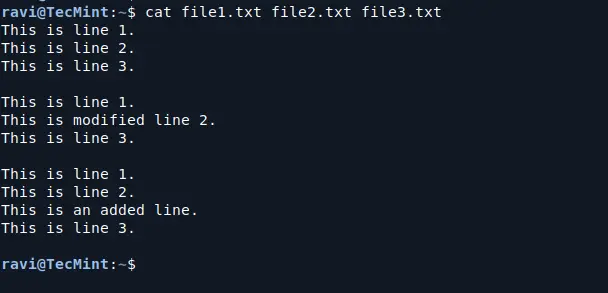
Running Python scripts is one of the most common tasks in automation. However, managing dependencies across different systems can be challenging. That’s where Docker comes in. Docker lets you package your Python script along with all its required dependencies into a container, ensuring it runs the same way on any machine. In this step-by-step guide, we’ll walk through the process of creating a real-life Python script and running it inside a Docker container.
Why Use Docker for Python Scripts
When you’re working with Python scripts, things can get messy/complex very fast. Different projects need different libraries, and what runs on your machine might break on someone else’s. Docker solves that by packaging your script and its environment together. So instead of saying “It works on my machine”, you can be sure it works the same everywhere.
It also keeps your system clean. You don’t have to install every Python package globally or worry about version conflicts. Everything stays inside the container.
If you’re deploying or handing your script off to someone else, Docker makes that easy, too. No setup instructions, no “install this and that”. Just one command, and it runs.
Write the Python Script
Let’s create a project directory to keep your Python script and Dockerfile. Once created, navigate into this directory using the cd command:
mkdir docker_file_organizer
cd docker_file_organizer
Create a script named “organize_files.py” to scan a directory and group files into folders based on their file extensions:
nano organize_files.pyPaste the following code into the “organize_file.py” file. Here, we use two pre-built Python modules, named os and shutil, to handle files and create directories dynamically:
import os
import shutil

SOURCE_DIR = "/files"

def organize_by_extension(directory):
    try:
        for fname in os.listdir(directory):
            path = os.path.join(directory, fname)
            if os.path.isfile(path):
                ext = fname.split('.')[-1].lower() if '.' in fname else 'no_extension'
                dest_dir = os.path.join(directory, ext)
                os.makedirs(dest_dir, exist_ok=True)
                shutil.move(path, os.path.join(dest_dir, fname))
                print(f"Moved: {fname} → {ext}/")
    except Exception as e:
        print(f"Error organizing files: {e}")

if __name__ == "__main__":
    organize_by_extension(SOURCE_DIR)
In this script, we organize files in a given directory based on their extensions. We use the os
module to list the files, check if each item is a file, extract its
extension, and create folders named after those extensions (if they
don’t already exist). Then, we use the shutil module to move each file into its corresponding folder. For each move, we print a message showing the file’s new location.
Create the Dockerfile
Now, create a Dockerfile to define the environment in which your script will run:
FROM python:latest
LABEL maintainer="you@example.com"
WORKDIR /usr/src/app
COPY organize_files.py .
CMD ["python", "./organize_files.py"]
We use this Dockerfile to create a container with Python, add our script to it, and make sure the script runs automatically when the container starts:

Build the Docker Image
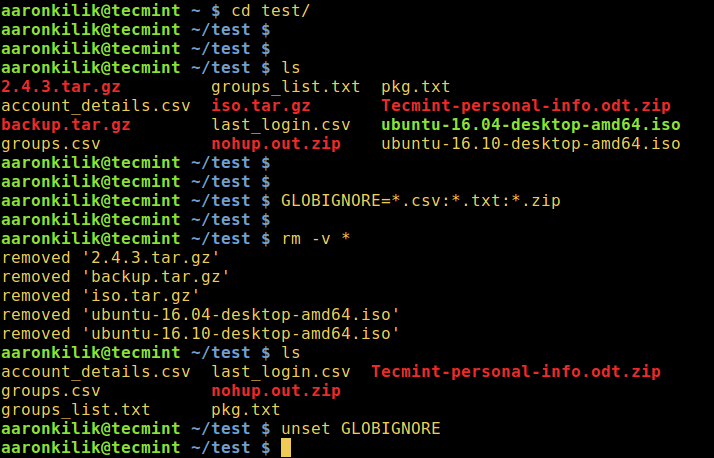
Before you can build the Docker image, you need to install Docker first. After that, run the following command to package everything into a Docker image:
sudo docker build -t file-organizer .It reads our Dockerfile and puts together the Python setup and our script so they’re ready to run in a single container image:

Create a Sample Folder with Files
To see our script in action, we create a test folder named “sample_files” with a few files of different types. We created these files just to make the folder a bit messy and see how our Python script handles it:
mkdir ~/sample_files
touch ~/sample_files/test.txt
touch ~/sample_files/image.jpg
touch ~/sample_files/data.csv
Run the Script Inside Docker
Finally, we run our Docker container and mount the sample folder into it. The -v
flag mounts your local “~/sample_files” directory to the “/files”
directory in the container, which allows the Python script to read and
organize files on your host machine:
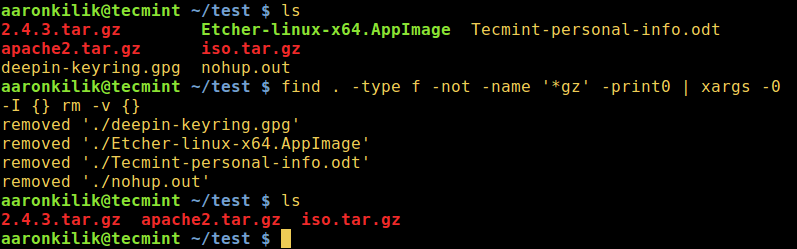
docker run --rm -v ~/sample_files:/files file-organizerHere, we use the --rm option to remove the container automatically after it finishes running, which saves disk space:

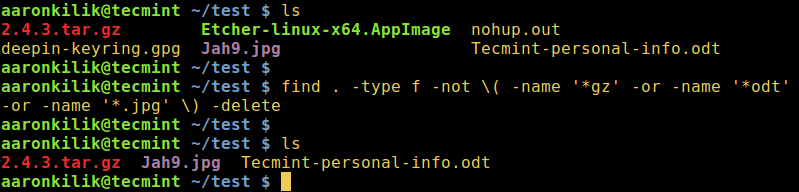
In the end, we use the tree command to check if the files have been sorted into folders based on their extensions:
tree sample_files
Note: The tree command isn’t pre-installed on most systems. You can easily install it using a package manager like apt on Ubuntu, brew on macOS, and so on.
Final Thoughts
With your Python script running inside Docker, you’re all set to take full advantage of a clean, portable, and consistent development setup. You can easily reuse this containerized workflow for other automation tasks, share your script without worrying about dependencies, and keep your system clutter-free. As a next step, consider exploring how to build multi-script Docker images, schedule containers with cron jobs, or integrate your scripts with other tools like Git, Jenkins, or even cloud platforms to streamline your automation and deployment process.