Thursday, January 30, 2025

How to Use Rsync to Sync Files Between Linux and Windows Using (WSL)

https://www.tecmint.com/rsync-files-between-linux-and-windows

How to Use Rsync to Sync Files Between Linux and Windows Using (WSL)

Synchronizing files between Linux and Windows can seem challenging, especially if you’re not familiar with the tools available. However, with the Windows Subsystem for Linux (WSL), this process becomes much simpler.

WSL allows you to run a Linux environment directly on Windows, enabling you to use powerful Linux tools like Rsync to sync files between the two operating systems.

In this article, we’ll walk you through the entire process of using Rsync to sync files between Linux and Windows using WSL. We’ll cover everything from setting up WSL to writing scripts for automated syncing.

By the end, you’ll have a clear understanding of how to efficiently manage file synchronization across these two platforms.

What is Rsync?

Rsync (short for “remote synchronization“) is a command-line tool used to synchronize files and directories between two locations, which is highly efficient because it only transfers the changes made to files, rather than copying everything every time, which makes it ideal for syncing large files or large numbers of files.

Why Use Rsync with WSL?

  • WSL allows you to run Linux commands and tools directly on Windows, making it easier to use Rsync.
  • Rsync only transfers the differences between files, saving time and bandwidth.
  • You can sync files between a Linux machine and a Windows machine effortlessly.
  • Rsync can be automated using scripts, making it perfect for regular backups or syncing tasks.

Prerequisites

Before we begin, ensure you have the following:

  • WSL is supported on versions of Windows 10 and 11.
  • You need to have WSL installed and set up on your Windows machine.
  • Install a Linux distribution (e.g., Ubuntu) from the Microsoft Store.
  • Rsync is usually pre-installed on Linux distributions, but we’ll cover how to install it if it’s not.
  • Rsync uses SSH to securely transfer files between systems.

Step 1: Install and Set Up WSL

If you haven’t already installed WSL, then open PowerShell as administrator by pressing Win + X and selecting “Windows PowerShell (Admin)” or “Command Prompt (Admin)” and run the following command to install WSL.

wsl --install

This command installs WSL and the default Linux distribution (usually Ubuntu). After installation, restart your computer to complete the setup.

Once your computer restarts, open the installed Linux distribution (e.g., Ubuntu) from the Start menu. Follow the on-screen instructions to create a user account and set a password.

Step 2: Install Rsync on WSL

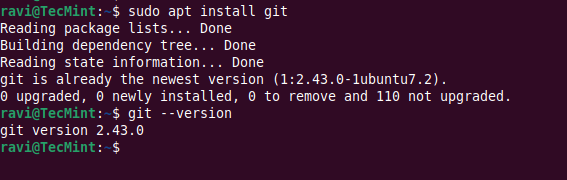
Rsync is usually pre-installed on most Linux distributions. However, if it’s not installed, you can install it using the following commands.

sudo apt update
sudo apt install rsync
rsync --version

This should display the installed version of Rsync.

Step 3: Set Up SSH on WSL

To enable SSH on WSL, you need to install the OpenSSH server.

sudo apt install openssh-server

Next, start and enable the SSH service to start automatically every time you launch WSL.

sudo service ssh start
sudo systemctl enable ssh

Verify that the SSH service is running.

sudo service ssh status

Step 4: Sync Files from Linux (WSL) to Windows

Now that Rsync and SSH are set up, you can start syncing files. Let’s say you want to sync files from your WSL environment to a directory on your Windows machine.

Launch your Linux distribution (e.g., Ubuntu) and identify the Windows directory, which typically mounted under /mnt/. For example, your C: drive is located at /mnt/c/.

Now run the following command to sync files from your WSL directory to a Windows directory:

rsync -avz /path/to/source/ /mnt/c/path/to/destination/

Explanation of the command:

  • -a: Archive mode (preserves permissions, timestamps, and symbolic links).
  • -v: Verbose mode (provides detailed output).
  • -z: Compresses data during transfer.
  • /path/to/source/: The directory in your WSL environment that you want to sync.
  • /mnt/c/path/to/destination/: The directory on your Windows machine where you want to sync the files.

Step 5: Sync Files from Windows to Linux (WSL)

If you want to sync files from a Windows directory to your WSL environment, you can use a similar command:

rsync -avz /mnt/c/path/to/source/ /path/to/destination/

Explanation of the command:

  • /mnt/c/path/to/source/: The directory on your Windows machine that you want to sync.
  • /path/to/destination/: The directory in your WSL environment where you want to sync the files.

Step 6: Automate Syncing with a Script

To make syncing easier, you can create a bash script to automate the process.

nano sync.sh

Add the following lines to the script:

#!/bin/bash
rsync -avz /path/to/source/ /mnt/c/path/to/destination/

Save the file and make the script executable:

chmod +x sync.sh

Execute the script to sync files.

./sync.sh

You can use cron to schedule the script to run at specific intervals. For example, to run the script every day at 2 AM, add the following line to your crontab:

0 2 * * * /path/to/sync.sh
Conclusion

Using Rsync with WSL is a powerful and efficient way to sync files between Linux and Windows. By following the steps outlined in this article, you can easily set up Rsync, configure SSH, and automate file synchronization.


How to Set Up SQL Server on Red Hat Enterprise Linux

https://www.tecmint.com/install-sql-server-on-red-hat-linux

How to Set Up SQL Server on Red Hat Enterprise Linux

This guide will walk you through installing SQL Server 2022 on RHEL 8.x or RHEL 9.x, connecting to it using the sqlcmd command-line tool, creating a database, and running basic queries.

Prerequisites

Before starting, ensure the following prerequisites are met:

  • Make sure you’re using a supported version of RHEL (e.g., RHEL 8, or 9).
  • You need sudo or root privileges to install software.
  • At least 2 GB of RAM, 6 GB of free disk space, and a supported CPU architecture (x64).

Step 1: Enable SELinux Enforcing Mode on RHEL

SQL Server 2022 supports running on RHEL 8.x and 9.x. For RHEL 9, SQL Server can run as a confined application using SELinux (Security-Enhanced Linux), which enhances security.

First, you need to enable SELinux (optional but recommended for RHEL 9) to use SQL Server as a confined application.

sestatus
sudo setenforce 1

The command is used to enable SELinux enforcement mode, if SELinux is disabled in the configuration file (/etc/selinux/config), this command won’t work and you will need to enable SELinux in the file and reboot your system.

Open the file located at /etc/selinux/config using any text editor you prefer.

sudo vi /etc/selinux/config

Change the SELINUX=disabled option to SELINUX=enforcing.

Enable SELinux Enforcing Mode

Restart your system for the changes to work.

sudo reboot

After the system reboots, check the SELinux status to confirm it’s in Enforcing mode:

getenforce

It should return Enforcing.

Step 2: Install SQL Server on RHEL

Run the following curl command to download and configure the Microsoft SQL Server Repositoryry:

sudo curl -o /etc/yum.repos.d/mssql-server.repo https://packages.microsoft.com/config/rhel/$(rpm -E %{rhel})/mssql-server-2022.repo

Next, install the SQL Server package using the following command:

sudo yum install -y mssql-server
Install SQL Server on RHEL

If you want to run SQL Server with extra security, you can install the mssql-server-selinux package, which adds special rules to help SQL Server work better with SELinux.

sudo yum install -y mssql-server-selinux

After the installation is done, run the setup script and follow the instructions to set a password for the ‘sa‘ account and pick the edition of SQL Server you want. Remember, these editions are free to use: Evaluation, Developer, and Express.

sudo /opt/mssql/bin/mssql-conf setup
Configure SQL Server on RHEL

After installation, confirm that SQL Server is running.

sudo systemctl status mssql-server
Check Status of SQL Server
Check the Status of the SQL Server

If it’s not running, start it with:

sudo systemctl start mssql-server

To allow remote connections, you need to open the SQL Server port on the RHEL firewall. By default, SQL Server uses TCP port 1433. If your system uses FirewallD for the firewall, run these commands:

sudo firewall-cmd --zone=public --add-port=1433/tcp --permanent
sudo firewall-cmd --reload

Now, SQL Server is up and running on your RHEL machine and is all set to use!

Step 3: Install SQL Server Command-Line Tools

To create a database, you need to use a tool that can run Transact-SQL commands on SQL Server. Here are the steps to install the SQL Server command-line tools such as sqlcmd and bcp utility.

First, download the Microsoft Red Hat repository configuration file.

For Red Hat 9, use the following command:

curl https://packages.microsoft.com/config/rhel/9/prod.repo | sudo tee /etc/yum.repos.d/mssql-release.repo

For Red Hat 8, use the following command:

curl https://packages.microsoft.com/config/rhel/8/prod.repo | sudo tee /etc/yum.repos.d/mssql-release.repo

Next, run the following commands to install mssql-tools18 with the unixODBC developer package.

sudo yum install -y mssql-tools18 unixODBC-devel
Install SQL Server Tools on RHEL

To update to the latest version of mssql-tools, run the following commands:

sudo yum check-update
sudo yum update mssql-tools18

To make sqlcmd and bcp available in the bash shell every time you log in, update your PATH in the ~/.bash_profile file using this command:

echo 'export PATH="$PATH:/opt/mssql-tools18/bin"' >> ~/.bash_profile
source ~/.bash_profile

To make sqlcmd and bcp available in the bash shell for all sessions, add their location to the PATH by editing the ~/.bashrc file with this command:

echo 'export PATH="$PATH:/opt/mssql-tools18/bin"' >> ~/.bashrc
source ~/.bashrc

Step 4: Connect to SQL Server on RHEL

Once SQL Server is installed, you can connect to it using sqlcmd.

Connect SQL Server Locally

sqlcmd -S localhost -U sa -P '<password>' -N -C
  • -S – Specifies the server name (use localhost for local connections).
  • -U – Specifies the username (use sa for the system administrator account).
  • -P – Specifies the password you set during configuration.
  • -N – Encrypts the connection.
  • -C – Trusts the server certificate without validation.

If successful, you’ll see a prompt like this:

1>

Create a New SQL Database

From the sqlcmd command prompt, paste the following Transact-SQL command to create a test database:

CREATE DATABASE TestDB;

On the next line, write a query to return the name of all of the databases on your server:

SELECT Name
FROM sys.databases;

The previous two commands aren’t executed immediately. You must type GO on a new line to execute the previous commands:

GO
Create SQL Database on RHEL

Insert Data into SQL Database

Next, create a new table, dbo.Inventory, and insert two new rows.

USE TestDB;
CREATE TABLE dbo.Inventory (id INT, name NVARCHAR(50), quantity INT, PRIMARY KEY (id));

Insert data into the new table.

INSERT INTO dbo.Inventory VALUES (1, 'banana', 150), (2, 'orange', 154);

Type GO to execute the previous commands:

GO
Insert Data into SQL Database

Query Data into SQL Database

From the sqlcmd command prompt, enter a query that returns rows from the dbo.Inventory table where the quantity is greater than 152:

SELECT * FROM dbo.Inventory WHERE quantity > 152;
GO
Query Data in SQL Database

To end your sqlcmd session, type QUIT:

QUIT

In addition to sqlcmd, you can use the following cross-platform tools to manage SQL Server:

  • Azure Data Studio – A cross-platform GUI database management utility.
  • Visual Studio Code – A cross-platform GUI code editor that runs Transact-SQL statements with the mssql extension.
  • PowerShell Core – A cross-platform automation and configuration tool based on cmdlets.
  • mssql-cli – A cross-platform command-line interface for running Transact-SQL commands.
Conclusion

By following this guide, you’ve successfully installed SQL Server 2022 on RHEL, configured it, and created your first database. You’ve also learned how to query data using the sqlcmd tool.


Thursday, January 23, 2025

Beginner’s Guide to Setting Up AI Development Environment on Linux

https://www.tecmint.com/setting-up-linux-for-ai-development

Beginner’s Guide to Setting Up AI Development Environment on Linux

In the previous article, we introduced the basics of AI and how it fits into the world of Linux. Now, it’s time to dive deeper and set up your Linux system to start building your first AI model.

Whether you’re a complete beginner or have some experience, this guide will walk you through installing the essential tools you need to get started on Debian-based systems.

System Requirements for Ubuntu 24.04

Before we begin, let’s make sure your system meets the minimum requirements for AI development.

  • Operating System: Ubuntu 24.04 LTS (or newer).
  • Processor: A 64-bit CPU with at least 2 cores (Intel Core i5 or AMD Ryzen 5 or better recommended for smooth performance).
  • RAM: Minimum 4 GB of RAM (8 GB or more recommended for more intensive AI models).
  • Storage: At least 10 GB of free disk space (SSD is highly recommended for faster performance).
  • Graphics Card (Optional): A dedicated GPU (NVIDIA recommended for deep learning) with at least 4 GB of VRAM if you plan to use frameworks like TensorFlow or PyTorch with GPU acceleration.

Step 1: Install Python on Ubuntu

Python is the most popular programming language for AI development, due to its simplicity, powerful, and huge library of tools and frameworks.

Most Linux systems come with Python pre-installed, but let’s make sure you have the latest version. If Python is installed, you’ll see something like Python 3.x.x.

python3 --version

If Python is not installed, you can easily install it using the package manager.

sudo apt update
sudo apt install python3

Next, you need to install pip (python package manager), which will help you install and manage Python libraries.

sudo apt install python3-pip

Step 2: Install Git on Ubuntu

Git is a version control tool that allows you to track changes in your code and collaborate with others, which is essential for AI development because many AI projects are shared on platforms like GitHub.

sudo apt install git

Verify the installation by typing:

git --version

You should see something like git version 2.x.x.

Install Git in Ubuntu

Step 3: Set Up a Virtual Environment in Ubuntu

A virtual environment helps you manage your projects and their dependencies in isolation, which means you can work on multiple projects without worrying about conflicts between different libraries.

First, make sure you have the python3-venv package installed, which is needed to create a virtual environment.

sudo apt install python3-venv

Next, you need to create a new directory for your project and set up a virtual environment:

mkdir my_ai_project
cd my_ai_project
python3 -m venv venv
source venv/bin/activate

After running the above commands, your terminal prompt should change, indicating that you’re now inside the virtual environment.

Setup Python Virtual Environment

Step 4: Install AI Libraries on Ubuntu

Now that you have Python, Git, and Virtual Environment set up, it’s time to install the libraries that will help you build AI models.

Some of the most popular libraries for AI are TensorFlow, Keras, and PyTorch.

Install TensorFlow in Ubuntu

TensorFlow is an open-source library developed by Google that is widely used for machine learning and AI projects.

pip3 install tensorflow
Install TensorFlow in Ubuntu

Install Keras in Ubuntu

Keras is a high-level neural networks API, written in Python, that runs on top of TensorFlow.

pip3 install keras
Install Keras in Ubuntu

Install PyTorch in Ubuntu

PyTorch is another popular AI library, especially for deep learning.

pip3 install torch
Install PyTorch in Ubuntu

Step 5: Building Your First AI Model

Now that your system is ready, let’s build a simple AI model called a neural network using TensorFlow and Keras to classify handwritten digits from the famous MNIST dataset.

Create a new Python file called first_ai_model.py and open it in your favorite text editor.

sudo nano first_ai_model.py

At the top of the file, add the following imports to import the necessary libraries:

import tensorflow as tf
from tensorflow.keras import layers, models

Next, load the MNIST dataset, which contains 60,000 images of handwritten digits (0-9) to train our model.

(train_images, train_labels), (test_images, test_labels) = tf.keras.datasets.mnist.load_data()

Preprocess the data to normalize the images to values between 0 and 1 by dividing by 255.

train_images, test_images = train_images / 255.0, test_images / 255.0

Build the model by creating a simple neural network with one hidden layer.

model = models.Sequential([
    layers.Flatten(input_shape=(28, 28)),
    layers.Dense(128, activation='relu'),
    layers.Dense(10)
])

Compile the model by specifying the optimizer, loss function, and metrics for evaluation.

model.compile(optimizer='adam',
              loss=tf.keras.losses.SparseCategoricalCrossentropy(from_logits=True),
              metrics=['accuracy'])

Train the model using the training data.

model.fit(train_images, train_labels, epochs=5)

Finally, test the model on the test data to see how well it performs.

test_loss, test_acc = model.evaluate(test_images, test_labels)
print('Test accuracy:', test_acc)

Step 6: Run the AI Model

Once you’ve written the code, save the file and run it in your terminal:

python3 first_ai_model.py

The model will begin training, and after 5 epochs, it will display the test accuracy. The higher the accuracy, the better the model’s performance.

Run AI Model
Run AI Model

Congratulations, you’ve just built your first AI model!

Conclusion

In this guide, we covered how to set up your Linux system for AI development by installing Python, Git, and essential AI libraries like TensorFlow, Keras, and PyTorch.

We also walked through building a simple neural network to classify handwritten digits. With these tools and knowledge, you’re now ready to explore the exciting world of AI on Linux!

Stay tuned for more articles in this series, where we’ll dive deeper into AI development techniques and explore more advanced topics.

Thursday, January 16, 2025

How to Convert Markdown (.MD) Files to PDF on Linux

https://www.tecmint.com/convert-md-to-pdf-on-linux

How to Convert Markdown (.MD) Files to PDF on Linux

Markdown (.MD) files are a favorite among developers, writers, and content creators due to their simplicity and flexibility, but what happens when you need to share your beautifully formatted Markdown file with someone who prefers a more universally accepted format, like PDF?

On Linux, you have several tools and methods to achieve this seamlessly and this guide will walk you through the process of converting .MD files to .PDF, ensuring your documents look professional and polished.

Method 1: Using Pandoc – A Document Converter

Pandoc is a powerful command-line tool for converting files between different formats and most Linux distributions have Pandoc available in their repositories.

sudo apt install pandoc         [On Debian, Ubuntu and Mint]
sudo dnf install pandoc         [On RHEL/CentOS/Fedora and Rocky/AlmaLinux]
sudo apk add pandoc             [On Alpine Linux]
sudo pacman -S pandoc           [On Arch Linux]
sudo zypper install pandoc      [On OpenSUSE]    
sudo pkg install pandoc         [On FreeBSD]

Once installed, converting a Markdown file to PDF is as simple as running a single command:

pandoc input.md -o output.pdf
Convert MD File to PDF

Method 2: Markdown Preview in VS Code

Visual Studio Code (VS Code) is a popular text editor that supports Markdown preview and export.

First, install VS Code from your distribution’s repository or download it from the official site and then install the Markdown PDF extension.

Install Markdown PDF Extension

Next, open your .md file in VS Code and press F1 or Ctrl+Shift+P and type export and select markdown-pdf: Export (pdf).

VS Code Convert MD to PDF File

Method 3: Using Grip Tool

Grip is a Python-based tool that renders Markdown in your web browser, which is especially useful for previewing Markdown as it would appear on GitHub.

pip install grip

Once installed, you can run the following command to render your Markdown file:

grip sample.md

Grip starts a local server, open the provided URL in your browser, and then use the browser’s print functionality to save the rendered file as a PDF.

Method 4: Using Calibre eBook Manager

Calibre is a feature-rich eBook management tool that supports various formats, including Markdown.

sudo apt install calibre         [On Debian, Ubuntu and Mint]
sudo dnf install calibre         [On RHEL/CentOS/Fedora and Rocky/AlmaLinux]
sudo apk add calibre             [On Alpine Linux]
sudo pacman -S calibre           [On Arch Linux]
sudo zypper install calibre      [On OpenSUSE]    
sudo pkg install calibre         [On FreeBSD]

Once installed, open Calibre and add your .md file and then right-click on the file and select Convert Books > Convert Individually.

Choose PDF as the output format and click OK.

Convert .md to PDF in Linux
Conclusion

Converting Markdown to PDF on Linux is straightforward and offers multiple methods tailored to your workflow. Whether you prefer the command-line power of Pandoc, the simplicity of VS Code, or the visual rendering of Grip, Linux has you covered.

With these tools, you can create professional, shareable PDFs from your Markdown files in no time.


Sunday, January 12, 2025

6 AI Tools Every Developer Needs for Better Code

https://www.tecmint.com/best-ai-coding-assistants

6 AI Tools Every Developer Needs for Better Code

In today’s fast-paced world, developers are constantly looking for ways to improve their productivity and streamline their workflows. With the rapid advancements in Artificial Intelligence (AI), developers now have a wide range of AI-powered tools at their disposal to make their coding experience faster, easier, and more efficient.

These tools can automate repetitive tasks, help write cleaner code, detect bugs early, and even assist in learning new programming languages.

In this blog post, we’ll dive deep into some of the best AI tools available for developers. We’ll explore their key features, how they can help boost productivity, and why they are worth considering for your development process.

1. GitHub Copilot

GitHub Copilot is an AI-powered code assistant developed by GitHub and OpenAI, which is designed to assist developers by suggesting code as they type and help you write entire functions, classes, or even entire files based on the context of your code.

GitHub Copilot · Your AI Pair Programmer

Key Features:

  • Code Suggestions: Suggests entire lines or blocks of code based on the current context by using the vast amount of code available on GitHub to provide accurate and relevant suggestions.
  • Multiple Language Support: Supports many programming languages, including Python, JavaScript, Ruby, TypeScript, Go, and more. It can also suggest code for various frameworks like React, Django, and Flask.
  • Context Awareness: It adapts to the code you are writing and understands the context, making its suggestions more relevant and precise.
  • Learning from Your Code: Over time, it learns from your coding style and preferences, tailoring its suggestions to fit your unique way of writing code.

Why It’s Useful:

GitHub Copilot can significantly reduce the time developers spend searching for code snippets or writing repetitive code. By suggesting code based on your current work, it can help you stay focused on the problem you’re solving rather than worrying about the syntax or implementation details.

2. Tabnine

Tabnine is another AI-powered code completion tool that integrates seamlessly with your Integrated Development Environment (IDE) and uses machine learning models to predict and suggest code completions as you type, making coding faster and more efficient.

Tabnine AI Code Assistant

Key Features:

  • Code Autocompletion: Its ability to suggest completions such as variables, functions, and entire code blocks for your code based on what you’re currently typing.
  • Private Models: If you’re working on a proprietary codebase or project, it allows you to use private models, which means the AI can learn from your team’s code and provide more tailored suggestions.
  • Works with Multiple IDEs: It integrates with popular IDEs like Visual Studio Code, IntelliJ IDEA, Sublime Text, and many others.
  • Team Collaboration: It can help teams maintain consistency in coding practices by providing suggestions that align with the team’s coding standards and style.

Why It’s Useful:

Tabnine is a great tool for developers who want to write code faster without sacrificing quality, which can help reduce the need for looking up documentation or searching for code snippets online.

3. Codex by OpenAI

Codex is a powerful AI model developed by OpenAI that can generate code from natural language descriptions. It powers GitHub Copilot and can assist developers in writing code by simply describing what they want to achieve in plain English.

Codex by OpenAI
Codex by OpenAI

Key Features:

  • Natural Language to Code: It can take plain English instructions and convert them into working code. For example, you can tell it “Create a Python function that calculates the Fibonacci sequence”, and it will generate the code for you.
  • Multi-Language Support: It supports a wide range of programming languages, including Python, JavaScript, Ruby, and more. It can also handle various frameworks and libraries.
  • Context-Aware Suggestions: It understands the context of the code you’re writing and provides relevant suggestions, which makes it more accurate and helpful in complex coding scenarios.
  • Code Explanation: It can also explain the code it generates, helping developers understand the logic behind it.

Why It’s Useful:

Codex is a game-changer for developers who are new to programming or learning a new language. It allows you to describe what you want to achieve in simple terms and get code suggestions, which can save a lot of time and help you overcome coding challenges quickly.

4. Sourcery

Sourcery is an AI-powered tool specifically designed for Python developers, which helps improve code quality by automatically suggesting refactorings and improvements to make the code cleaner, more efficient, and easier to maintain.

Sourcery - Instant Code Review
Sourcery – Instant Code Review

Key Features:

  • Code Refactoring: It analyzes your Python code and suggests refactorings to improve its readability and performance by recommending changes like merging duplicate code, simplifying complex expressions, and improving variable names.
  • Code Suggestions: It can suggest improvements in real-time as you write code, which helps you follow best practices and avoid common mistakes.
  • Instant Feedback: It provides instant feedback, allowing you to make improvements as you write code, rather than having to go back and refactor everything at the end.
  • Supports Multiple IDEs: It integrates with popular IDEs like Visual Studio Code and PyCharm, making it easy to use in your existing development environment.

Why It’s Useful:

Sourcery is perfect for Python developers who want to improve the quality of their code without spending too much time on manual refactoring. It ensures your code is clean, efficient, and easy to maintain, which is especially important in larger projects.

5. IntelliCode by Microsoft

IntelliCode is an AI-powered tool developed by Microsoft to enhance the IntelliSense feature in Visual Studio and Visual Studio Code by using machine learning to provide smarter, context-aware code suggestions that help developers write code faster and with fewer errors.

Visual Studio IntelliCode - Microsoft
Visual Studio IntelliCode – Microsoft

Key Features:

  • Smart Code Suggestions: It suggests the most relevant code completions based on the context of your project by learning from the code in your repository and provides suggestions that match your project’s style.
  • Code Style Recommendations: It can recommend code that follows best practices and aligns with your project’s coding style, which can also suggest refactorings to improve code quality.
  • Refactoring Assistance: It can help you refactor your code by suggesting improvements in structure and readability.
  • Multi-Language Support: It supports several languages, including C#, C++, Python, and JavaScript, making it useful for a wide range of developers.

Why It’s Useful:

IntelliCode is ideal for developers who want to write code more efficiently while following best practices, which ensure that your code is consistent with your project’s coding standards and suggest improvements that can make your code more readable and maintainable.

6. DeepCode

DeepCode is an AI-powered code review tool that helps developers identify bugs, security vulnerabilities, and code quality issues in their code by using machine learning to analyze code and suggest improvements.

DeepCode - AI Code Review
DeepCode – AI Code Review

Key Features:

  • Code Analysis: It scans your code for potential issues, such as bugs, security vulnerabilities, and performance bottlenecks.
  • Automated Code Review: It provides automated code reviews, saving you time and effort during the development process.
  • Multi-Language Support: It can analyze code in various programming languages and provide suggestions for improvements.
  • Integration with GitHub and GitLab: It integrates seamlessly with popular version control platforms like GitHub and GitLab, making it easy to add to your workflow.

Why It’s Useful:

DeepCode is an invaluable tool for developers who want to ensure that their code is free from bugs and security vulnerabilities. It helps you catch issues early in the development process, reducing the chances of problems later on.

Conclusion

AI tools are revolutionizing the way developers work, making coding faster, more efficient, and error-free. From code completion and suggestions to automated code reviews, AI tools like GitHub Copilot, Tabnine, Codex, Sourcery, IntelliCode, and DeepCode can significantly boost your productivity as a developer.


Tuesday, January 7, 2025

How to Rename Files Using mmv for Advanced Renaming

https://www.tecmint.com/mmv-command-linux

How to Rename Files Using mmv for Advanced Renaming

Renaming files in Linux is something we all do, whether it’s to organize our files better or to rename files in bulk.

While there are basic tools like mv and rename, there’s an advanced tool called mmv that makes the process much easier, especially when you need to rename multiple files at once.

As an experienced Linux user, I’ve found mmv to be a powerful tool for batch renaming files, and in this post, I’ll show you how to use it effectively.

What is mmv?

mmv stands for multiple move, which is a command-line utility that allows you to rename, move, and copy multiple files at once. Unlike the mv command, which is great for renaming one file at a time, mmv is designed to handle bulk renaming with ease.

To install mmv on Linux, use the following appropriate command for your specific Linux distribution.

sudo apt install mmv         [On Debian, Ubuntu and Mint]
sudo yum install mmv         [On RHEL/CentOS/Fedora and Rocky/AlmaLinux]
sudo emerge -a sys-apps/mmv  [On Gentoo Linux]
sudo apk add mmv             [On Alpine Linux]
sudo pacman -S mmv           [On Arch Linux]
sudo zypper install mmv      [On OpenSUSE]    
sudo pkg install mmv         [On FreeBSD]

Once installed, you’re ready to start renaming your files.

The basic syntax of mmv is:

mmv [options] source_pattern target_pattern
  • source_pattern: This is the pattern that matches the files you want to rename.
  • target_pattern: This is how you want the renamed files to appear.

For example, if you want to rename all .txt files to .md files, you would use:

mmv '*.txt' '#1.md'

Here, #1 refers to the part of the filename matched by the * wildcard.

Examples of Using mmv for Advanced Renaming in Linux

Here are some advanced examples of how to use mmv effectively:

1. Renaming Multiple Files with a Pattern

Let’s say you have several files like file1.txt, file2.txt, file3.txt, and so on and you want to rename them to document1.txt, document2.txt, document3.txt, etc.

Here’s how you can do it:

mmv 'file*.txt' 'document#1.txt'

In this example:

  • file*.txt matches all files starting with file and ending with .txt.
  • document#1.txt renames them to document1.txt, document2.txt, etc.
Renaming Files with a Pattern

2. Renaming Files by Adding a Prefix or Suffix

Let’s say you want to add a prefix or suffix to a group of files. For example, you have files like image1.jpg, image2.jpg, image3.jpg, and you want to add the prefix 2025_ to each file.

Here’s how you do it:

mmv '*.jpg' '2025_#1.jpg'

This will rename the files to 2025_image1.jpg, 2025_image2.jpg, etc.

If you wanted to add a suffix instead, you could use:

mmv '*.jpg' '#1_2025.jpg'

This will rename the files to image1_2025.jpg, image2_2025.jpg, etc.

Renaming Files with Prefix

3. Renaming Files with Regular Expressions

mmv supports regular expressions, so you can use them to match complex patterns. For example, let’s say you have files like data_01.txt, data_02.txt, data_03.txt, and you want to remove the leading zero in the numbers.

You can do this with:

mmv 'data_0*.txt' 'data_#1.txt'
Renaming Files with Regular Expressions

4. Renaming Files in Subdirectories

If you have files in subdirectories and want to rename them as well, you can use the -r option to rename files recursively. For example, if you want to rename all .txt files in the current directory and all subdirectories:

mmv -r '*.txt' '#1.txt'

This will rename all .txt files in the current directory and its subdirectories.

Conclusion

Renaming files in Linux doesn’t have to be a tedious task. With mmv, you can easily rename multiple files with advanced patterns, saving you time and effort. Whether you need to add a prefix, change extensions, or rename files in bulk, mmv has you covered.

Give it a try, and let me know how it works for you! If you have any questions or need further help, feel free to leave a comment below.


Friday, January 3, 2025

How To Build Lightweight Docker Images With Mmdebstrap In Linux

https://ostechnix.com/build-docker-images-with-mmdebstrap

How To Build Lightweight Docker Images With Mmdebstrap In Linux

A Step-by-Step Guide to Create Minimal Debian-based Container Images for Docker using Mmdebstrap

475 views

Building lightweight container images with mmdebstrap for Docker is a great way to create minimal and efficient environments for your applications. This process allows you to leverage the power of Debian while keeping your images small and manageable. In this step-by-step tutorial, we will explain how to build docker images with mmdebstrap in Linux.

This is useful to create optimized, minimal Docker images, such as microservices, CI/CD pipelines, or serverless applications.

Why Use mmdebstrap?

  • Small Base Images: It produces minimal Debian root filesystems, reducing image size.
  • Flexible Output Formats: It can generate tarballs, squashfs, or directory outputs, which can be easily imported into Docker.
  • No Dependencies: It does not require dpkg or apt inside the container.
  • Reproducibility: It supports exact package versions for consistent builds.

Build Docker Images with mmdebstrap

mmdebstrap is a modern, minimal, and dependency-free alternative to debootstrap for creating Debian-based root filesystems. It supports reproducible builds and integrates well with Docker.

Prerequisites

Before you start, ensure you have the following installed:

Make sure Docker is installed and running on your system. if not, use the following links to install Docker on your preferred Linux system.

You can also use Podman if you prefer to run containers in rootless mode.

Next, Install mmdebstrap if you haven't already. You can do this with the following command:

sudo apt update
sudo apt install mmdebstrap

Step 1: Create a Minimal Debian Filesystem

We will first create a basic Debian image using mmdebstrap. This image will serve as the foundation for our Docker container.

1. Choose a Debian Suite:

Decide which Debian release you want to use (e.g., bullseye, bookworm).

2. Create the Image:

Run the following command to create a basic Debian filesystem:

mmdebstrap --variant=minbase --include=ca-certificates,curl stable debian-rootfs.tar

This adds required packages like curl and ca-certificates. You can further customize the container by installing any other additional packages or making configuration changes.

Here,

  • --variant=minbase: Creates a minimal base system without unnecessary packages.
  • --include=ca-certificates,curl: Installs curl and ca-certificates in the debian image.
  • stable: Specifies the Debian release (e.g., stable, bookworm, or bullseye).
  • debian-rootfs.tar: Output tarball for the root filesystem.

You can also clean up package caches and logs inside the tarball before importing:

tar --delete -f debian-rootfs.tar ./var/cache/apt ./var/lib/apt/lists

Step 2: Import the Tarball into Docker

Import the Debian image that you created in the earlier step into docker using command:

cat debian-rootfs.tar | docker import - debian:custom

Here,

  • debian:custom: Assigns a tag to the imported image.

Step 3: Verify the Docker Images

Verify if the docker image is imported into your docker environment using command:

docker images

You will see an output like below:

REPOSITORY                  TAG         IMAGE ID      CREATED         SIZE
localhost/debian            custom      7762908acf49  21 seconds ago  170 MB

Step 4: Run the Container

Finally, run the container with the new image using command:

docker run -it debian:custom /bin/bash

This command starts a new container from your image and opens an interactive terminal.

If you want to run the container in detached mode, use -d flag.

Conclusion

Using mmdebstrap to build lightweight container images for Docker is a straightforward process. By creating a minimal Debian environment, you can ensure that your images are small and efficient.

This method is especially useful for developers looking to create custom Docker images tailored to their applications. With just a few steps, you can have a fully functional and lightweight Debian container ready for your projects.

Related Read:

Wednesday, January 1, 2025

How to Set Up an AI Development Environment on Ubuntu

https://www.tecmint.com/setup-ai-development-environment-on-ubuntu

How to Set Up an AI Development Environment on Ubuntu

Artificial Intelligence (AI) is one of the most exciting and rapidly evolving fields in technology today. With AI, machines are able to perform tasks that once required human intelligence, such as image recognition, natural language processing, and decision-making.

If you’re a beginner and want to dive into AI development, Linux is an excellent choice of operating system, as it is powerful, flexible, and widely used in the AI community.

In this guide, we’ll walk you through the process of setting up an AI development environment on your Ubuntu system.

What You Need to Get Started

Before you begin, let’s go over the essentials that you’ll need to set up an AI development environment on Linux:

  • Basic Command Line Knowledge: You should have some familiarity with the Linux terminal and basic commands, as you’ll need to run commands in it.
  • Python: Python is the most popular language for AI development, as most AI libraries and frameworks are written in Python, so it’s essential to have it installed.

Once you have these ready, let’s begin setting up your environment.

Step 1: Update Your System

The first step in setting up any development environment is to ensure that your system is up-to-date, which will ensure that all the software packages on your system are the latest versions and that you don’t run into any compatibility issues.

To update your system, open your terminal and run the following command:

sudo apt update && sudo apt upgrade -y

Once this process is complete, your system is ready for the installation of AI tools.

Step 2: Install Python in Ubuntu

Python is the go-to language for AI development and most AI frameworks such as TensorFlow and PyTorch, are built with Python, so it’s essential to have it installed on your system.

To check if Python is already installed, run:

python3 --version

If Python is installed, you should see a version number, such as Python 3.x.x. If it’s not installed, you can install it by running:

sudo apt install python3 python3-pip -y

Once Python is installed, you can verify the installation by running:

python3 --version

You should see the Python version number displayed.

Step 3: Install AI Libraries in Ubuntu

With Python installed, we now need to install the AI libraries that will help you build and train machine learning models. The two most popular AI libraries are TensorFlow and PyTorch, but there are others as well.

If you’re working on multiple AI projects, it’s a good idea to use virtual environments, as it allows you to isolate the dependencies for each project, so they don’t interfere with each other.

sudo apt install python3-venv
python3 -m venv myenv
source myenv/bin/activate

1. Install TensorFlow in Ubuntu

TensorFlow is one of the most widely used AI frameworks, particularly for deep learning, which provides tools for building and training machine learning models.

To install TensorFlow, run the following command:

pip3 install tensorflow

2. Install PyTorch in Ubuntu

PyTorch is another popular AI framework, especially known for its ease of use and dynamic computational graph, which is widely used for research and prototyping.

To install PyTorch, run:

pip3 install torch torchvision

3. Install Keras in Ubuntu

Keras is a high-level neural networks API that runs on top of TensorFlow, which makes it easier to build and train deep learning models by providing a simple interface.

To install Keras, run:

pip3 install keras

Keras is included with TensorFlow 2.x by default, so if you’ve already installed TensorFlow, you don’t need to install Keras separately.

4. Install Scikit-learn

For machine learning tasks that don’t require deep learning, Scikit-learn is a great library, which provides tools for classification, regression, clustering, and more.

To install it, run:

pip3 install scikit-learn

5. Install Pandas and NumPy in Ubuntu

Pandas and NumPy are essential libraries for data manipulation and analysis, as they are used for handling datasets and performing mathematical operations.

To install them, run:

pip3 install pandas numpy

Step 4: Install Jupyter Notebook (Optional)

Jupyter Notebook is a web-based tool that allows you to write and execute Python code in an interactive environment and it is widely used in AI development for experimenting with code, running models, and visualizing data.

To install Jupyter Notebook, run:

pip3 install notebook

After installation, you can start Jupyter Notebook by running:

jupyter notebook

This will open a new tab in your web browser where you can create new notebooks, write code, and see the output immediately.

Step 5: Install GPU Drivers (Optional for Faster AI Development)

If you have a compatible NVIDIA GPU on your system, you can use it to speed up the training of AI models, especially deep learning models, require a lot of computational power, and using a GPU can drastically reduce training time.

To install the necessary GPU drivers for NVIDIA cards, run:

sudo apt install nvidia-driver-460

After the installation is complete, restart your system to apply the changes.

You also need to install CUDA (Compute Unified Device Architecture) and cuDNN (CUDA Deep Neural Network library) to enable TensorFlow and PyTorch to use the GPU.

You can find the installation instructions for CUDA and cuDNN on NVIDIA’s website.

Step 6: Test Your Setup

Now that you have installed Python, the necessary AI libraries, and optionally set up a virtual environment and GPU drivers, it’s time to test your setup.

To test TensorFlow, open a Python interpreter by typing:

python3

Then, import TensorFlow and check its version:

import tensorflow as tf
print(tf.__version__)

You should see the version number of TensorFlow printed on the screen. If there are no errors, TensorFlow is installed correctly.

Next, test PyTorch:

import torch
print(torch.__version__)

If both libraries print their version numbers without any errors, your setup is complete.

Step 7: Start Building AI Models

With your environment set up, you can now start building AI models. Here’s a simple example of how to create a basic neural network using TensorFlow and Keras.

import tensorflow as tf
from tensorflow.keras.models import Sequential
from tensorflow.keras.layers import Dense

# Define a simple model
model = Sequential([
    Dense(64, activation='relu', input_shape=(784,)),
    Dense(10, activation='softmax')
])

# Compile the model
model.compile(optimizer='adam', loss='sparse_categorical_crossentropy', metrics=['accuracy'])

# Summary of the model
model.summary()

This code defines a simple neural network with one hidden layer and an output layer for classification. You can train this model using datasets like MNIST (handwritten digits) or CIFAR-10 (images of objects).

Conclusion

Congratulations! You’ve successfully set up your AI development environment on Ubuntu with Python, TensorFlow, PyTorch, Keras, and Jupyter Notebook, you now have all the tools you need to start building and training AI models.

As you continue your journey into AI, you can explore more advanced topics such as deep learning, reinforcement learning, and natural language processing. There are many online resources, tutorials, and courses available to help you learn and improve your skills.

Remember, AI development is an exciting field with endless possibilities. Whether you want to build self-driving cars, create intelligent chatbots, or analyze big data, the skills you develop in AI will be valuable in many areas of technology.

Happy coding, and enjoy your AI journey!