Thursday, October 31, 2024

How to Redirect URLs Using Nginx

https://www.rosehosting.com/blog/how-to-redirect-urls-using-nginx

How to Redirect URLs Using Nginx

How to redirect URLs using Nginx

URL redirection, also called URL forwarding, allows multiple URL addresses to be associated with a single page. This can include a form, the entire website, or a web application. This functionality is executed through a specialized HTTP response called an HTTP redirect. Redirecting URLs involves pointing an existing URL to a new one. This effectively communicates to your visitors and search bots that the URL has a new destination. This redirect can be either a temporary or a permanent redirection. Nginx, a web server, has gained more and more popularity over the past few years. It was initially created as a high-performance web server. Using an asynchronous event-driven architecture, Nginx can increase speed and stability when handling high traffic. This article will show you how to redirect URLs using nginx in an easy-to-follow guide.

Prerequisites

  • Linux VPS hosting with Nginx as the web server
  • SSH root access or a normal system user with sudo privileges

Redirection Types

There are only two redirection types: permanent and temporary. The permanent redirection has HTTP code 301, while the temporary redirection has HTTP code 302. The difference between 301 and 302 redirects lies in how they affect the redirection of URLs on a website. This can have a significant impact on your on-page SEO. To clarify, below is an explanation of the differences between 301 and 302 redirects in detail:

Permanent Redirect (301)

As the name indicates, a permanent redirect means the old URL will no longer be used. Visitors will be permanently redirected to the new URL. This means that when visitors access the old URL, they will be automatically redirected to the new URL.

301 redirects also tell search engines that the old URL page has been made permanent and redirected to the new URL. Search engines will pass on any link authority directly from the old URL to the new URL. A 301 redirects are usually used for website pages that have been moved to a new URL or permanently deleted. This is akin to moving your house permanently and letting everyone know your new address.

Temporary Redirect (302)

Redirect 302 is known as a “temporary redirect”. This means the old URL has been moved, and visitors are redirected to the new URL, just like with a 301.

The difference is that a 302 tells search engines that the old URL page is only temporarily redirected to the new URL. This signals to search engines that the old URL will return and will still maintain the page’s ranking of the old URL. As such, a 302 redirect is typically used for website pages that will return to the original URL after a while. Think of this as leaving your house when you go on an extended vacation and have your mail sent there.

Redirects are helpful when you send website visitors to a different URL according to the page they are trying to access. Here are some popular reasons to use them:

  • Reroute visitors from discontinued pages (which would otherwise show a 404 error) to the most similar page.
  • Keep old URLs operational after moving from one software system to another.
  • Take visitors from a short and simple, memorable URL to the correct page.
  • Redirecting outdated .html URLs or non-www to their www counterparts.
  • Retain seasonal page content with limited-time deals; the same offer will return next season. Think of Black Friday count-down timer pages.

When using Nginx as the web server, you can generally create redirects using rewrite or return directives. Incorporating a redirect map can be beneficial for extensive redirect lists.

Use RETURN Directive

We can use the return directive in the server context to redirect HTTP to HTTPS or from one domain name to another.

server {
listen 80;
server_name example.com www.example.com;
return 301 https://example.com$request_uri;
}

The following configuration should also work if you want to redirect a URL to another.

location = /blog/how-to-redirect-in-nginx {
return 301 $scheme://blog.example.com/how-to-redirect-in-nginx
}

Use REWRITE Directive

We can place both RETURN and REWRITE directives in the server and location context in the Nginx configuration file.

server {
listen 80;
server_name example.com www.example.com;
rewrite ^/(.*)$ https://example.com/$1 redirect;
}

We can use the above config to redirect HTTP to HTTPS temporarily. To change it to a permanent redirect, simply replace redirect with permanent.

Another example is to redirect a URL using rewrite, but this time, we use location context.

Need a fast and easy fix?
✔ Unlimited Managed Support
✔ Supports Your Software
✔ 2 CPU Cores
✔ 2 GB RAM
✔ 50 GB PCIe4 NVMe Disk
✔ 1854 GeekBench Score
✔ Unmetered Data Transfer
NVME 2 VPS

Now just $43 .99
/mo

GET YOUR VPS
location = /how-to-redirect-in-nginx {
rewrite ^/how-to-redirect-in-nginx?$ /redirection-in-nginx.html break;
}

Use MAP Directive

If you have many redirections, you can use Nginx MAP directive. Add the following to the top of your Nginx server block file.

map $request_uri $new_uri {
include /etc/nginx/redirect-map.conf;
}

Then, create a file /etc/nginx/redirect-map.conf, and you can put your old and new URLs there.

The file /etc/nginx/redirect-map.conf should contain something like this:

/blog/how-to-redirect-in-nginx /nginx-redirect;
/old.html /new.html;
/old-file.php /new-file.php;

Make sure to check the map file, it should contain ‘;’ at the end of each line or else it causes EOL error. Also, remember that you should restart Nginx every time you modify its configuration file to apply the changes.

That’s it! You have learned about configuring URL redirects in Nginx.

Of course, you don’t have to spend your time and follow this article to learn how to redirect URLs using Nginx. If you have an active VPS hosting service with us, you can ask our expert Linux admins to redirect URLs using Nginx for you. Simply log in to the client area, then submit a ticket. Our system administrators are available 24×7 and will take care of your request immediately.

If you liked this post on how to redirect URLs using Nginx, please share it with your friends on social media or leave a comment below.

Tags , , , , , ,

rbash – A Restricted Bash Shell Explained with Practical Examples

https://www.tecmint.com/rbash-restricted-bash-shell

rbash – A Restricted Bash Shell Explained with Practical Examples

In the world of Linux and Unix-like systems, security is crucial, especially when multiple users share a system. One way to enhance security is by using restricted shells. One such shell is rbash, or Restricted Bash.

This article will explain what rbash is, how it differs from the regular Bash shell, and provide practical examples of its usage.

What is a Shell?

Before diving into rbash, let’s clarify what a shell is.

A shell is a program that enables users to interact with the Linux system through a command-line interface. It interprets commands entered by the user and communicates with the system to execute those commands.

Bash (Bourne Again SHell) is one of the most widely used shells in Linux environments.

What is rbash?

rbash is a restricted version of the Bash shell, which is designed to limit users’ access to certain commands and features, enhancing system security.

When a user logs into a system using rbash, they cannot perform tasks that could compromise the system or other users.

Key Differences Between Bash and rbash

Following are some key differences between bash and rbash:

  • In rbash, users cannot change their directory with the cd command. They can only operate in their home directory.
  • Certain commands like exec, set, and unset are restricted, preventing users from altering the shell’s environment.
  • Users cannot change environment variables that can affect other users or system settings.
  • In rbash, users cannot redirect input or output, making it harder to execute commands that can access or manipulate files outside their designated areas.

These restrictions make rbash suitable for scenarios where you want to provide limited access to users while maintaining a level of security.

When to Use rbash

Here are some situations where using rbash is beneficial:

  • Public Terminals: In environments like libraries or schools where users need access to basic commands but should not tamper with system settings.
  • Shared Servers: On shared systems, rbash can prevent users from accessing other users’ data or critical system files.
  • Testing and Learning Environments: When teaching users basic command-line skills, rbash can help limit their actions to avoid accidental system changes.

How to Set Up rbash in Linux

Setting up rbash on your Linux system is a straightforward process, all you need to do is follow these steps:

1. Install Bash in Linux

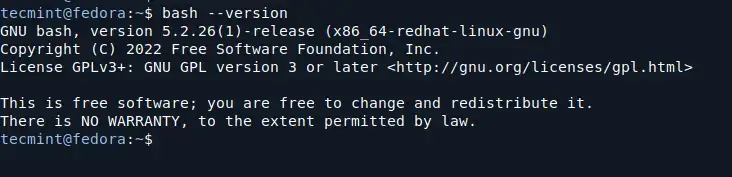
Most Linux distributions come with Bash installed by default, you can check if it’s installed by running:

bash --version
Check Bash Version
Check Bash Version

2. Create a Restricted Shell User

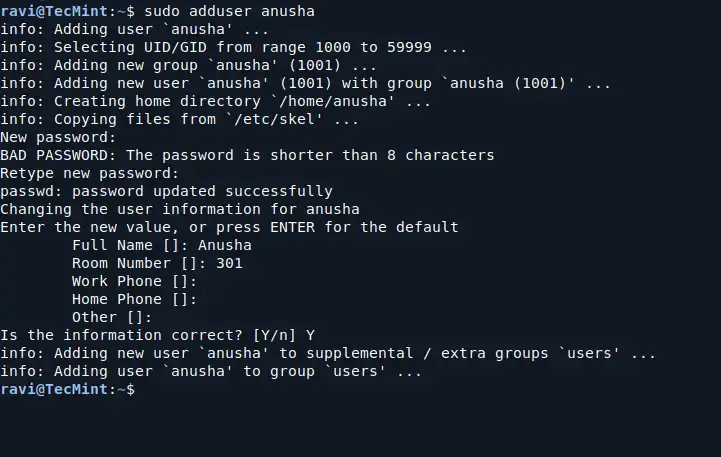
You can create a user specifically for rbash.

sudo adduser anusha
Create a Restricted Shell User

After creating the user, change their default shell to rbash:

sudo usermod -s /bin/rbash restricteduser

To further restrict this user’s environment, you can create a specific directory and set it as their home directory:

sudo mkdir /home/anusha/bin

Then, you can place any scripts or commands you want the user to access inside this bin directory.

To limit the commands available to the user, set their PATH variable to only include the bin directory:

echo 'export PATH=$HOME/bin' | sudo tee -a /home/anusha/.bashrc

Now, you can log in as a restricted user:

su - anusha

How to Use rbash in Linux

Let’s explore some practical examples to illustrate how rbash works.

Example 1: Attempting to Change Directory

Once logged in as the restricted user, try changing directories:

cd /tmp

You will receive an error message like -rbash: cd: restricted, which confirms that the user cannot navigate outside their home directory.

Example 2: Running Restricted Commands

Try executing commands like exec or set:

exec bash

You will get an error like -rbash: exec: restricted, which shows that the user is restricted from executing new shell instances.

Example 3: File Redirection

Attempt to redirect output to a file:

echo "Test" > test.txt

You will receive an error message that indicates that users cannot redirect output to files.

-rbash: test.txt: restricted: cannot redirect output

Example 4: Allowed Commands

To see what commands the restricted user can execute, you can create a simple script in their bin directory.

For example, create a file named hello.sh:

echo "echo 'Hello, World!'" > /home/restricteduser/bin/hello.sh
chmod +x /home/restricteduser/bin/hello.sh

Now, when the restricted user runs:

./hello.sh

They will see Hello, World! printed on the screen, demonstrating that they can execute allowed commands.

Conclusion

In summary, rbash is a powerful tool for enhancing security in multi-user Linux environments. By restricting access to certain commands and features, it helps maintain system integrity while allowing users to perform basic tasks.


DTrace 2.0 Arrives On Gentoo Linux

https://ostechnix.com/dtrace-2-0-arrives-on-gentoo-linux

Exciting news for Gentoo Linux users! DTrace 2.0, the powerful dynamic tracing tool, is now available on Gentoo. This means you can now analyse and debug your system, both the kernel and userland applications, with ease. Whether you're tackling performance bottlenecks or troubleshooting unexpected behaviour, DTrace has you covered.

What is DTrace?

DTrace allows you to dynamically trace your running system, capturing valuable insights into its operation. It works by attaching to specific points in the kernel or userland applications, known as probes, and recording data when these probes are triggered. This data can include timestamps, stack traces, function arguments, and more, providing a wealth of information to help you understand your system's behaviour.

Gentoo Embraces DTrace 2.0

Gentoo has fully embraced DTrace 2.0, making it incredibly easy to get started. Simply install the dev-debug/dtrace package and you're ready to go. The newest stable Gentoo distribution kernel already has all the necessary kernel options enabled, simplifying the setup process even further. If you're compiling your kernel manually, the DTrace ebuild will guide you through the required configuration changes.

Power of eBPF

Under the hood, DTrace 2.0 for Linux leverages the Extended Berkeley Packet Filter (eBPF) engine of the Linux kernel. eBPF is a powerful and versatile technology that enables efficient and safe in-kernel program execution. By utilizing eBPF, DTrace 2.0 delivers performance and security benefits.

Getting Started with DTrace

Gentoo provides extensive documentation and resources to help you get started with DTrace. The Gentoo Wiki DTrace page offers a comprehensive overview, while the DTrace for Linux GitHub page delves into the technical details. Additionally, the original documentation for Illumos, where DTrace originated, provides valuable insights.

Learn and Explore

With DTrace 2.0 now readily available on Gentoo, there's never been a better time to explore the dynamic tracing. Gentoo's support for DTrace empowers users with a powerful toolset for understanding, analysing, and debugging their systems. Get started with DTrace today and unlock a deeper level of system knowledge!

Resource: