Killport: Stopping Processes by Port Number in Linux
killport is a CLI tool that provides a simple solution to stop
processes by their port number, thereby resolving the problem of users
struggling to identify the processes behind an open port.
This
way, you don’t have to follow the traditional method of finding the
open port, then looking for the responsible processes behind that port,
then finding the process PID, and then stopping it.
Instead, all
you need to do is pass the port number to the killport command as an
argument, and then it will immediately stop the processes behind that
port by sending “SIGTERM” signals.
In
this article, I’ll show you its features, how to install killport on
Linux, how to list open ports, and then stop it by using the port number
with killport.
The following is a list of standout features of Killport:
It’s cross-platform and available for Linux, Windows, and macOS.
Kill processes by port number.
You can kill multiple ports at once.
Specify a “SIGHUP“, “SIGKILL“, or “SIGTERM” signal that is to be sent.
Use the verbose option to receive detailed output.
How to Install Killport on Linux
There are multiple ways to install killport on your desired Linux distribution; the recommended one is by using the “brew” command. So, if you have Homebrew installed on your Linux system, you can use the following command (it also works for macOS).
$ brew install killport
If you have the Cargo package manager installed on your Linux, Windows, or macOS, then you can easily install it using the following command:
$ cargo install killport
Finally, on Linux and macOS, if you prefer, you can use its installation script (not recommended) using the curl command. The script will automatically download the latest binary package and place it in the users “/bin” directory.
📝
Make sure that you include “$HOME/.local/bin” in your $PATH environment variable. If you’re unsure how to do this, simply add this line: “export PATH="$HOME/.local/bin:$PATH"” at the end of your shell configuration file (“~/.bashrc” for bash).
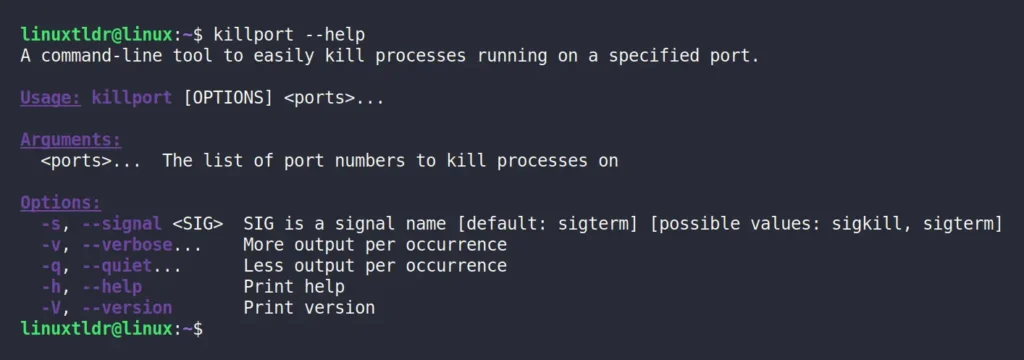
Once completed, you can run the following command to confirm its successful installation on your Linux system:
$ killport --help
Output:
Usage of Killport
Once
killport is installed, you can start killing processes based on their
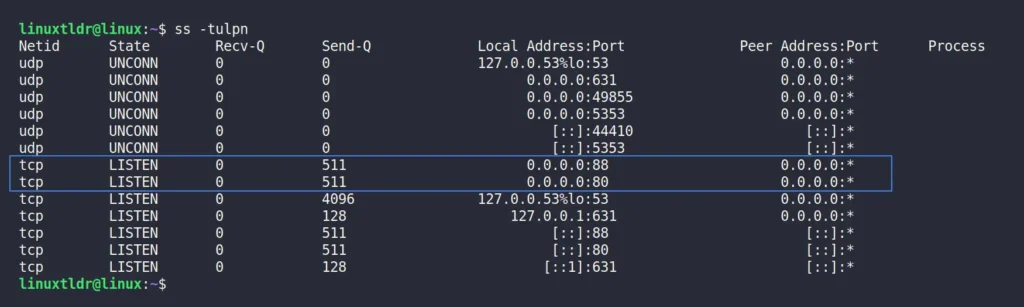
port number. To showcase its usage, I’ll first check the list of all
open ports on my Linux system using the “ss” or “netstat” commands:
$ ss -tulpn

#OR

$ netstat -tulpn
Output:
In the above picture, ports “80” and “88”
are shown to be in a LISTEN state, handled by Nginx and Apache2. To
stop one or both of these open ports, you can use the following killport
commands:
📝
You can easily terminate a user-initiated process, but system-level processes require root or sudo privileges.
# The following command will kill port 80.
$ sudo killport 80

# The following command will kill ports 80 and 88 at onces.
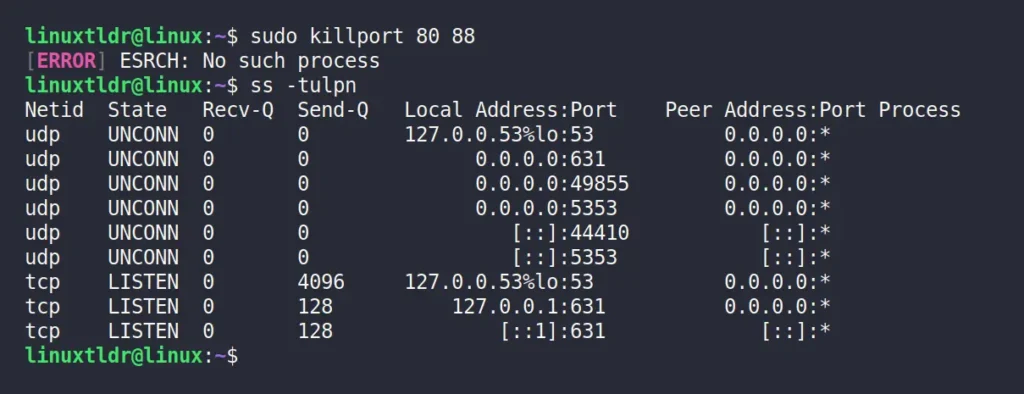
$ sudo killport 80 88
Output:
Voila, you’ve successfully terminated the two processes responsible for listening on ports “80” and “88“. To show you the proof, I’ll re-check the list of all open ports on my Linux system.
If you notice, the two ports mentioned aren’t on the list. Now, you might be thinking that in the output there is an “[ERROR] ESRCH: No such process”
message, which makes it seem that there was never such a process and
nothing has been terminated. Then, my friend, you are mistaken.
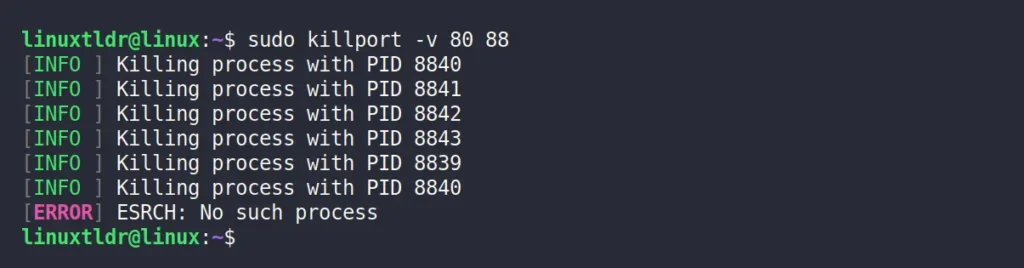
The
message we are receiving in the output is the last signal sent to the
process, ensuring that the target process is terminated. To confirm, you
can enable the verbose mode using the “-v” flag and see for yourself that this message appears at the end.
$ sudo killport -v 80 88
Output:
I’ve told you, look. Finally, to kill the process using the specific “SIGHUP“, “SIGKILL“, or “SIGTERM” signal, you can use the “-s” flag. However, if you’re unsure of the differences between them, you can refer to the following table:
Signal Name
Signal Value
Behavior
SIGHUP
1
Hangup (a less secure way)
SIGKILL
9
Kill Signal (forceful)
SIGTERM
15
Terminate (default and safest)
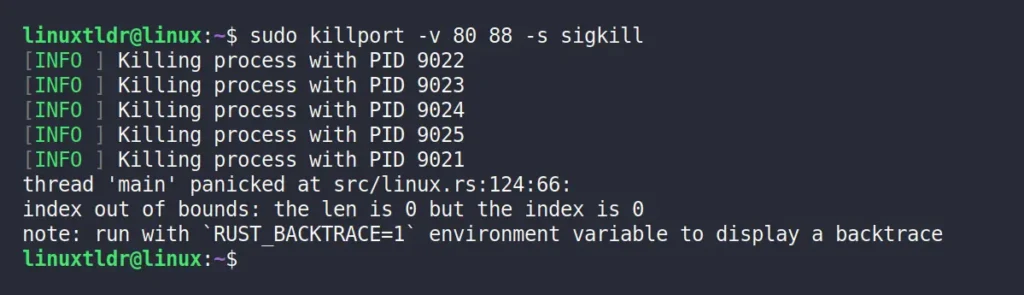
So, to kill the process responsible for ports “80” and “88” by sending a “SIGKILL” signal, use the following command:
$ sudo killport -v 80 88 -s sigkill
Ouput:
That’s
it. Here comes the end of this article. To give you my opinion, I find
this tool pretty amazing because finding the process PID and then
killing it makes me sick. I’m usually aware of which ports are started
by me and can easily identify them, so when they are not in need, I can
quickly kill them using the “killport” command.
Now, I am interested in knowing your thoughts and opinions on this, so do share them in the comment section.
Systemd
is a powerful and highly versatile init system for Linux distros. It
can run programs, manage system resources, and even control the state of
your computer. In this article, I’ll demonstrate how you can use
Systemd to control your apps by creating a custom service unit in
Ubuntu.
What is a Systemd Service Unit?
A service unit is a regular file that contains details on how to run a
specific app. It includes the general metadata of the program, how to
run it, and whether Systemd can access it on a regular session.
By default, every daemon on a Systemd-based machine has some form of a
service file. OpenSSH, for instance, uses the ssh.service unit in
“/etc/systemd/system/” to determine how it will run in Debian and
Ubuntu.
At a basic level, a service unit file is made up of three parts: the Unit, Service, and Install categories. The Unit section provides the app’s metadata and dependencies. The Service section defines where the app is and how Systemd will run it. Lastly, the Install section describes when can Systemd start the app.
Creating a System-level Custom Systemd Service
One of the most common uses for a custom service is automating commands that require root privileges or take advantage of Systemd Timers. For instance, a custom service helps in ensuring that a Minecraft server will start up properly after a restart.
To create a custom system-level service in Linux, start by making the Systemd unit file in your user’s home directory:
nano ~/my-system-app.service
Paste the following block of code inside your new unit file. This is the simplest valid config for a Systemd service:
[Unit]Description=My First Service
After=network.target
[Service]Type=simple
ExecStart=/path/to/bin
Restart=always
[Install]WantedBy=multi-user.target
Replace the “Description” variable with the details of your user-level service.
Replace the “ExecStart” variable with the full file path of program that you want to run.
Save your new file, then copy it to your machine’s services directory:
Run the following command to restart the Systemd daemon:
sudo systemctl daemon-reload
Test your new system-level service by running the following command:
sudo systemctl start my-system-app.service
Lastly, confirm that your new service is running properly by checking its status in systemctl:
systemctl status my-system-app.service
Creating a User-level Custom Systemd Service
Service units aren’t limited to system-level apps or superusers. With
the help of Systemd-user, it’s possible to create rootless services.
This allows non-root users to manage local apps while improving their
PC’s security by limiting programs with root access.
To create your user-level custom service in Linux, make a new Systemd unit file in your user’s home directory:
nano ~/my-user-app.service
Paste the following block of code inside your new unit file:
[Unit]Description=My First User Service
After=graphical-session.target
[Service]Type=simple
ExecStart=/path/to/bin
[Install]WantedBy=default.target
Replace the value of the “ExecStart” variable to the path of the
program that you want to run. Since this is a user-level service, make
sure that your user account has proper access to the binary.
Save your new user-level service file, then create the local Systemd directory for your user:
mkdir-p ~/.config/systemd/user/
Copy your new user-level service file to the local Systemd directory for your user:
cp ./my-user-app.service ~/.config/systemd/user/
Make sure that Systemd checks your user directory for new service unit files:
systemctl daemon-reload --user
Lastly, confirm that your new service is running properly by checking its status in systemctl:
One of the core strengths of Systemd is that it allows you to fully customize how to run and manage programs.
Adding Environment Variables to a Custom Service
Environment variables are an important part of every Linux system.
They provide additional data to a program without fiddling with config
files. With Systemd, it’s possible to make use of environment variables
by incorporating it to your service units.
Start by disabling the service that you want to modify:
Scroll to the “[Service]” section, then add the following line of code just below the “Type=” variable:
Environment=""
Add the environment variable that you want to add to your custom
service. In my case, I want to add an EDITOR variable to make sure that
my service sees my Vim instance.
Save your modified service file, then reload your Systemd daemon to apply your changes.
Restart your new Systemd service to make use of your new environment variable:
systemd --user start my-user-app.service
Restricting Custom Service to a Specific User
Apart from user-level unit files, you can also tweak a system-level
service to run under a specific user. This is helpful if you want to run
an app under a rootless and shell-less user account.
To bind a Systemd service to a user, first completely disable your custom unit.
Make sure that the target user account already exists on your machine.
Open your system-level service file using your favorite text editor:
sudonano/etc/systemd/system/my-system-app.service
Scroll down to the “[Service]” section, then add the “User=” variable followed by the name of your user account.
Note: you can also specify the group for your service by adding “Group=” below the User variable.
Save the changes on your unit file, then restart the service:
sudo systemctl start my-system-app.service
Confirm that your service is now running as your user by running the following command:
ps-ouser= -p $(systemctl show my-system-app.service -p MainPID |awk-F= '{print $2}')
Limiting a Service Unit’s Resource Consumption
On top of tweaking environment variables and users, Systemd can limit
the resources an app can consume over its lifespan. While it doesn’t do
it by default, it’s possible to control core parts such as CPU usage
and overall process count.
Begin by completely disabling the service that you want to tweak.
Open the service unit file using your favorite text editor:
sudonano/etc/systemd/system/my-system-app.service
Scroll down to the “[Service]” section, then add the variable name
for the resource that you want to limit. For instance, adding the
“MemoryHigh=” variable allows you to set a soft memory limit for that
service.
Tip: You can find a list of valid variables by running man systemd.resource-control on a terminal session.
Save your unit file, then reload your Systemd service:
sudo systemctl enable--now my-system-app.service
Lastly, you can monitor your running services by running systemd-cgtop.
Learning how to create custom Systemd services and modifying them to
your needs is just the step in understanding this highly versatile tool.
Explore more of Systemd and what its comprehensive ecosystem can do by
checking out how Run0 performs against Sudo.
C is an excellent, powerful, and general-purpose
programming language that offers modern and generic programming features
for developing large-scale applications ranging from video games,
search engines, and other computer software to operating systems.
C language is usually considered the base for many other programming languages (C++, JavaScript, Java, PHP, Perl, Python,
and more) due to its easy and efficient language design which includes a
relatively small set of features that can be used to develop more
complex systems and applications.
There are several text editors out there that programmers can use to write code, but IDE has come up to offer comprehensive facilities and components for easy and ideal programming.
What is an IDE?
An IDE (Integrated Development Environment)
editor is a software application that offers an extensive collection of
tools for software development, which includes a text editor, debugging
tools, code compiler, version control, and other features that help
software developers to write, debug, and test their code efficiently.
A text editor is generally an IDE but designed to
offer a more feature-rich environment that includes syntax highlighting,
code folding, auto-indentation, and code completion, which is a useful
feature that helps developers to reduce code errors and write code more
efficiently.
In
this article, we shall look at some of the best IDEs you can find on
the Linux platform that is widely used in many programming languages.
Table of Contents
1. Netbeans for C/C++ Development
Netbeans is a free, open-source, and popular cross-platform IDE for C/C++ and many other programming languages. It is fully extensible using community-developed plugins.
Netbeans
includes project types and templates for C/C++ and you can build
applications using static and dynamic libraries. Additionally, you can
reuse existing code to create your projects and also use the
drag-and-drop feature to import binary files into it to build
applications from the ground.
Support for automatic packaging of compiled applications into .tar, .zip, and many more archive files
Support for multiple compilers such as GNU, Clang/LLVM, Cygwin, Oracle Solaris Studio, and MinGW
Support for remote development
File navigation
Source inspection
NetBeans IDE for C++ Programming
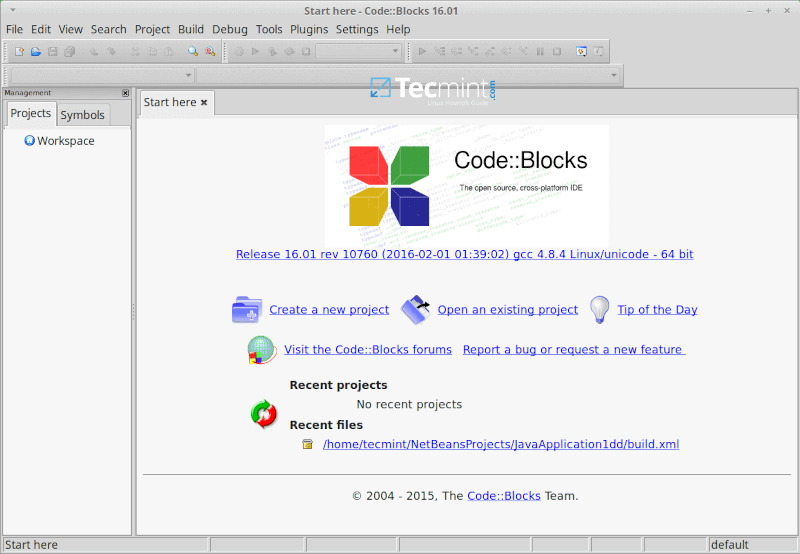
2. Code::Blocks
Code::Blocks is a free, highly extensible, and configurable, cross-platform C++ IDE built to offer users the most demanded and ideal features. It delivers a consistent user interface and feels.
And most importantly, you can extend its functionality by using plugins developed by users, some of the plugins are part of the Code::Blocks release, and many are not, written by individual users not part of the Code::Block development team.
Its features are categorized into a compiler, debugger, and interface features and these include:
Multiple compiler support including GCC, clang, Borland C++ 5.5, digital Mars plus many more
Very fast, no need for makefiles
Multi-target projects
A workspace that supports the combining of projects
Interfaces GNU GDB
Support for full breakpoints including code breakpoints, data breakpoints, breakpoint conditions plus many more
display local functions symbols and arguments
custom memory dump and syntax highlighting
Customizable and extensible interface plus many more other features including those added through user-built plugins
CodeBlocks IDE for C++ Programming
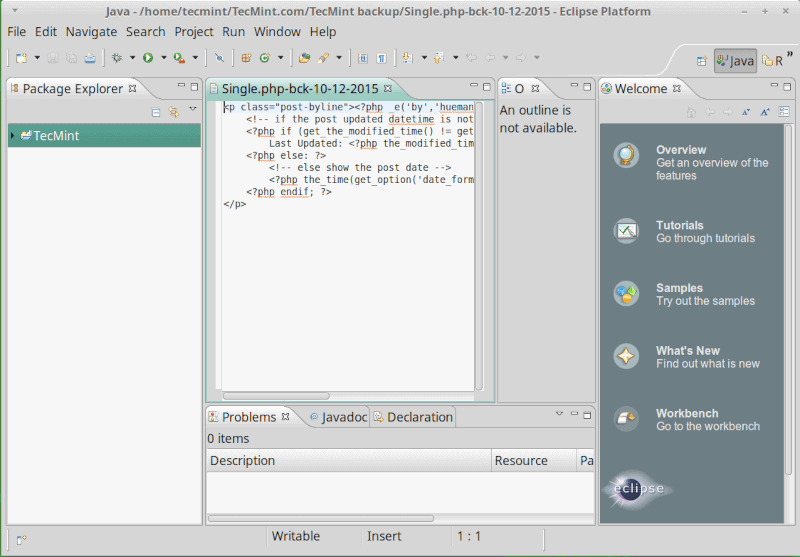
3. Eclipse CDT(C/C++ Development Tooling)
Eclipse
is a well-known open-source, cross-platform IDE in the programming
arena. It offers users a great GUI with support for drag and drop
functionality for easy arrangement of interface elements.
The Eclipse CDT is a project based on the primary Eclipse platform and it provides a fully functional C/C++ IDE with the following features:
Supports project creation.
Managed build for various toolchains.
Standard make build.
Source navigation.
Several knowledge tools such as call graph, type hierarchy, in-built browser, and macro definition browser.
Code editor with support for syntax highlighting.
Support for folding and hyperlink navigation.
Source code refactoring plus code generation.
Tools for visual debugging such as memory, and registers.
Disassembly viewers and many more.
Eclipse IDE for Linux
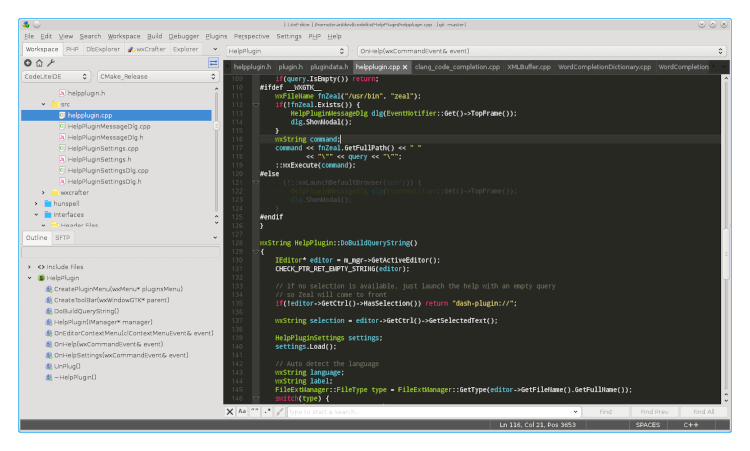
4. CodeLite IDE
CodeLite
is also a free, open-source, cross-platform IDE designed and built
specifically for C/C++, JavaScript (Node.js), and PHP programming.
Some of its main features include:
Code completion offers two code completion engines.
Supports several compilers including GCC, clang/VC++.
Displays errors as code glossary.
Clickable errors via the build tab.
Support for LLDB next-generation debugger.
GDB support.
Support for refactoring.
Code navigation.
Remote development using built-in SFTP.
Source control plugins.
RAD (Rapid Application Development) tool for developing wxWidgets-based apps plus many more features.
Codelite IDE for Linux
5. Bluefish Editor
Bluefish
is more than just a normal editor, it is a lightweight, fast editor
that offers programmers IDE-like features for developing websites,
writing scripts, and software code. It is multi-platform, runs on Linux,
Mac OSX, FreeBSD, OpenBSD, Solaris, and Windows, and also supports many
programming languages including C/C++.
It is feature-rich including the ones listed below:
Multiple document interfaces.
Supports the recursive opening of files based on filename patterns or content patterns.
Offers a very powerful search and replace functionality.
Snippet sidebar.
Support for integrating external filters of your own, pipe documents
using commands such as awk, sed, and sort plus custom-built scripts.
Supports full-screen editing.
Site uploader and downloader.
Multiple encoding support and many other features.
BlueFish IDE Editor for Linux
6. Brackets Code Editor
Brackets
is a modern and open-source text editor designed specifically for web
design and development. It is highly extensible through plugins,
therefore C/C++ programmers can use it by installing the
C/C++/Objective-C pack extension, this pack is designed to enhance C/C++
code writing and to offer IDE-like features.
Brackets Code Editor for Linux
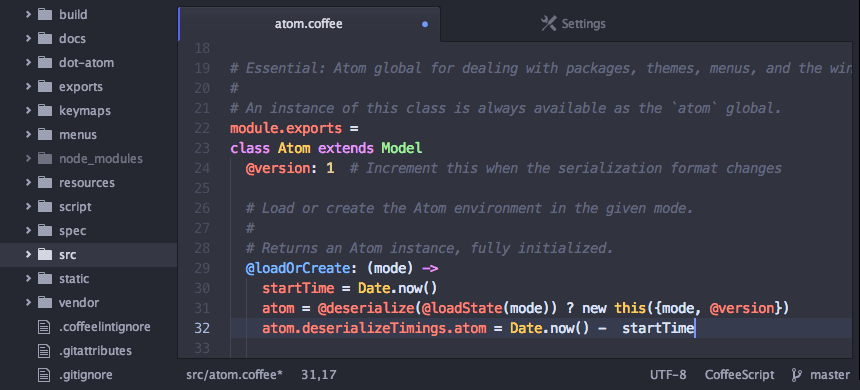
7. Atom Code Editor – Deprecated
Atom
is also a modern, open-source, multi-platform text editor that can run
on Linux, Windows, or Mac OS X. It is also hackable down to its base,
therefore users can customize it to meet their code-writing demands.
It is fully featured and some of its main features include:
Built-in package manager.
Smart auto-completion.
In-built file browser.
Find and replace functionality and many more.
Atom Code Editor for Linux
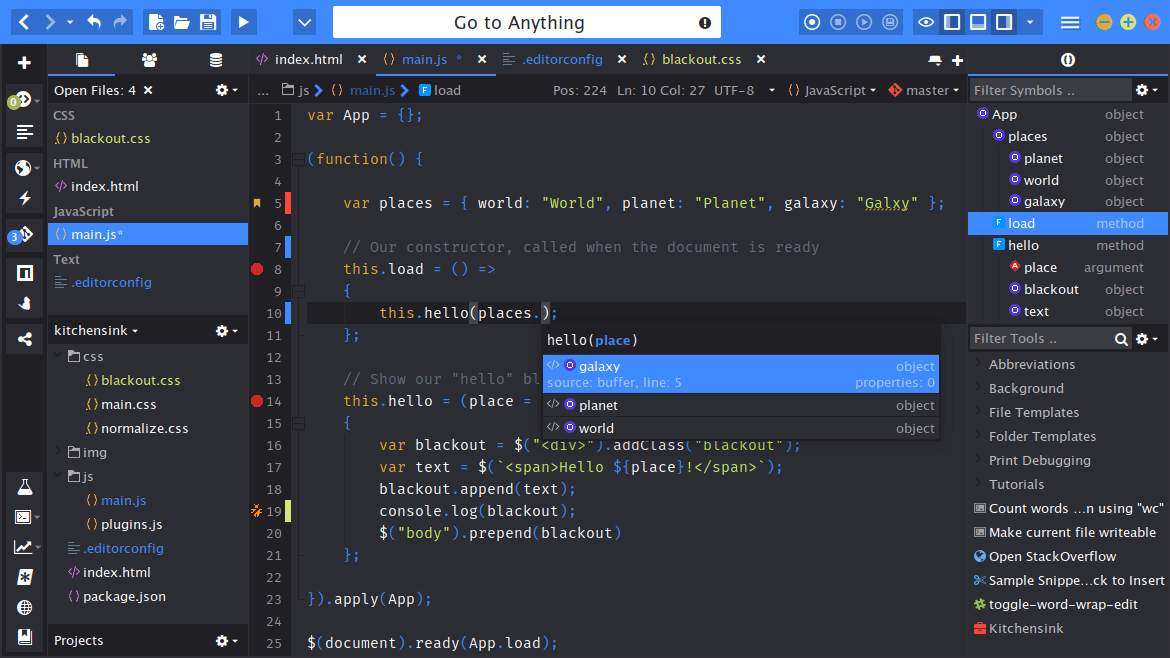
8. Sublime Text Editor
Sublime Text
is a well-defined, multi-platform text editor designed and developed
for code, markup, and prose. You can use it for writing C/C++ code and
offers a great user interface.
Its features list comprises of:
Multiple selections
Command palette
Goto anything functionality
Distraction-free mode
Split Editing
Instant project switching support
Highly customizable
Plugin API support based on Python plus other small features
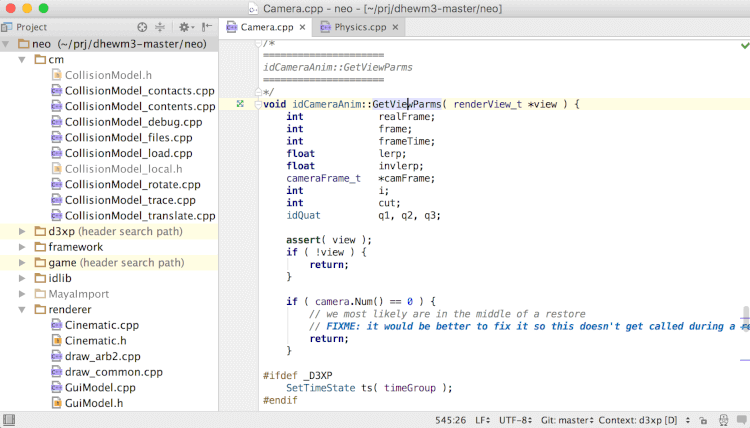
CLion
is a non-free, powerful, and cross-platform IDE for C/C++ programming.
It is a fully integrated C/C++ development environment for programmers,
providing Cmake as a project model, an embedded terminal window, and a
keyboard-oriented approach to code writing.
It also offers a smart and modern code editor plus many more exciting
features to enable an ideal code-writing environment and these features
include:
Supports several languages other than C/C++
Easy navigation to symbol declarations or context usage
Code generation and refactoring
Editor customization
On-the-fly code analysis
An integrated code debugger
Supports Git, Subversion, Mercurial, CVS, Perforce(via plugin), and TFS
Seamlessly integrates with Google test frameworks
Support for Vim text editor via Vim-emulation plugin
JetBrains CLion IDE
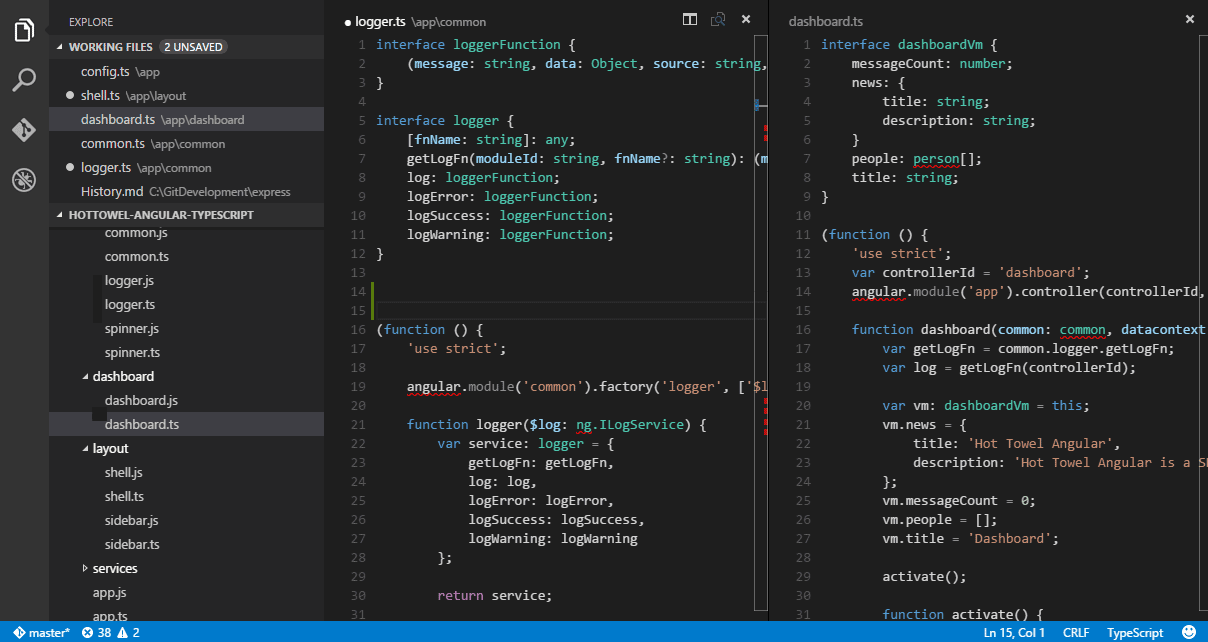
10. Microsoft’s Visual Studio Code Editor
Visual Studio
is a rich, fully integrated, cross-platform development environment
that runs on Linux, Windows, and Mac OS X. It was recently made
open-source to Linux users and it has redefined code editing, offering
users every tool needed for building every app for multiple platforms
including Windows, Android, iOS and the web.
It is feature-full, with features categorized under application
development, application lifecycle management, and extend and integrate
features. You can read a comprehensive features list from the Visual
Studio website.
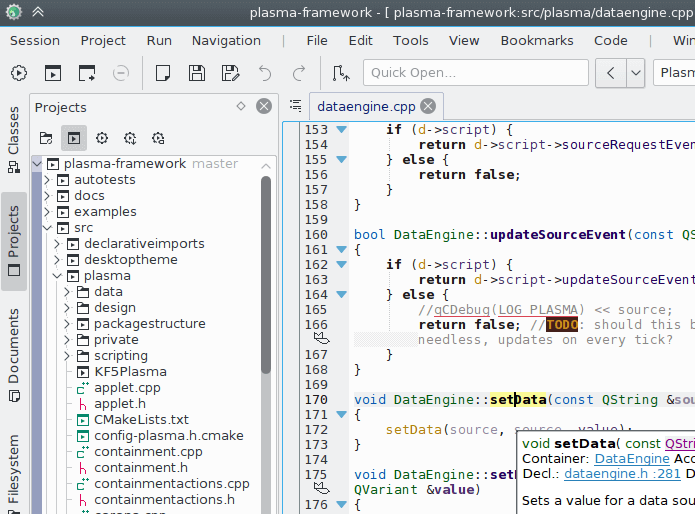
KDevelop
is just another free, open-source, and cross-platform IDE that works on
Linux, Solaris, FreeBSD, Windows, Mac OSX, and other Unix-like
operating systems. It is based on the KDevPlatform, KDE, and Qt
libraries. KDevelop is highly extensible through plugins and
feature-rich with the following notable features:
Support for Clang-based C/C++ plugin
KDE 4 config migration support
A revival of Oketa plugin support
Support for different line editings in various views and plugins
Support for Grep view and Uses widget to save vertical space plus many more
KDevelop IDE Editor
12. Geany IDE
Geany
is a free, fast, lightweight, and cross-platform IDE developed to work
with few dependencies and also operate independently from popular Linux
desktops such as GNOME and KDE. It requires GTK2 libraries for
functionality.
Its features list consists of the following:
Support for syntax highlighting
Code folding
Call tips
Symbol name auto-completion
Symbol lists
Code navigation
A simple project management tool
In-built system to compile and run a users code
Extensible through plugins
Geany IDE for Linux
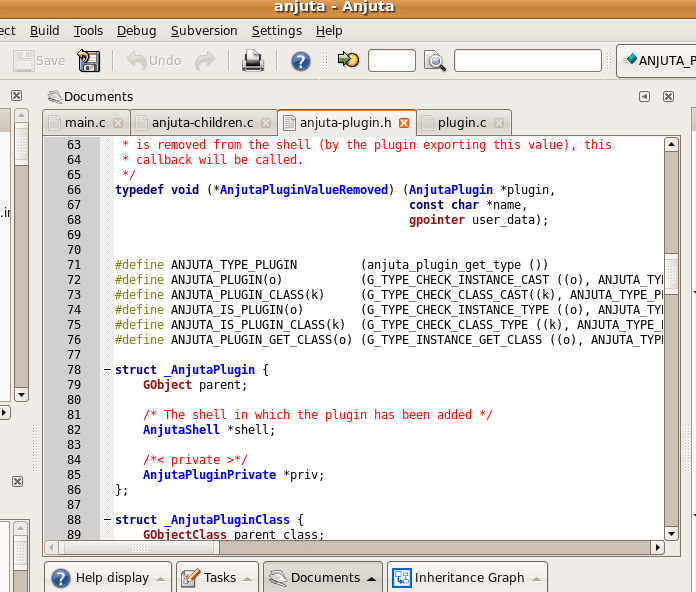
13. Anjuta DevStudio – Discontinued
Anjuta DevStudio is a simple GNOME yet powerful software development studio that supports several programming languages including C/C++.
It offers advanced programming tools such as project management, GUI
designer, interactive debugger, application wizard, source editor,
version control plus so many other facilities. In additionally, to the
above features, Anjuta DevStudio also has some other great IDE features
and these include:
Simple user interface
Extensible with plugins
Integrated Glade for WYSIWYG UI development
Project wizards and templates
Integrated GDB debugger
In-built file manager
Integrated DevHelp for context-sensitive programming help
Source code editor with features such as syntax highlighting, smart
indentation, auto-indentation, code folding/hiding, text zooming plus
many more
Anjuta DevStudio for Linux
14. The GNAT Programming Studio
The GNAT Programming Studio is a free easy-to-use IDE designed and developed to unify the interaction between a developer and his/her code and software.
Built for ideal programming by facilitating source navigation while
highlighting important sections and ideas of a program. It is also
designed to offer a high level of programming comfortability, enabling
users to develop comprehensive systems from the ground.
It is feature-rich with the following features:
Intuitive user interface
Developer friendly
Multi-lingual and multi-platform
Flexible MDI(multiple document interface)
Highly customizable
Fully extensible with preferred tools
GNAT Programming Studio
15. Qt Creator
Qt Creator
is a free, cross-platform IDE designed for the creation of connected
devices, UIs, and applications. Qt creator enables users to do more
creation than actual coding of applications.
It can be used to create mobile and desktop applications, and also connected embedded devices.
Some of its features include:
Sophisticated code editor
Support for version control
Project and build management tools
Multi-screen and multi-platform support for easy switching between build targets plus many more
Qt Creator for Linux
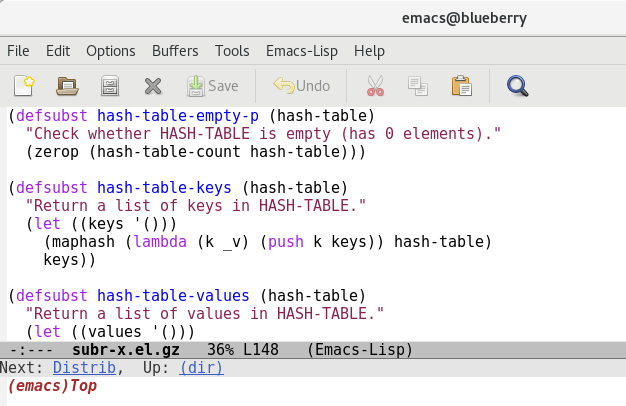
16. Emacs Editor
Emacs
is a free, powerful, highly extensible, and customizable,
cross-platform text editor you can use on Linux, Solaris, FreeBSD,
NetBSD, OpenBSD, Windows, and Mac OS X.
The core of Emacs is also an interpreter for Emacs Lisp
which is a language under the Lisp programming language. As of this
writing, the latest release of GNU Emacs is version 27.2 and the
fundamental and notable features of Emacs include:
Content-aware editing modes
Full Unicode support
Highly customizable using GUI or Emacs Lisp code
A packaging system for downloading and installing extensions
An ecosystem of functionalities beyond normal text editing including
a project planner, mail, calendar, and newsreader plus many more
A complete built-in documentation plus user tutorials and many more
Emacs Editor for Linux
17. SlickEdit
SlickEdit (previously Visual SlickEdit)
is an award-winning commercial cross-platform IDE created to enable
programmers the ability to code on 7 platforms in 40+ languages.
Respected for its feature-rich set of programming tools, SlickEdit
allows users to code faster with complete control over their
environment.
Its features include:
Dynamic differencing using DIFFzilla
Syntax expansion
Code templates
Autocomplete
Custom typing shortcuts with aliases
Functionality extensions using Slick-C macro language
Customizable toolbars, mouse operations, menus, and key bindings
Support for Perl, Python, XML, Ruby, COBOL, Groovy, etc.
SlickEdit – Source Code and Text Editor
18. Lazarus IDE
Lazarus IDE is a free and open-source Pascal-based cross-platform visual Integrated Development Environment created to provide programmers with a Free Pascal Compiler
for rapid application development. It is free for building anything
including e.g. software, games, file browsers, graphics editing
software, etc. irrespective of whether they will be free or commercial.
Feature highlights include:
A graphical form designer
100% freedom because it is open source
Drag & Drop support
Contains 200+ components
Support for several frameworks
A built-in Delphi code converter
A huge welcoming community of professionals, hobbyists, scientists, students, etc.
Lazarus IDE
19. MonoDevelop
MonoDevelop is a cross-platform and open-source IDE developed by Xamarin for building web and cross-platform desktop applications with a primary focus on projects that use Mono and .Net frameworks. It has a clean, modern UI with support for extensions and several languages right out of the box.
MonoDevelop’s feature highlights include:
100% free and open-source
A Gtk GUI designer
Advanced text editing
A configurable workbench
Multi-language support e.g. C#, F#, Vala, Visual Basic .NET, etc.
ASP.NET
Unit testing, localization, packaging, deployment, etc.
An integrated debugger
MonoDevelop IDE for C Programming
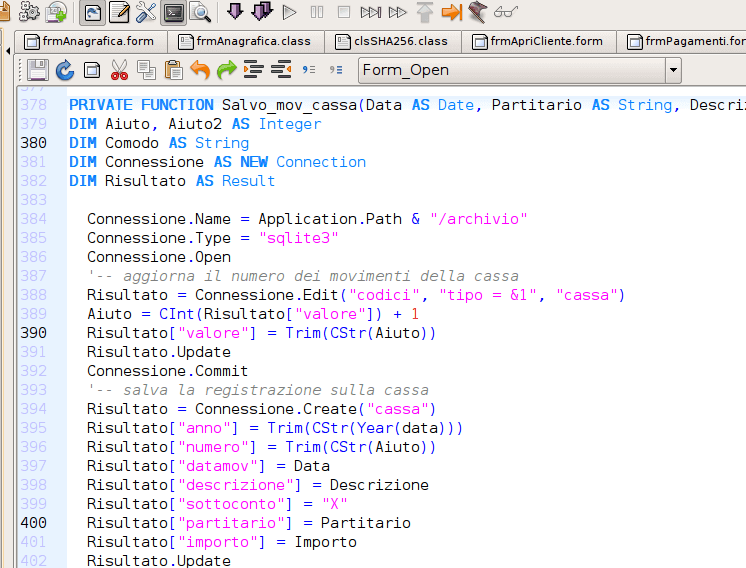
20. Gambas
Gambas
is a powerful free and open-source development environment platform
based on a Basic interpreter with object extensions similar to those in
Visual Basic. To greatly improve its usability and feature set its
developers have several additions in the pipeline such as an enhanced
web component, a graph component, an object persistence system, and
upgrades to its database component.
Among its several current feature highlights are:
A Just-in-Time compiler
Declarable local variables from anywhere in a function’s body
Smooth scrolling animation
Gambas playground
JIT compilation in the background
Support for PowerPC64 and ARM64 architectures
Built-in Git support
Auto-closing of braces, markups, strings, and brackets
A dialog for inserting special characters
Gambas IDE Editor
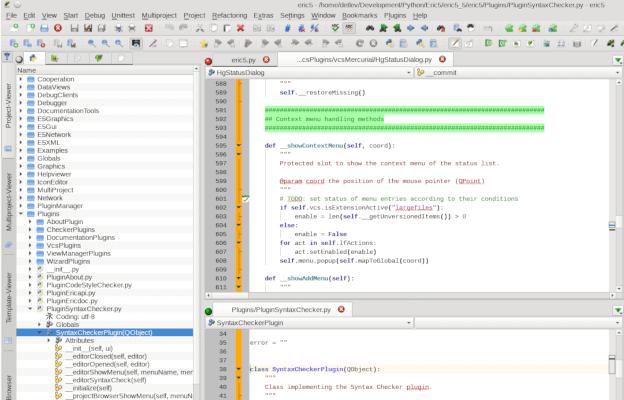
21. The Eric Python IDE
The Eric Python IDE
is a full-featured Python IDE written in Python based on the Qt UI
toolkit to integrate with Scintilla editor control. It is designed for
use by both beginner programmers and professional developers and it
contains a plugin system that enables users to easily extend its
functionality.
Its feature highlights include:
100% free and open-source
2 tutorials for beginners – a Log Parser and Mini Browser application
An integrated web browser
A source documentation interface
A wizard for Python regular expressions
Graphic module diagram import
A built-in icon editor, screenshot tool, difference checker
A plugin repository
Code autocomplete, folding
Configurable syntax highlighting and window layout
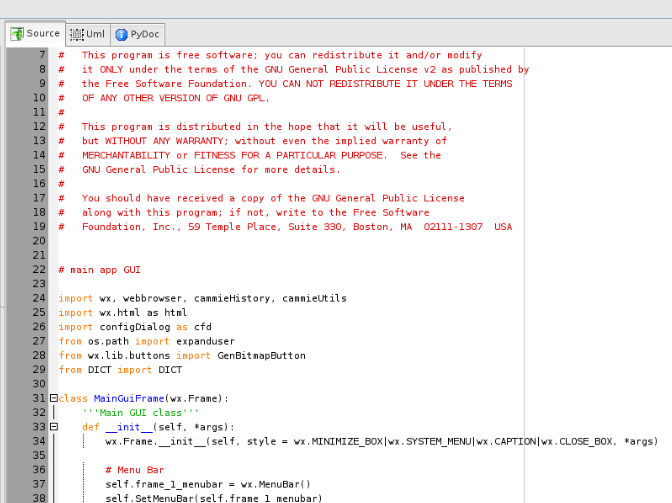
Stani’s Python Editor is a cross-platform IDE for Python programming. It was developed by Stani Michiels
to offer Python developers a free IDE capable of call tips,
auto-indentation, PyCrust shell, source index, blender support, etc. It
uses a simple UI with tabbed layouts and integration support for several
tools.
Stani’s Python Editor’s features include:
Syntax coloring & highlighting
A UML viewer
A PyCrust shell
File browsers
Drag and drop support
Blender support
PyChecker and Kiki
wxGlade right out of the box
Auto indentation & completion
Stanis Python Editor
23. Boa Constructor
Boa Constructor
is a simple free Python IDE and wxPython GUI builder for Linux,
Windows, and Mac Operating Systems. It offers users with Zope support
for object creation and editing, visual frame creation and manipulation,
property creation and editing from the inspector, etc.
Feature highlights include:
An object inspector
A tabbed layout
A wxPython GUI builder
Zope support
An advanced debugger and integrated help
Inheritance hierarchies
Code folding
Python script debugging
Boa Constructor Python IDE
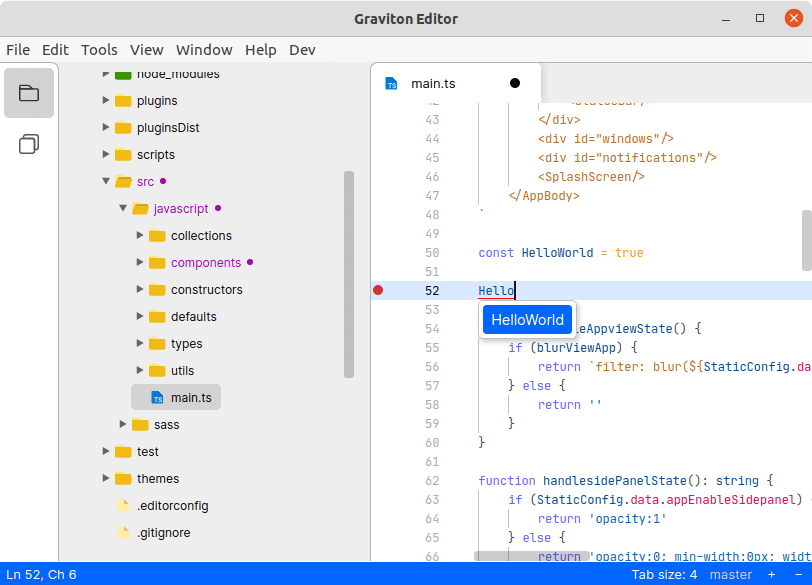
24. Graviton
Graviton
is a free and open-source minimalist source code editor built with a
focus on speed, customizability, and tools that boost productivity for
Windows, Linux, and macOS. It features a customizable UI with colorful
icons, syntax highlighting, auto-indentation, etc.
Graviton’s features include:
100% free and open-source
A minimalist, clutter-free User Interface
Customizability using themes
Plugins
Autocomplete
Zen mode
Full compatibility with CodeMirror themes
Graviton Source Code Editor
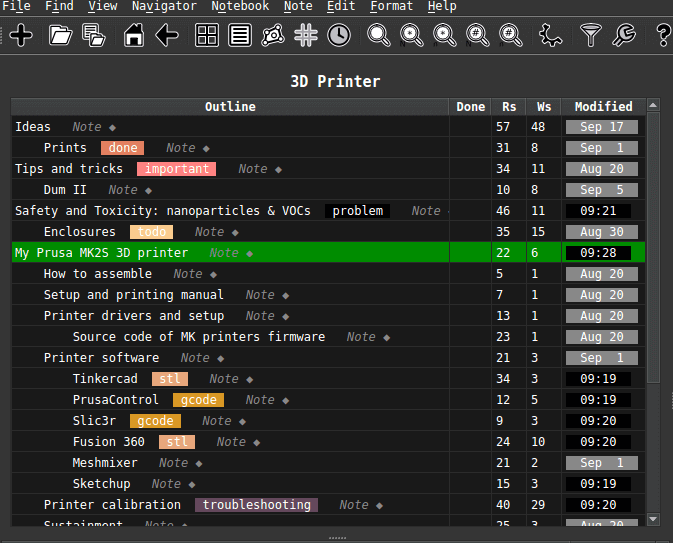
25. MindForger
MindForger
is a robust free and open-source performance-driven Markdown IDE
developed as a smart note-taker, editor, and organizer with respect for
the security and privacy of users. It offers many features for advanced
note-taking, management, and sharing such as tag support, data backup,
metadata editing, Git and SSH support, etc.
Its features include:
Free and open source
Privacy-focused
Supports several encryption tools e.g. ecryptfs
Sample mapper
Automatic linking
HTML preview and zooming
Import/export
Support for tags, metadata editing, and sorting
MindForger Markdown IDE
26. Komodo IDE
Komodo IDE
is the most popular and powerful multi-language integrated development
environment (IDE) for Perl, Python, PHP, Go, Ruby, web development
(HTML, CSS, JavaScript), and more.
Check out some of the following key features of Komodo IDE.
A powerful editor with syntax highlighting, autocomplete, and more.
A visual debugger to debug, inspect, and test your code.
Support for Git, Subversion, Mercurial, and more.
Useful add-ons for customizing and extending features.
Supports Python, PHP, Perl, Go, Ruby, Node.js, JavaScript, and more.
Set your own workflow using easy file and project navigation.
Komodo IDE
27. VI/VIM Editor
Vim an improved version of the VI
editor, is a free, powerful, popular, and highly configurable text
editor. It is built to enable efficient text editing and offers exciting
editor features for Unix/Linux users, therefore, it is also a good
option for writing and editing C/C++ code.
To learn how to use Vim editor in Linux, read our following articles:
Generally, IDEs offer more programming comfort than
traditional text editors, therefore it is always a good idea to use
them. They come with exciting features and offer a comprehensive
development environment, sometimes programmers are caught up in choosing
the best IDE to use for C/C++ programming.
There are many other IDEs you can find out and download from the
Internet, but trying out several of them can help you find that which
suits your needs.