https://www.tecmint.com/basic-mysql-commands
A database is a structured set of data stored electronically. The concept of a database was known to our ancestors even when there were no computers. However, creating and maintaining such databases was a very tedious job. For instance, in a manual database of 100 pages, searching for all employees whose salaries were less than 10,000 would have been quite difficult.
In today’s world, you cannot escape databases. Right now, millions of databases are working around the world to store and fetch data of every kind, whether it be strategic data, employee records, or web technologies.
Databases are often termed as backend processes because they are neither visible to end users nor do end users interact directly with the database. Instead, they work on frontend processes like PHP, VB, ASP.NET, etc., and ask the frontend to deal with the database in the backend.
There are several database servers and clients available, such as Oracle, MySQL, MySQLi, MariaDB, and MongoDB. The syntax for all of these is more or less the same. Mastering one means gaining control over most of them, and learning the queries of a database is both easy and enjoyable.
Let’s start with simple queries on databases. We will use MySQL, which comes bundled with most Linux distributions by default. You can install it manually from the repository if it is not installed by default in your case.
A database query is a simple piece of code sent to the database to obtain custom and refined results as required.
Install MySQL Database in Linux
Use the “yum” or “apt” package manager to install the MySQL database.
sudo yum install mysql mysql-client mysql-server  (on Yum-based systems)
sudo apt install mysql mysql-client mysql-server  (on Apt-based systems)
Once installed, start the MySQL database service with:
sudo systemctl start mysqld
Or
sudo systemctl start mysql
Installing a fresh copy of the MySQL database will take you to a configuration step where you will be asked to set up an root password and answer questions regarding security settings.
sudo mysql_secure_installation
Once you finish installing and securing the server, go to your MySQL prompt.
sudo mysql -u root -p
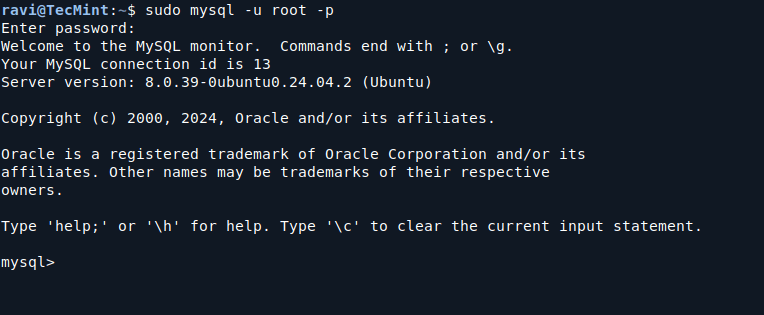
Now, executing queries at this prompt is both educational and enjoyable.
Create a MySQL Database
Create a database named “tecmint“.
create database tecmint;
Note: The message indicates that the query was successful, meaning the database is created.
You can verify your newly created database by running:
show databases;
Notice your database in the output below.

Create Tables in MySQL Database
Now you need to select the database to work on:
use tecmint;
Here we will create a table called “minttec” with three fields:
CREATE TABLE minttec (
    id INT(3),
    first_name VARCHAR(15),
    email VARCHAR(20)
);
Note: The above query returns “OK“, indicating that the table was created without any errors.
To verify the table, run the following query:
show tables;
You can view the columns you created in the “minttec” table as follows:
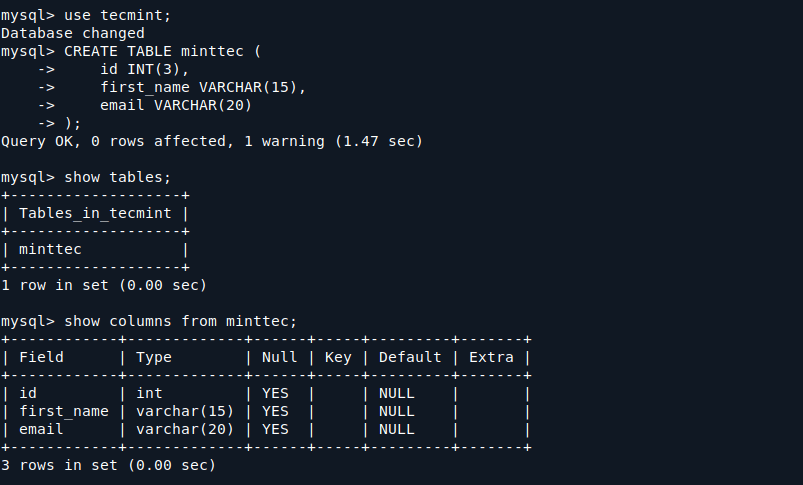
Anyway, let me explain the types of declarations and their meanings.
INTis an Integer.VARCHARis a character type with a variable length as defined. The value after the type indicates the maximum length of the field in which it can store data.
Add Columns in MySQL Database
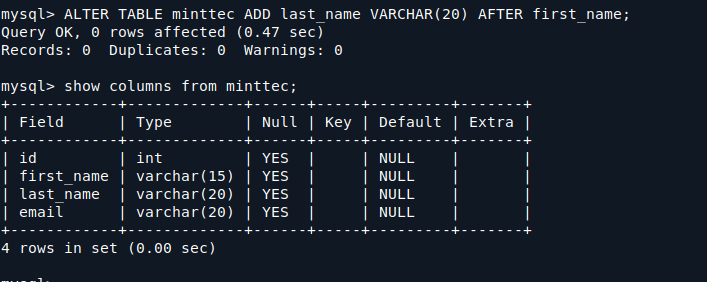
Now, we need to add a column named ‘last_name‘ after the column ‘first_name‘:
ALTER TABLE minttec ADD last_name VARCHAR(20) AFTER first_name;
Verify the change in your table:
show columns from minttec;
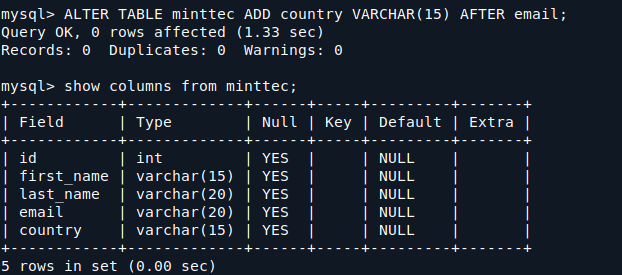
Now we will add a column named ‘country‘ to the right of the email field:
ALTER TABLE minttec ADD country VARCHAR(15) AFTER email;
Verify the column addition:
show columns from minttec;
Insert Values into Fields of MySQL Database
Now let’s insert values into the fields:
INSERT INTO minttec VALUES ('1', 'Ravi', 'Saive', 'raivsaive@xyz.com', 'India');
Now let’s insert multiple values at once into the table.
INSERT INTO minttec (id, first_name, last_name, email, country) VALUES
  ('2', 'Narad', 'Shrestha', 'narad@xyz.com', 'India'),
  ('3', 'user', 'singh', 'user@xyz.com', 'Aus'),
  ('4', 'tecmint', 'com', 'tecmint@gmail.com', 'India');
Verify the inserted values:
select * from minttec;
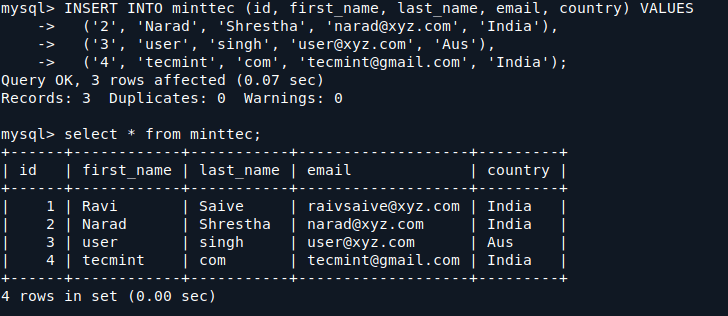
The values have been inserted successfully.
Update Values in MySQL Table
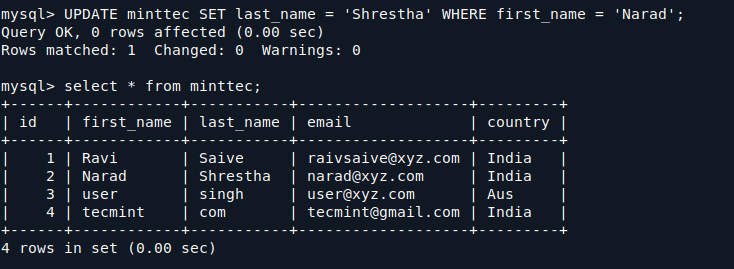
Now, how about changing the last name of the user whose first name is “Narad“?
UPDATE minttec SET last_name = 'Shrestha' WHERE first_name = 'Narad';
Check to verify the changes.
select * from minttec;
Delete Values from MySQL Table
What about deleting a row from the table? For example, let’s delete the last entry of the user whose first name is “tecmint“.
DELETE FROM minttec WHERE first_name = 'tecmint';
Now, check the entries after the deletion.
select * from minttec;
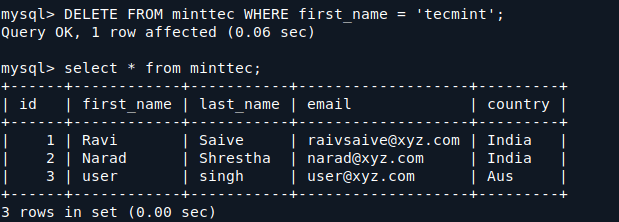
Now, as you can see, the user “tecmint” has been deleted successfully.
Rename Table in MySQL
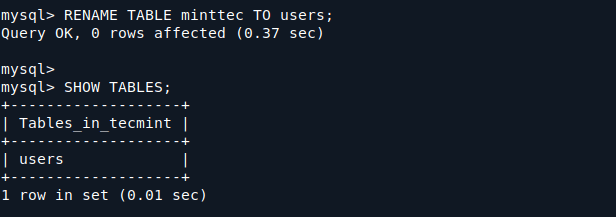
To rename a table in MySQL, you can use the RENAME TABLE statement. Let’s say you want to rename the table minttec to users. You would run the following command.
RENAME TABLE minttec TO users;
After renaming the table, you can verify the change by listing the tables in your current database:
SHOW TABLES;
Backup a Database
To back up a MySQL database, you can use the mysqldump command, which creates a logical backup by generating a SQL script file containing all the commands to recreate the database.
mysqldump -u root -p tecmint > tecmint_backup.sql
You can verify that the backup file was created by listing the files in your current directory:
ls -l tecmint_backup.sql
Restore a Database
To restore a MySQL database from a backup file, you can use the mysql command.
mysql -u root -p tecmint < tecmint_backup.sql
Make sure the database you are trying to restore to already exists. If it doesn’t, you can create it using:
mysql -u root -p -e "CREATE DATABASE tecmint;"
Conclusion
You have now learned the basics of creating and manipulating a MySQL database, including creating a database, creating tables, inserting records, updating records, deleting records, and dropping tables. This foundation is essential for working with databases effectively.

No comments:
Post a Comment