11 Useful X-window (GUI Based) Linux Commands – Part I
We, the Tecmint Team, are dedicated to creating
high-quality articles about Linux and open-source topics. Since we
started, we’ve put in a lot of effort to provide our readers with useful
and interesting information. We’ve also created many shell programs,
from fun commands to helpful tools.
In this article, we will provide a few X-based commands that are generally available in most standard distributions today. If you find that any of the X-based commands listed below are not installed on your system, you can always use apt or yum to install the required packages.
1. xeyes Command
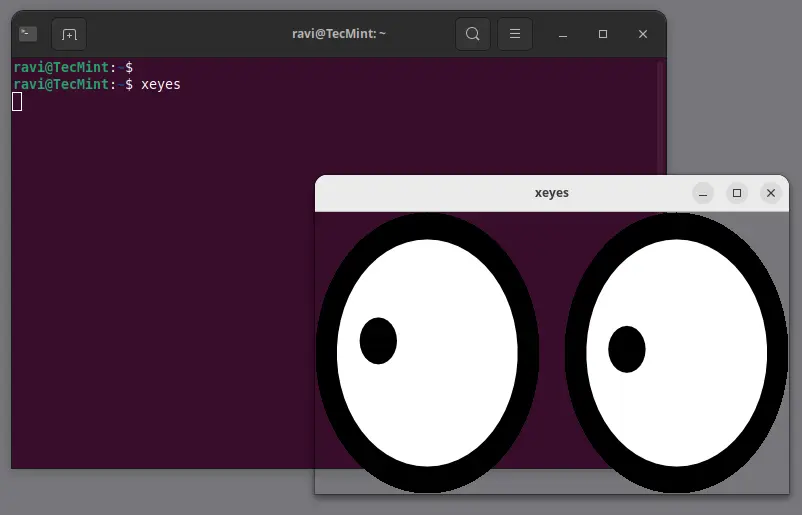
The xeyes command displays a graphical pair of eyes that
follow your mouse movements. While it may seem more amusing than
useful, its novelty makes it enjoyable to use.
Simply run xeyes in the terminal and watch the eyes track your mouse pointer.
xeyes
Xeyes – Show a Graphical Pair of Eyes
2. xfd Command
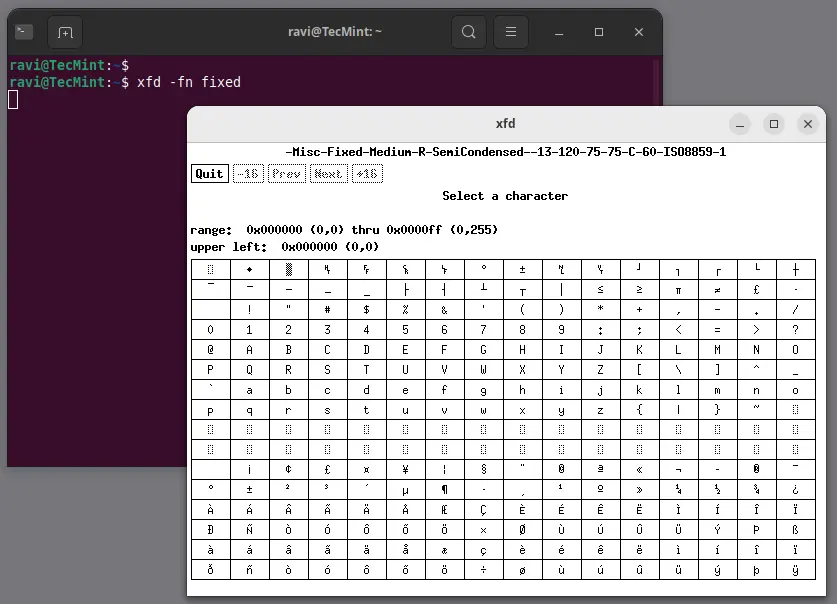
The xfd command displays all the characters in a specified X font. It creates a window showing the name of the font being displayed.
xfd -fn fixed
Using xfd to Display Fonts
3. xload Command
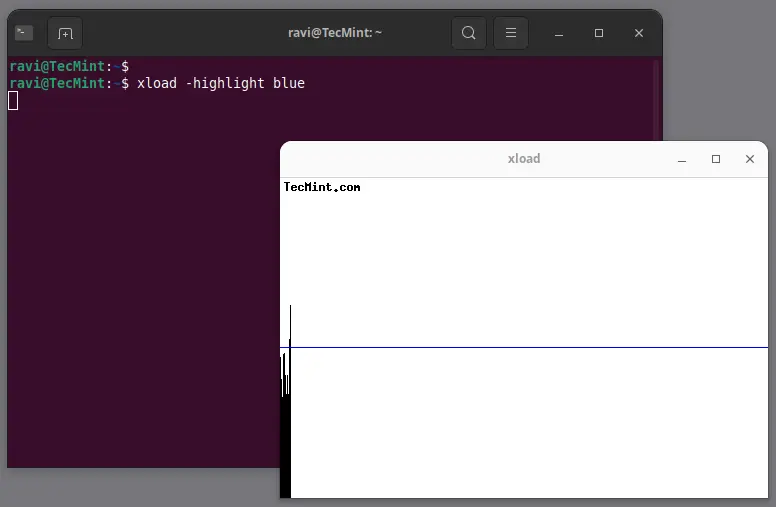
The xload command outputs a graphical representation of the system load average for the X server, which is an excellent tool for monitoring real-time average system load.
xload -highlight blue
xload – Visualize System Load on Linux
4. xman Command
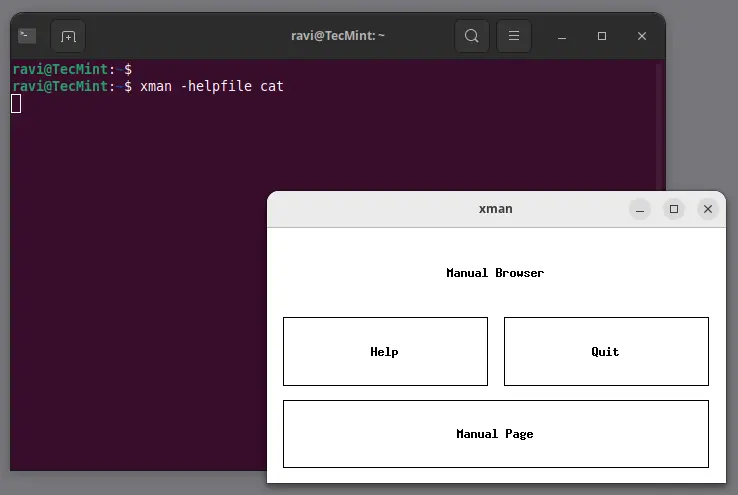
Most users are familiar with the man command for accessing manual pages. However, many may not know that there is an X version called xman, which provides a graphical interface for man pages.
xman -helpfile cat
Xman: A Graphical Interface for Man Pages
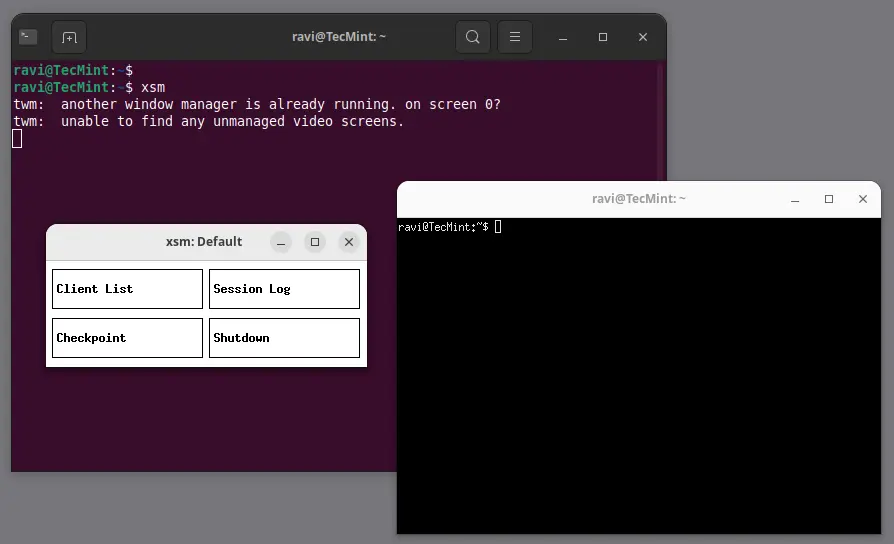
5. xsm Command
The xsm command stands for “X Session Manager“, which acts as a session manager, grouping applications that refer to a particular state.
xsm
xsm – Managing X Sessions
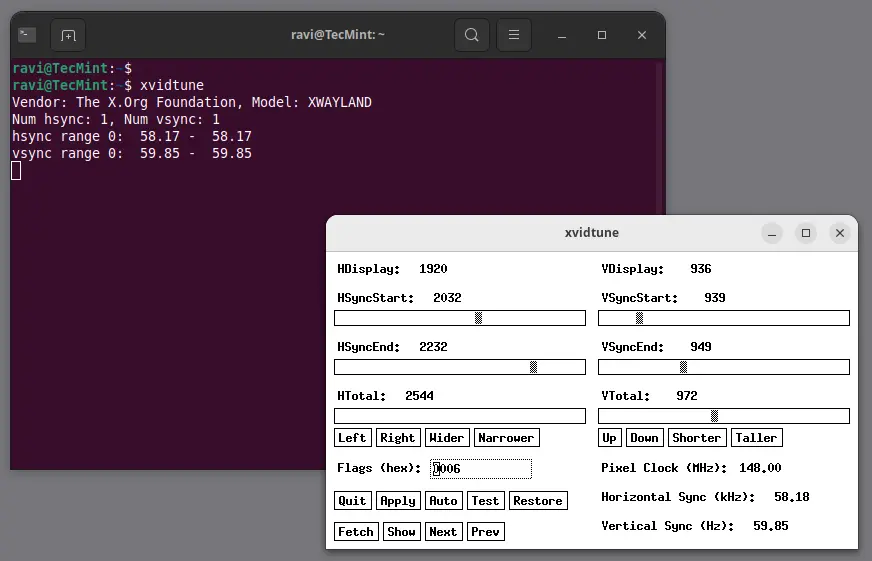
6. xvidtune Command
The xvidtune command is a video mode tuner for Xorg, which provides a client interface to the X server’s video mode extension.
xvidtune
xvidtune: A Video Mode Tuner for Xorg
Note: Incorrect use of this program can cause
permanent damage to your monitor and/or video card. If you don’t know
what you are doing, avoid making changes and exit immediately.
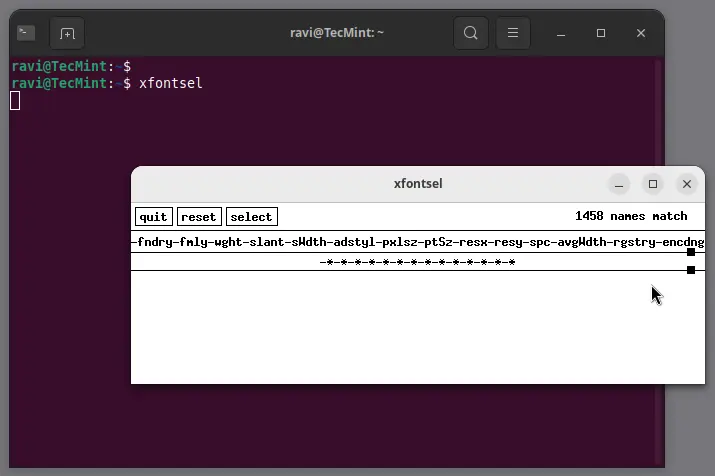
7. xfontsel Command
The xfontsel application provides a simple way to display the fonts known to your X server.
xfontsel
xfontsel to List Fonts on Your X Server
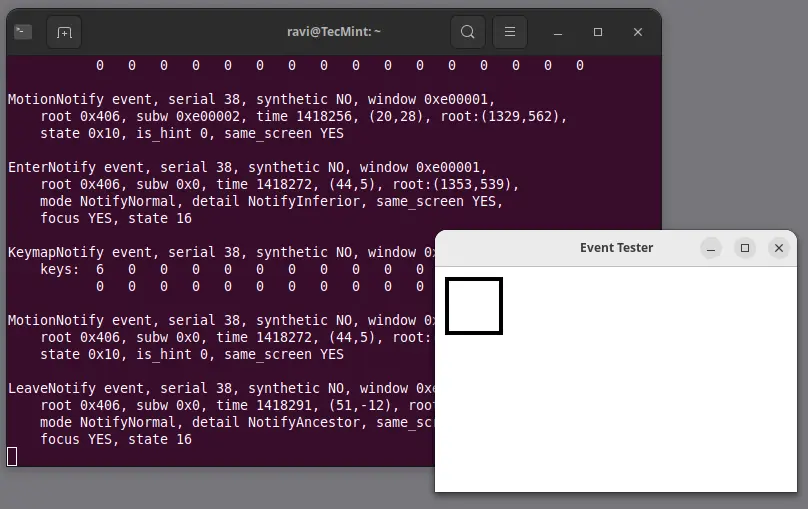
8. xev Command
The xev command stands for “X events“, which prints the content of X events, helping users understand input events generated by the X server.
xev
xev – Analyze X Events
9. xkill Command
The xkill command
allows you to kill a client application by clicking on its window,
which can be particularly useful for terminating unresponsive
applications quickly.
xkill
10. xset Command
The xset command is used to set various user preferences
for the X server, that can be used to control keyboard and mouse
settings, including screen saver options.
xset q
11. xrandr Command
The xrandr command is a command-line interface to the
X11 Resize and Rotate extension, which can be used to set the size,
orientation, and reflection of the outputs for a screen.
xrandr
Conclusion
That’s all for now! We plan to post at least one more article (Useful X-based Commands) in this series, and we are actively working on it. Until then, stay tuned and connected to Tecmint.
Don’t forget to share your valuable feedback in our comment section.
Introduction To ELF In Linux: A Simple Guide To Executable Files
If you've ever wondered how programs run on Linux, you might be surprised to learn that a special file format called ELF, or Executable and Linkable Format, is at the heart of it all.
ELF
files are essential for various types of files you encounter on your
system, including executable files that launch programs, object files
used during the programming process, shared libraries that allow
multiple programs to use the same code, and core dumps that help
diagnose crashes.
In this article, we'll break down what ELF is, how it works, and why it's so important for Linux users and developers.
We'll
also look at the different kinds of ELF files, explain the structure of
an ELF file in simple terms, and discuss why understanding ELF can help
you better navigate and manage your Linux system.
Whether you're a beginner or just curious about the technical side of Linux, this guide will help you grasp the basics of ELF and its role in making your computer run smoothly.
Table of Contents
What is ELF in Linux
In Linux, ELF stands for Executable and Linkable Format.
It is a standard file format for executables, object code, shared
libraries, and core dumps. Linux, along with other UNIX-like systems,
uses ELF as the main format for binary files.
Executable and Linkable Format (ELF) in Linux
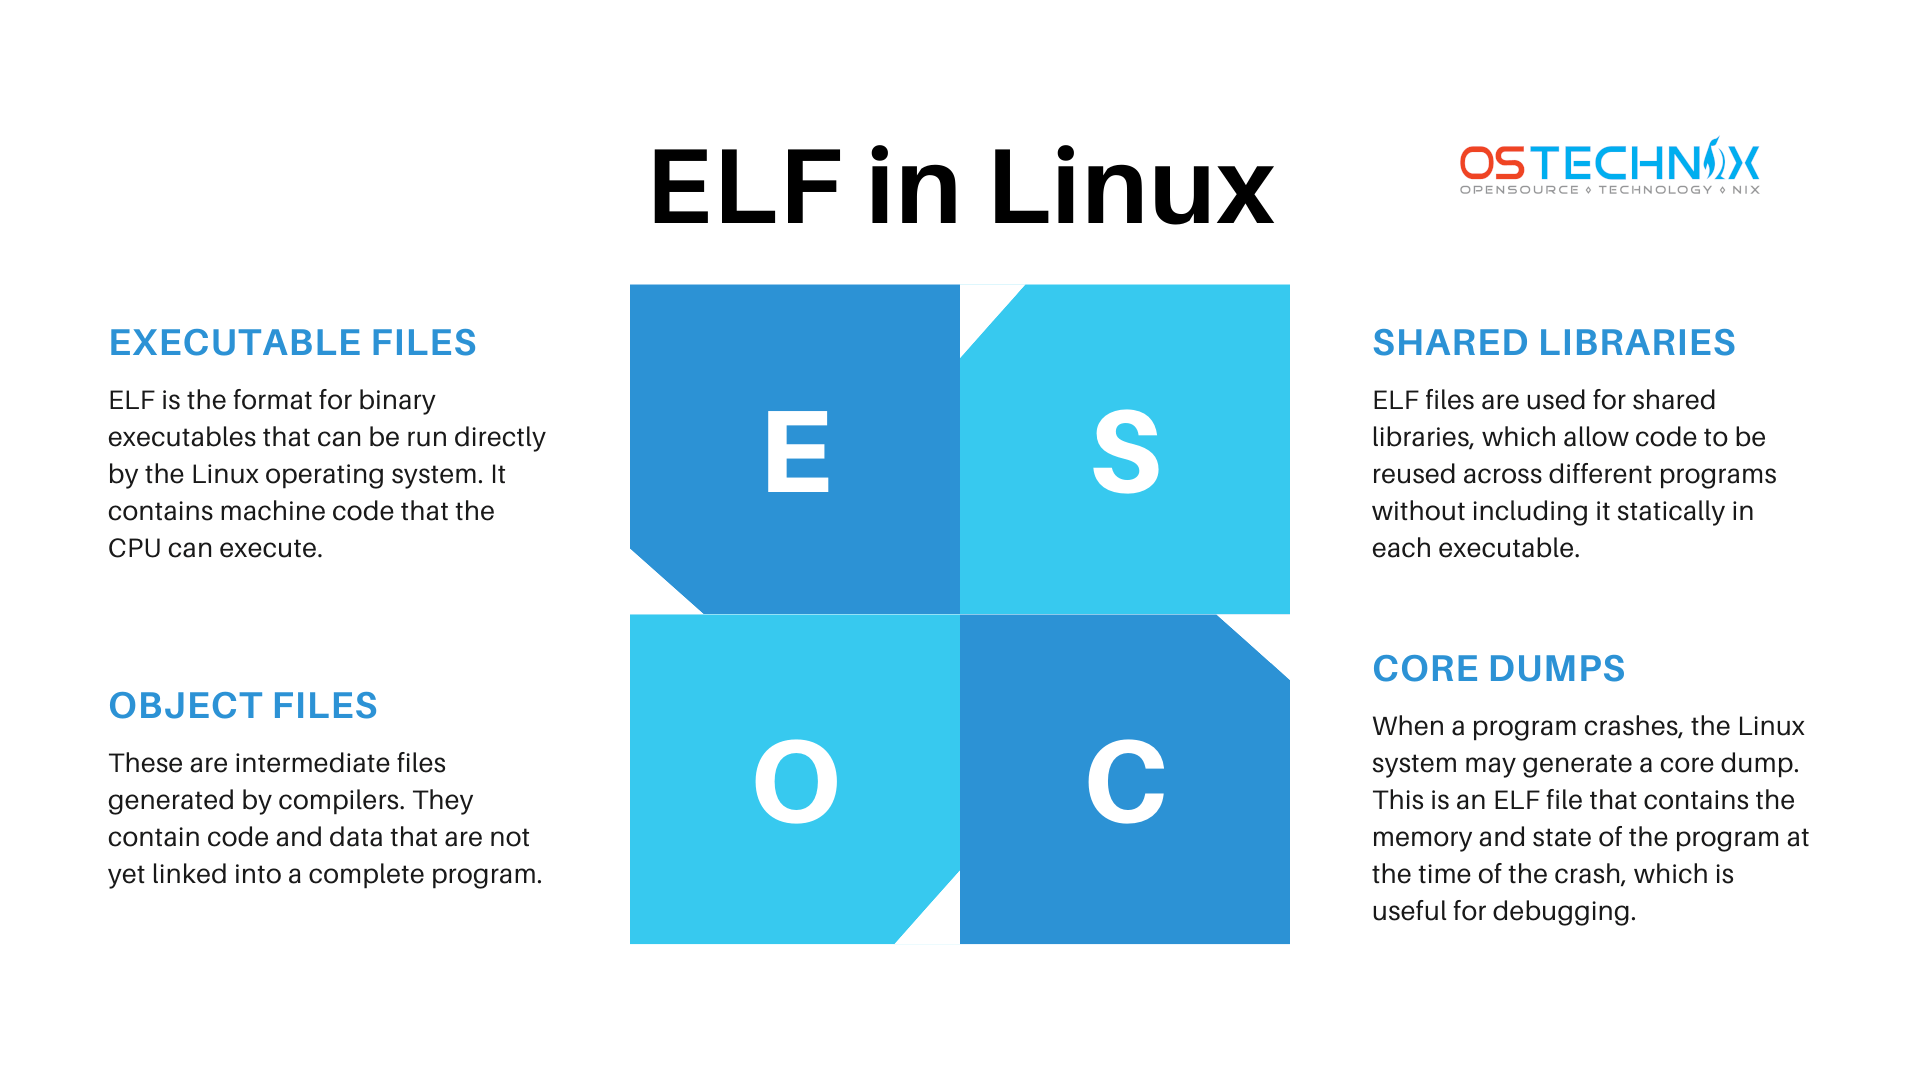
Here’s a breakdown of what ELF is used for and how it works:
1. Executable Files
ELF
is the format for binary executables that can be run directly by the
Linux operating system. It contains machine code that the CPU can
execute.
2. Object Files
These are intermediate files generated by compilers (like gcc).
They contain code and data that are not yet linked into a complete
program. ELF serves as the format for these files, allowing linking
tools like ld to create the final executable.
3. Shared Libraries
ELF files are used for shared libraries (.so files), which allow code to be reused across different programs without including it statically in each executable.
4. Core Dumps
When
a program crashes, the Linux system may generate a core dump. This is
an ELF file that contains the memory and state of the program at the
time of the crash, which is useful for debugging.
Structure of an ELF File
An ELF file is divided into different sections, each with specific roles:
Header: Contains information about how to interpret the rest of the file.
Program Header: Describes segments that need to be loaded into memory.
Section Header: Provides details about individual sections like text (code), data, and symbol tables.
Text Segment: Contains the actual executable code.
Data Segment: Contains global variables and dynamic data used by the program.
The
use of ELF simplifies program development and execution because it
provides a unified format for both executables and libraries.
It also supports dynamic linking, which allows programs to use shared libraries at runtime, reducing memory usage and enabling easier updates.
You
now know what ELF is, and you may be wondering how to view the details
of ELF files. Believe me, it's easier than you might think.
Display Information about ELF Files
You can use several commands and tools in Linux to display information about ELF files. Some of the most common ones are file, readelf, and objdump.
1. Using the file Command
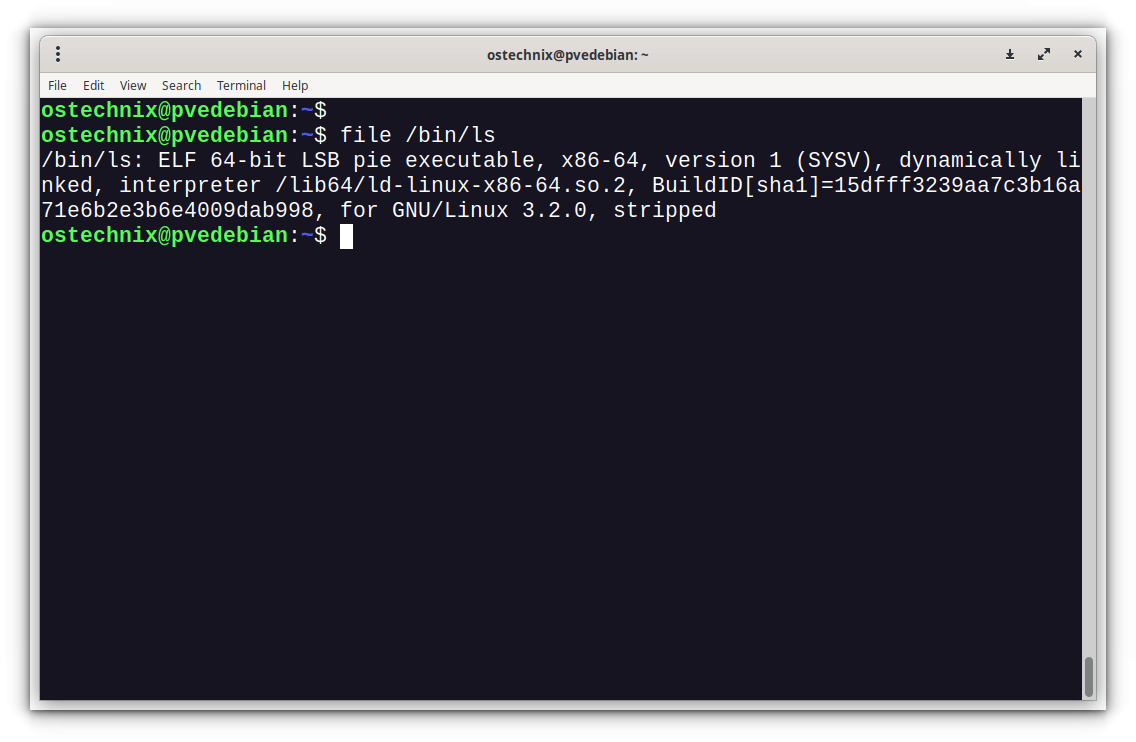
The file command quickly identifies the type of a file, including whether it’s an ELF file, and provides basic information about it.
file <filename>
Example:
file /bin/ls
Sample Output:
/bin/ls: ELF 64-bit LSB pie executable, x86-64, version 1 (SYSV), dynamically linked, interpreter /lib64/ld-linux-x86-64.so.2, BuildID[sha1]=15dfff3239aa7c3b16a71e6b2e3b6e4009dab998, for GNU/Linux 3.2.0, stripped
Display Information about ELF Files
2. Using the readelf Command
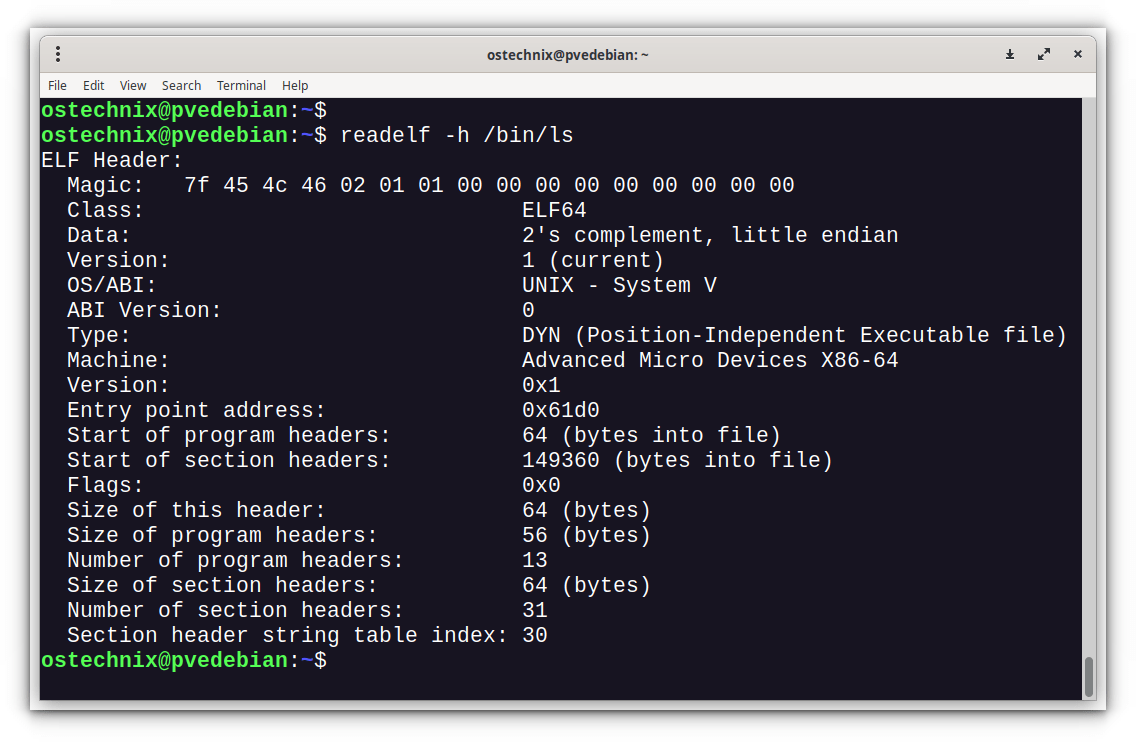
readelf
is a more detailed tool specifically designed for examining the
contents of ELF files. You can use it to display headers, section
details, and more.
Basic usage:
readelf -h <filename> # Displays ELF header information
Example:
readelf -h /bin/ls
Viewing Details of ELF File using readelf command
You can also use different flags to get more detailed information:
-S: Lists the sections in the ELF file.
-l: Displays the program headers (used by the loader).
-r: Shows the relocation entries.
-s: Displays the symbol table (if present).
Example:
readelf -S /bin/ls # Lists all sections
3. Using the objdump Command
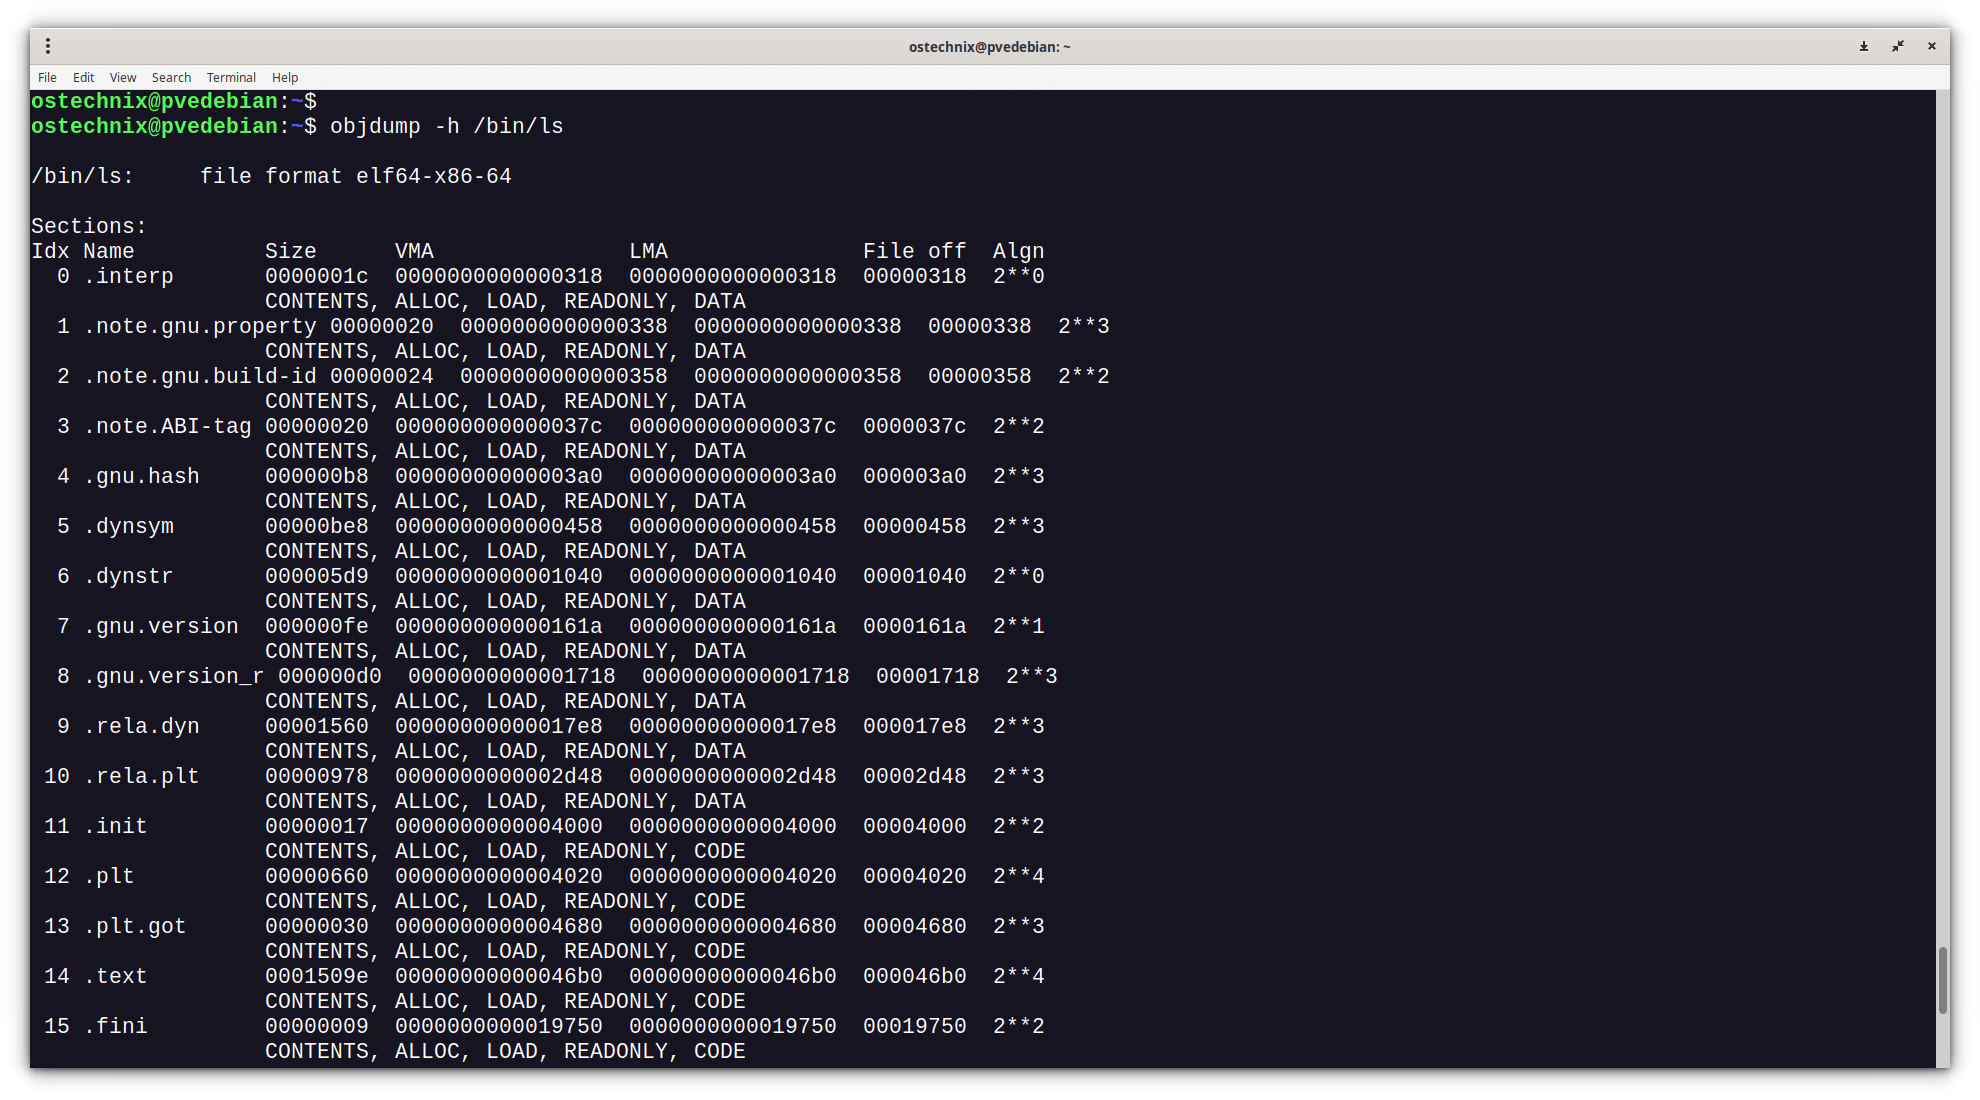
objdump
is a more comprehensive tool that can disassemble ELF binaries and
display information about them. It shows sections, disassembled code,
and more.
Basic usage:
objdump -h <filename> # Displays the section headers
Example:
objdump -h /bin/ls
Find Information about ELF File using objdump Command
Other useful flags:
-d: Disassembles the file and shows machine code.
-x: Displays all headers, including the ELF and section headers.
-s: Displays the contents of all sections (in hexadecimal).
Example:
objdump -d /bin/ls # Disassemble and view the assembly code
Summary of Tools:
file: Quick summary of the file type and basic ELF details.
readelf: Detailed ELF file structure and headers.
objdump: Disassembling and more in-depth inspection of sections and headers.
These tools are typically pre-installed on most Linux distributions. If you need specific information, readelf and objdump will be your most detailed options.
Analyze ELF Binaries with Binsider
Apart from the pre-installed tools, there is a new TUI tool called Binsider to view and analyze BLF binaries in Linux. Binsider offers a comprehensive suite of features, including static and dynamic analysis, allowing users to examine the structure and behaviour of binaries.
Binsider provides
a user-friendly terminal interface, enabling users to inspect strings,
linked libraries, perform hexdumps, and modify binary data. The tool
aims to empower users with the ability to understand the inner workings
of ELF binaries and identify potentially interesting data. For more
details, refer the following guide:
For the average Linux user, knowing how to examine ELF files using tools like file, readelf, or objdump
may not seem essential at first. But, there are practical situations
where this knowledge becomes useful. Here's how it can help in everyday
tasks:
1. Identifying File Types and Troubleshooting
Purpose:
Sometimes, a file might have no extension, or its extension could be misleading. Using the file command to determine whether it's an ELF binary, script, or data file can clarify what kind of file you are dealing with.
Example:
If you downloaded a file and are unsure whether it’s a valid executable or corrupted, file will quickly tell you whether it’s a valid ELF file.
file myfile
If
the file is not an ELF executable, the command can guide you in
troubleshooting further (e.g., figuring out if it's a text file or needs
different handling).
2. Verifying System Executables
Purpose:
Using readelf or file
allows you to inspect system binaries and libraries to verify they are
in the expected format. For instance, after a system upgrade or during
troubleshooting, you can ensure that your important binaries (e.g., /bin/bash, /bin/ls) are intact and correctly formatted as ELF files.
Example:
If a system utility is acting strangely, checking if the file is valid and has not been corrupted or replaced can help:
file /bin/bash
3. Understanding Program Dependencies
Purpose:
The readelf -l or objdump
command helps identify the shared libraries an executable depends on.
If a program fails to run due to missing libraries, this information is
useful for troubleshooting missing dependencies.
Example:
If a program complains about missing libraries, running:
readelf -d /usr/bin/ls | grep NEEDED
Will show which libraries are required, helping you install any missing ones.
Checking whether a binary is dynamically or statically linked, or
whether it has unusual headers, can be useful for advanced users
concerned about security.
Example:
If you suspect that a binary has been tampered with or could contain malicious code, inspecting its ELF structure using readelf could give insight into whether it behaves unexpectedly, such as having uncommon sections or unknown dependencies.
5. Debugging and Development
Purpose:
For
users doing any kind of development, including scripting or compiling,
knowing the ELF structure is useful for debugging. Tools like readelf help ensure that your compiled code links properly, uses the correct libraries, and behaves as expected.
Example:
When compiling your own software, you can inspect object files (.o) or the final binary:
readelf -h myprogram
6. Diagnosing Crashes or Core Dumps
Purpose:
If
a program crashes and creates a core dump (an ELF file), you can
inspect the core dump to analyze the state of the program at the time of
the crash, making it easier to identify the cause of the failure.
Example:
If you want to analyze a core dump, running:
readelf -h <core>
provides a starting point for understanding the crash.
7. Performance Optimization
Purpose:
Advanced
users looking to optimize their systems can analyze binaries to see if
they’re dynamically linked or statically linked, how many sections are
loaded into memory, and other performance-related characteristics.
Example:
Using objdump to inspect the machine code or linked sections of a program can help users or developers identify inefficient code.
For
an average Linux user, these commands may not be used daily, but they
become handy when troubleshooting system issues, verifying file
integrity, understanding program dependencies, or debugging software.
Conclusion
The
Executable and Linkable Format (ELF) is an important part of how Linux
works. It helps your computer run programs smoothly by organizing
different types of files, like executable files, object files, shared
libraries, and core dumps. Understanding ELF can make it easier for you
to troubleshoot issues and optimize your system.
A database is a structured set of data stored electronically. The
concept of a database was known to our ancestors even when there were no
computers. However, creating and maintaining such databases was a very
tedious job. For instance, in a manual database of 100 pages, searching
for all employees whose salaries were less than 10,000 would have been
quite difficult.
In today’s world, you cannot escape databases. Right now, millions of
databases are working around the world to store and fetch data of every
kind, whether it be strategic data, employee records, or web
technologies.
Databases are often termed as backend processes because they are
neither visible to end users nor do end users interact directly with the
database. Instead, they work on frontend processes like PHP, VB,
ASP.NET, etc., and ask the frontend to deal with the database in the
backend.
There are several database servers and clients available, such as
Oracle, MySQL, MySQLi, MariaDB, and MongoDB. The syntax for all of these
is more or less the same. Mastering one means gaining control over most
of them, and learning the queries of a database is both easy and
enjoyable.
Let’s start with simple queries on databases. We will use MySQL, which comes bundled with most Linux distributions by default. You can install it manually from the repository if it is not installed by default in your case.
A database query is a simple piece of code sent to the database to obtain custom and refined results as required.
Install MySQL Database in Linux
Use the “yum” or “apt” package manager to install the MySQL database.
sudo yum install mysql mysql-client mysql-server  (on Yum-based systems)
sudo apt install mysql mysql-client mysql-server  (on Apt-based systems)
Once installed, start the MySQL database service with:
sudo systemctl start mysqld
Or
sudo systemctl start mysql
Installing a fresh copy of the MySQL database will
take you to a configuration step where you will be asked to set up an
root password and answer questions regarding security settings.
sudo mysql_secure_installation
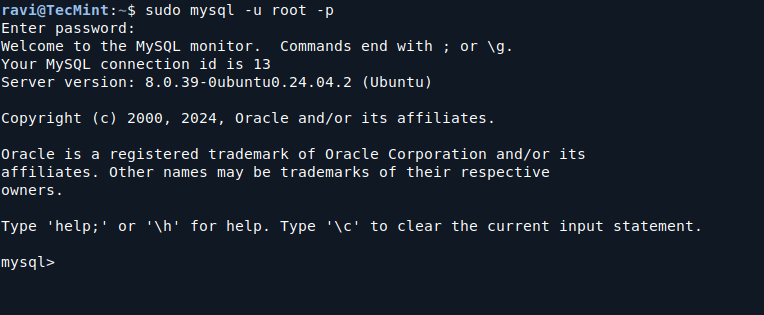
Once you finish installing and securing the server, go to your MySQL prompt.
sudo mysql -u root -p
MySQL Shell Prompt
Now, executing queries at this prompt is both educational and enjoyable.
Create a MySQL Database
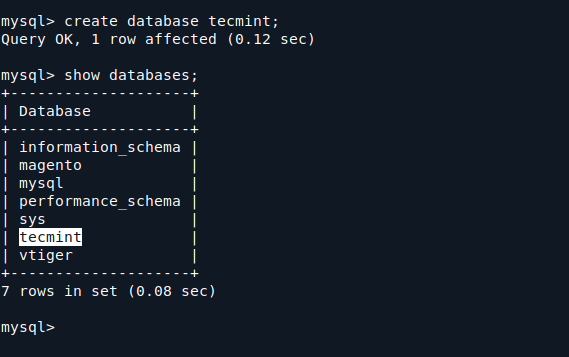
Create a database named “tecmint“.
create database tecmint;
Note: The message indicates that the query was successful, meaning the database is created.
You can verify your newly created database by running:
show databases;
Notice your database in the output below.
Create a MySQL Database
Create Tables in MySQL Database
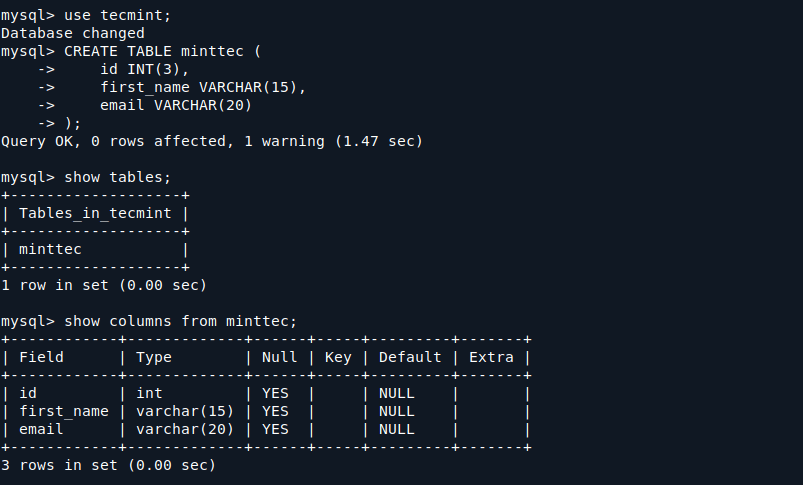
Now you need to select the database to work on:
use tecmint;
Here we will create a table called “minttec” with three fields:
Note: The above query returns “OK“, indicating that the table was created without any errors.
To verify the table, run the following query:
show tables;
You can view the columns you created in the “minttec” table as follows:
Create Tables in MySQL Database
Anyway, let me explain the types of declarations and their meanings.
INT is an Integer.
VARCHAR is a character type with a variable length as
defined. The value after the type indicates the maximum length of the
field in which it can store data.
Add Columns in MySQL Database
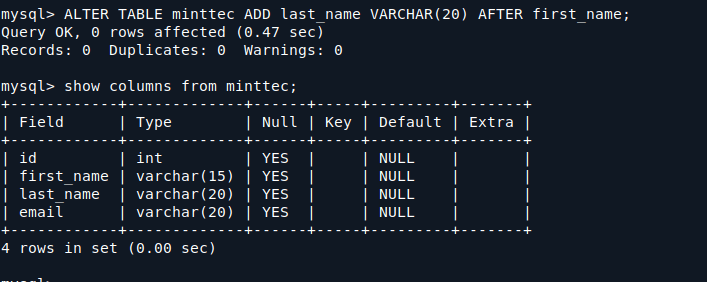
Now, we need to add a column named ‘last_name‘ after the column ‘first_name‘:
ALTER TABLE minttec ADD last_name VARCHAR(20) AFTER first_name;
Verify the change in your table:
show columns from minttec;
Add Column in MySQL Database
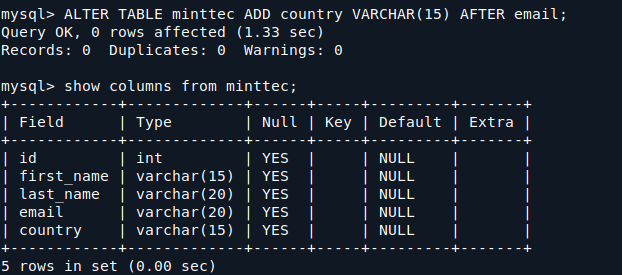
Now we will add a column named ‘country‘ to the right of the email field:
ALTER TABLE minttec ADD country VARCHAR(15) AFTER email;
Verify the column addition:
show columns from minttec;
Verify Column in MySQL Database
Insert Values into Fields of MySQL Database
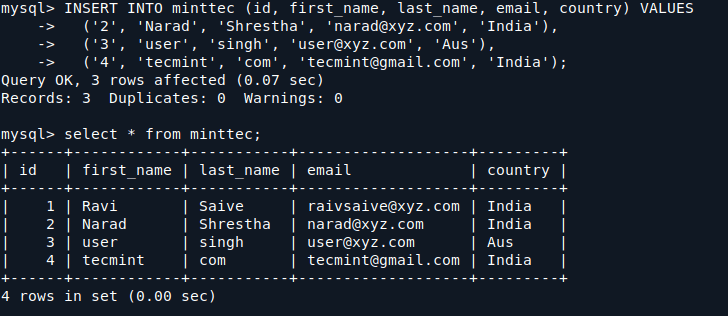
Now let’s insert values into the fields:
INSERT INTO minttec VALUES ('1', 'Ravi', 'Saive', 'raivsaive@xyz.com', 'India');
Now let’s insert multiple values at once into the table.
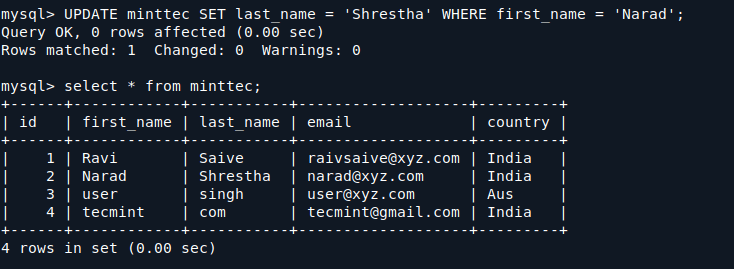
Now, how about changing the last name of the user whose first name is “Narad“?
UPDATE minttec SET last_name = 'Shrestha' WHERE first_name = 'Narad';
Check to verify the changes.
select * from minttec;
Update Values in Table
Delete Values from MySQL Table
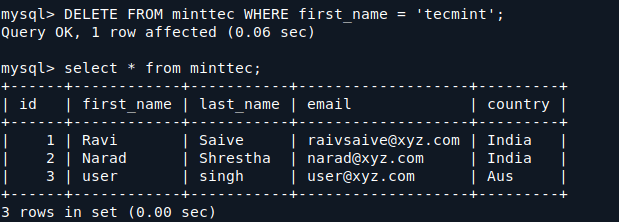
What about deleting a row from the table? For example, let’s delete the last entry of the user whose first name is “tecmint“.
DELETE FROM minttec WHERE first_name = 'tecmint';
Now, check the entries after the deletion.
select * from minttec;
Delete Values in Table
Now, as you can see, the user “tecmint” has been deleted successfully.
Rename Table in MySQL
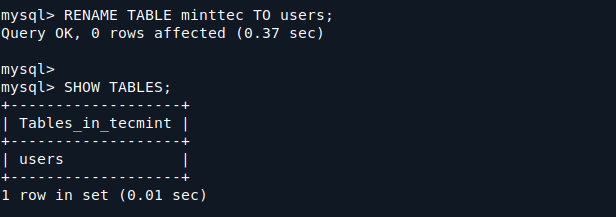
To rename a table in MySQL, you can use the RENAME TABLE statement. Let’s say you want to rename the table minttec to users. You would run the following command.
RENAME TABLE minttec TO users;
After renaming the table, you can verify the change by listing the tables in your current database:
SHOW TABLES;
Rename Table in Database
Backup a Database
To back up a MySQL database, you can use the mysqldump command, which creates a logical backup by generating a SQL script file containing all the commands to recreate the database.
mysqldump -u root -p tecmint > tecmint_backup.sql
You can verify that the backup file was created by listing the files in your current directory:
ls -l tecmint_backup.sql
Restore a Database
To restore a MySQL database from a backup file, you can use the mysql command.
mysql -u root -p tecmint < tecmint_backup.sql
Make sure the database you are trying to restore to already exists. If it doesn’t, you can create it using:
mysql -u root -p -e "CREATE DATABASE tecmint;"
Conclusion
You have now learned the basics of creating and manipulating a MySQL
database, including creating a database, creating tables, inserting
records, updating records, deleting records, and dropping tables. This
foundation is essential for working with databases effectively.