https://www.linuxtechi.com/install-tripleo-undercloud-centos-7

Undercloud is a single node OpenStack installation deployed either in a Virtual machine or in bare metal server. The objective of undercloud is to install, test, manage and update its overcloud servers (Controller, Compute & Storage nodes). In Red Hat terminology undercloud is known as “Director“. Undercloud basically contains all the images that is required to deployed Overcloud Controller, Computes, Swift and Storage.
Overcloud is the actual functional cloud for any organization where all the Virtual Machines are created on compute nodes and handle all the workloads. In other words we can say overcloud provides the openstack services like Nova, Keystone , Horizon, Neutron, cinder, Glance, Heat & Ceilometer Services.
In this article we will demonstrate how to install TripleO undercloud or Director on CentOS 7 VM.
Following are the minimum system requirements for undercloud:
Let’s jump into the CentOS 7 VM and follow the below Steps:

Verify the OpenStack Service list
Read More on: How to deploy TripleO Overcloud (Controller , Compute) on CentOS 7 VMs
In case this article helps you to understand how to install undercloud on CentOS 7 VM, please do share your feedback and comments.

Undercloud is a single node OpenStack installation deployed either in a Virtual machine or in bare metal server. The objective of undercloud is to install, test, manage and update its overcloud servers (Controller, Compute & Storage nodes). In Red Hat terminology undercloud is known as “Director“. Undercloud basically contains all the images that is required to deployed Overcloud Controller, Computes, Swift and Storage.
Overcloud is the actual functional cloud for any organization where all the Virtual Machines are created on compute nodes and handle all the workloads. In other words we can say overcloud provides the openstack services like Nova, Keystone , Horizon, Neutron, cinder, Glance, Heat & Ceilometer Services.
Following are the minimum system requirements for undercloud:
- 16 GB RAM
- 1 Quad Core CPU
- 80 GB disk Space
- 2 Nics
- CentOS 7.x / RHEL 7.x
- CentOS 7 VM (Minimal Installation) is hosted inside the KVM hypervisor.
- Two Interfaces are attached to VM (Provisioning & NAT)
- Provisioning Network: 192.168.126.0/24
- NAT Network: 192.168.122.0/24
- IP Address on eth0 is 192.168.122.90 and IP Address on eth1 is 192.168.126.1
Let’s jump into the CentOS 7 VM and follow the below Steps:
Step:1) Set the Hostname and update /etc/hosts file
Run the hostnamectl command to set the hostname,[root@localhost ~]# hostnamectl set-hostname "undercloud.example.com" [root@localhost ~]# exec bash [root@undercloud ~]#Add the following entries using the beneath command:
[root@undercloud ~]# echo "192.168.126.1 undercloud.example.com" >> /etc/hostsUpdate your system using below yum command and reboot once.
[root@undercloud ~]# yum update -y && reboot
Step:2) Create non-root user (stack)
Run the beneath commands one after the another to create stack user and assign sudo rights to it. We will install undercloud using stack user only.[root@undercloud ~]# useradd stack [root@undercloud ~]# echo "enter_password_here" | passwd --stdin stack [root@undercloud ~]# echo "stack ALL=(root) NOPASSWD:ALL" | sudo tee -a /etc/sudoers.d/stack stack ALL=(root) NOPASSWD:ALL [root@undercloud ~]# chmod 0440 /etc/sudoers.d/stack [root@undercloud ~]# su - stack [stack@undercloud ~]$
Step:3) Enable required repositories for undercloud
Execute the below commands to enable and configured required repositories for undercloud installation.[stack@undercloud ~]$ sudo curl -L -o /etc/yum.repos.d/delorean.repo https://trunk.rdoproject.org/centos7-master/current-passed-ci/delorean.repo [stack@undercloud ~]$ sudo sed -i 's/\[delorean\]/\[delorean-current\]/' /etc/yum.repos.d/delorean-current.repo [stack@undercloud ~]$ sudo /bin/bash -c "cat <>/etc/yum.repos.d/delorean-current.repo includepkgs=diskimage-builder,instack,instack-undercloud,os-apply-config,os-collect-config,os-net-config,os-refresh-config,python-tripleoclient,openstack-tripleo-common*,openstack-tripleo-heat-templates,openstack-tripleo-image-elements,openstack-tripleo,openstack-tripleo-puppet-elements,openstack-puppet-modules,openstack-tripleo-ui,puppet-* EOF" [stack@undercloud ~]$ [stack@undercloud ~]$ sudo curl -L -o /etc/yum.repos.d/delorean-deps.repo https://trunk.rdoproject.org/centos7/delorean-deps.repo [stack@undercloud ~]$ sudo yum -y install yum-plugin-priorities [stack@undercloud ~]$ sudo yum install epel-release -y
Step:4) Install TripleO CLI package using yum command
[stack@undercloud ~]$ sudo yum install python-tripleoclient -y
Step:5) Copy & edit “undercloud.conf” sample file that suits to your env
[stack@undercloud ~]$ cp /usr/share/instack-undercloud/undercloud.conf.sample ~/undercloud.confNow edit ‘undercloud.conf‘ that suits to your environment, In my case I am adding the following content under “Default” Section
[stack@undercloud ~]$ vi undercloud.conf
[DEFAULT]
local_ip = 192.168.126.1/24
undercloud_public_vip = 192.168.126.2
undercloud_admin_vip = 192.168.126.3
local_interface = eth1
masquerade_network = 192.168.126.0/24
dhcp_start = 192.168.126.100
dhcp_end = 192.168.126.150
network_cidr = 192.168.126.0/24
network_gateway = 192.168.126.1
inspection_iprange = 192.168.126.160,192.168.126.199
generate_service_certificate = true
certificate_generation_ca = local
………………………………
Save and exit the file.
Step:6) Start undercloud installation using openstack command
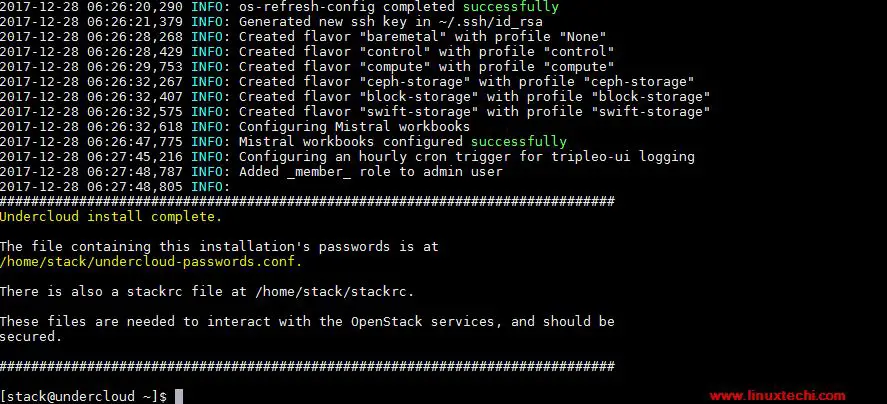
Now start undercloud installation using below openstack command,[stack@undercloud ~]$ openstack undercloud installOnce the installation is completed successfully, we will get the output something like below

Verify the OpenStack Service list
[stack@undercloud ~]$ source stackrc
(undercloud) [stack@undercloud ~]$ openstack service list
+----------------------------------+------------------+-------------------------+
| ID                               | Name             | Type                    |
+----------------------------------+------------------+-------------------------+
| 19f1261745004b31bc77dcb17a5ed4f5 | heat-cfn         | cloudformation          |
| 1bdd5dfbc36f444ebe62580d71f1a7ec | heat             | orchestration           |
| 2b39423f188b412d85bed43f112b35d7 | zaqar-websocket  | messaging-websocket     |
| 46f64d65be874718a1b2c123f588371b | keystone         | identity                |
| 605261da43d64395b72acc5309a22096 | mistral          | workflowv2              |
| 6f50fb704b224c1abc3c2a1a163eb73a | neutron          | network                 |
| 7110b7d7711a4aa1af6a3c13566be28f | zaqar            | messaging               |
| 7e41468745724ecfa8ed339137e8b700 | placement        | placement               |
| 853efa8a8acf403b827617725c3b7322 | ironic-inspector | baremetal-introspection |
| a5522e5df77343b99a0e47812323a17b | swift            | object-store            |
| b9bbb1a771704b57a0833d738bfb86e5 | glance           | image                   |
| d50fdfa25fb64c3e865c172754452ab1 | ironic           | baremetal               |
| e2ea283690c742d3a98bd1eae6f9b830 | nova             | compute                 |
+----------------------------------+------------------+-------------------------+
(undercloud) [stack@undercloud ~]$
This confirms that undercloud has been installed successfully. In the next article we will demonstrate how to import overcloud images in under cloud and how to create inventory file for overcloud servers and then we will see how we can deploy overcloud servers via undercloud.
Read More on: How to deploy TripleO Overcloud (Controller , Compute) on CentOS 7 VMs
In case this article helps you to understand how to install undercloud on CentOS 7 VM, please do share your feedback and comments.

No comments:
Post a Comment