Monday, June 28, 2010

حمامة السلام


حمامتك يا ريس حمامة السلام
نايمه يا ريس وأسأل سوزان
بص يا ريس حمامة الجيران
واقفه يا ريس فاكه الحزام
داخله يا ريس فى كل مكان
حمامتك يا ريس حمامة السلام
نايمه يا ريس وأسأل سوزان
نفسى ياريس اشبع وانام
وتغور يا ريس وتغور المدام
وابنك يا ريس يغور كمان
وتغور يا ريس كل الحيتان
حمامتك يا ريس حمامة السلام
نايمه يا ريس وأسأل سوزان
شايف يا ريس حمامة ايران
تبسط يا ريس ادى الحمام
مش انته ياريس مرخرخ جبان
حمامتك يا ريس حمامة السلام
نايمه يا ريس وأسأل سوزان
---------
عليا الحرنكش يا ريس مبارك
في عصر مزركش ملون بنارك
لابايعك وأبايع حكومة حمارك
ملعون أبو اللي يقدر يقاطع قرارك
نهاره مقندل وليله مبارك
فهمبك وهجص وطلع في عيننا
أكيد هيا طالعة تشاهد جمالك
جمالك مبارك سوزانك سوزاننا
يامحلى حصارك لمصر اللي جالنا
نسيمها في عصرك بيشوي في بدنا
أؤيد وأبايع فخامة جلالتك
وأيد أي واحد بيمسح ريالتك
ولأنك سر باتع هاننسى هبالتك
فأقعد ياريس ودلدل حمامتك
حمامة السلام حمامتك ياريس
سلامة الحمامة وسلامتك يا ريس
ياريس حمامة ياريس كويس
على تل مصر ياريتك تهيص
خرابة فسيحة عليها متيس
وأأمر تطاع فشعبك مفيص

أحمد فؤاد نجم

Saturday, June 26, 2010

Expire User Accounts

Using the expire option will allow the administrator to lock down an account without destroying the data so that it may be available for a short time.

When people go on vacation, have an extended break for some reason or  may not be comng back, you can use the expire option to lock down their account.

You also may want to close an account correctly.  The Ubuntu Server like other Linux Servers provides methods to make this happen.


Example:


# sudo chage -E 2011-06-10 mike

This option is valuable for temporary accounts as well.
A directory could be created to hold the user’s files for a time.


Example:


# sudo mkdir /mikeold: chmod 000 /mikeold

This will protect the data from being changed.


Expire User Passwords
In addition to setting an expiration date for a user’s account, you can also set minimum and maximum change periods for a user’s password.

To ensure that a user can’t change his or her password more often than a given time period, use chage with the “-m” option.

So, to ensure that user “james” can’t change his password more than every seven days, enter:


# sudo chage -m 7 james

To ensure that james’s password has to be changed at least every 90 days, enter:


# sudo chage -M 90 james


You can also give james a warning before he has to change his password.  To set the warning period to five days, you can enter:


# sudo chage -W 5 james

If need be, you can set all of these values with one single command:


# sudo chage -m 7 -M 20 -W 5 james


A “chage -l james” command will verify that all values were properly set.

Note that password expiration dates are completely separate from account expiration dates.


Deleting Users and Data
When users leave a system often the userdel command  is used to delete their account. However, the result may be that users have created files and directories outside of their home directory.

The /tmp directory often is used to create programs for users so there may be files left in that directory. If you use this command it will delete all of the user files as well:


# sudo userdel -r tom

Example: The -r takes all associated files and directories in the home directory.  It will not delete files owned by the user in another directory besides home and user mail.

If you only wanted to delete the the user account and login you would use:


# sudo userdel tom


When you use userdel to delete a user account the command will not delete files owned by the user outside the user’s home directory.

You will need to search those out:

# find / -user tom -print

This command will search for all files owned by the user mike starting with / and print the filenames to the screen.

Often on systems with different administrator’s you may find that these little issues have been overlooked.

If a user account has been deleted and they left files in locations that were not removed, you will find files that have no owner, as the owner has been deleted.

One way to find these files and folders is to use this command:


# find / \( -nouser  \)


Once you find these nouser files you will need to decide if they should be kept or deleted.

You may want to assign a user to those files as they may have significance to the company.


Change File Ownership
There may be a time when you need to delete a user and replace that user with another user who will need access to the former user’s files.

For this you want to change ownership of the needed files.  Do a search and change the files.

# find / -user mike -exec chown joe {} \;


Place brackets after joe so that the output can be placed in them. All of the files will be searched out for mike and ownership changed to joe.

xhost+ : How to Fix “Cannot Open Display” Error While Launching GUI on Remote Server

Question: When I try to launch any GUI application on a remote server, I’m getting the “cannot open display:” error, as shown below. How do I fix this?
For example, while launching the gedit on remote server, I got the following message.
(gedit:3658): Gtk-WARNING **: cannot open display:
I get similar message when I try to open any GUI application. For example, launching Oracle Installer on remote server also gives the “cannot open display” error.
Answer: You can fix the “cannot open display” error by following the xhost procedure mentioned in this article.

1. Allow clients to connect from any host using xhost+

Execute the following command to disable the access control, by which you can allow clients to connect from any host.
$ xhost +
access control disabled, clients can connect from any host

2. Enable X11 forwarding

While doing ssh use the option -X to enable X11 forwarding.
$ ssh username@hostname -X
Enable trusted X11 forwarding, by using the -Y option,
$ ssh username@hostname -Y

3. Open GUI applications in that host

After opening ssh connection to the remote host as explained above, you can open any GUI application which will open it without any issue.
If you still get the “cannot open display” error, set the DISPLAY variable as shown below.
$ export DISPLAY='IP:0.0'
Note: IP is the local workstation’s IP where you want the GUI application to be displayed.

Sunday, June 20, 2010

How To Integrate ClamAV Into PureFTPd For Virus Scanning On CentOS 5.4

This tutorial explains how you can integrate ClamAV into PureFTPd for virus scanning on a CentOS 5.4 system.

In the end, whenever a file gets uploaded through PureFTPd, ClamAV will check the file and delete it if it is malware.


I do not issue any guarantee that this will work for you!


1 Preliminary Note
You should have a working PureFTPd setup on your CentOS 5.4 server, e.g. as shown in this tutorial: Virtual Hosting With PureFTPd And MySQL (Incl. Quota And Bandwidth Management) On CentOS 5.3 (yes, it's for CentOS 5.3, but works for CentOS 5.4 as well).


2 Installing ClamAV
ClamAV is not available in the official CentOS repositories, therefore we enable the RPMforge repository:

# rpm --import http://dag.wieers.com/rpm/packages/RPM-GPG-KEY.dag.txt
# cd /tmp
# wget http://dag.wieers.com/rpm/packages/rpmforge-release/rpmforge-release-0.3.6-1.el5.rf.x86_64.rpm
# rpm -ivh rpmforge-release-0.3.6-1.el5.rf.x86_64.rpm

Afterwards we can install ClamAV as follows:

# yum install clamav clamd

Next we create the system startup links for clamd and start it:

# chkconfig --levels 235 clamd on
# /usr/bin/freshclam
Click here to find 
out more!
/etc/init.d/clamd start

3 Configuring PureFTPd
First we open /etc/pure-ftpd/pure-ftpd.conf and set CallUploadScript to yes :

# vi /etc/pure-ftpd/pure-ftpd.conf

[...]
# If your pure-ftpd has been compiled with pure-uploadscript support,
# this will make pure-ftpd write info about new uploads to
# /var/run/pure-ftpd.upload.pipe so pure-uploadscript can read it and
# spawn a script to handle the upload.

CallUploadScript yes
[...]

Next we create the file /etc/pure-ftpd/clamav_check.sh (which will call /usr/bin/clamdscan whenever a file is uploaded through PureFTPd)...

# vi /etc/pure-ftpd/clamav_check.sh

#!/bin/sh
/usr/bin/clamdscan --remove --quiet --no-summary "$1"

... and make it executable:

# chmod 755 /etc/pure-ftpd/clamav_check.sh

Now we start the pure-uploadscript program as a daemon - it will call our /etc/pure-ftpd/clamav_check.sh script whenever a file is uploaded through PureFTPd:

# pure-uploadscript -B -r /etc/pure-ftpd/clamav_check.sh

Of course, you don't want to start the daemon manually each time you boot the system - therefore we open /etc/rc.local...

# vi /etc/rc.local

... and add the line /usr/sbin/pure-uploadscript -B -r /etc/pure-ftpd/clamav_check.sh to it - e.g. as follows:

#!/bin/sh
#
# This script will be executed *after* all the other init scripts.
# You can put your own initialization stuff in here if you don't
# want to do the full Sys V style init stuff.

/usr/sbin/pure-uploadscript -B -r /etc/pure-ftpd/clamav_check.sh
touch /var/lock/subsys/local

Finally we restart PureFTPd:

/etc/init.d/pure-ftpd restart

That's it! Now whenever someone tries to upload malware to your server through PureFTPd, the "bad" file(s) will be silently deleted.


4 Links

How to do Perl Hash Reference and Dereference

Question: How do I reference perl hash? How do I deference perl hash? Can you explain it with a simple example?
Answer: In our previous article we discussed about Perl array reference. Similar to the array, Perl hash can also be referenced by placing the ‘\’ character in front of the hash. The general form of referencing a hash is shown below.
%author = (
'name'              => "Harsha",
'designation'      => "Manager"
);

$hash_ref = \%author;
This can be de-referenced to access the values as shown below.
$name = $ { $hash_ref} { name };
Access all keys from the hash as shown below.
my @keys = keys % { $hash_ref };
The above code snippet is same as the following.
my @keys = keys %author;
If the reference is a simple scalar, then the braces can be eliminated.
my @keys =  keys  %$hash_ref;
When we need to reference the particular element, we can use -> operator.
my $name =  $hash_ref->{name};
Make reference to an anonymous Perl hash as shown below.
my $hash_ref  =  {
'name'               => "Harsha",
'designation'       => "Manager"
};
De-Referencing this hash is same as we did for the above example (%author).
$name = $ { $hash_ref} { name };

HP-UX: How to Install or Remove DEPOT Packages Using swinstall and swremove

Question: I would like to know how to install, uninstall, verify depot packages on HP Unix. Can you explain me with an example?
Answer: Use swinstall to install a depot package. Use swremove to remove a depot package as explained below.

Install a DEPOT on HP-UX using swinstall

swinstall command installs software from a software source (a depot or physical media) to your local host. swinstall command invokes GUI, the following steps has to be done to complete the installations.
1. Select the target location
2. Select the source
3. Select the depot file to install as shown in the figure.

4. Mark the software for installation.
5. Press ‘m’ to mark the software for installation
6. Install the software. Go to Actions, and select install to install the package.

7. Analysis – It will perform the analysis process.
8. Installation of software – It will install the software.
You can verify your installation using swlist @target.
$ swlist @/tmp
# Contacting target "mac13"...
#
# Target:  mac13:/tmp
#

#
# No Bundle(s) on mac13:/tmp
# Product(s):
#

  tcltk         8.5.7          tcltk

Uninstalling a Depot on HP-UX using swremove

swremove is the command to uninstall the depot package.
syntax:
swremove packagename @target
where target is the location you gave during installation.
$ swremove tcltk @/tmp

Debian: How to Install or Remove DEB Packages Using dpkg

Question: I would like to know how to install, uninstall, verify deb packages on Debian. Can you explain me with an example?
Answer: Use dpkg to install and remove a deb package as explained below.

On Debian, dpkg (Debian package system) allows you to install and remove the software packages. dpkg is the simplest way to install and uninstall a package.
Debian now supplies a tool named Apt (for “A Package Tool”) and aptitude to help the administrators to add or remove software more easily. Refer to our earlier Manage packages using apt-get for more details.

Installing a Deb Using dpkg -i

syntax:
dpkg -i package-file-name

-i is to install a package.
The following example installs the Debian package for tcl tool.
$ dpkg -i tcl8.4_8.4.19-2_amd64.deb
Selecting previously deselected package tcl8.4.
(Reading database ... 94692 files and directories currently installed.)
Unpacking tcl8.4 (from tcl8.4_8.4.19-2_amd64.deb) ...
Setting up tcl8.4 (8.4.19-2) ...
Processing triggers for menu ...
Processing triggers for man-db ...
You can verify the installation of package using dpkg -l packagename as shown below.
$ dpkg -l | grep 'tcl'
ii  tcl8.4                               8.4.19-2                   Tcl (the Tool Command Language) v8.4 - run-t
The above command shows that tcl package is installed properly. ‘ii’ specifies status ‘installed ok installed’.

Uninstalling a Deb using dpkg -r

dpkg with -r option removes the installed package.
$ dpkg -r tcl8.4
(Reading database ... 94812 files and directories currently installed.)
Removing tcl8.4 ...
Processing triggers for man-db ...
Processing triggers for menu ...
Now list the package and check the status.
# dpkg -l | grep 'tcl'
rc  tcl8.4                                8.4.19-2                   Tcl (the Tool Command Language) v8.4 - run-t
rc stands for ‘removed ok config-files’. The remove action didn’t purge the configuration files. The status of each installed package will be available in /var/lib/dpkg/status. Status of tcl8.4 package looks like,
Package: tcl8.4
Status: deinstall ok config-files
Priority: optional
Section: interpreters
Installed-Size: 3308
The following command is used to purge the package completely.
$ dpkg -P tcl8.4
(Reading database ... 94691 files and directories currently installed.)
Removing tcl8.4 ...
Purging configuration files for tcl8.4 ...
Processing triggers for menu ...
$ dpkg -l | grep 'tcl'
$
So the package is completely removed, and the status in the /var/lib/dpkg/status is given below.
Package: tcl8.4
Status: purge ok not-installed
Priority: optional
Section: interpreters

Friday, June 18, 2010

HowTo: Speed Up Linux Software Raid Building And Re-syncing

It is no secret that I am a pretty big fan of excellent Linux Software RAID.

Creating, assembling and rebuilding small array is fine. But, things started to get nasty when you try to rebuild or resync large size array.

You may get frustrated when you see it is going to take 22 hours to rebuild the array.

You can always increase RAID resync performance using the following technique.


Recently, I build a small NAS server running Linux for one my client with 5 x 2TB disks in RAID 6 configuration for all in one backup server for Mac OS X and Windows XP/Vista clients computers.

Then whey I cat /proc/mdstat it reported that md0 is created and resync is in progress. The resync speed was around 4000K/sec and resync will complete in approximately in 22 hours. I wanted to finish this early.


/proc/sys/dev/raid/{speed_limit_max,speed_limit_min}
The /proc/sys/dev/raid/speed_limit_min is config file that reflects the current "goal" rebuild speed for times when non-rebuild activity is current on an array.

The speed is in Kibibytes per second, and is a per-device rate, not a per-array rate.

The default is 1000.

The /proc/sys/dev/raid/speed_limit_max is config file that reflects the current "goal" rebuild speed for times when no non-rebuild activity is current on an array.

The default is 100,000.

To see current limits, enter:


# sysctl dev.raid.speed_limit_min
# sysctl dev.raid.speed_limit_max


To increase speed, enter:
 
echo value > /proc/sys/dev/raid/speed_limit_min
 
OR
 
sysctl -w dev.raid.speed_limit_min=value
 
In this example, set it to 50000 K/Sec, enter:


# echo 50000 > /proc/sys/dev/raid/speed_limit_min


OR


# sysctl -w dev.raid.speed_limit_min=50000


If you want to override the defaults you could add these two lines to /etc/sysctl.conf:
dev.raid.speed_limit_min = 50000
dev.raid.speed_limit_max = 200000

Bitmap Option
Bitmaps optimize rebuild time after a crash, or after removing and re-adding a device. Turn it on by typing the following command:


# mdadm --grow --bitmap=internal /dev/md0


Once array rebuild or fully synced, disable bitmaps:


# mdadm --grow --bitmap=none /dev/md0


Result
My speed went from 4k to 51k:


# cat /proc/mdstat


Sample outputs:
Personalities : [linear] [raid0] [raid1] [raid10] [raid6] [raid5] [raid4] [multipath]
md5 : active raid1 sde2[2](S) sdd2[3](S) sdc2[4](S) sdb2[1] sda2[0]
      530048 blocks [2/2] [UU]

md0 : active raid6 sde3[4] sdd3[3] sdc3[2] sdb3[1] sda3[0]
      5855836800 blocks level 6, 64k chunk, algorithm 2 [5/5] [UUUUU]
      [============>........]  resync = 61.7% (1205475036/1951945600) finish=242.9min speed=51204K/sec

References:
  • man page md and mdadm

HowTo: Debug Crashed Linux Application Core Files Like A Pro

Core dumps are often used to diagnose or debug errors in Linux or UNIX programs.

Core dumps can serve as useful debugging aids for sys admins to find out why Application like Lighttpd, Apache, PHP-CGI or any other program crashed.

Many vendors and open source project author requests a core file to troubleshoot a program. A core file is generated when an application program abnormally terminates due to bug, operating system security protection schema, or program simply try to write beyond the area of memory it has allocated, and so on.

This article explains how to turn on core file support and track down bugs in programs.


Turn On Core File Creation Support

By default most Linux distributions turn off core file creation (at least this is true for RHEL, CentOS, Fedora and Suse Linux).

You need to use the ulimit command to configure core files.


See The Current Core File Limits
Type the following command:


# ulimit -c


Sample outputs:
0

The output 0 (zero) means core file is not created.


Change Core File Limits
In this example, set the size limit of core files to 75000 bytes:


# ulimit -c 75000


HowTo: Enable Core File Dumps For Application Crashes And Segmentation Faults
Edit /etc/profile file and find line that read as follows to make persistent configuration:

# ulimit -S -c 0 > /dev/null 2>&1
Update it as follows:
# ulimit -c unlimited >/dev/null 2>&1

Save and close the file. Edit /etc/sysctl.conf, enter:


# vi /etc/sysctl.conf


Append the following lines:
kernel.core_uses_pid = 1
kernel.core_pattern = /tmp/core-%e-%s-%u-%g-%p-%t
fs.suid_dumpable = 2

Save and close the file. Where,
  1. kernel.core_uses_pid = 1 - Appends the coring processes PID to the core file name.
  2. fs.suid_dumpable = 2 - Make sure you get core dumps for setuid programs.
  3. kernel.core_pattern = /tmp/core-%e-%s-%u-%g-%p-%t - When the application terminates abnormally, a core file should appear in the /tmp. The kernel.core_pattern sysctl controls exact location of core file. You can define the core file name with the following template whih can contain % specifiers which are substituted by the following values when a core file is created:
    • %% - A single % character
    • %p - PID of dumped process
    • %u - real UID of dumped process
    • %g - real GID of dumped process
    • %s - number of signal causing dump
    • %t - time of dump (seconds since 0:00h, 1 Jan 1970)
    • %h - hostname (same as ’nodename’ returned by uname(2))
    • %e - executable filename
Finally, enable debugging for all apps, enter (Redhat and friends specific):


# echo "DAEMON_COREFILE_LIMIT='unlimited'" >> /etc/sysconfig/init


Reload the settings in /etc/sysctl.conf by running the following command:


# sysctl -p


How Do I Enable Core Dumping For Specific Deamon?
To enable core dumping for specific deamons, add the following line in the /etc/sysconfig/daemon-file file. In this example, edit /etc/init.d/lighttped and add line as follows:

DAEMON_COREFILE_LIMIT='unlimited'

Please note that DAEMON_COREFILE_LIMIT is Redhat specific, for all other distro add configuration as follows:
# ulimit -c unlimited >/dev/null 2>&1
echo /tmp/core-%e-%s-%u-%g-%p-%t > /proc/sys/kernel/core_pattern

Save and close the file. Restart / reload lighttpd:


# /etc/init.d/lighttpd restart
# su - lighttpd
$ ulimit -c


Sample outputs:
unlimited

Now, you can send core files to vendor or software writes.


How Do I Read Core Files?
You need use the gdb command as follows:


$ gdb /path/to/application /path/to/corefile


See the gdb command man page for more information.


strace command
System administrators, diagnosticians and trouble-shooters will find it invaluable for solving problems with programs for which the source is not readily available since they do not need to be recompiled in order to trace them.

This is also useful to submit bug reports to open source developers. See how to use the strace command under Linux to debug the problems.


Recommended readings:
Stay stunned for gdb tutorial which will explains how to use generated core file to track down problem.

Friday, June 4, 2010

How to Install Android on Your iPhone

Maybe you want to liberate your iPhone from Apple's clutches. Maybe you just want to tinker with something new.

Either way, you've seen Android running on the iPhone, and you want to try it for yourself.

Still a Work in Progress
Android in a bag
Graphic: Eliza WeeAlthough this port does everything that you expect your smartphone to be able to do, it isn't usable for day-to-day activities just yet--I haven't implemented any power-management functions, so a fully charged iPhone running Android will last only an hour or so.

A few bugs and performance issues remain, too, so while the phone will be usable, it won't be fast. If you do something unexpected (such as forcing the iPhone off), there is a small chance that you may end up restoring your device.

However, it is impossible for any bugs to brick or disable your iPhone permanently.

Finally, media syncing is not working, so loading your media onto your phone is kind of a pain. I'm working as hard as I can, though, and I expect to fix these issues soon.


Required Reading
Start by brushing up on the fundamentals of iPhone maintenance: how to get your iPhone into Recovery Mode, how to put it into DFU Mode, and how to perform a firmware restore from those modes.

The iPhone is a well-engineered device, and it is virtually impossible to brick if you know these techniques. If all else fails, remember that you can always restore using DFU Mode.

You'll also need to be reasonably comfortable working in a command-line interface, and unless you're confident in trying to compile your own binaries, you'll need a PC running Linux (or a Linux virtual machine).


What You Need
1. A first-generation iPhone or an iPhone 3G with firmware versions between 2.0 and 3.1.2, jailbroken with Redsn0w, Blacksn0w, or PwnageTool.

If you already updated your handset to 3.1.3 or to a 4.0 beta, you must use PwnageTool to create a jailbroken 3.1.2 .ipsw file to restore down to.

The Spirit jailbreak won't work

Note that I am explicitly excluding the iPhone 3GS, all iPod Touch models, and the iPad. This hack will not work with those devices (yet). I am also explicitly excluding iPhone OS 3.1.3 and all of the 4.0 betas. It will not work with the 
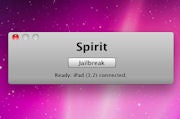
Spirit jailbreak, either.

If you haven't yet jailbroken your iPhone, don't worry--it's a simple process that consists mainly of pressing buttons on the device when prompted and clicking the next button in a wizard.

I humbly recommend Redsn0w, since I wrote much of the code for that program.

2. A 32-bit Linux system or virtual machine (I recommend Ubuntu). See "How to Easily Install Ubuntu Linux on Any PC" for instructions if you don't already have Ubuntu.

Although much of the process can be conducted on any machine, one of the tools involved (called 'oibc') has not yet been ported to Windows.

In addition, the binaries I provide are compiled on a 32-bit Ubuntu machine.

All of the utilities compile for Linux and Mac, however, so if you're feeling adventurous, compile the sources at github.com/planetbeing/iphonelinux and github.com/planetbeing/xpwn instead of using the binaries.


3. The prebuilt images and binaries; the exact files you use depend on whether you have a first-generation iPhone or an iPhone 3G.


4. The iPhone OS 3.1.2 .ipsw file for your device, namely either iPhone1,1_3.1.2_7D11_Restore.ipsw or iPhone1,2_3.1.2_7D11_Restore.ipsw.

Chances are, you already have this file somewhere on your computer, but if you need it, you can download it.


5. The firmware for the Marvell WLAN chip inside the iPhone. Go to the URL, and on the right side of the page you should see a drop-down menu labeled 'Choose your platform'.

Select Linux 2.6 - Fedora from the drop-down menu and click the Search button underneath. Download the file labeled SD-8686-LINUX26-SYSKT-9.70.3.p24-26409.P45-GPL.

You'll get a file called SD-8686-LINUX26-SYSKT-9.70.3.p24-26409.P45-GPL.zip.


Android on iPhone, Step-by-Step
The first steps collect the multitouch and WLAN firmware for the iPhone.

We cannot legally redistribute these binary blobs, so it is necessary for you to extract them from the .ipsw file and Marvell's Website.

1. On the Linux machine, create a folder named firmware in your home directory.


2. Extract SD-8686-FEDORA26FC6-SYSKT-GPL-9.70.3.p24-26409.P45.tar from SD-8686-LINUX26-SYSKT-9.70.3.p24-26409.P45-GPL.zip to a temporary folder.


3. Extract FwImage/helper_sd.bin and FwImage/sd8686.bin from SD-8686-FEDORA26FC6-SYSKT-GPL-9.70.3.p24-26409.P45.tar and put them inside your 'firmware' folder.


4. Rename helper_sd.bin to sd8686_helper.bin.
You have your WLAN firmware at this point. Now for the multitouch firmware.


5. On the Linux machine, create a folder named idroid in your home directory and extract utils/dripwn from the prebuilt tarball (.tar archive) you downloaded into it.


6. Copy or move the 3.1.2 .ipsw file you obtained from Apple's Website into the same 'idroid' folder as dripwn.


7. Start a command-line shell (Terminal under Ubuntu) and navigate to the 'idroid' folder you created. You can type cd ~/idroid to do this.


8. Go to this page if you have an iPhone 3G or this page if you have an older iPhone. Copy the VFDecrypt key.


9. In the shell you started earlier, if you have a first-generation iPhone, type the following:
./dripwn iPhone1,1_3.1.2_7D11_Restore.ipsw [the VFDecrypt key you copied]

If you have a iPhone 3G, type the following:
./dripwn iPhone1,2_3.1.2_7D11_Restore.ipsw [the VFDecrypt key you copied]
The 'firmware' folder with 'zephyr' files 
10. After a while, the command will finish and you will have zephyr_main.bin, zephyr_aspeed.bin, and zephyr2.bin in your 'idroid' folder.

Move these files into the 'firmware' folder.

You now have all the files needed for Android, and you can begin installing it.


11. If you haven't already, install the OpenSSH tool on your iPhone via Cydia.
Change the OpenSSH password (seriously--change it)
12. If you just installed OpenSSH, connect to your iPhone via SSH, log in as root with the password alpine, and type passwd root to change the password for root.

Then, enter passwd mobile to change the password for the mobile user.

Don't skip this step. All of the iPhone worms out there affect you only if you haven't changed the SSH password from the default.


13. Extract prebuilt/android.img.gz, prebuilt/cache.img, prebuilt/ramdisk.img, prebuilt/system.img, prebuilt/userdata.img, and zImage from the prebuilt tarball.
Uploading the extracted images onto the iPhone
14. Use the 'scp' command or an SFTP client to upload all of these files into the /private/var folder on the iPhone.

You can use these commands on Linux, if you wish to use scp instead of an SFTP graphical-interface client.

Assuming you're in the same folder as the files, enter:


scp android.img.gz root@[ip address of iPhone]:/private/var/
scp cache.img root@[ip address of iPhone]:/private/var/
scp ramdisk.img root@[ip address of iPhone]:/private/var/
scp system.img root@[ip address of iPhone]:/private/var/
scp userdata.img root@[ip address of iPhone]:/private/var/
scp zImage root@[ip address of iPhone]:/private/var/


15. Using the SFTP client or scp, create a folder called firmware in the /private/var folder on the iPhone; afterward, upload all the files from the 'firmware' folder you created earlier to it.

If the 'firmware' folder you created earlier is inside your home directory, you can use the following command:


scp -r ~/firmware/ root@[ip address of iPhone]:/private/var/firmware


16. Reboot your iPhone. As a safety precaution, check to make sure that the files are still present after the reboot and that they all have the right sizes.

An incorrect file size is one that does not exactly match the source file size (for example, system.img is not 71327744 bytes, android.img.gz is not 2161556 bytes, or zImage is not 2364280 bytes on the 3G or not 2356044 bytes on the older iPhone).

Many people have trouble with this process because not all of the files reached their iPhone in one piece.

17. Extract utils/oibc, utils/loadibec, and prebuilt/openiboot.img3 from the prebuilt tarball into your 'idroid' folder.


18. Shut down the iPhone and place it into Recovery Mode: With the iPhone powered off and plugged into the computer via USB, push Hold and Home simultaneously, and then let go of Hold after the backlight turns on.

Continue holding Home until the 'Connect to iTunes' image appears on the screen.


19. Run the following commands in Terminal (you'll need to install libusb-0.1-4 with Synaptics or 'apt-get' if you haven't already):


cd ~/idroid
sudo ./loadibec openiboot.img3

If all goes well, the 'openiboot' boot menu should now appear!
Backing up the iPhone's NOR and installing OpeniBoot
20. Use either the volume-control buttons or the Hold button to select the second menu option, Console. Tap the Home button to launch it.

A text-mode console should start running on your screen, ending with a 'Welcome to openiboot' message.


21. Type sudo ./oibc in Terminal.
The same messages that appeared on the iPhone screen should now appear in Terminal.

You should next make a backup of the NOR (the device on which the iPhone's bootloader is stored) in case something goes wrong, so you don't brick your iPhone.


22. Type nor_read 0x09000000 0x0 1048576 in Terminal/oibc. This will read the entire NOR into main memory.


23. Type ~norbackup.bin@0x09000000:1048576 in Terminal/oibc. A file will appear in the 'idroid' folder called norbackup.bin. Keep this somewhere safe.

The command uploads the NOR to the computer. After you make this backup, you are now free to modify the NOR.

The next step installs OpeniBoot onto the NOR, supplanting the existing Apple iBoot bootloader.


24. Type install in Terminal/oibc.
This process may take a few minutes. Wait until the installation-complete message appears.


25. Type reboot in Terminal/oibc and then exit out of it by pressing Ctrl-C.


The OpeniBoot menu should now come up whenever you boot your iPhone. Note that you can uninstall OpeniBoot from oibc with the 'uninstall' command.


Type help for a list of all OpeniBoot commands.


You can still get into the iPhone OS's recovery mode by holding down Home on the iPhone OS option in the menu until the 'Connect to iTunes' image appears (instead of just tapping Home).
OpeniBoot.
You should be finished! Use the OpeniBoot menu to boot Android by selecting that OS from the menu whenever you wish.

Unfortunately, no good method to shut down Android exists yet, so the only way to turn it off is to hold down the Hold and Home buttons until you've forced the phone off.

Check out iDroidWiki for more tutorials and tips on what you can do with your new Android iPhone.