https://www.linuxtechi.com/lynis-security-auditing-tool-linux-servers
Today, as we all know that how security is important for servers and network in this era. We spend our most of time to implement our security policy for infrastructure. So here is a question in mind that, is there any automatic tool which can help us to find out the vulnerability for us. So I would like to introduce free and open source tool called Lynis.
Lynis is a one of the popular security auditing tool for Unix and Linux like systems, it can find out malwares and security related vulnerability in Linux based systems.
Normally we run so many things on our Linux server like webserver,
database server, Email server, FTP server etc. Lynis can make Linux
administrator’s life easy by doing the automated security auditing and
penetration testing on their all Linux Boxes.
Lynis is free and open source all in one network and Server auditing tool. Once the audit is complete, we can review the results, warnings, and suggestions, and then we can implement our security related policy according to it. It will show reports of a system, that report can be broken into sections.
First of all we will create a directory for Lynis installation,
Run the either of the below command to start the auditing for whole system,
1) Initialize Lynis tool
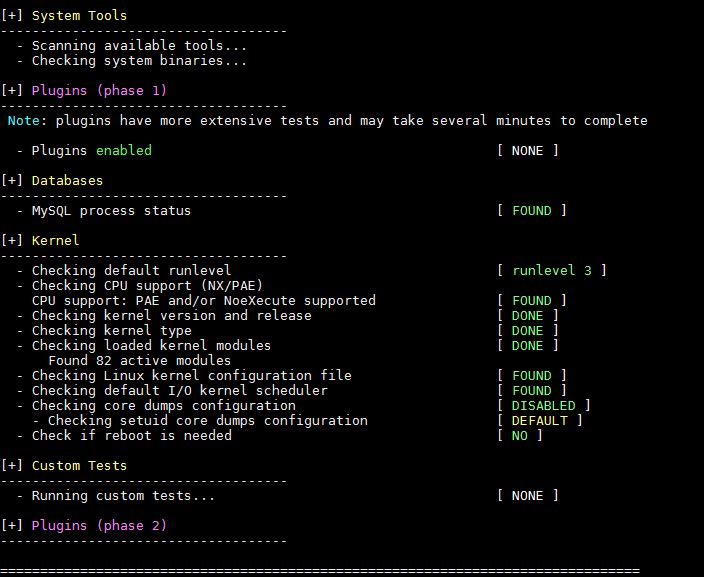
2) System Tool and Boot & Services
3) Kernel and Memory & Process auditing

4) User and Group & Authentication

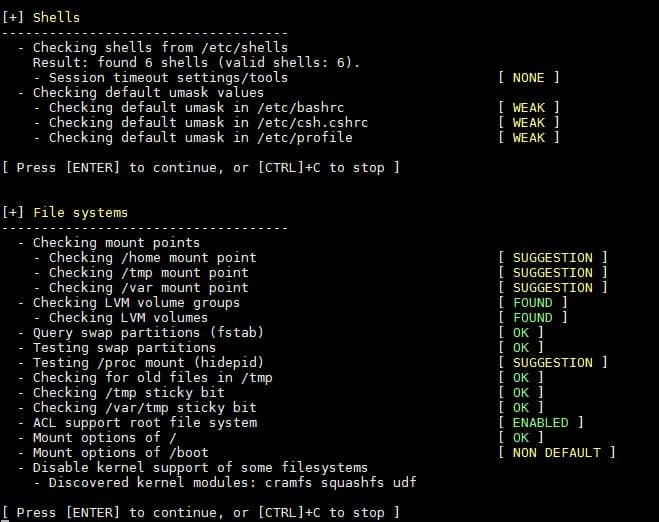
5) Shells and File System Auditing
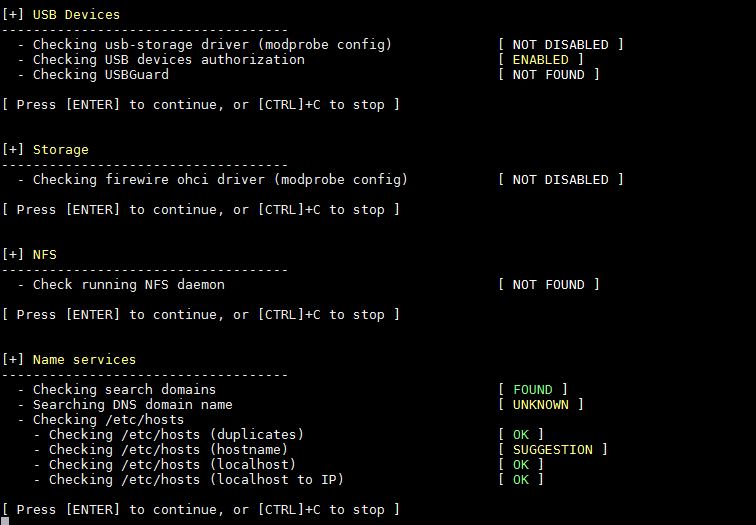
6) USB, Storage, NFS and Name Service Audit
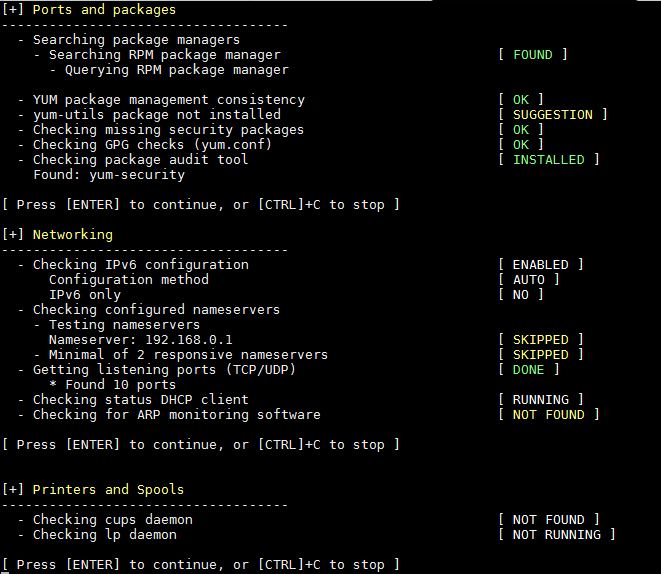
7) Port, Packages, Networking and Printers & Spool Audit
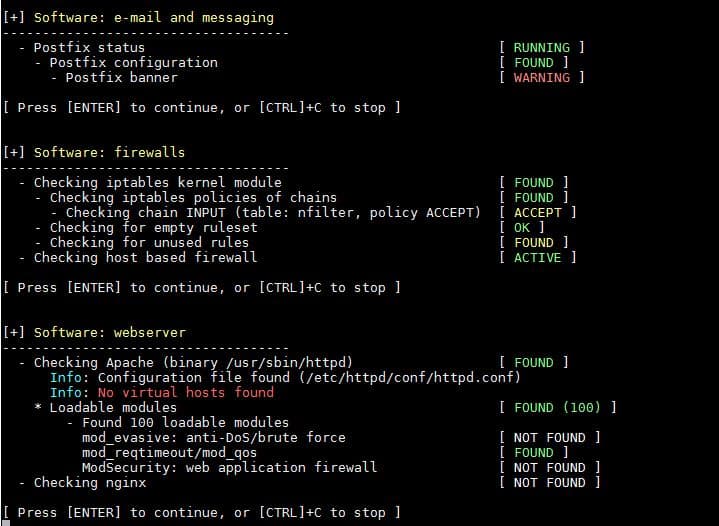
8) Installed Software Audit
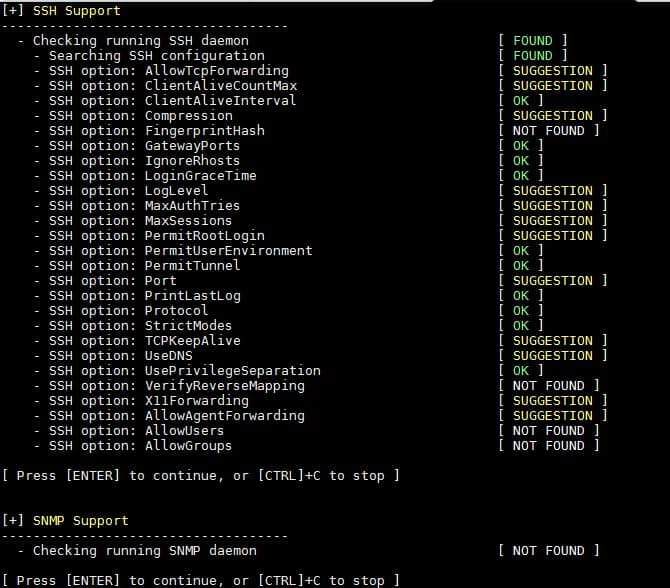
9) SSH Server and SNMP Audit
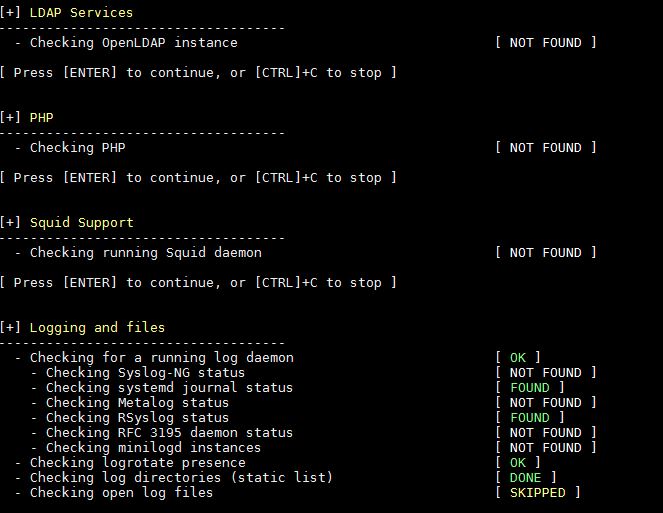
10) LDAP Service, PHP, Squid and Logging audit
11) Insecure Services, Banners, Cron jobs and Accounting audit

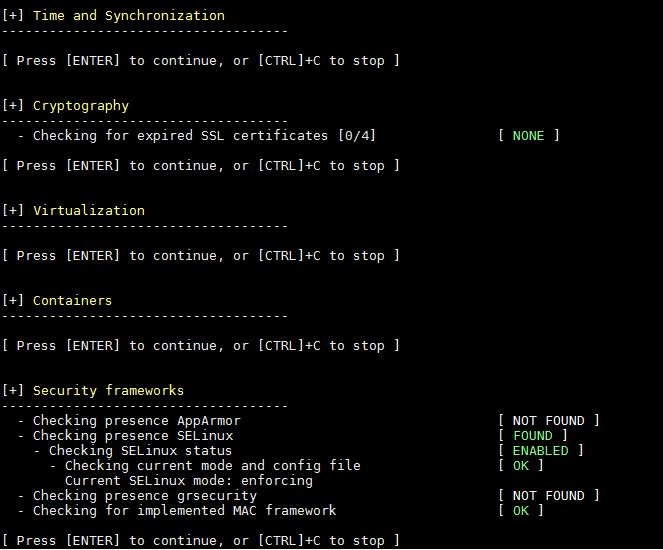
12) Time Synchronization, Cryptography, Virtualization, Containers and Security Framework Audit
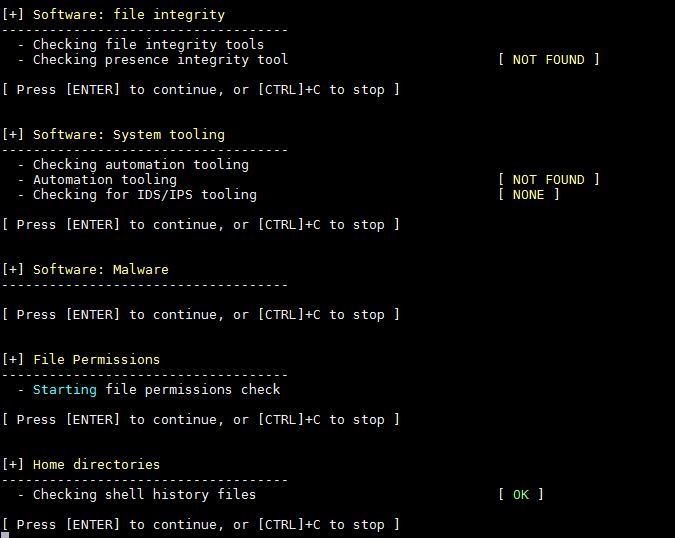
13) File Permissions, Malware detection and Home Directory Audit
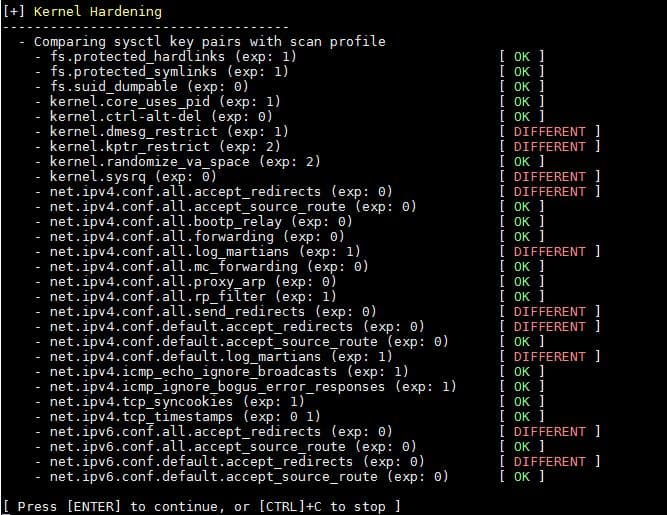
14) Kernel Hardening Audit
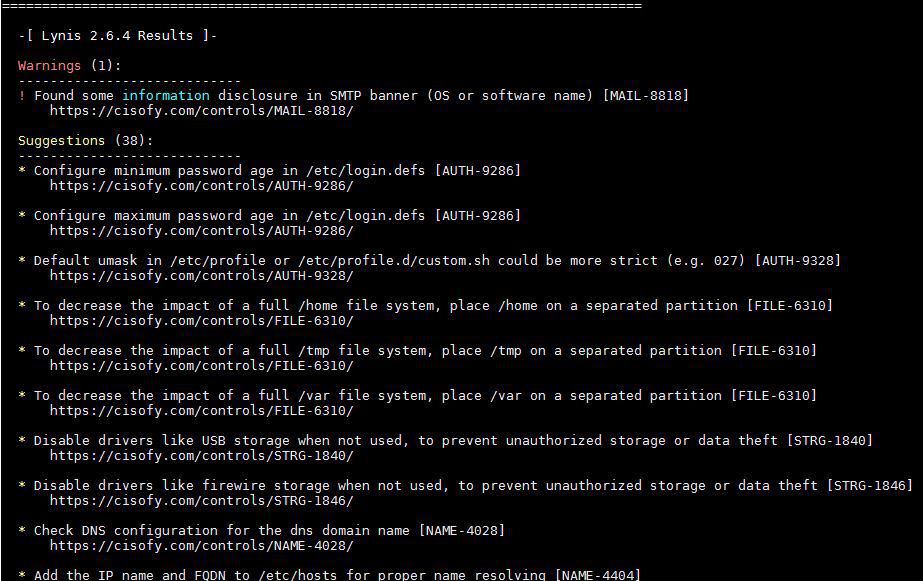
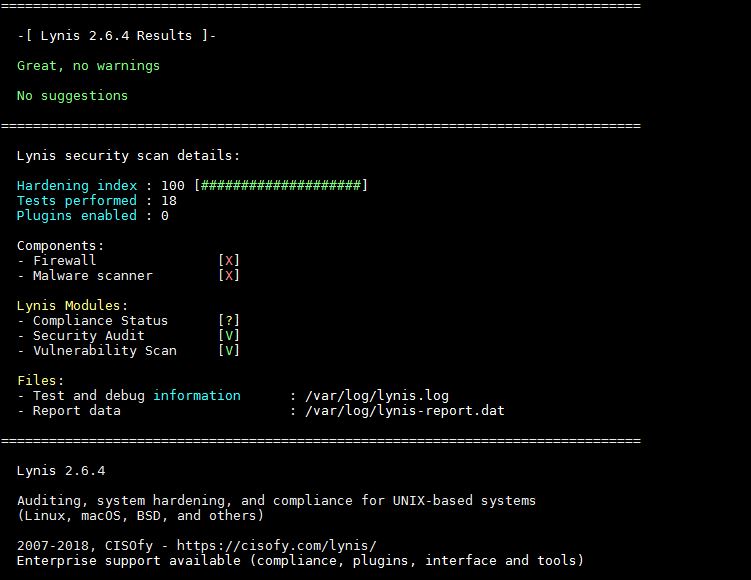
15) Warning and suggestions
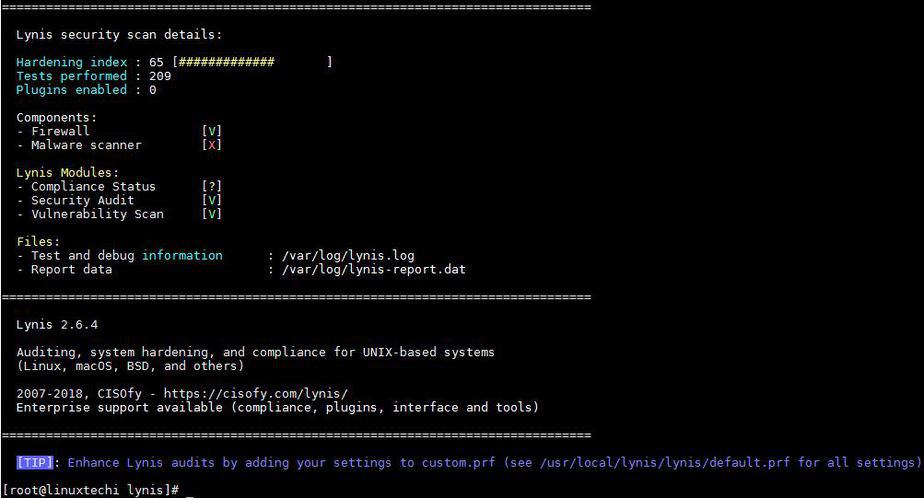
16) Lynis Scan and Audit results
Sometimes we don’t want to scan or audit full system’s Applications or service, So we can audit custom application by category. Let have a look how to perform it,
To check more options of lynis command, please refer its man page,
Today, as we all know that how security is important for servers and network in this era. We spend our most of time to implement our security policy for infrastructure. So here is a question in mind that, is there any automatic tool which can help us to find out the vulnerability for us. So I would like to introduce free and open source tool called Lynis.
Lynis is a one of the popular security auditing tool for Unix and Linux like systems, it can find out malwares and security related vulnerability in Linux based systems.
Lynis is free and open source all in one network and Server auditing tool. Once the audit is complete, we can review the results, warnings, and suggestions, and then we can implement our security related policy according to it. It will show reports of a system, that report can be broken into sections.
Why we should use Lynis :
There are numbers of reasons why we should Lynis in our environment, but prominent are listed below:- Network and Servers Security Audit
- Vulnerability detection and scanning
- System hardening
- Penetration Testing
- RPM Based OS like Red Hat, CentOS and Fedora
- Debian Based OS like Ubuntu, Linux Mint
- FreeBS
- macOS
- NetBSD
- OpenBSD
- Solaris
Installation of Lynis on Linux Server
Lynis is light weight software, it will not break your system and will not affect any application or services which are hosted on your Linux BoxFirst of all we will create a directory for Lynis installation,
[root@linuxtechi ~]# mkdir /usr/local/lynis
[root@linuxtechi ~]#
Now go to the directory and download latest Lynis source code with the help of wget command
[root@linuxtechi ~]# cd /usr/local/lynis/
[root@linuxtechi lynis]# wget https://downloads.cisofy.com/lynis/lynis-2.6.4.tar.gz
Extract the downloaded Lynis tar.gz file using below command,
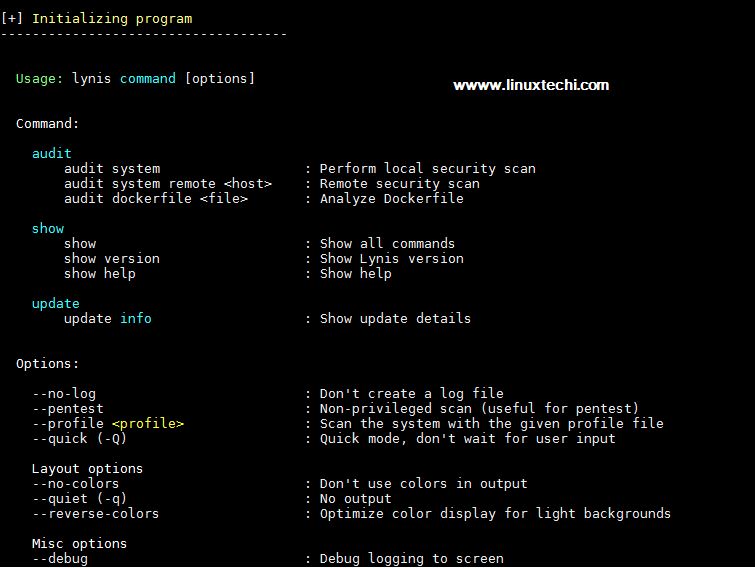
[root@linuxtechi lynis]# ll
total 268
-rw-r--r--. 1 root root 273031 May  2 07:45 lynis-2.6.4.tar.gz
[root@linuxtechi lynis]# tar zxpvf lynis-2.6.4.tar.gz
[root@linuxtechi lynis]# ll
total 272
drwxr-xr-x. 6 root root   4096 Jun  1 23:17 lynis
-rw-r--r--. 1 root root 273031 May  2 07:45 lynis-2.6.4.tar.gz
[root@linuxtechi lynis]#
Now Go to the directory lynis, run lynis script what options available. Root user or user with admin privileges can run the script, all logs and output will be saved in /var/log/lynis.log file
root@linuxtechi lynis]# cd lynis
[root@linuxtechi lynis]# ./lynis
Output of above command will be something like below
Start auditing and find Vulnerabilities
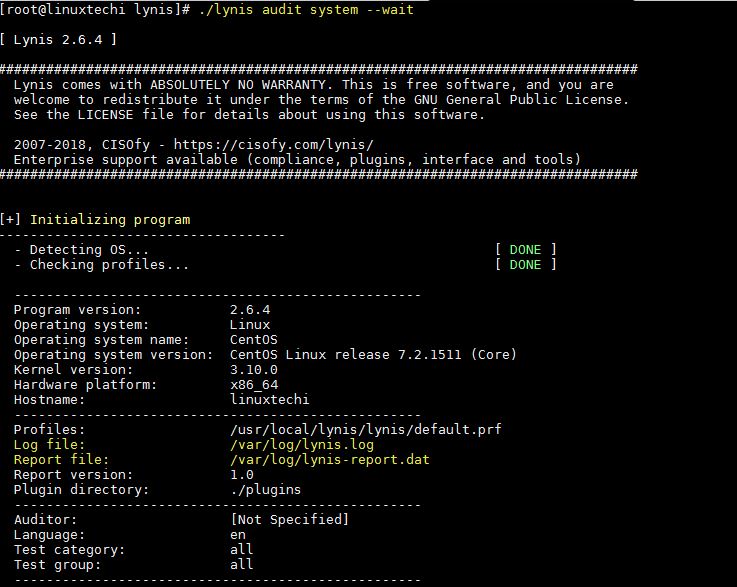
Now we need to start Lynis process, so we must define a ‘audit system’ parameter for scanning whole system.Run the either of the below command to start the auditing for whole system,
[root@linuxtechi lynis]# ./lynis audit system
Or
[root@linuxtechi lynis]# ./lynis audit system --wait --> (wait for user to hit enter to display report for next section)
Output above command would be something like below:
1) Initialize Lynis tool
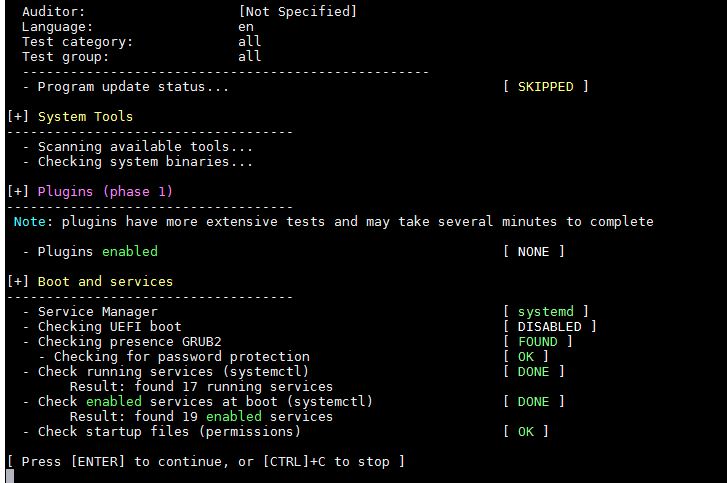
2) System Tool and Boot & Services
3) Kernel and Memory & Process auditing
4) User and Group & Authentication
5) Shells and File System Auditing
6) USB, Storage, NFS and Name Service Audit
7) Port, Packages, Networking and Printers & Spool Audit
8) Installed Software Audit
9) SSH Server and SNMP Audit
10) LDAP Service, PHP, Squid and Logging audit
11) Insecure Services, Banners, Cron jobs and Accounting audit
12) Time Synchronization, Cryptography, Virtualization, Containers and Security Framework Audit
13) File Permissions, Malware detection and Home Directory Audit
14) Kernel Hardening Audit
15) Warning and suggestions
16) Lynis Scan and Audit results
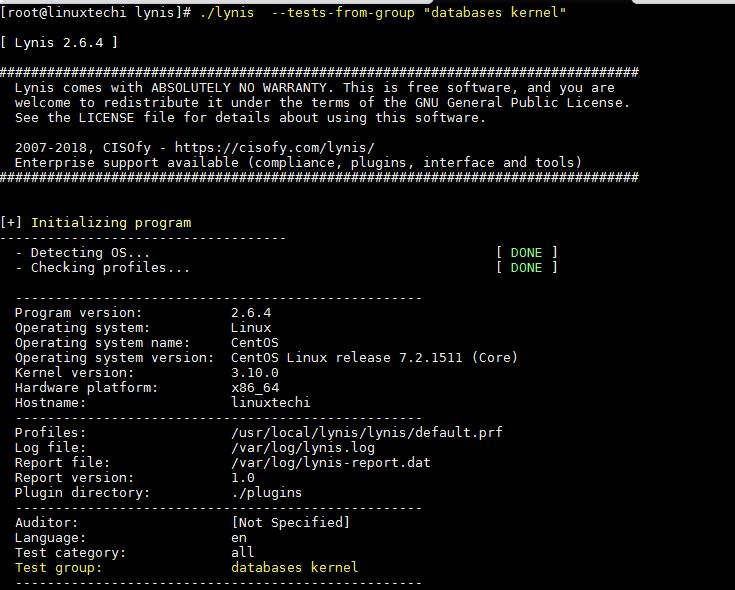
Sometimes we don’t want to scan or audit full system’s Applications or service, So we can audit custom application by category. Let have a look how to perform it,
[root@linuxtechi lynis]# ./lynis show groups
accounting
authentication
banners
boot_services
containers
crypto
databases
dns
file_integrity
file_permissions
filesystems
firewalls
hardening
homedirs
insecure_services
kernel
kernel_hardening
ldap
logging
mac_frameworks
mail_messaging
malware
memory_processes
nameservices
networking
php
ports_packages
printers_spools
scheduling
shells
snmp
squid
ssh
storage
storage_nfs
system_integrity
time
tooling
usb
virtualization
webservers
[root@linuxtechi lynis]#
So now we will get an simple audit of Linux Kernel and database, We will use the command as below.
[root@linuxtechi lynis]# ./lynis --tests-from-group "databases kernel"
To check more options of lynis command, please refer its man page,
[root@linuxtechi lynis]# ./lynis --manThat’s all from this article, please do share your feedback & comments.


