lot of you fine readers are already contributors to your favorite
worthy Linux projects. I'll wager there are also some who would love to
contribute in some way, but aren't quite sure how. So here are a few
ideas to get you inspired and, hopefully, involved.
Money
Many projects accept donations of money. They may have wish lists of
hardware for testing, or other items. A little bit is better than zero,
so don't feel badly if you can only give a little. I suggest focusing
on a limited number of projects that you can support regularly, rather
than trying to spread your finances too thinly.
Kindness
This is a lot more valuable than you may think. I'm not sure where
the "you must have a hide this thick to enter" ethos came from, but it's
bizarre and it doesn't work. Most people prefer to be treated with
courtesy and friendliness, and that goes a long way in building a
friendly, productive atmosphere. How to Protect Your Open Source Project From Poisonous People is a fast introduction to the subject.
If you enjoy encouraging people, and helping groups work together, you just might be a born community manager. The Art of Community by Jono Bacon is an excellent resource for anyone nutty enough to think they might want to be a Linux cat-herder.
Help Noobs
Every day there are hordes of new Linux users, and users new to a
particular piece of Linux software. Having the patience to help newbies
is incredibly valuable, and there are a lot of fairly simple ways to do
this without it turning into a time sink. Your #1 resource is a good
FAQ. It's not that hard to assemble and organize one from forum posts
and IRC discussions, and it's a valuable way to help the developers of
your favorite projects. Answering questions is a lot easier when you can
point people to helpful resources.
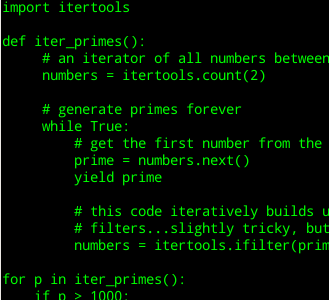
Learn to Code
It all starts with the code, and all you need to learn is time and effort. I suggest starting with Bash shell scripting, because
it is the default Linux shell, and you'll need to know it no matter
what other languages you learn. Don't make yourself crazy trying to
decide which scripting or programming language to learn first-- just
pick one. Everyone has their own ideas which ones are essential, and you
can overthink yourself right out of even trying to start. Javascript,
Python, Ruby, and PHP are all popular, fairly easy to learn, and
well-documented. C is an oldtimer that is not going away anytime soon.
Basic programming concepts are the same no matter what language you're
using, so as soon as you develop some proficiency with one it's easier
to learn additional languages.
Web Design and Marketing
Don't let the word "marketing" turn you off because I'm not talking
about selling a project, but rather presenting its best face to the
world. A lot of Linux and FOSS projects have Web sites that don't
publish useful information. Like what the software does, in plain
language. News and howtos are jumbled randomly into single blogs, or
there is little useful communication of any kind. A project Web site
doesn't need to be fancy, but it does need to be informative, and
organized enough that interested visitors can learn cool things about
the project.
Artwork and Multimedia
There are a lot of generous artists contributing beautiful work to
Linux projects. Appearance does matter-- we stare at these dang things
all day long, so they might as well look nice.
Encourage the Boss
If your business relies on Linux software, talk to the boss about supporting it in some way.
Write Howtos
The most brilliant software will just sit there if nobody knows how
to use it. "Read the code" is not a substitute for good howtos. (Bruce
Byfield offers some guidance on becoming a professional technical writer
in Careers in Linux: Technical Writing.)
Users into Contributors
Turning users into contributors is what makes Linux and FOSS work. It
takes a lot of different roles to support any software project, so
don't be shy-- somewhere out there is the right one for you, where you
can do satisfying work and make a difference.
This tutorial shows how to set up a high-availability storage with two storage servers (CentOS 6.3) that use GlusterFS.
Each storage server will be a mirror of the other storage server, and
files will be replicated automatically across both storage servers. The
client system (CentOS 6.3 as well) will be able to access the storage as
if it was a local filesystem.
GlusterFS is a clustered file-system capable of scaling to several
peta-bytes. It aggregates various storage bricks over Infiniband RDMA or
TCP/IP interconnect into one large parallel network file system.
Storage bricks can be made of any commodity hardware such as x86_64
servers with SATA-II RAID and Infiniband HBA.
I do not issue any guarantee that this will work for you!
1 Preliminary Note
In this tutorial I use three systems, two servers and a client:
server1.example.com: IP address 192.168.0.100 (server)
server2.example.com: IP address 192.168.0.101 (server)
client1.example.com: IP address 192.168.0.102 (client)
All three systems should be able to resolve the other systems'
hostnames. If this cannot be done through DNS, you should edit the /etc/hosts file so that it looks as follows on all three systems:
(It is also possible to use IP addresses instead of hostnames in the
following setup. If you prefer to use IP addresses, you don't have to
care about whether the hostnames can be resolved or not.)
2 Enable Additional Repositories
server1.example.com/server2.example.com/client1.example.com:
First we import the GPG keys for software packages:
rpm --import /etc/pki/rpm-gpg/RPM-GPG-KEY*
Then we enable the EPEL6 repository on our CentOS systems:
cd /tmp
wget http://dl.fedoraproject.org/pub/epel/6/x86_64/epel-release-6-7.noarch.rpm
rpm -ivh epel-release-6-7.noarch.rpm
yum install yum-priorities
Edit /etc/yum.repos.d/epel.repo...
vi /etc/yum.repos.d/epel.repo
... and add the line priority=10 to the [epel] section:
[epel]
name=Extra Packages for Enterprise Linux 6 - $basearch
#baseurl=http://download.fedoraproject.org/pub/epel/6/$basearch
mirrorlist=https://mirrors.fedoraproject.org/metalink?repo=epel-6&arch=$basearch
failovermethod=priority
enabled=1
priority=10
gpgcheck=1
gpgkey=file:///etc/pki/rpm-gpg/RPM-GPG-KEY-EPEL-6
[...]
3 Setting Up The GlusterFS Servers
server1.example.com/server2.example.com:
GlusterFS is available as a package for EPEL, therefore we can install it as follows:
yum install glusterfs-server
Create the system startup links for the Gluster daemon and start it:
chkconfig --levels 235 glusterd on
/etc/init.d/glusterd start
The command
glusterfsd --version
should now show the GlusterFS version that you've just installed (3.2.7 in this case):
[root@server1 ~]# glusterfsd --version
glusterfs 3.2.7 built on Jun 11 2012 13:22:28
Repository revision: git://git.gluster.com/glusterfs.git
Copyright (c) 2006-2011 Gluster Inc.
GlusterFS comes with ABSOLUTELY NO WARRANTY.
You may redistribute copies of GlusterFS under the terms of the GNU General Public License.
[root@server1 ~]#
If you use a firewall, ensure that TCP ports 111, 24007, 24008, 24009-(24009 + number of bricks across all volumes) are open on server1.example.com and server2.example.com.
Next we must add server2.example.com to the trusted storage pool (please note that I'm running all GlusterFS configuration commands from server1.example.com, but you can as well run them from server2.example.com
because the configuration is repliacted between the GlusterFS nodes -
just make sure you use the correct hostnames or IP addresses):
Next we create the share named testvol
with two replicas (please note that the number of replicas is equal to
the number of servers in this case because we want to set up mirroring)
on server1.example.com and server2.example.com in the /data directory (this will be created if it doesn't exist):
gluster volume create testvol replica 2 transport tcp server1.example.com:/data server2.example.com:/data
[root@server1 ~]# gluster volume create testvol replica 2 transport tcp server1.example.com:/data server2.example.com:/data
Creation of volume testvol has been successful. Please start the volume to access data.
[root@server1 ~]#
Start the volume:
gluster volume start testvol
It is possible that the above command tells you that the action was not successful:
[root@server1 ~]# gluster volume start testvol
Starting volume testvol has been unsuccessful
[root@server1 ~]#
You can check the status of the volume with the command
gluster volume info
[root@server1 ~]# gluster volume info
Volume Name: testvol
Type: Replicate
Status: Started
Number of Bricks: 2
Transport-type: tcp
Bricks:
Brick1: server1.example.com:/data
Brick2: server2.example.com:/data
[root@server1 ~]#
By default, all clients can connect to the volume. If you want to grant access to client1.example.com (= 192.168.0.102) only, run:
gluster volume set testvol auth.allow 192.168.0.102
Please note that it is possible to use wildcards for the IP addresses (like 192.168.*) and that you can specify multiple IP addresses separated by comma (e.g. 192.168.0.102,192.168.0.103).
The volume info should now show the updated status:
gluster volume info
[root@server1 ~]# gluster volume info
Volume Name: testvol
Type: Replicate
Status: Started
Number of Bricks: 2
Transport-type: tcp
Bricks:
Brick1: server1.example.com:/data
Brick2: server2.example.com:/data
Options Reconfigured:
auth.allow: 192.168.0.102
[root@server1 ~]#
4 Setting Up The GlusterFS Client
client1.example.com:
On the client, we can install the GlusterFS client as follows:
yum install glusterfs-client
Then we create the following directory:
mkdir /mnt/glusterfs
That's it! Now we can mount the GlusterFS filesystem to /mnt/glusterfs with the following command:
(Instead of server1.example.com you can as well use server2.example.com in the above command!)
You should now see the new share in the outputs of...
mount
[root@client1 ~]# mount
/dev/mapper/vg_client1-LogVol00 on / type ext4 (rw)
proc on /proc type proc (rw)
sysfs on /sys type sysfs (rw)
devpts on /dev/pts type devpts (rw,gid=5,mode=620)
tmpfs on /dev/shm type tmpfs (rw)
/dev/sda1 on /boot type ext4 (rw)
none on /proc/sys/fs/binfmt_misc type binfmt_misc (rw)
sunrpc on /var/lib/nfs/rpc_pipefs type rpc_pipefs (rw)
server1.example.com:/testvol on /mnt/glusterfs type fuse.glusterfs (rw,allow_other,default_permissions,max_read=131072)
[root@client1 ~]#
Instead of mounting the GlusterFS share manually on the client, you could modify /etc/fstab so that the share gets mounted automatically when the client boots.
Open /etc/fstab and append the following line:
Now let's check the /data directory on server1.example.com and server2.example.com. The test1 and test2 files should be present on each node: server1.example.com/server2.example.com:
As you see, server1.example.com hasn't
noticed the changes that happened while it was down. This is easy to
fix, all we need to do is invoke a read command on the GlusterFS share
on client1.example.com, e.g.:
The best way to fight an enemy is to start by learning everything you can about it, which is exactly what the team at Integreen are looking to do in the Italian city of Bolzano.
By using the latest technology and banking on open source software,
Integreen hopes to provide the city management with enough traffic and
environmental data to help them more effectively implement
environmentally conscience programs such as mass transit.
Bluetooth Traffic Monitoring
Integreen’s goal is to use the relatively new technique of Bluetooth
traffic monitoring to gather data on vehicular and pedestrian traffic
throughout the city. By putting Bluetooth scanners at known locations
and combining the resulting data, Integreen can extrapolate data like
traffic density and average transit times without requiring costly and
hard to maintain traditional vehicle counters.
There are of course, some limitations to this technology. Naturally,
any vehicle (or at least, occupant riding in said vehicle) needs to have
a Bluetooth device, and even then, it must be set to the so called
“Discoverable” mode. While this does significantly lower the amount of
data you will be able to gather (compared to say, a device
which measures pressure on the road), it has the distinct advantage of
being many orders of magnitude cheaper and easier to deploy.
Even with the limited sample size that Bluetooth traffic monitoring
provides, there is still a wealth of data to be collected. As long as
you have a handful of devices that you can track around through the
city, you’ll be able to determine average transit times and locate the
areas of highest congestion. You’ll never be able to get an accurate
idea of how many vehicles are with Bluetooth traffic
monitoring, but you can certainly determine where the concentrations of
them are and how fast they are moving around.
Still, an educated guess can be made by comparing the physical
vehicles with the detected Bluetooth devices and finding a rough
average. If one road is equipped with the hardware required to count
physical devices, and that is compared with the detected Bluetooth
devices in the same area, a rough average can be found.
If you can estimate that 25% of vehicles have discoverable Bluetooth
devices with this method, it would be safe enough to multiply the number
of discovered Bluetooth devices in other parts of the city by 4 to get a
rough idea of how many physical vehicles there are.
Scanner Development
For this project, Integreen needed a low cost, rugged, and highly
efficient device which could be deployed for long stretches of time.
Answering the call was the ever popular Raspberry Pi
ARM development board, which gave the team at Integreen a powerful and
efficient Linux computer at a fraction of the cost of commercial traffic
monitoring systems.
Combined with off-the-shelf Bluetooth hardware, a battery pack, and
placed in a weatherproof plastic enclosure, the Raspberry Pi became the
perfect hardware platform for Integreen to conduct its research with.
Internals of Raspberry Pi Monitoring Device
So far, four such devices have been constructed and strategically
located around Bolzano. The team at Integreen is still fine tuning the
operation to determine the best location for their Bluetooth scanners,
and how to correlate their data to the real world traffic situation. So
far, the team has focused on physically counting vehicles passing over a
stretch of road, and comparing that to their Bluetooth scanners running
various different configurations.
With continued experimentation, the team hopes to both learn about
the ideal placement of these devices, and adjust their software to
return the maximum amount of data possible.
On the software side, developer Paolo Valleri has been working on adapting multiple FOSS software projects for use in the project.
Open Data
By
opening up the development of their Bluetooth traffic monitoring
system, Integreen is helping more than just the city of Bolzano. Their
project can serve as an inspiration for other communities who could
benefit from this type of data but either cannot afford or don’t have
access to traditional traffic monitoring systems.
It doesn’t seem like much, but having access to this kind of
information can be a huge advantage for small towns which might not
otherwise be adequately represented when it comes time to spend
development money. Being able to determine the flow of traffic is
essential in many aspects of city planning and management, such as
ensuring the safety of intersections and planning bus routes and stops.
Information that can make or break these kind of everyday services
shouldn’t be locked up, it should be in the hands of everyone who lives
in the community.
With the published details on their hardware setup and backend
software, Integreen is laying the groundwork for a whole new generation
of low cost vehicle monitoring It’s not unreasonable to imagine a future
where traffic data is crowd sourced by concerned citizens with their
own Bluetooth traffic monitoring devices all over the city, helping to
ensure the quality of life in their own communities.
With the understanding of the ELF format, one gets to know about its
sections, the headers, etc. However, apart from the theoretical concepts
of ELF, how about if we can verify and understand the format in its
actual machine language i.e. the way machine understands it. Yes, we
have many tools out there which are provided by the open source
community, like readelf, objdump, etc to strip off an ELF binary.
However, in this article we shall be exploring the readelf command or
tool in Linux.
Please note, a prior understanding of the ELF format would be great for the readers of this article.
Linux readelf command
Introduction
readelf is a Linux utility which can read and understand the format of the ELF files, be it object files, executable etc.
It has the capability of displaying all sorts of information related to
ELF format, be it the section headers, the sections, or the symbols,
etc. One may wonder, why a programmer would we ever need to know such
kind of details? Well, such details are of great help when one is
debugging some “unresolved symbol” linking errors, or debugging
a crash or maybe hacking an executable. The most paramount is to know
how and when to use readelf.
The Usage
Here is the syntax in its abstract form:
$readelf
Well, there are numerous options offered by ‘readelf’ for many scenarios and usage. What better source than man page to get familiar with these options.
As described in the man page
In further sections, we shall be discussing a few of readelf command
options, how to understand them and to use them understand ELF format.
Following is our example C source code i.e. the test program, which
would be used, along with its object file and executable, throughout
this article.
test Program
#include < stdio.h >

int d = 1;
const int N = 48;

int main()
{
   char c;
   c = d + N;
   printf("Char is %c\n", c);

   return 0;
}
Any ELF file will have a top level ELF header, which like any other header lists down what is coming up.
In our test program, we can view the ELF header using option ‘-h’
$ readelf -h ./tstProgram
What we get is;
ELF Header:
 Magic:   7f 45 4c 46 01 01 01 00 00 00 00 00 00 00 00 00
 Class:                             ELF32
 Data:                              2's complement, little endian
 Version:                           1 (current)
 OS/ABI:                            UNIX - System V
 ABI Version:                       0
 Type:                              EXEC (Executable file)
 Machine:                           Intel 80386
 Version:                           0x1
 Entry point address:               0x8048310
 Start of program headers:          52 (bytes into file)
 Start of section headers:          4400 (bytes into file)
 Flags:                             0x0
 Size of this header:               52 (bytes)
 Size of program headers:           32 (bytes)
 Number of program headers:         8
 Size of section headers:           40 (bytes)
 Number of section headers:         29
 Section header string table index: 26
Lets understand what all these pieces of information means.
First of all, we see some bytes of data in the beginning of the Elf header.
7f 45 4c 46 01 01 01 00 00 00 00 00 00 00 00 00
The first four bytes represent the“Magic Number”, to identify the type of file. Here, these bytes
7f 45 4c 46
The remaining bytes represents the metadata of the file, like the version, size, data encoding etc.
We shall be discussing some of the listed information, not all as most of the header information are self explanatory like the
Data: 2's complement, little endian
which states that the data of file is being stored in the form of
2’s
complement with
little endian byte
order. The elf has 8 segments and 29 sections.
One important thing to note is the
Type: EXEC (Executable file)
It specifies if the ELF file is an Executable. An Elf file could be
an relocatable file (i.e. an object file), a shared object, core file or
processor specific. A Linux kernel object is of type relocatable.
Next is the entry point.
Entry point address: 0x8048310
All the beginner programmers are told that, the execution of a
program is entered from the method main(). However, actually, entry
point to a C executable is the method _start().
The hex number in front of ‘Entry point address’ i.e. 0×8048310 is
the the address of this method ‘_start’ which marks the entry point for
the instruction pointer. Note, this is the virtual address.
Regarding the entry through method ‘_start()’, lets confirm that
through a simple test. Lets write a program without main() and try to
compile it.
#include < stdio.h >

int function()
{

    printf("In function \n");
    return 1;
}
How about trying to compiling and linking it to get an executable? Lets try
$ gcc empty.c -o empty
/usr/lib/gcc/i686-linux-gnu/4.6/../../../i386-linux-gnu/crt1.o: In function `_start':
(.text+0x18): undefined reference to `main'
collect2: ld returned 1 exit status
Check out the error, it says, “In the function ‘_start’”, which
confirms that, first and foremost, it calls ‘_start’, which is the entry
point and there, it tries calling ‘main()’ which was not available and
hence the error.
One can also confirm it through its disassembly using Linux tool ‘objdump’ which is out of the scope of this article.
Next items in the ELF header are
 Start of program headers:          52 (bytes into file)
 Start of section headers:          4400 (bytes into file)
Here it specifies the offsets from the beginning of the elf file for
program header table and section header table in the ELF file. The
program header table lists the information related to segments needs to
be created in the run time process image. However, section table lists
all the information related to sections in the binary elf file. Hence,
it is through program table, it comes to know which section goes to
which segment.
Further moving on to
Flags:                             0x0
 Section header string table index: 26
The flags specify any processor specific flags and the Section header
string table contains the null terminated strings which are the names
of the sections. Hence, in our case, section header string table is at
index ‘26’.
Sections
Moving on what are the sections lying underneath the elf file, we use the ‘-S’ option
readelf -S ./tstProgram
Using -S option, readelf lists down the section headers of the elf file, along with the offset at which they are starting at.
In our case we get
There are 29 section headers, starting at offset 0x1130:

Section Headers:
 [Nr] Name              Type            Addr     Off    Size   ES Flg Lk Inf Al
 [ 0]                   NULL            00000000 000000 000000 00      0   0  0
 [ 1] .interp           PROGBITS        08048134 000134 000013 00   A  0   0  1
 [ 2] .note.ABI-tag     NOTE            08048148 000148 000020 00   A  0   0  4
 [ 3] .note.gnu.build-i NOTE            08048168 000168 000024 00   A  0   0  4
 [ 4] .gnu.hash         GNU_HASH        0804818c 00018c 000020 04   A  5   0  4
 [ 5] .dynsym           DYNSYM          080481ac 0001ac 000050 10   A  6   1  4
 [ 6] .dynstr           STRTAB          080481fc 0001fc 00004c 00   A  0   0  1
 [ 7] .gnu.version      VERSYM          08048248 000248 00000a 02   A  5   0  2
 [ 8] .gnu.version_r    VERNEED         08048254 000254 000020 00   A  6   1  4
 [ 9] .rel.dyn          REL             08048274 000274 000008 08   A  5   0  4
 [10] .rel.plt          REL             0804827c 00027c 000018 08   A  5  12  4
 [11] .init             PROGBITS        08048294 000294 000030 00  AX  0   0  4
 [12] .plt              PROGBITS        080482c4 0002c4 000040 04  AX  0   0  4
 [13] .text             PROGBITS        08048310 000310 00018c 00  AX  0   0 16
 [14] .fini             PROGBITS        0804849c 00049c 00001c 00  AX  0   0  4
 [15] .rodata           PROGBITS        080484b8 0004b8 000018 00   A  0   0  4
 [16] .eh_frame         PROGBITS        080484d0 0004d0 000004 00   A  0   0  4
 [17] .ctors            PROGBITS        08049f14 000f14 000008 00  WA  0   0  4
 [18] .dtors            PROGBITS        08049f1c 000f1c 000008 00  WA  0   0  4
 [19] .jcr              PROGBITS        08049f24 000f24 000004 00  WA  0   0  4
 [20] .dynamic          DYNAMIC         08049f28 000f28 0000c8 08  WA  6   0  4
 [21] .got              PROGBITS        08049ff0 000ff0 000004 04  WA  0   0  4
 [22] .got.plt          PROGBITS        08049ff4 000ff4 000018 04  WA  0   0  4
 [23] .data             PROGBITS        0804a00c 00100c 00000c 00  WA  0   0  4
 [24] .bss              NOBITS          0804a018 001018 000008 00  WA  0   0  4
 [25] .comment          PROGBITS        00000000 001018 00002a 01  MS  0   0  1
 [26] .shstrtab         STRTAB          00000000 001042 0000ee 00      0   0  1
 [27] .symtab           SYMTAB          00000000 0015b8 000420 10     28  44  4
 [28] .strtab           STRTAB          00000000 0019d8 000206 00      0   0  1
Key to Flags:
 W (write), A (alloc), X (execute), M (merge), S (strings)
 I (info), L (link order), G (group), T (TLS), E (exclude), x (unknown)
 O (extra OS processing required) o (OS specific), p (processor specific)
So, looking through its output, one can actually structure through the ELF file, with addresses and offsets.
As one can observe from the output, all sections have a name and a type. Each type has a meaning, important ones are as follows
PROGBITS : This section holds data related to the program. Examples would be sections like .text, .data, etc.
NOTE : This section holds data which is not used by the program
though. In the above output, you can observe the section
“.note.gnu.build-i” as a NOTE section. It holds a build-id, which may be
necessary for a particular project build maintenance this source is
part of, but is not at all needed by the application.
SYMTAB : This section holds the symbol table. Just as an exercise,
observe this section in two cases, building the executable with debug
option ‘-g’ and without the debug option.
REL : It is in this section it holds the relocation entries.
NOBITS : This section is empty and holds no data.
STRTAB : This section would hold the string table.
DYNAMIC : This Section holds details regarding dynamic linking.
NULL : Its an inactive one and associated to no section.
After section type, it gives the address at which the section is on memory, the offset and its size.
The next ones are all flags related to linking and debugging. Although the Flags do signify certain things like A allocatable X executable W writable M mergeable S holds null terminated strings G member of section group T used for thread local storage
Segments
The segments play their role in the execution image of the ELF, the
same way sections are in the linking image of the ELF. Hence, while the
process is running, triggered by an ELF executable, all the
instructions, data, etc are held in segments. Hence, when execution is
initiated, data and information from sections are moved to segments, as
per a set mapping.
To view this mapping and what segments, we use
$readelf -l ./tstProgram
In our case, the output we see is
Elf file type is EXEC (Executable file)
Entry point 0x8048310
There are 8 program headers, starting at offset 52

Program Headers:
 Type           Offset   VirtAddr   PhysAddr   FileSiz MemSiz  Flg Align
 PHDR           0x000034 0x08048034 0x08048034 0x00100 0x00100 R E 0x4
 INTERP         0x000134 0x08048134 0x08048134 0x00013 0x00013 R   0x1
     [Requesting program interpreter: /lib/ld-linux.so.2]
 LOAD           0x000000 0x08048000 0x08048000 0x004d4 0x004d4 R E 0x1000
 LOAD           0x000f14 0x08049f14 0x08049f14 0x00104 0x0010c RW  0x1000
 DYNAMIC        0x000f28 0x08049f28 0x08049f28 0x000c8 0x000c8 RW  0x4
 NOTE           0x000148 0x08048148 0x08048148 0x00044 0x00044 R   0x4
 GNU_STACK      0x000000 0x00000000 0x00000000 0x00000 0x00000 RW  0x4
 GNU_RELRO      0x000f14 0x08049f14 0x08049f14 0x000ec 0x000ec R   0x1

Section to Segment mapping:
 Segment Sections...
  00
  01     .interp
  02     .interp .note.ABI-tag .note.gnu.build-id .gnu.hash .dynsym .dynstr .gnu.version .gnu.version_r .rel.dyn .rel.plt .init .plt .text .fini .rodata .eh_frame
  03     .ctors .dtors .jcr .dynamic .got .got.plt .data .bss
  04     .dynamic
  05     .note.ABI-tag .note.gnu.build-id
  06
  07     .ctors .dtors .jcr .dynamic .got
Note that, it states all the segments, its offset, virtual and physical address, etc.
Moreover, looking into the bottom half output, it mentions how sections
are mapped to each segment. For Example,segment 02 i.e. LOAD is created
through sections
After the compilation of a source code, we get an object file. There
may be certain symbols in this object file which have undefined
references i.e. their definition is still unknown. The symbols get
resolved during linking i.e. if a function is being called, then the
caller is updated with the function’s address, so that it can jump to
its definition during execution. This is called symbol resolution. If
due to any reason, the definition is not there, then the linker would
complain.
Lets get more insight of symbol resolutions using readelf.
We would have to take a two file test program to explore symbol resolution.
NOTE: This example source code is entirely and only for this section “Symbol resolution”.
main.c
#include < stdio.h >
char toChar(int num);
int main()
{

    int num = 3;
    char ch;
    ch = toChar(num);
    printf("Char is %c \n", ch);

    return 0;
}
Do you think, there would be any unresolved symbols in the object files?
readelf will help us find it out by peeking into its symbol table,
$readelf -s main.o
what do we see?
Symbol table '.symtab' contains 12 entries:
  Num:    Value  Size Type    Bind   Vis      Ndx Name
    0: 00000000     0 NOTYPE  LOCAL  DEFAULT  UND
    1: 00000000     0 FILE    LOCAL  DEFAULT  ABS main.c
    2: 00000000     0 SECTION LOCAL  DEFAULT    1
    3: 00000000     0 SECTION LOCAL  DEFAULT    3
    4: 00000000     0 SECTION LOCAL  DEFAULT    4
    5: 00000000     0 SECTION LOCAL  DEFAULT    5
    6: 00000000     0 SECTION LOCAL  DEFAULT    7
    7: 00000000     0 SECTION LOCAL  DEFAULT    8
    8: 00000000     0 SECTION LOCAL  DEFAULT    6
    9: 00000000    62 FUNC    GLOBAL DEFAULT    1 main
    10: 00000000     0 NOTYPE  GLOBAL DEFAULT  UND toChar
    11: 00000000     0 NOTYPE  GLOBAL DEFAULT  UND printf
The last column lets us know the name of the symbols. All the global
variables and functions, even main() are being part of our program are
included in the symbol table.
Notice,
    10: 00000000     0 NOTYPE  GLOBAL DEFAULT  UND toChar
    11: 00000000     0 NOTYPE  GLOBAL DEFAULT  UND printf
It mentions ‘UND’ before printf and toChar, and that is how it tells
about the undefined symbol. Rightly stated as the standard function
‘printf()’ would be defined in the library ‘libc’, which is not yet
linked and ‘toChar()’ is defined in a separate object file.
Let’s concentrate only on symbol ‘toChar’ as ‘printf’ symbol
resolution would need the knowledge of dynamic linking and much more,
which is beyond the scope of this article.
Now, to see the symbol table of the final executable,
$readelf -s main
and zooming in to the symbol ‘toChar’ in the symbol table.
52: 08048424 21 FUNC GLOBAL DEFAULT 13 toChar
Yes, it is no more undefined as when the executable was created, the
object file was linked to ch.o, and this object file holds the
definition of ‘toChar’ and the symbol got resolved in the final
executable.
Relocation
Before the linking phase, the object files are relocatable. By
relocatable, we mean all the symbol references occupying relative
address spaces. Hence, when the program is actually loaded on memory,
those addresses would be different.
Relocation involves:
Once the symbol resolution is done, the next big thing is to
combining the sections of all the object files and use them to create
one section for the executable. For example, all the object files would
be having a .bss section, however there has to be just one .bss,
combining information from all the object files.
Updating all the addresses of the symbols with its load-time addresses.
Now we shall be pulling out the roots of relocation using readelf.
We’ll get back to our very own test program i.e. tstProgram.c included
in section “The Usage”.
To have a look at the relocation section of the object file,
$ readelf -r tstProgram.o

Relocation section '.rel.text' at offset 0x398 contains 4 entries:
Offset     Info    Type            Sym.Value  Sym. Name
0000000a  00000801 R_386_32          00000000   d
00000011  00000901 R_386_32          00000000   N
00000022  00000501 R_386_32          00000000   .rodata
0000002e  00000b02 R_386_PC32        00000000   printf
These are the relocation entries, which majorly hold the
offset
r_info
addend
The offset is the offset at which this particular storage unit would be placed at, on which relocation needs to be applied.
The r_info, caters two purposes – one, it gives the index of the
symbol, in the symbol table with respect to which, relocation is to be
made.
It is computed through following macro for both 32 bit and 64 bit,
which is defined in /usr/src/linux-2.6.39/include/linux/elf.h in my
case.
/* The following are used with relocations */
#define ELF32_R_SYM(x) ((x) >> 8)
#define ELF64_R_SYM(i)                  ((i) >> 32)
Picking a symbol, lets take ‘N’ from the relocation entry.
00000011 00000901 R_386_32 00000000 N
For symbol ‘N’,
offset = 0x00000011
r_info = 0x901
Offset from the start of the section is 0×11, for it which needs to be relocated.
First let’s compute which symbol does relocation go to. The index of
the relocation, from the symbol table is, as computed using the macro
mentioned above.
For 32 bit,
#define ELF32_R_SYM(x) ((x) >> 8)
Here ‘x’ is ‘r_info’ which is 0×901 in hex, and in binary it comes out to be
r_info = 100100000001
r_info >> 8 i.e. 100100000001 >> 8
= 1001
= 9 in decimal
Hence, we need to go to index 9 of the symbol table. How do we see the symbol table?
$readelf -s tstProgram.o

Symbol table '.symtab' contains 12 entries:
  Num:    Value  Size Type    Bind   Vis      Ndx Name
    0: 00000000     0 NOTYPE  LOCAL  DEFAULT  UND
    1: 00000000     0 FILE    LOCAL  DEFAULT  ABS tstProgram.c
    2: 00000000     0 SECTION LOCAL  DEFAULT    1
    3: 00000000     0 SECTION LOCAL  DEFAULT    3
    4: 00000000     0 SECTION LOCAL  DEFAULT    4
    5: 00000000     0 SECTION LOCAL  DEFAULT    5
    6: 00000000     0 SECTION LOCAL  DEFAULT    7
    7: 00000000     0 SECTION LOCAL  DEFAULT    6
    8: 00000000     4 OBJECT  GLOBAL DEFAULT    3 d
    9: 00000000     4 OBJECT  GLOBAL DEFAULT    5 N
   10: 00000000    57 FUNC    GLOBAL DEFAULT    1 main
   11: 00000000     0 NOTYPE  GLOBAL DEFAULT  UND printf
Check out index 9 symbol entry, which is
9: 00000000 4 OBJECT GLOBAL DEFAULT 5 N
From here, we need to go to the relevant section, which is identified
through ‘Ndx’ value. The ‘Ndx’ value is ‘5’ for symbol index ‘9’.
Ndx = 5
Further, to see, to which it needs to relocate, we need to look at the section headers.
$ readelf -S tstProgram.o
There are 11 section headers, starting at offset 0x100:

Section Headers:
 [Nr] Name              Type            Addr     Off    Size   ES Flg Lk Inf Al
 [ 0]                   NULL            00000000 000000 000000 00      0   0  0
 [ 1] .text             PROGBITS        00000000 000034 000039 00  AX  0   0  4
 [ 2] .rel.text         REL             00000000 000398 000020 08      9   1  4
 [ 3] .data             PROGBITS        00000000 000070 000004 00  WA  0   0  4
 [ 4] .bss              NOBITS          00000000 000074 000000 00  WA  0   0  4
 [ 5] .rodata           PROGBITS        00000000 000074 000010 00   A  0   0  4
 [ 6] .comment          PROGBITS        00000000 000084 00002b 01  MS  0   0  1
 [ 7] .note.GNU-stack   PROGBITS        00000000 0000af 000000 00      0   0  1
 [ 8] .shstrtab         STRTAB          00000000 0000af 000051 00      0   0  1
 [ 9] .symtab           SYMTAB          00000000 0002b8 0000c0 10     10   8  4
 [10] .strtab           STRTAB          00000000 000378 00001e 00      0   0  1
Key to Flags:
 W (write), A (alloc), X (execute), M (merge), S (strings)
 I (info), L (link order), G (group), T (TLS), E (exclude), x (unknown)
 O (extra OS processing required) o (OS specific), p (processor specific)
Our ‘Ndx’ value is actually ‘Nr’ in this section header table. Hence,
our relocation is to the section corresponding to section with ‘Nr’
value as ‘5’ which is .rodata
So, now, we can say, that relocation for the storage unit at offset
0×11, ’ in our program is in ELF section ‘.rodata’ at an offset 0×0
(taken from symbol table). There is a concrete way to compute the exact
address, which depends on type of the relocation and the underlying
architecture.
Here is one of such table listing the way of computation for Intel Architecture,
 Name | Value | Field | Calculation
R_386_NONE     |    0    |     none        |     none
R_386_32         |    1     |    word32    |     S + A
R_386_PC32         |    2     |    word32    |    S + A - P
R_386_GOT32    |    3    |    word32    |    G + A - P
R_386_PLT32        |    4    |    word32    |    L + A - P
R_386_COPY        |    5    |    none        |    none
R_386_GLOB_DAT    |    6    |    word32    |    S
R_386_JMP_SLOT    |    7    |    word32    |    S
R_386_RELATIVE    |    8    |    word32    |    B + A
R_386_GOTOFF    |    9    |    word32    |    S + A - GOT
R_386_GOTPC    |    10    |    word32    |    GOT + A - P
Where, S = value of symbol whose index resides in relocation A = the addend, it is one of the adjustment variable for padding. P = place of the storage unit which is being relocated. GOT = Global Offset Table address B = base address at which shared object is being loaded in memory during execution
To compute type of relocation, we need to use macro for 32 bit,
#define ELF32_R_TYPE(x) ((x) & 0xff)
that is, last one byte, which is 0×1.
For relocation type 1 and intel architecture, it uses
S + A
Conclusion
This was all about playing with readelf, to understand and imbibe the
elf format. However, besides learning, readelf is really useful
debugging linking issues, and many complicated issues due to intricacies
in the elf. However, it is also a great tool to debug Linux kernel
objects. It is one of those tools, which may be difficult to learn, but
in-stores plethora of features and interesting ways to use it.
In the end, I would say, happy to learn about your experiences with
readelf, how it helped you and what options did you use and in what way.
SO as you can probably tell from the title, this will be a small tutorial on how to get the password for android devices, specifically if it has a gesture password (see image left of here) For this demonstration I was getting the password for my HTC sensation, using the latest version of Debian.
For this to work you need to be able to access the /data/system/gesture.key file on the target device, This is done either with ADB or through a JTAG hardware interface. For this demonstration I'll be using ADB.
This is for educational purposes only, you should only do this on your own devices or with the owners permission.
So lets get started. There are a few programs you will need if you don't have them already:
$ apt-get installandroid-tools-adb unrar wget
Firstly check that ADB is working, and that there is only 1 device. If you have more than one device then you will need to remember the device ID and modify the commands accordingly.
$ adb devices
List of devices attached
SH16GV808818 device
This command will pull down the gesture.key file onto your local system.
$ adb pull /data/system/gesture.key
0 KB/s(20 bytes in0.046s)
Now download the rainbow table of all the possible codes and correlating pins and unrar it
 because
it is the default Linux shell, and you'll need to know it no matter
what other languages you learn. Don't make yourself crazy trying to
decide which scripting or programming language to learn first-- just
pick one. Everyone has their own ideas which ones are essential, and you
can overthink yourself right out of even trying to start. Javascript,
Python, Ruby, and PHP are all popular, fairly easy to learn, and
well-documented. C is an oldtimer that is not going away anytime soon.
Basic programming concepts are the same no matter what language you're
using, so as soon as you develop some proficiency with one it's easier
to learn additional languages.
because
it is the default Linux shell, and you'll need to know it no matter
what other languages you learn. Don't make yourself crazy trying to
decide which scripting or programming language to learn first-- just
pick one. Everyone has their own ideas which ones are essential, and you
can overthink yourself right out of even trying to start. Javascript,
Python, Ruby, and PHP are all popular, fairly easy to learn, and
well-documented. C is an oldtimer that is not going away anytime soon.
Basic programming concepts are the same no matter what language you're
using, so as soon as you develop some proficiency with one it's easier
to learn additional languages. Money
Money