http://www.linux-magazine.com/Online/Blogs/Productivity-Sauce/Correct-Lens-Distortion-in-GIMP-with-GimpLensfun
While GIMP offers a wide range of tools for working with photos, it
lacks one feature that is essential for serious photographers: the
ability to automatically fix lens distortion. Fortunately, the GimpLensfun plugin fills the void quite nicely. As the name suggests, the plugin uses the excellent LensFun
library as its back end. One way to install the plugin is to compile it
from source. Start with installing the required packages. On Ubuntu,
this can be done using the following command:
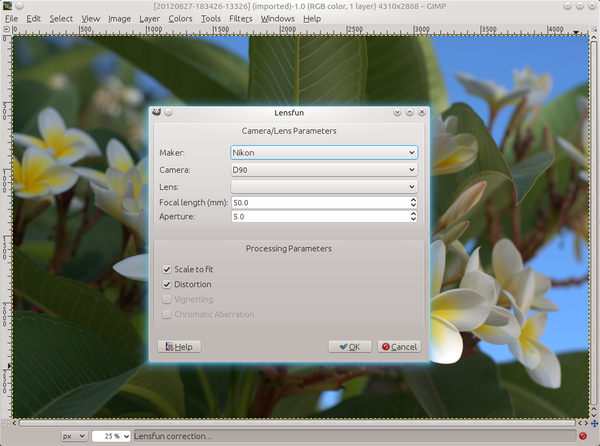
Once the plugin has been installed it can be accessed via the Filters | Enhance | GimpLensfun menu. The plugin automatically reads the lens and camera model along with the corresponding parameters from the photo's EXIF data, so all you need to do is to hit OK to apply lens correction.
sudo apt-get install build-essential libgimp2.0-dev libexiv2-dev liblensfun-dev gitGrab then the latest source code from the project's GitHub repository:
git clone git://github.com/seebk/GIMP-Lensfun.gitSwitch to the GIMP-Lensfun directory and run the make command to compile the plugin:
cd GIMP-Lensfun
make
Move then the compiled gimp-lensfun plugin to the ~/.gimp-2.x/plug-ins/ directory, and you are done. If you don't feel like getting your hands dirty compiling the plugin, you can grab the latest tarball from the project's website. The archive contains compiled versions of the plugin stored in the /bin/linux directory.
|
Once the plugin has been installed it can be accessed via the Filters | Enhance | GimpLensfun menu. The plugin automatically reads the lens and camera model along with the corresponding parameters from the photo's EXIF data, so all you need to do is to hit OK to apply lens correction.

No comments:
Post a Comment