http://www.ostechnix.com/neofetch-display-linux-systems-information


Hi guys! How are you doing?
Today, I have come up with an interesting utility that displays the
Linux distribution’s information in Terminal. Meet Neofetch,
a simple, yet useful script that gathers information about your system
and displays them in the Terminal, with an ascii image or your
distribution’s logo, or any image of your choice right next to the
output. You can customize which information is displayed, where it is
displayed and when it is displayed. It supports Linux, BSD, Mac OS X,
iOS, and Windows operating systems.
In this brief tutorial, Let us see how to display the Linux system’s information using Neofetch.
Install Neofetch
In Arch Linux:
Neofetch is available in AUR. So you can install it either using packer or yaourt. To install packer or yaourt, check the following links.
After installing packer or Yaourt, enter the following command to install Neofetch from the Terminal:
Using packer:
packer -S neofetch
Or,
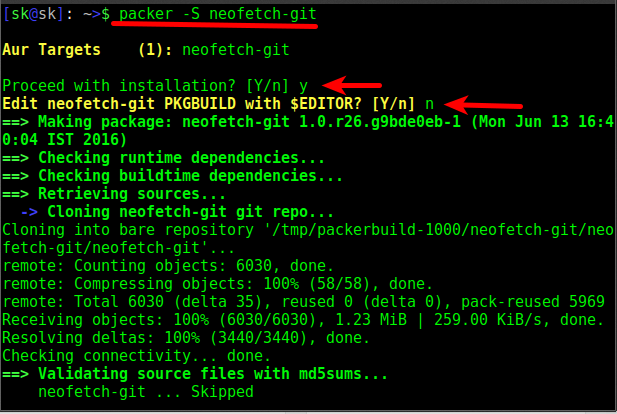
packer -S neofetch-git
Using Yaourt:
yaourt -S neofetch
Or,
yaourt -S neofetch-git
Sample output:
Press “y” when the installer asks to proceed with installation, and press ‘n’ when it asks you to edit neofetch PKGBUILD.

In Ubuntu:
Add the following repository:
sudo add-apt-repository ppa:dawidd0811/neofetch
Update sources list:
sudo apt-get update
And, install Neofetch using command:
sudo apt-get install neofetch
In Debian:
Add third party neofetch repository:
echo "deb http://dl.bintray.com/dawidd6/neofetch jessie main" | sudo tee -a /etc/apt/sources.list
Add public key using command:
curl -L "https://bintray.com/user/downloadSubjectPublicKey?username=bintray" -o Release-neofetch.key && sudo apt-key add Release-neofetch.key && rm Release-neofetch.key
Update the sources list:
sudo apt-get update
Finally, install Neofetch using command:
sudo apt-get neofetch
In Fedora / CentOS / RHEL / Scientific Linux:
Install dnf-plugins-core first:
sudo dnf install dnf-plugins-core
Add and enable COPR repository that contains the Neofetch package.
sudo dnf copr enable konimex/neofetch
Then, install neofetch using command:
sudo dnf install neofetch
Neofetch basic usage
Neofetch is pretty easy and straightforward. Let us see some examples.
Open up your Terminal, and run the following command:
neofetch
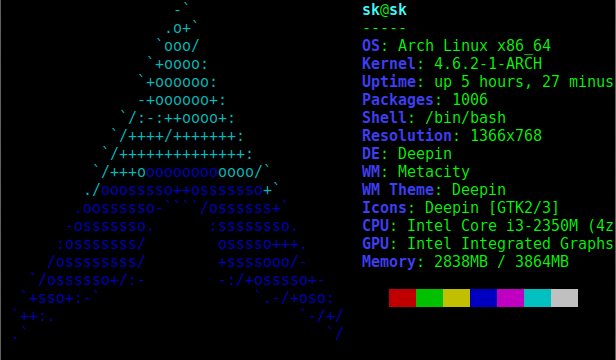
Sample output:

As you in the above output, neofetch has displayed the following details about my Arch Linux system.
- Name of operating system that I use
- Kernel details
- Shell details
- Uptime
- RAM size
- List of installed packages
- CPU information
- GPU details
- Display resolution
- Desktop environment
- Window manager
- Theme details
Also, You can even take the screenshot
of the above output and save it to the location of your choice. To do
so, make sure you have installed ‘scrot’ tool.
In Arch Linux:
sudo pacman -S scrot
In Ubuntu and other DEB based systems:
sudo apt-get install scrot
In Fedora and other RPM distros:
sudo dnf install scrot
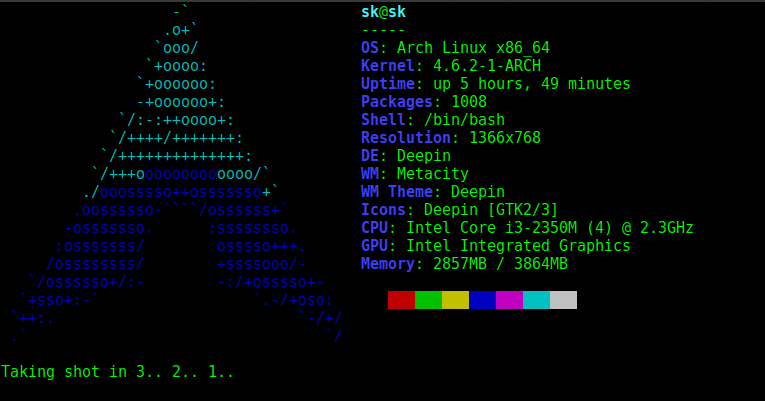
For example, I want to take the screenhsot of my system details generated by Neofetch, and save it in my home folder.
neofetch --scrot /home/sk/ostechnix.png
Sample output:

As you see, the above command will take a screenshot of Neofetch’s output and save it in the /home/sk/ location. You can change the location of your choice.
Neofetch has plenty of other options too. You can sort the result only with OS details, or Up time.
To view all available options in Neofetch, run:
neofetch --help

As far as I tested Neofetch, It worked
perfectly in my Arch Linux system as I expected. It is a nice tool to
easily and quickly the details of your system in few seconds. Give it a
try you’ll find it useful.
That’s all for now. If you like this tutorial, please share it on your social networks and support OSTechNix.
Cheers!
Reference links:

No comments:
Post a Comment