http://xmodulo.com/2014/05/manage-linux-containers-docker-ubuntu.html
While full hardware virtualization such as KVM, Xen or Hyper-V is
great at running fully isolated instances of multiple operating systems
on a physical host, it comes with various overheads in terms of
performance, resource, and provisioning time. Depending on your use
cases, full machine virtuailization may actually not be necessary.
An alternative lightweight virtualization approach is so-called Linux Containers (LXC), which provides operating system level virtualization. Without the overhead of running virtual machines, LXC allows you to run multiple instances of full Linux operating system within lightweight container sandbox. Containers can be very useful when you set up a reproducible development/test environment or deploy applications within secure sandboxes.
Docker is an open-source tool which was developed to facilitate the deployment of Linux containers. Docker is fast becoming a de-facto standard for container technologies, being embraced in major Linux distros such as Ubuntu and Red Hat.
In this tutorial, I am going to demonstrate how to manage Linux containers with Docker on Ubuntu 14.04. Note that instructions may be slightly different for earlier versions of Ubuntu.
At this time, the Docker package available on Ubuntu only supports 64-bit systems. To run it on 32-bit machine, you will need to build 32-bit version of Docker from source.
Next, edit the Docker configuration file to update the location of the Docker binary.
To exit a Docker container, type "exit" at the prompt inside the container.
You can launch containers in different flavors. For example, to start a Fedora container:
If you want to launch a container with a particular distro release, you can also do that. For example, to start a Ubuntu 13.04 Docker:

An alternative lightweight virtualization approach is so-called Linux Containers (LXC), which provides operating system level virtualization. Without the overhead of running virtual machines, LXC allows you to run multiple instances of full Linux operating system within lightweight container sandbox. Containers can be very useful when you set up a reproducible development/test environment or deploy applications within secure sandboxes.
Docker is an open-source tool which was developed to facilitate the deployment of Linux containers. Docker is fast becoming a de-facto standard for container technologies, being embraced in major Linux distros such as Ubuntu and Red Hat.
In this tutorial, I am going to demonstrate how to manage Linux containers with Docker on Ubuntu 14.04. Note that instructions may be slightly different for earlier versions of Ubuntu.
At this time, the Docker package available on Ubuntu only supports 64-bit systems. To run it on 32-bit machine, you will need to build 32-bit version of Docker from source.
Install Docker
Installing Docker is easy with apt-get command.
$ sudo apt-get install docker.io
To allow non-root user to run Docker, add yourself to docker group. The command below will allow the current user to run Docker without root permission.
$ sudo usermod -a -G docker $USER
Log out and then re-login to activate group membership change.Next, edit the Docker configuration file to update the location of the Docker binary.
$ sudo vi /etc/default/docker.io
DOCKER="/usr/bin/docker.io"Restart Docker service.
$ sudo service docker.io restart
Manage Docker Containers
If you want to start a new Docker container of Ubuntu operating system, first pull Ubuntu Docker image first. The command below will download Docker image over a network.
$ docker pull ubuntu
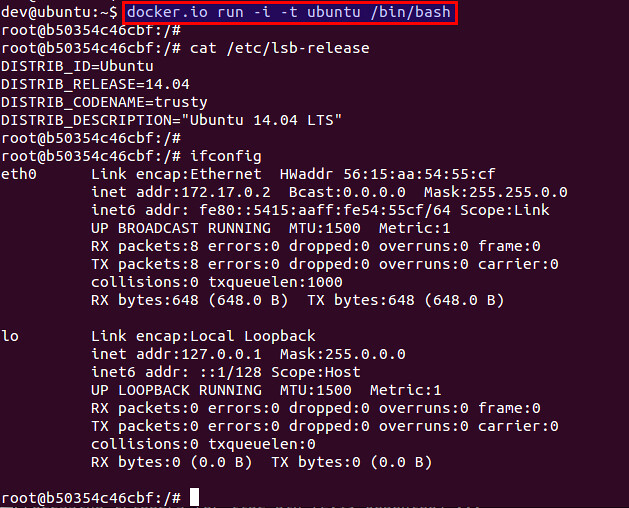
You can start a Ubuntu Docker in an interactive mode as follows. The
last argument "/bin/bash" is the command that will be executed inside a
container once it is launched, in this case, a simple bash shell.
$ docker run -i -t ubuntu /bin/bash
The above command will launch a Ubuntu container immediately (which
is the beauty of containers!), and give you a shell prompt inside the
container. At this point, you should be able to access a full Ubuntu
operating system inside a sandboxed environment.To exit a Docker container, type "exit" at the prompt inside the container.
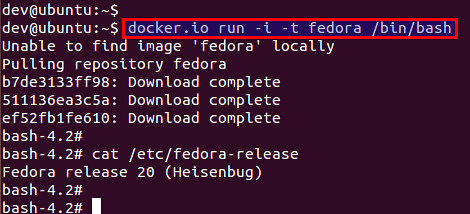
You can launch containers in different flavors. For example, to start a Fedora container:
$ docker.io run -i -t fedora /bin/bash
If a Fedora Docker image is not available locally, the command will
automatically download the image first, and then launch a Docker.If you want to launch a container with a particular distro release, you can also do that. For example, to start a Ubuntu 13.04 Docker:
$ docker.io run -i -t ubuntu:13.04 /bin/bash
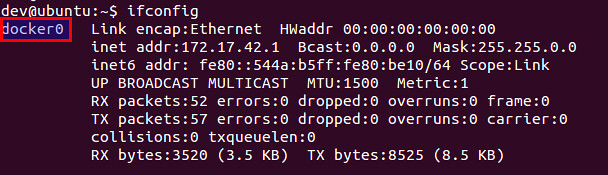
Container Networking
Docker uses Linux bridge to interconnect containers with each other, and to connect them to external networks. After installing Docker, you should see docker0 Linux bridge created automatically by default. Every container you create will be connected to docker0 bridge interface.Custom Linux Bridge
If you want, you can use a custom Linux bridge to interconnect containers. For that, you can create a custom bridge and configure it as follows. You can assign a separate subnet to the bridge, and have Dockers assigned IP addresses from the subnet. I am going to use 10.0.0.0/24 as a Docker subnet.
$ sudo apt-get install bridge-utils
$ sudo brctl addbr br0
$ sudo ifconfig br0 10.0.0.1 netmask 255.255.255.0
To make the custom bridge used by Docker, add "-b=br0" to DOCKER_OPTS
variable in /etc/default/docker.io, and restart Docker service.$ sudo brctl addbr br0
$ sudo ifconfig br0 10.0.0.1 netmask 255.255.255.0
$ sudo service docker.io restart
At this point, any new container will be connected to br0, and its IP address will automatically be assigned from 10.0.0.0/24.Other Customizations
There are several other ways to customize the default network settings of Docker, mostly by tweaking DOCKER_OPTS variable in /etc/default/docker.io.- "-dns 8.8.8.8 -dns 8.8.4.4": specify the DNS servers used by a container.
- "-icc=false": make containers isolated from each other.
Troubleshooting
1. You encounter the following error when running docker.io command.dial unix /var/run/docker.sock: no such file or directoryThe error may be because Docker daemon is not running. Check the status of Docker daemon, and make sure to start it first.
$ sudo service docker.io status
$ sudo service docker.io start
$ sudo service docker.io start

No comments:
Post a Comment