https://www.howtoforge.com/tutorial/map-mouse-on-linux
The Linux desktop is unfortunately not a mainstream operating system, and so peripherals manufacturers don't care much whether those cool extra side buttons (or whatever else) of our mouse works as intended or not. Thankfully, Linux is a powerful system that allows users to set things as they like, so here is a quick guide on how to map your mouse.
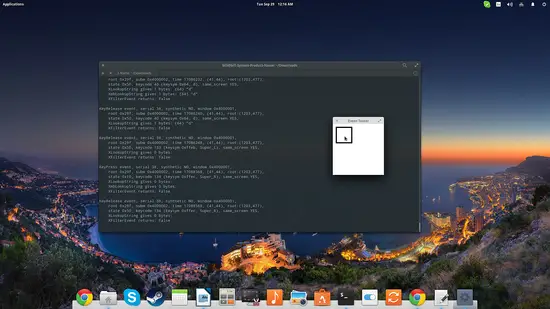
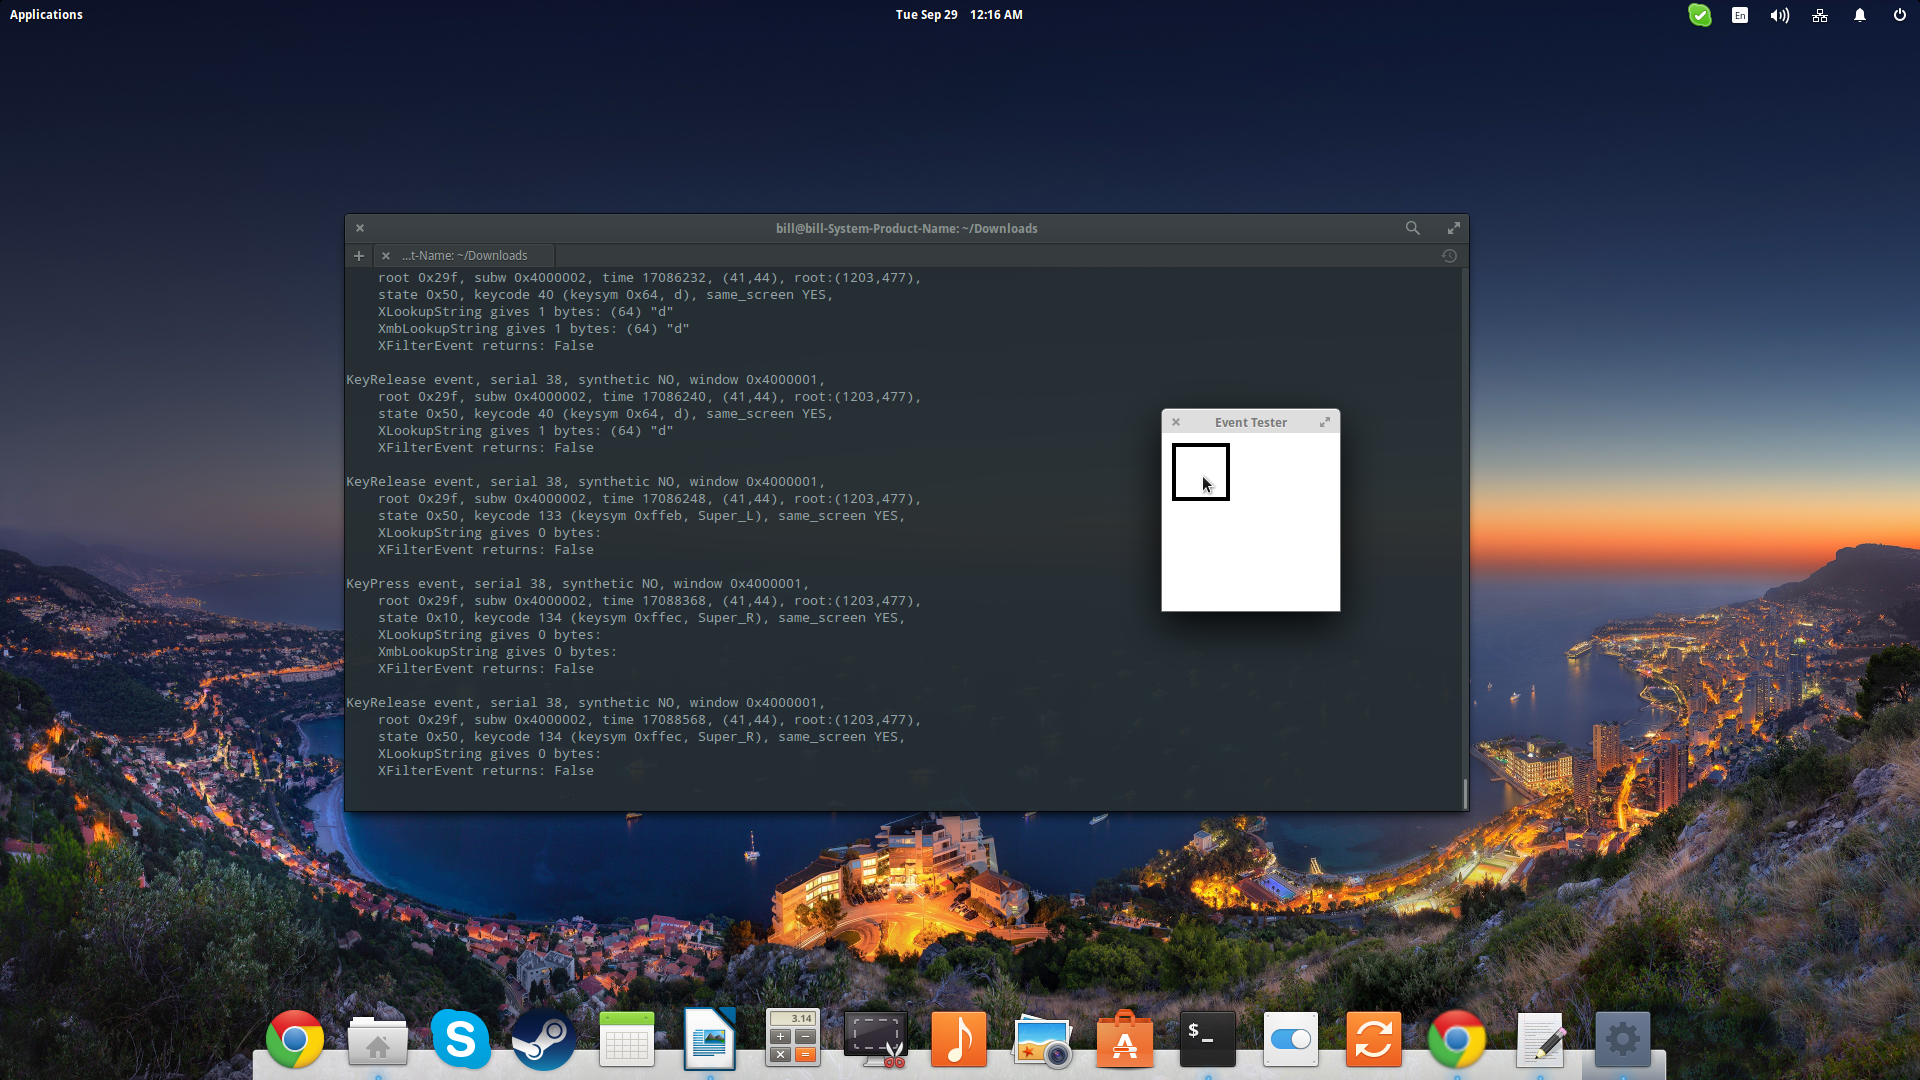
First, make sure to install the packages “xbindkeys” and “xautomation”. Then open a terminal and type “xev” and press enter. This little tool is essential for the process of mapping your mouse as it creates a small window and monitors mouse movement and actions on it. Take your cursor above this window and start clicking your mouse buttons to determine what number is assigned on each one.
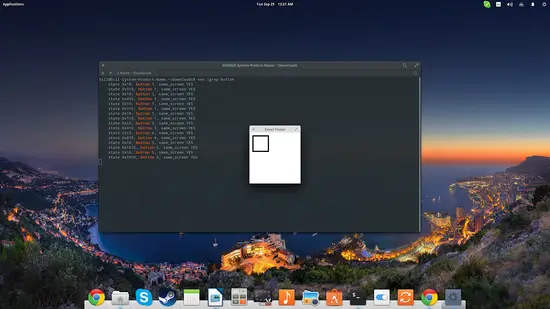
 If you got overwhelmed by the volume of information that is printed
on the terminal with this command, you can alternatively use the “xev
|grep button” to limit the terminal output on the mouse button clicks
only.
If you got overwhelmed by the volume of information that is printed
on the terminal with this command, you can alternatively use the “xev
|grep button” to limit the terminal output on the mouse button clicks
only.
 Now that we know what button corresponds to what number we can
proceed to the mapping by navigating to the etc/X11/xorg.conf and
opening the configuration file for editing. Note that to edit and save
your changes to the file, you will need to do it as root. If you can't
find an xorg.conf file in the indicated location, don't be alarmed as
this is a common thing for Ubuntu-based distributions nowadays. You can
generate an xorg.conf file by doing the following:
Now that we know what button corresponds to what number we can
proceed to the mapping by navigating to the etc/X11/xorg.conf and
opening the configuration file for editing. Note that to edit and save
your changes to the file, you will need to do it as root. If you can't
find an xorg.conf file in the indicated location, don't be alarmed as
this is a common thing for Ubuntu-based distributions nowadays. You can
generate an xorg.conf file by doing the following:
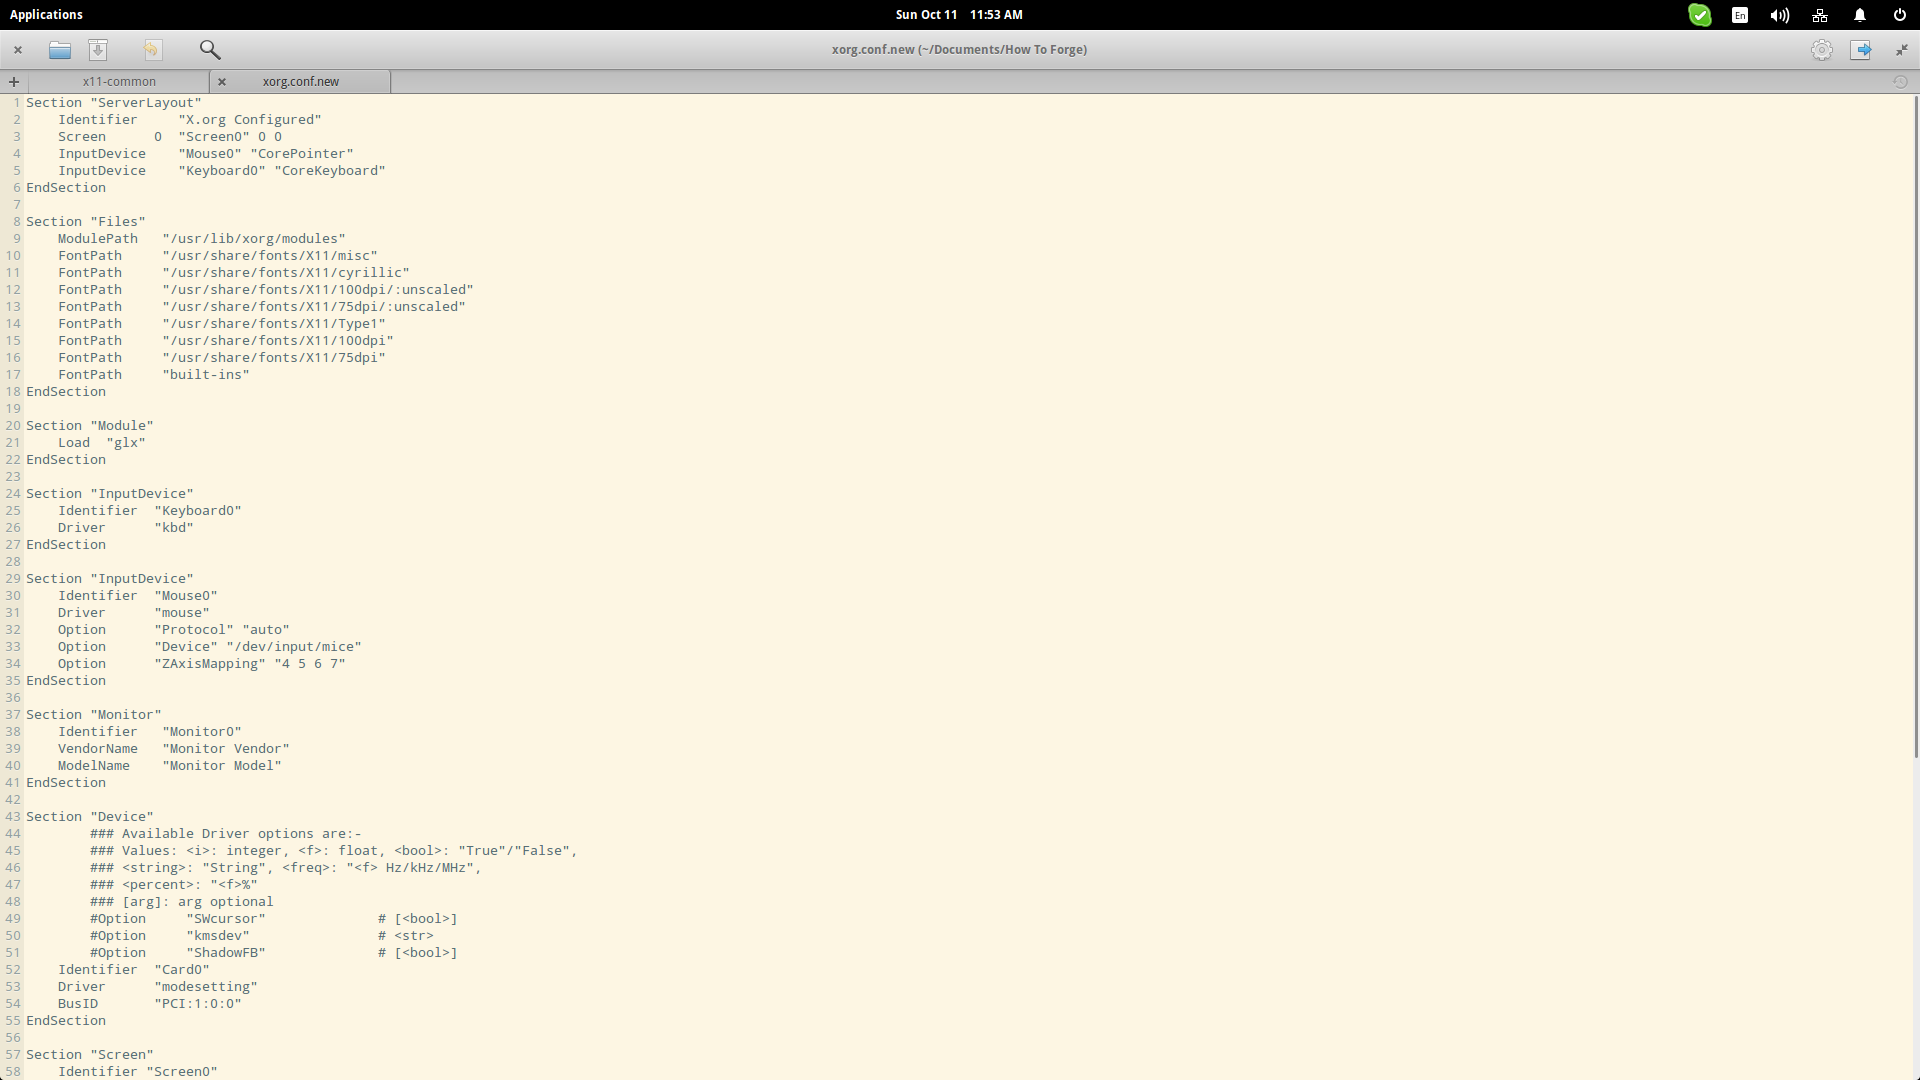
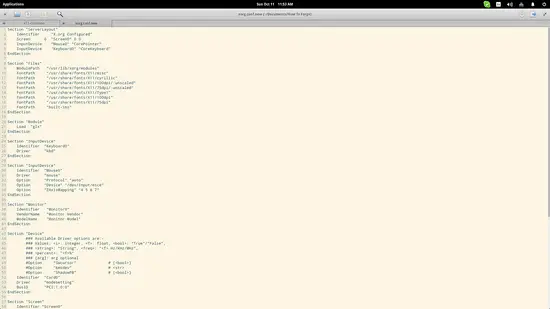 The particular lines that need our attention are those containing the
word “Protocol” and the “ZAxisMapping”. The protocol refers to what
protocol is used for the communication of your device with your system
so it may be a “PS/2”, a “BusMouse”, an “Explorer PS/2, a
“MouseSystems”, a “USB” or “Logitech” protocol. There are many protocols
that you can enter on this line, and depending on your mouse model you
may need to research a bit, but the only reason to change the protocol
is if you have any buttons that don't work. If all of your buttons
outputs a number on the “xev” command, then you are good to proceed to
the configuration of the “ZAxisMapping” line.
The particular lines that need our attention are those containing the
word “Protocol” and the “ZAxisMapping”. The protocol refers to what
protocol is used for the communication of your device with your system
so it may be a “PS/2”, a “BusMouse”, an “Explorer PS/2, a
“MouseSystems”, a “USB” or “Logitech” protocol. There are many protocols
that you can enter on this line, and depending on your mouse model you
may need to research a bit, but the only reason to change the protocol
is if you have any buttons that don't work. If all of your buttons
outputs a number on the “xev” command, then you are good to proceed to
the configuration of the “ZAxisMapping” line.
This line refers to the functionality of your mouse's scroll wheel
and in my case it contains four numbers as my mouse wheel also has a
back/forward ability. If yours doesn't, you should see two numbers
corresponding to up/down scrolling action. If your wheel isn't working,
you should change the numbers on this line with the numbers that were
generated when your scrolled your mouse wheel during the “xev” command
testing. You may do that, save the file, restart X and the wheel should
work now.
Getting to the mouse button mapping, we need to use the “xmodmap” utility. Open a terminal and type
Configuring your mouse may prove to be a tricky process, especially if you've bought one of those “Windows 8 and 10” mouses that send keyboard commands and complicate things even more. Trying various configurations with xmodmap will almost always get you there sooner or later, but don't forget to backup your original xorg.conf file in case things go wrong. For mouse model-specific information and configuration help, visit HowToForge forums as chances are you're not the only one using a “nasty” mouse.
The Linux desktop is unfortunately not a mainstream operating system, and so peripherals manufacturers don't care much whether those cool extra side buttons (or whatever else) of our mouse works as intended or not. Thankfully, Linux is a powerful system that allows users to set things as they like, so here is a quick guide on how to map your mouse.
First, make sure to install the packages “xbindkeys” and “xautomation”. Then open a terminal and type “xev” and press enter. This little tool is essential for the process of mapping your mouse as it creates a small window and monitors mouse movement and actions on it. Take your cursor above this window and start clicking your mouse buttons to determine what number is assigned on each one.

- Switch to console mode by pressing “Alt+Ctrl+F1” simultaneously
- Kill the x server that is still active by typing “sudo service lightdm stop” and pressing enter
- Generate the xorg.conf file by typing “sudo X -configure” and pressing enter
- Get back to the desktop environment by typing “sudo start lightdm” and pressing enter
- Locate the newly created file and rename it to “xorg.conf”
- Move the renamed configuration file to etc/X11
Getting to the mouse button mapping, we need to use the “xmodmap” utility. Open a terminal and type
xmodmap -e “pointer = 1 4 3 7 9 5 8 2”
The numbers are not random, as each entry corresponds to a function.
You should first consider that the first position corresponds to the
left-click, the second to the middle click, the third to the right
click, fourth and fifth to up and down scrolling etc. So, if your middle
click isn't working, you should use the middle click outputted number
from “xev” on the second position in the xmodmap command. If you are
left handed, you may swap keys 3 and 1 to correspond to invert
right-left clicking etc. By typing:
xmodmap -pp
And pressing enter on a terminal, you can see how many physical
buttons are defined for your device and what corresponds to which entry.Configuring your mouse may prove to be a tricky process, especially if you've bought one of those “Windows 8 and 10” mouses that send keyboard commands and complicate things even more. Trying various configurations with xmodmap will almost always get you there sooner or later, but don't forget to backup your original xorg.conf file in case things go wrong. For mouse model-specific information and configuration help, visit HowToForge forums as chances are you're not the only one using a “nasty” mouse.

No comments:
Post a Comment