https://www.howtoforge.com/tutorial/record-jack-ardour-linux
With all the madness that prevails the Linux audio engines and complex inter-related frameworks and subsystems, it is very easy to get lost and overwhelmed when you want to do something as simple as to record yourself playing an electric musical instrument. Recording from JACK is imperative in that case, as using a “mic to speaker” arrangement will introduce unwanted noise to the recording, no matter what. Thankfully, there are many ways to perform a JACK recording on Linux and one of the easiest ones is by using the Ardour sound workstation.
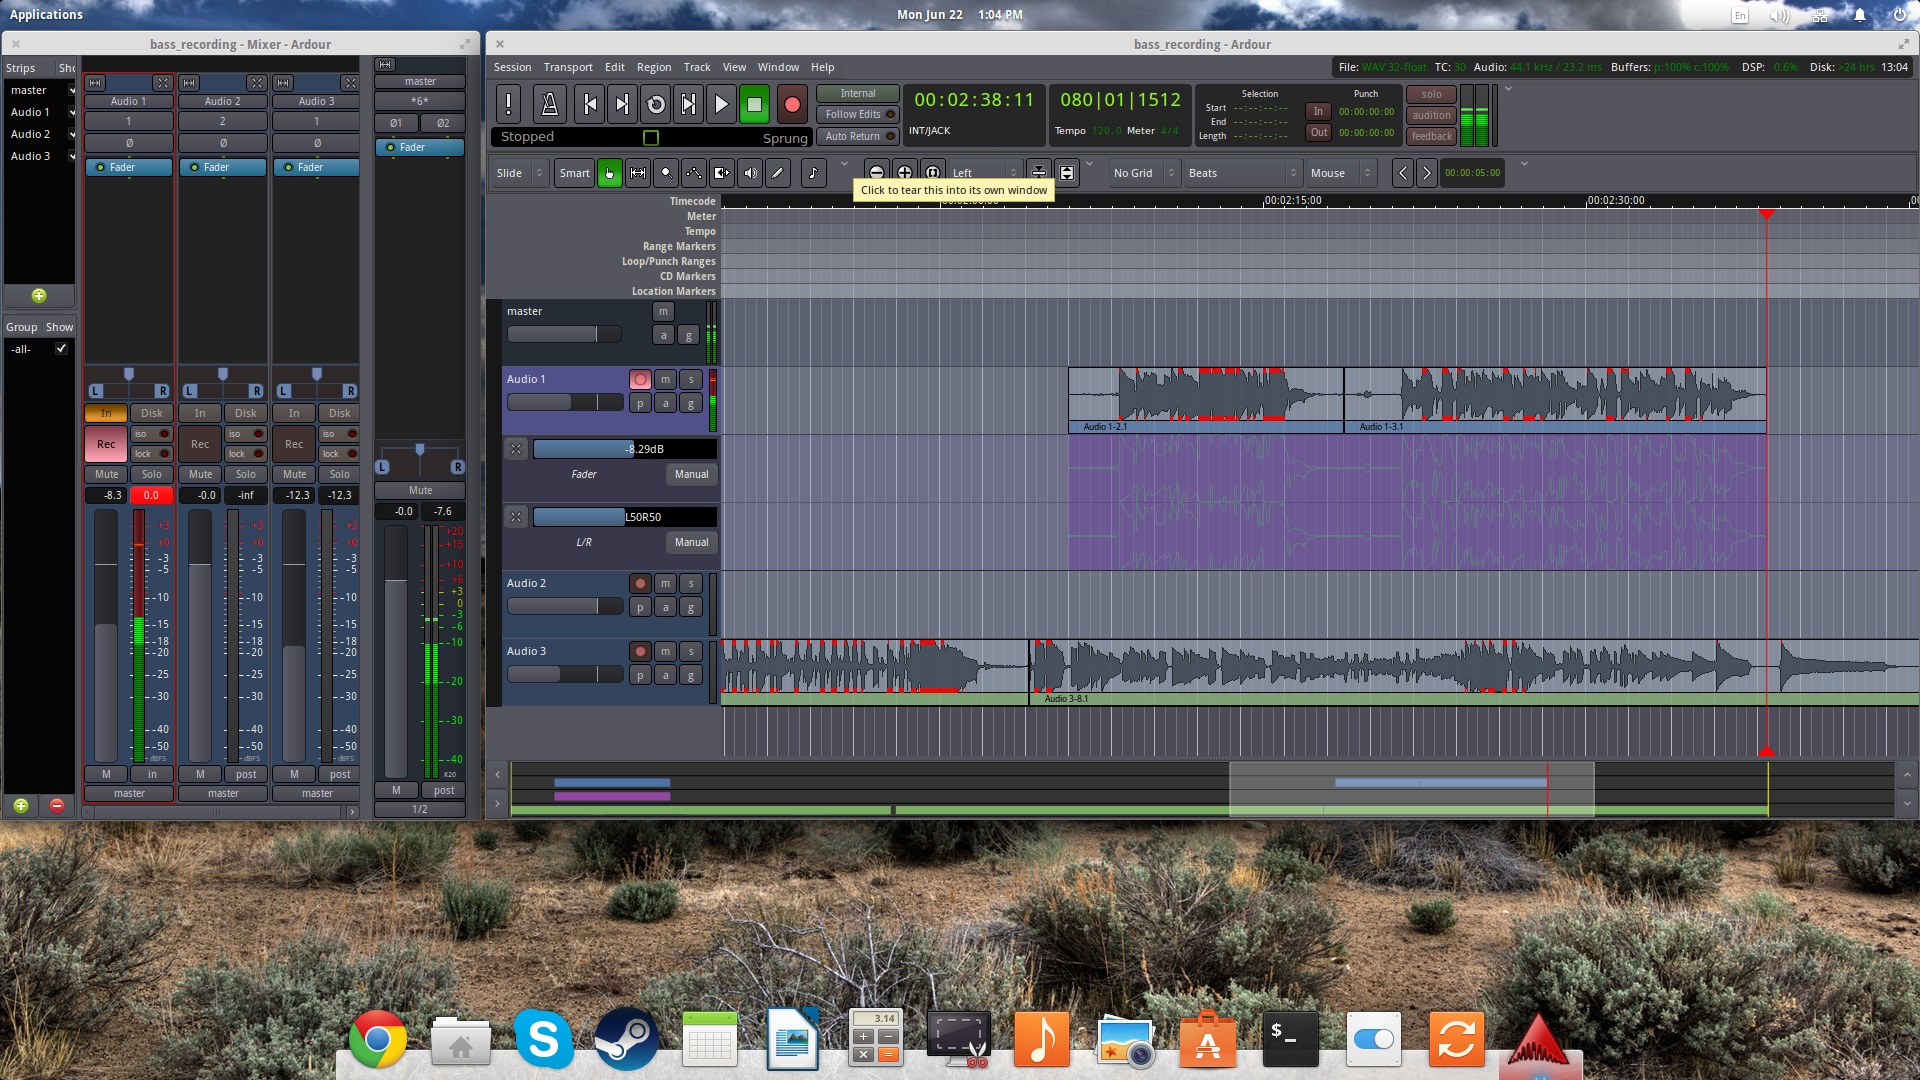
 Now you may insert a new recording channel through “Session/Add Track
or Bus” option from the top panel menu. Adding a mixer is also helpful
for setting the channel levels when recording on top of a previous
recording, or when recording from multiple sources. This is done through
“View/Show Editor Mixer” from the top panel again. You can start the
recording by pressing the “record” button on the channel and then the
“record” and “play” buttons on the top left.
Now you may insert a new recording channel through “Session/Add Track
or Bus” option from the top panel menu. Adding a mixer is also helpful
for setting the channel levels when recording on top of a previous
recording, or when recording from multiple sources. This is done through
“View/Show Editor Mixer” from the top panel again. You can start the
recording by pressing the “record” button on the channel and then the
“record” and “play” buttons on the top left.
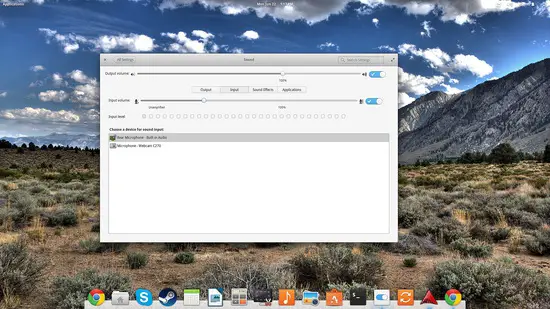
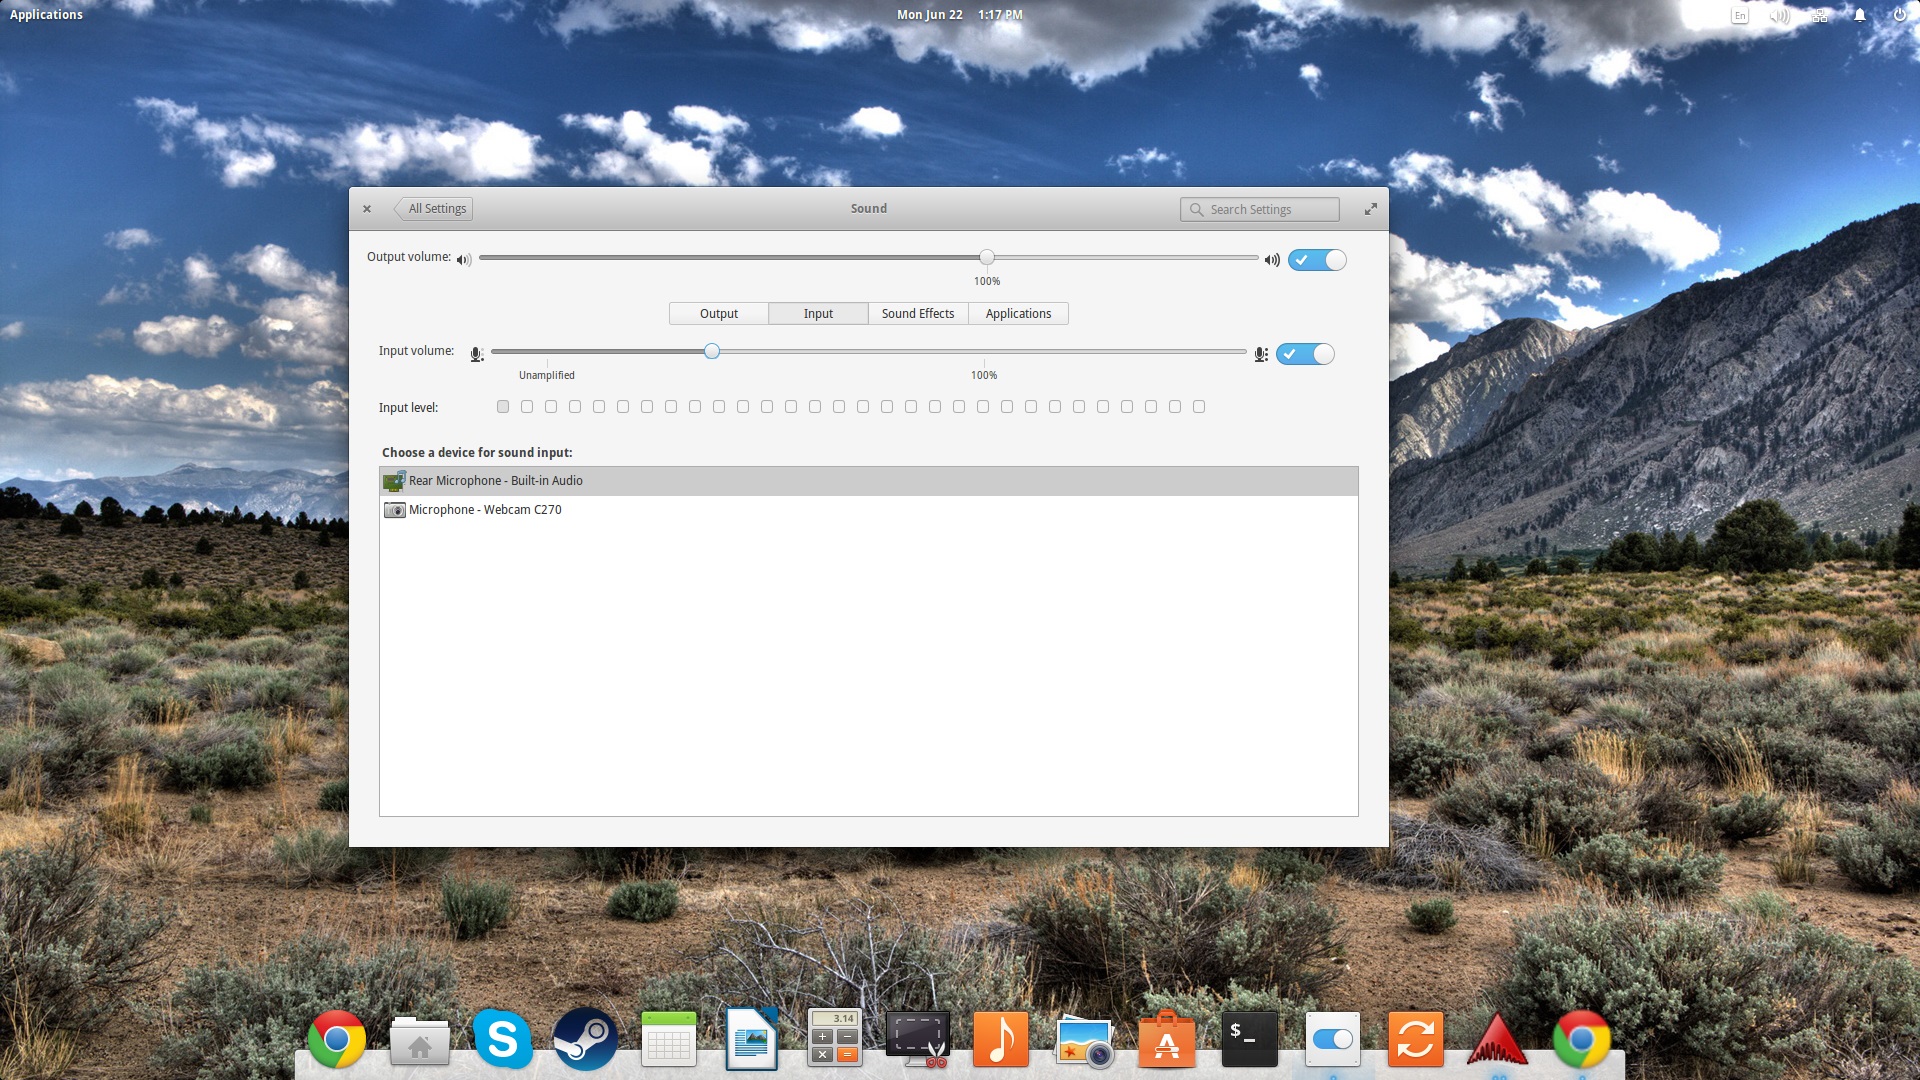
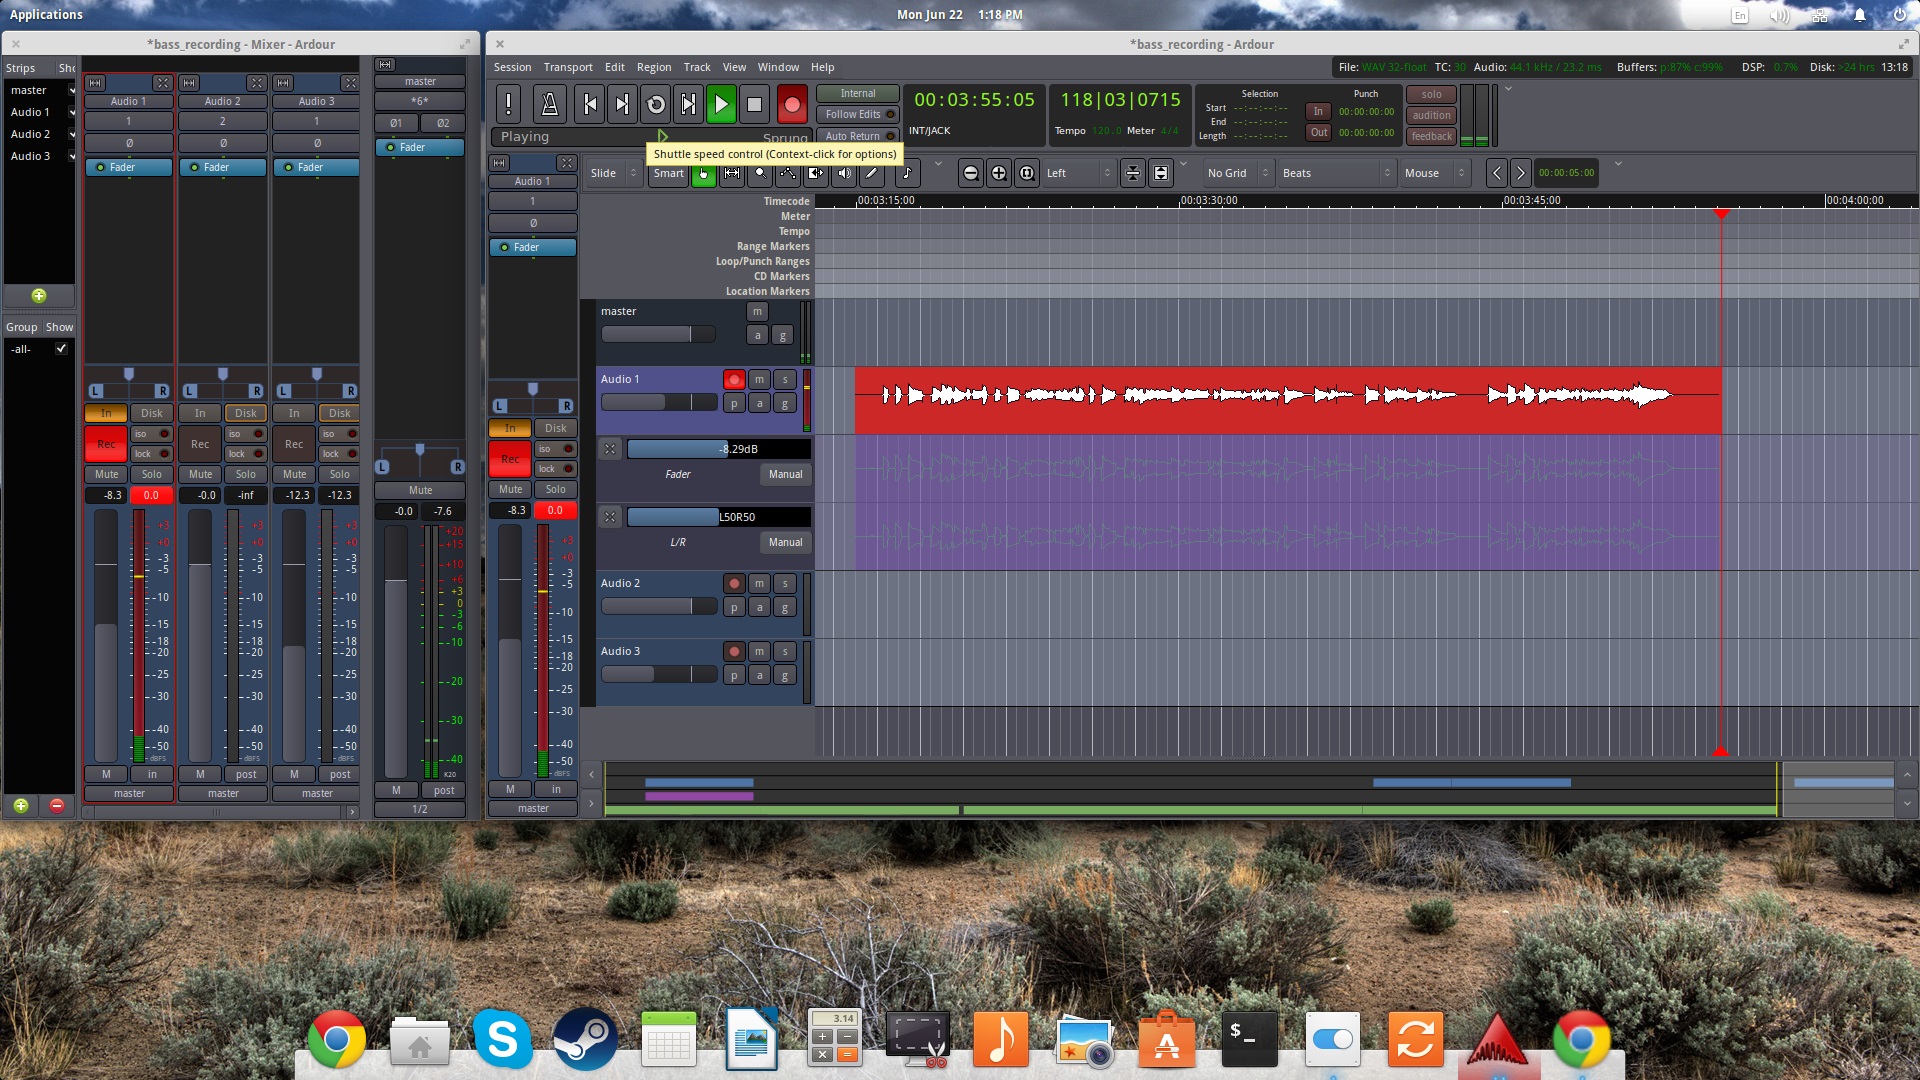
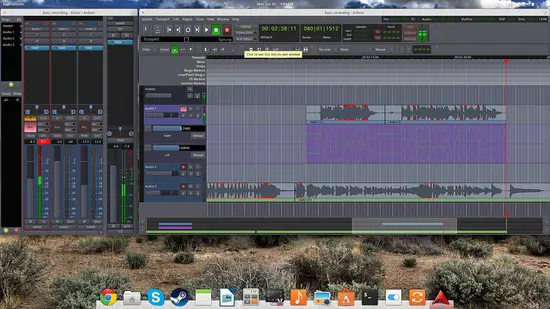 Notice the points when the recording peaks. This is a basic problem
that has to do with the recording levels, and fixing it is important as
the audio gets distorted in these points. You may adjust the recording
level from your distribution's Sound Settings. Go to the “input sources”
and choose the device you have plugged your JACK cable on, and then
reduce the input volume level as much as needed for the recording not to
peak. Depending on the instrument and frequency range, this adjustment
may differ greatly. I used an electric bass and electric guitar with
only the first peaking and only at low frequency notes. After reducing
the input volume level, the recording got into a seamless range, as
indicated by the following screenshot.
Notice the points when the recording peaks. This is a basic problem
that has to do with the recording levels, and fixing it is important as
the audio gets distorted in these points. You may adjust the recording
level from your distribution's Sound Settings. Go to the “input sources”
and choose the device you have plugged your JACK cable on, and then
reduce the input volume level as much as needed for the recording not to
peak. Depending on the instrument and frequency range, this adjustment
may differ greatly. I used an electric bass and electric guitar with
only the first peaking and only at low frequency notes. After reducing
the input volume level, the recording got into a seamless range, as
indicated by the following screenshot.
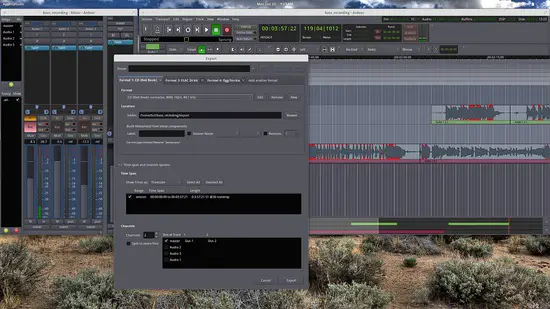
 Once you are done with the recording, you may save your work through
“Session/Export” option located on the top menu panel. This will allow
you to choose from a variety of formats, export channels independently
and even split two channels to mono files. I chose to export my
recording in three different files simultaneously (CD wav, FLAC and OGG
vorbis).
Once you are done with the recording, you may save your work through
“Session/Export” option located on the top menu panel. This will allow
you to choose from a variety of formats, export channels independently
and even split two channels to mono files. I chose to export my
recording in three different files simultaneously (CD wav, FLAC and OGG
vorbis).
 One thing to note is the fact that depending on your system hardware
and OS kernel, you may experience a recording latency (lag) that may be
confusing for the performer. This can be relieved by installing a
low-latency kernel, or by connecting your instrument on your amp or
head, listen to your playing through headphones, and connecting the amp
with the PC through the DI (Direct Out). Have fun!
One thing to note is the fact that depending on your system hardware
and OS kernel, you may experience a recording latency (lag) that may be
confusing for the performer. This can be relieved by installing a
low-latency kernel, or by connecting your instrument on your amp or
head, listen to your playing through headphones, and connecting the amp
with the PC through the DI (Direct Out). Have fun!
With all the madness that prevails the Linux audio engines and complex inter-related frameworks and subsystems, it is very easy to get lost and overwhelmed when you want to do something as simple as to record yourself playing an electric musical instrument. Recording from JACK is imperative in that case, as using a “mic to speaker” arrangement will introduce unwanted noise to the recording, no matter what. Thankfully, there are many ways to perform a JACK recording on Linux and one of the easiest ones is by using the Ardour sound workstation.
You can find the latest version of Ardour in the official website, or search for the “ardour” package on your distribution's software center/package manager.
For Ubuntu, run:
sudo apt-get install ardour
Once you open the software for the first time, you will be prompt to
set some key options like the Audio System, Driver, Active Device etc.
These settings override your system's settings as Ardour takes control
of the sound server. To record from JACK, you should choose the
corresponding option on the Audio Setup screen, as shown below.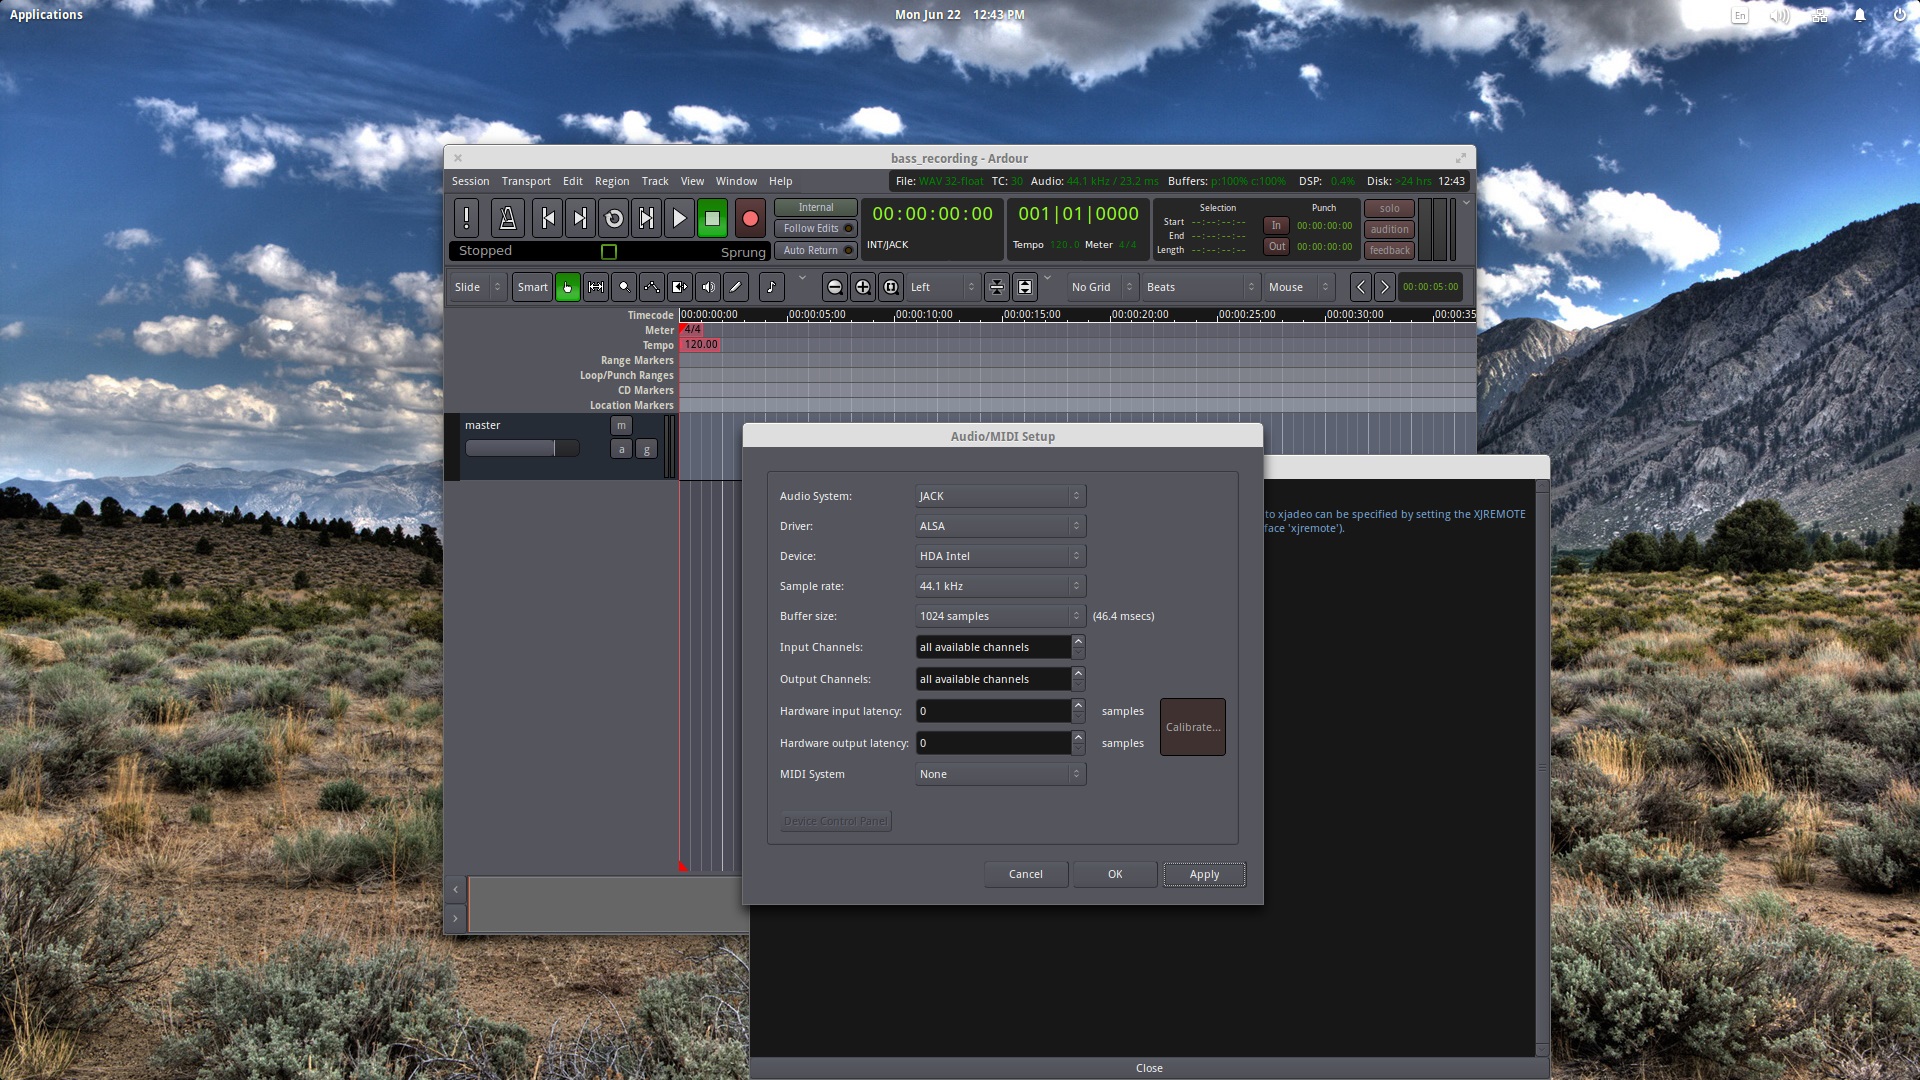


No comments:
Post a Comment