https://www.howtoforge.com/tutorial/docker-how-to-use-it-in-a-practical-way-part-3
Part 3: Creation a Notepad with WordPress and DokuWiki containers
Preface
In the first part, we talked about how docker containers work and differ from other software virtualization technologies and in the second part , we prepared our system for managing docker containers.
In this part, we will start using Docker images and create containers in a practical way. In other words, we will create a web-based, advanced personal notepad that runs on top of DokuWiki or WordPress. You can choose whichever you are comfortable with.
Remember, when we talk about an image it is the suspended state
whereas when we talk about container it is a run-time instance of a
docker image. In an analogy, that we talked in a previous part, a docker
image is like the ISO file of a Linux distribution, while the container
is the live session of the ISO file as if you were running it from a
USB thumb drive.
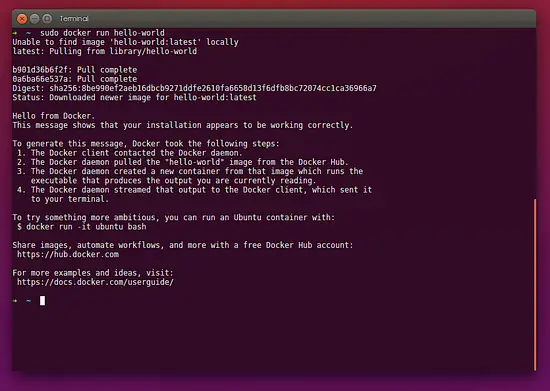
To download and run the "Hello world" image just type in the terminal
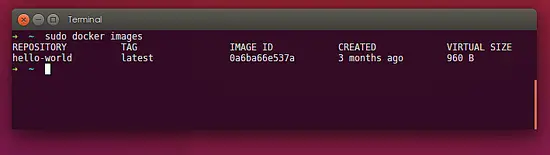
How do we check how many images do we have in our system? Well we simply run
You may ask yourself, how did my system find this Hello World image and where did it come from? Well, this is where the docker hub comes in play.
Specifically, Docker Hub provides some useful features and functions which we will discuss more in later parts.
Currently, we will focus on one feature and this is finding and downloading a docker image.
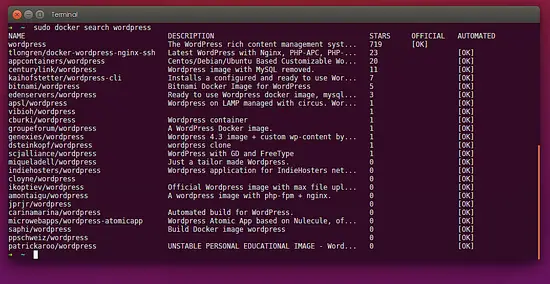
So for the purpose of this part, we will focus on using the terminal way. Let us search for WordPress
As you can see there are tons of WordPress docker images, that are built with various combinations (e.g. with or without database inclusion), they are rated with popularity stars and they are either official (maintained by the docker company) or automated (built and maintained by individuals). It is obvious that anyone can create an account and upload his / her custom docker image and we will discuss it in a later part.
Currently, we have downloaded a WordPress image and nothing else. We can proceed now by downloading a DokuWiki Image by searching one and selecting the one that we like, or using the one that is as follows

As you can imagine, each Docker Image references a list of read-only layers that represent file-system differences. When you create a new container, from a Docker Image as we will do, later on, you add a new, thin, writable layer on top of the underlying stack. All changes made to the running container - such as writing new files, modifying existing files, and deleting files - are written to this thin writable container layer. The diagram below shows a container based on the Ubuntu 15.04 image.
Now if you check how many images you have on your system
By design Docker containers are ephemeral. By “ephemeral,” we mean that a container can be stopped and destroyed and a new one can be built from the same Docker image and put in place with an absolute minimum of set-up and configuration.
Thus, you should keep in mind that when we will create a container from the Docker Image of your preference (WordPress or DokuWiki) any changes you make e.g. adding a post, picture, will be lost once you stop or delete the container. In other words, when a container is deleted, any data written to the container that is not stored in a data volume is deleted along with the container.
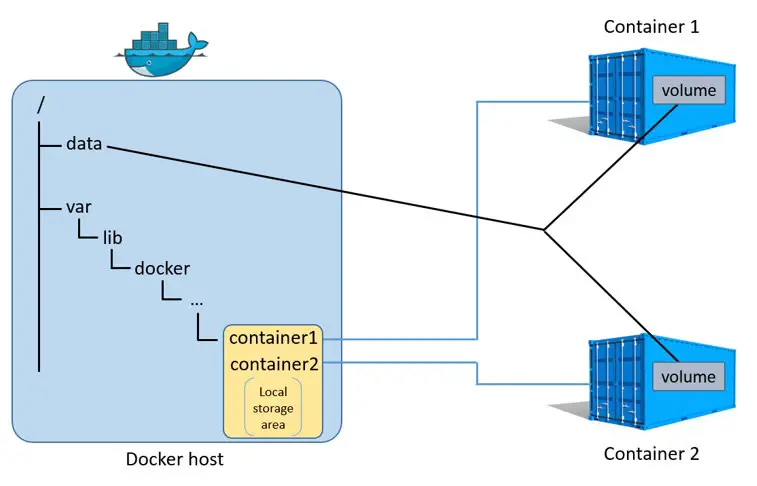
A data volume is a directory or file in the Docker host’s filesystem that is mounted directly into a container. This way you can swap containers, with new ones and keep any data safe in your users home folder. Note that, you can mount any number of data volumes into a container. Even multiple containers can also share one or more data volumes.
The diagram below shows a single Docker host (e.g. your Ubuntu 15.10) running two containers. As you can see there is also a single shared data volume located at /data on the Docker host. This is mounted directly into both containers.
This way when a container is deleted, any data stored in data volumes persists on the Docker host and can be mounted to a new container.
It is important to understand that Docker containers are isolated and they are individual micro-services that have their own network properties and the way we run them and connect to them is by mapping their port number to a port number of the hosts system.
This way we can expose the web service that a container runs to the host system.
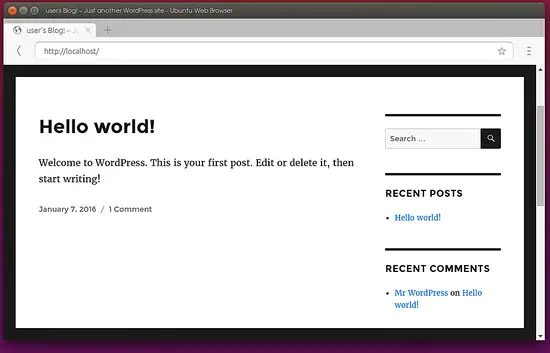
Once the container is initialized you will be greeted with some info about the container. It is time to launch a browser and point it to http://localhost
If everything went well, you will see the default WordPress website
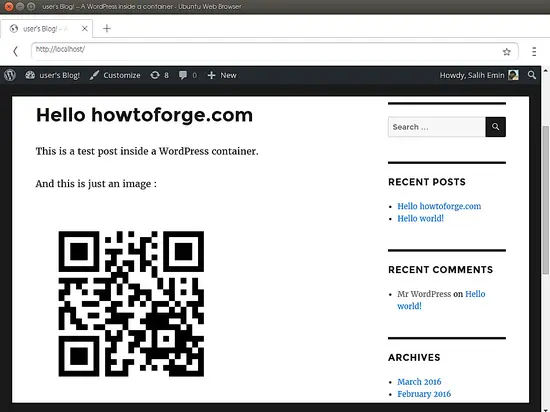
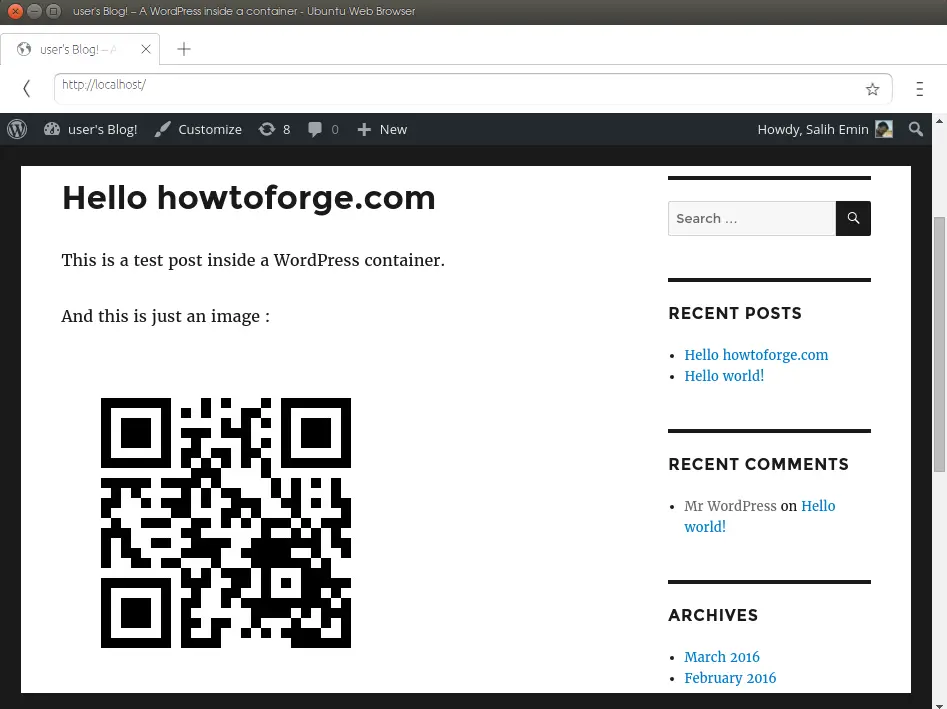
As you may already know to log in to the WordPress administration page, just go to http://localhost/login and use the default credentials user / bitnami. Then you can create a new user or a test post in the WordPress and publish it. You can see my test post in the image below
Let us get back to the terminal. As you can see your terminal currently is bind to the running container. You can use Ctrl+C to exit. This will also stop the container.
Now let us check our available containers. You can run the following command:
As you can see from the above image, there is some important information like the name of the container and the unique ID of the container. This way we can start the container again:
Where are the containers
If you want to see where the containers are on the hosts file system then you can head over to /var/lib/docker
First we create a folder in our home directory
 The difference, this time, is that we used the -d parameter for
detached mode and the -ti parameter to attach a terminal in interactive
mode so that I can interact with it later on.
The difference, this time, is that we used the -d parameter for
detached mode and the -ti parameter to attach a terminal in interactive
mode so that I can interact with it later on.
To check the running container just run the following command

Let's stop the container
Let's start it again with the following command:
You can read more about the image we used at the docker hub https://hub.docker.com/r/bitnami/wordpress/
So let's run the following command to create our `mywikipad` named container
To delete a container first you will need to stop it and then delete it by running the following command:
In the next part, we will take a look on how the docker images are created by creating our own.
Part 3: Creation a Notepad with WordPress and DokuWiki containers
Preface
In the first part, we talked about how docker containers work and differ from other software virtualization technologies and in the second part , we prepared our system for managing docker containers.
In this part, we will start using Docker images and create containers in a practical way. In other words, we will create a web-based, advanced personal notepad that runs on top of DokuWiki or WordPress. You can choose whichever you are comfortable with.
How to run a Docker container
First we must make sure that docker engine is working as needed by downloading a "Hello world" image and creating a container from it.To download and run the "Hello world" image just type in the terminal
sudo docker run hello-world
This command downloads the Hello World image and runs it in a
container. When the container runs, it prints an informational message
and then, it exits (meaning it shut down).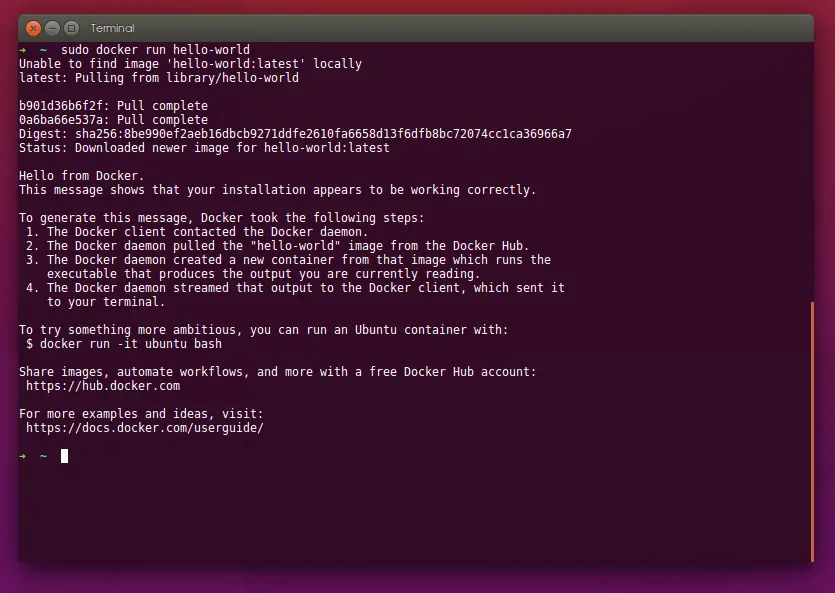
How do we check how many images do we have in our system? Well we simply run
sudo docker images

You may ask yourself, how did my system find this Hello World image and where did it come from? Well, this is where the docker hub comes in play.
Introduction to the Docker Hub
The Docker Hub is a cloud-based centralized resource for container image discovery, image building, and distribution of those images.Specifically, Docker Hub provides some useful features and functions which we will discuss more in later parts.
Currently, we will focus on one feature and this is finding and downloading a docker image.
Searching for Docker Images
You can search for a "ready to download and run docker image", by simply visiting the online docker hub or by using the terminal. Note that you can not download a docker image from the web hub but you can learn more about an image, like how it is built and maintained etc.So for the purpose of this part, we will focus on using the terminal way. Let us search for WordPress
sudo docker search wordpress
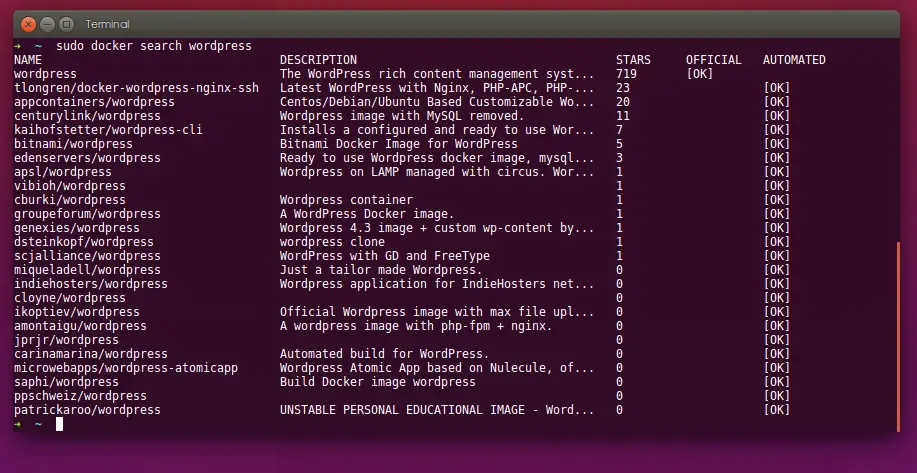
As you can see there are tons of WordPress docker images, that are built with various combinations (e.g. with or without database inclusion), they are rated with popularity stars and they are either official (maintained by the docker company) or automated (built and maintained by individuals). It is obvious that anyone can create an account and upload his / her custom docker image and we will discuss it in a later part.
Downloading a Docker Image
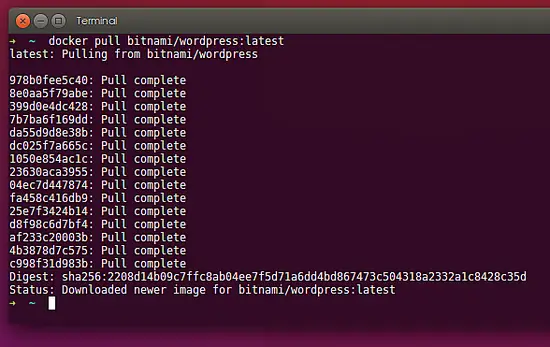
For the purpose of this article, we will use the latest built of bitnamis' docker image, which comes with MySQL preinstalled in it. So let us download it:
sudo docker pull bitnami/wordpress:latest
Once you run the above command, it will communicate with the docker
hub, ask if there is a repository named "bitnami", then asks if there is
a "WordPress" build that is tagged as the "latest" version.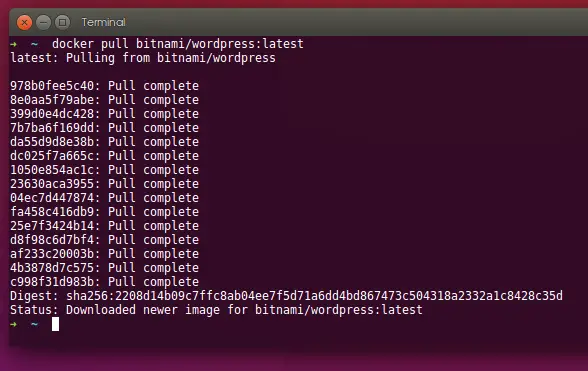
Currently, we have downloaded a WordPress image and nothing else. We can proceed now by downloading a DokuWiki Image by searching one and selecting the one that we like, or using the one that is as follows
sudo docker pull mprasil/dokuwiki
The Docker Image architecture
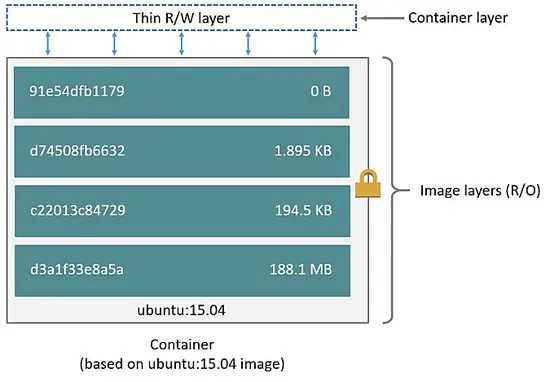
While waiting for the download procedure to complete, you can see that a docker image is a multi-layer image on top of a base image. You can see each and every layer being downloaded and then "magically" be unified. The diagram below shows an Ubuntu base image comprising 4 stacked image layers.
As you can imagine, each Docker Image references a list of read-only layers that represent file-system differences. When you create a new container, from a Docker Image as we will do, later on, you add a new, thin, writable layer on top of the underlying stack. All changes made to the running container - such as writing new files, modifying existing files, and deleting files - are written to this thin writable container layer. The diagram below shows a container based on the Ubuntu 15.04 image.

Deleting a Docker Image
Now if you check how many images you have on your system
sudo docker images
you will see the WordPress, DokuWiki, and the Hello World. If for any
reason you want to remove and delete (rmi) an image you simply type
sudo docker rmi
where the name of the image is the name of the docker as it is
displayed with "docker images" command. For example, if we want to
delete the Hello World we can simply type:
sudo docker rmi hello-world
Containers are ephemeral
By design Docker containers are ephemeral. By “ephemeral,” we mean that a container can be stopped and destroyed and a new one can be built from the same Docker image and put in place with an absolute minimum of set-up and configuration.By design Docker containers are ephemeral. By “ephemeral,” we mean that a container can be stopped and destroyed and a new one can be built from the same Docker image and put in place with an absolute minimum of set-up and configuration.
Thus, you should keep in mind that when we will create a container from the Docker Image of your preference (WordPress or DokuWiki) any changes you make e.g. adding a post, picture, will be lost once you stop or delete the container. In other words, when a container is deleted, any data written to the container that is not stored in a data volume is deleted along with the container.
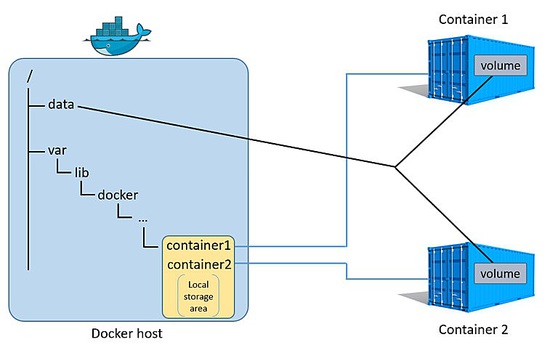
A data volume is a directory or file in the Docker host’s filesystem that is mounted directly into a container. This way you can swap containers, with new ones and keep any data safe in your users home folder. Note that, you can mount any number of data volumes into a container. Even multiple containers can also share one or more data volumes.
The diagram below shows a single Docker host (e.g. your Ubuntu 15.10) running two containers. As you can see there is also a single shared data volume located at /data on the Docker host. This is mounted directly into both containers.
This way when a container is deleted, any data stored in data volumes persists on the Docker host and can be mounted to a new container.
Docker container Networking
When you install Docker, it creates a network device in your system. You can view it (it will be named as docker0) as part of a host’s network stack by using the `ifconfig` command on your host system.It is important to understand that Docker containers are isolated and they are individual micro-services that have their own network properties and the way we run them and connect to them is by mapping their port number to a port number of the hosts system.
This way we can expose the web service that a container runs to the host system.
Creating a personal notepad with a WordPress container
Let us get started with creating our testing notepad. First we will use the WordPress image to create a Docker container
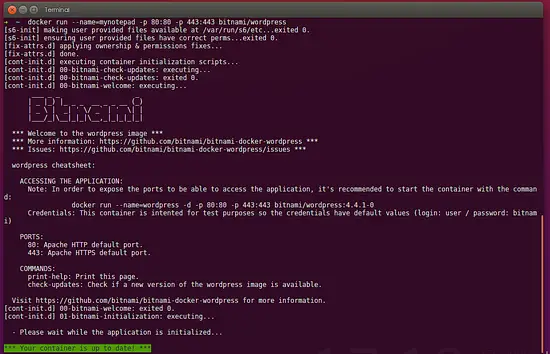
sudo docker run --name=mynotepad -p 80:80 -p 443:443 bitnami/wordpress
With the above command, we asked the Docker service in our host
system to create and run (docker run) a container named `mynotepad`
(--name=mynotepad), map the HTTP and HTTPS port of the host and
container ( -p 80:80 -p 443:443 ) and use the WordPress image (
bitnami/wordpress )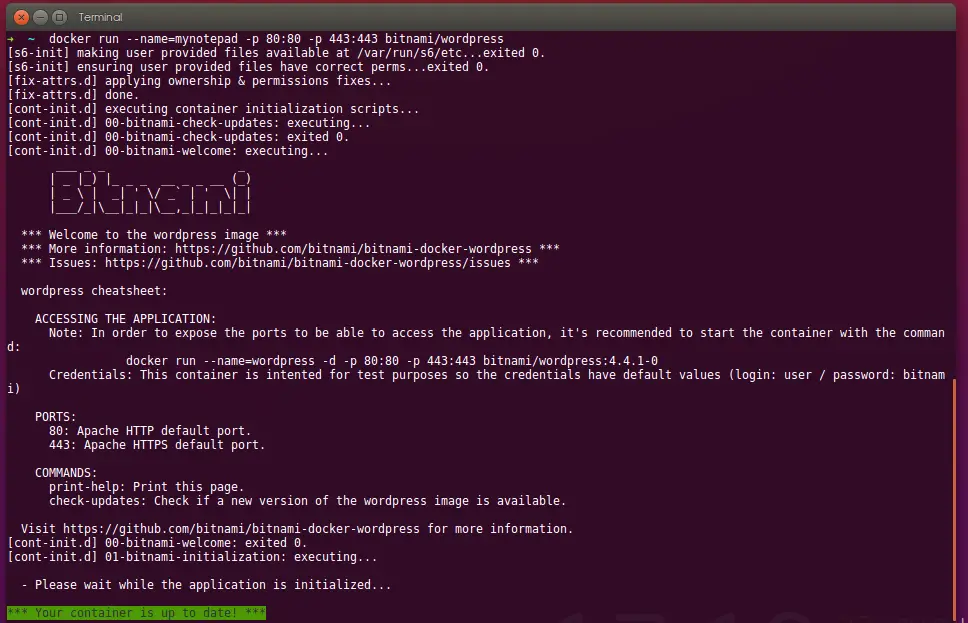
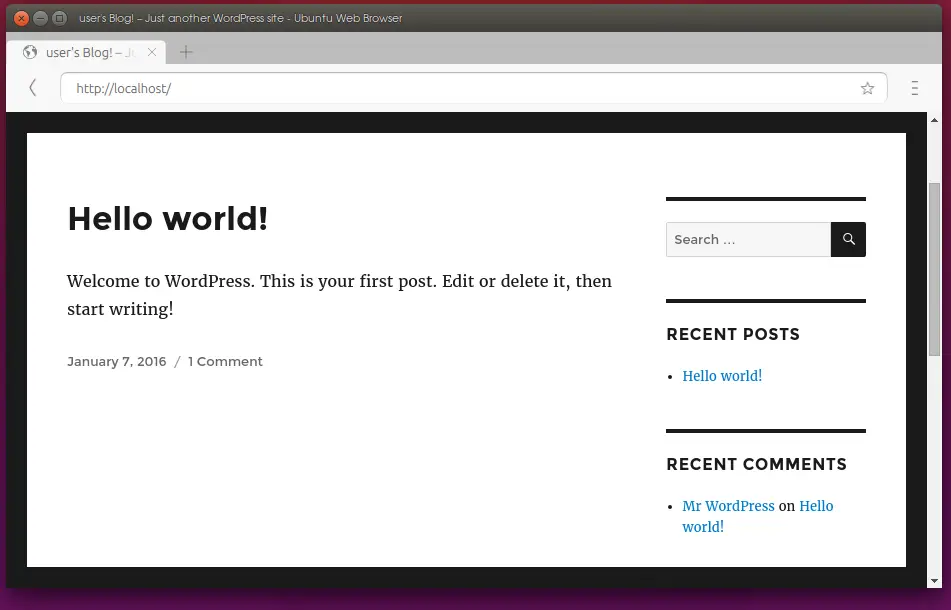
Once the container is initialized you will be greeted with some info about the container. It is time to launch a browser and point it to http://localhost
If everything went well, you will see the default WordPress website
As you may already know to log in to the WordPress administration page, just go to http://localhost/login and use the default credentials user / bitnami. Then you can create a new user or a test post in the WordPress and publish it. You can see my test post in the image below
Let us get back to the terminal. As you can see your terminal currently is bind to the running container. You can use Ctrl+C to exit. This will also stop the container.
Now let us check our available containers. You can run the following command:
sudo docker ps -l
to view the container that we had previously created and run.As you can see from the above image, there is some important information like the name of the container and the unique ID of the container. This way we can start the container again:
docker start mynotepad
Then you can check the processes that the docker container runs, with the following command:
sudo docker top mynotepad
By default with the `docker start mynotepad` the docker container is
running in the background. To stop it, you can run the following command
sudo docker stop mynotepad
You can read more on how to interact with the container in the
official documentation of the docker
https://docs.docker.com/engine/userguide/containers/usingdocker/Where are the containers
If you want to see where the containers are on the hosts file system then you can head over to /var/lib/docker
sudo cd /var/lib/docker
sudo ls
sudo cd containers
sudo cd ID
sudo ls
As you can see the ID numbers represent the actual containers that you have created.sudo ls
sudo cd containers
sudo cd ID
sudo ls
Creating persistent storage
Let us create a new WordPress container, but this time, will put it in the background and also expose the WordPress folder to our host system so that we can put files in it or remove any files we don't want.First we create a folder in our home directory
mkdir ~/wordpress-files
then run and create a container based on the same image we created the previous one:
sudo docker run -d -ti --name=mynotepad-v2 -v ~/wordpress-files:/opt/bitnami/apps -e USER_UID=`id -u` -p 80:80 bitnami/wordpress

To check the running container just run the following command
sudo docker ps

Let's stop the container
sudo docker stop mynotepad-v2
Now if you run the `docker ps` command you will see nothing there.Let's start it again with the following command:
sudo docker start mynotepad-v2
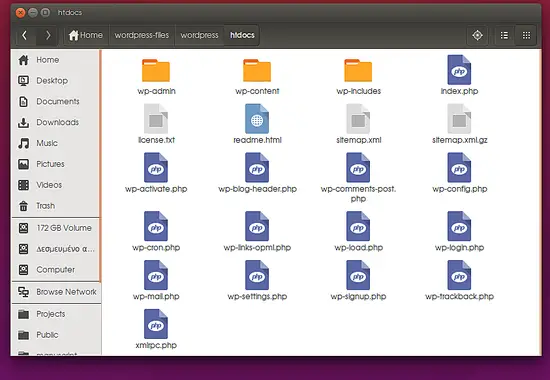
If you check the folder we have previously created you will see the WordPress installation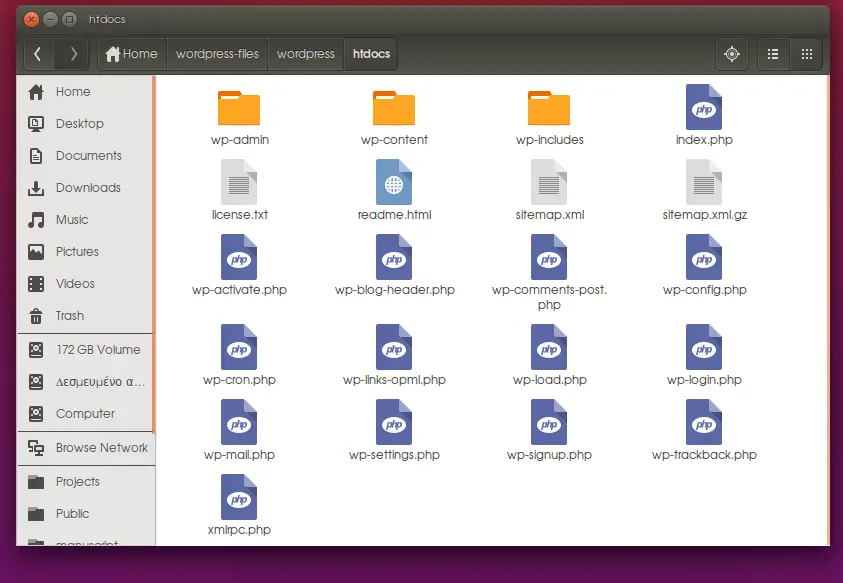
You can read more about the image we used at the docker hub https://hub.docker.com/r/bitnami/wordpress/
Creating a personal notepad with a DokuWiki container
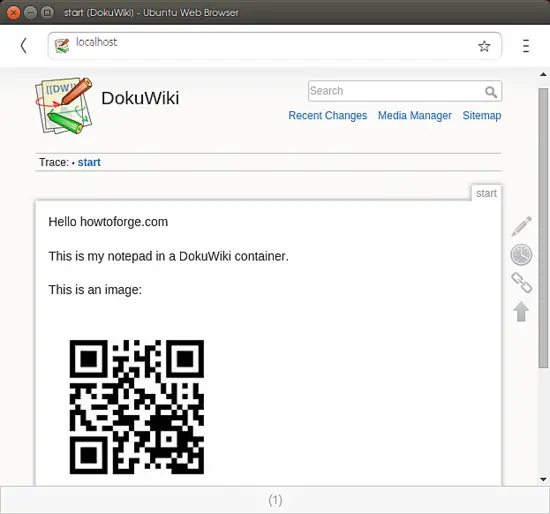
This time, we will create a notepad using DokuWiki. As we have previously downloaded the image, the only thing that's left to be done is to create a container out of it.So let's run the following command to create our `mywikipad` named container
docker run -d -p 80:80 --name mywikipad mprasil/dokuwiki
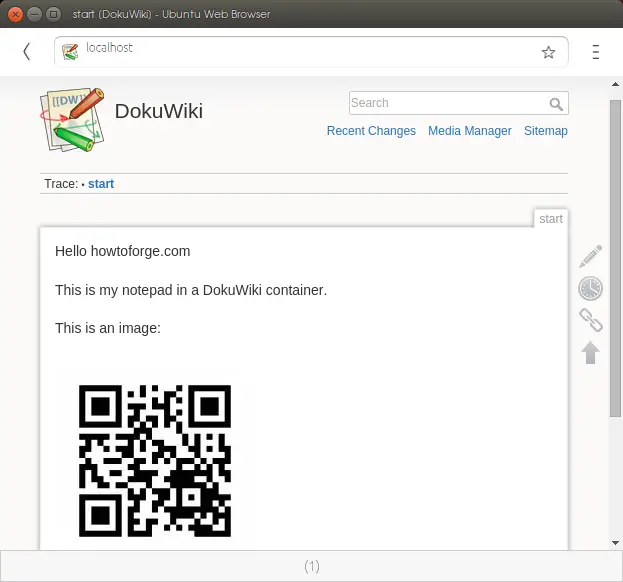
And then head over to your browser and add the following address to start the configuration of your wiki notepad:
http://localhost/install.php
You can learn more for DokuWiki from the official documentation and customize the wiki for your needs:
https://www.dokuwiki.org/manual
Deleting a Docker container
Once you are comfortable with creating, starting and stopping docker containers, you will find yourself in need to clean up the testing mess created by the multiple containers.To delete a container first you will need to stop it and then delete it by running the following command:
docker rm
You can also add multiple ID's in the same `docker rm` command to delete multiple docker containers at the same time.Summary
In this part, we learned how to create a container and use it in a practical way to create a personal notepad based on either WordPress or DokuWiki. We looked at some basic commands on how to start and stop the containers that we create and how to delete the images and the containers.In the next part, we will take a look on how the docker images are created by creating our own.

No comments:
Post a Comment