https://www.howtoforge.com/tutorial/passwordless-encryption-of-linux-root-partition
Security of critical data on the storage device (hard disk, portable memory stick) is necessary so that an intruder can not steal sensitive information. In this tutorial, our focus is the security of Linux root filesystem and swap area. The default Linux encryption feature "LUKS" will be used, which requires a passphrase at boot time. Therefore, our next goal is to automatically provide the passphrase to an encrypted volume at boot time. There are already a few articles on the same topic for older releases of the Debian distribution available. However, in this tutorial the Debain 8 (Jessie) version is installed on a VirtualBox VM.
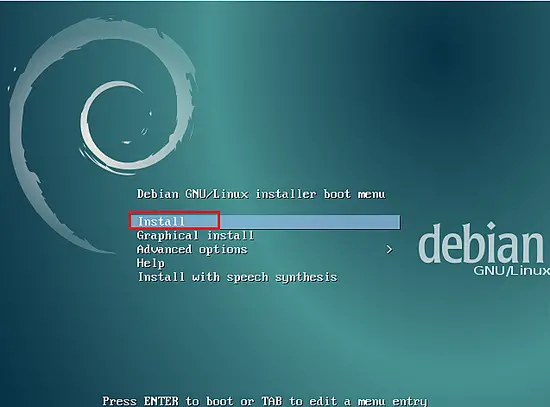
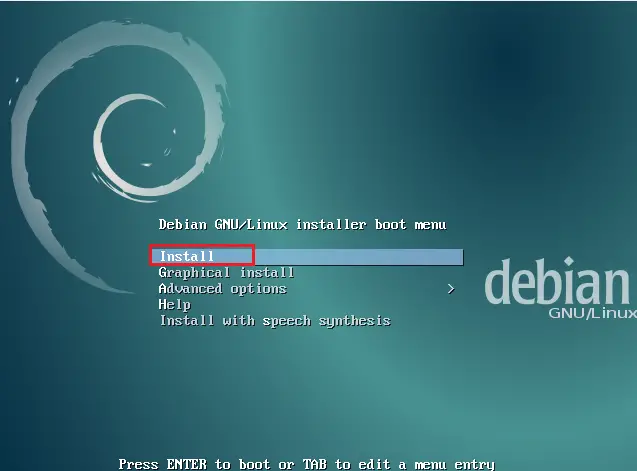
Add the Debian net installer iso file in the VM and start the vm, the installer prompt will appear. Select the "Install" option to start the installation process.
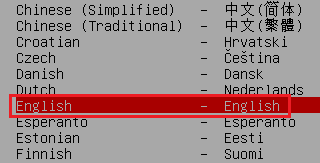
The following few screens will prompt for the basic settings of Debian. Select the desired language option from the given list.
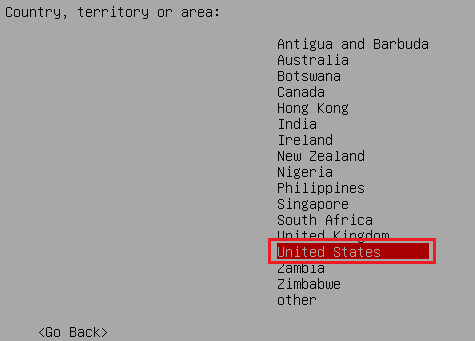
Select country or area as shown in the following figure.

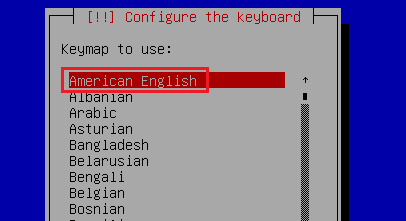
Configure the language for the keyboard.
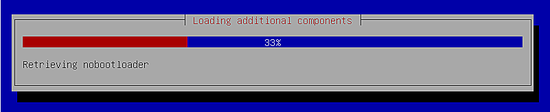
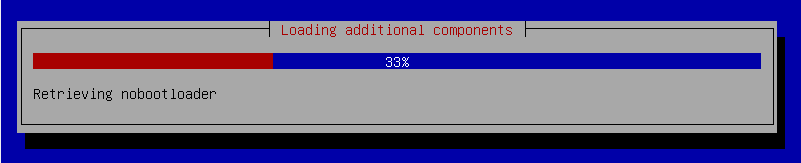
After the basic settings, the installer loads more components for configuration.
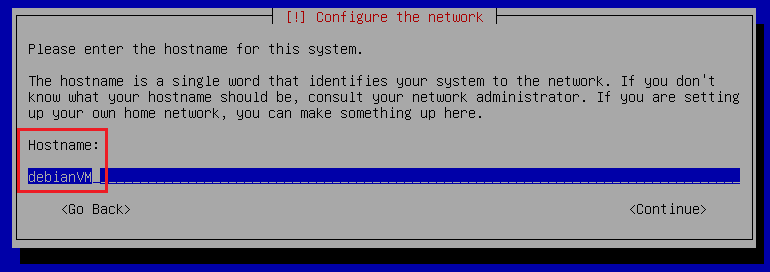
Again, more base settings will be configured during the installation process.
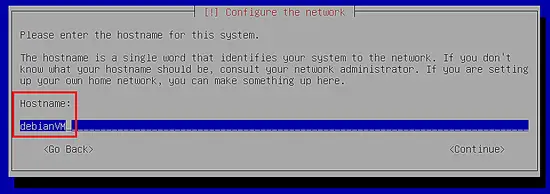
1. Setting hostname
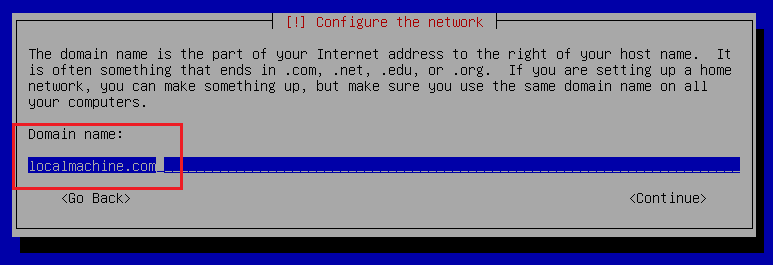
2. Configuring Domain name

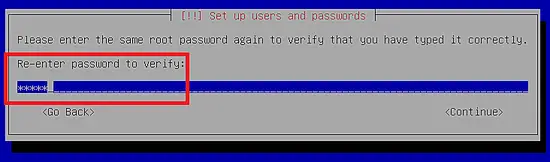
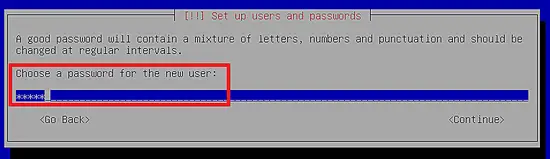
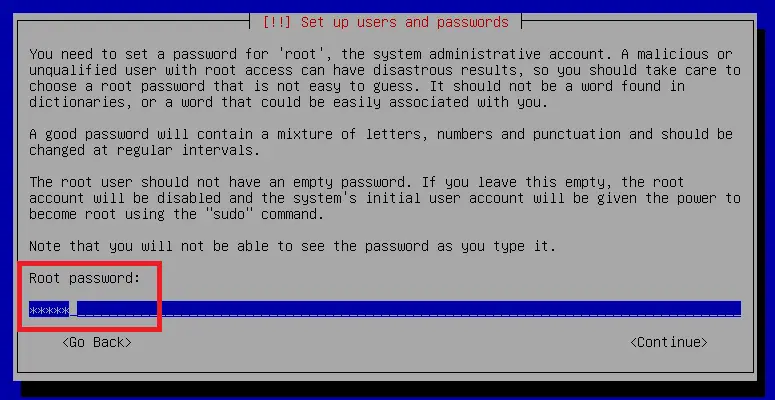
3. Setting a password for "root" user.

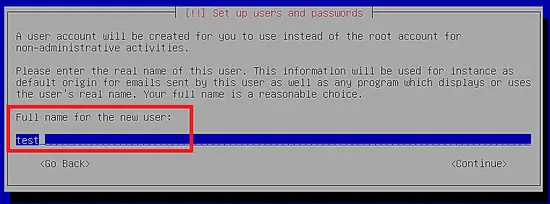
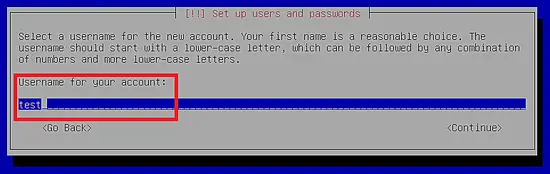
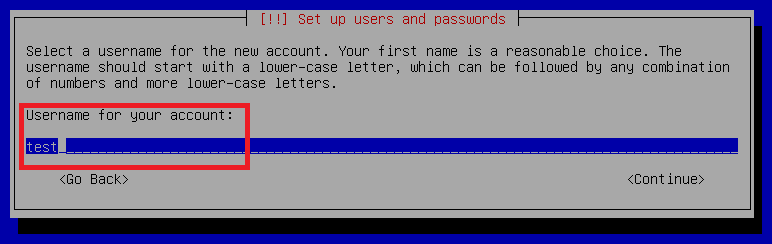
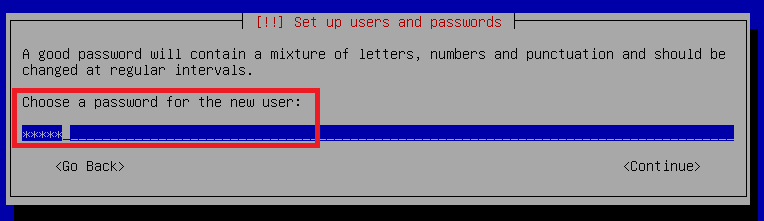
4. Creating a new user other than root.
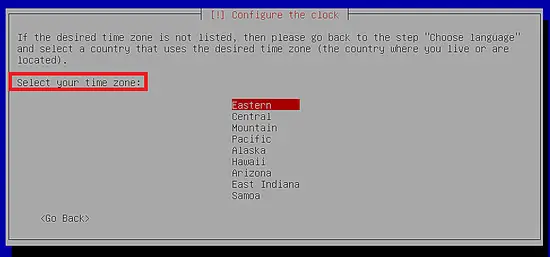
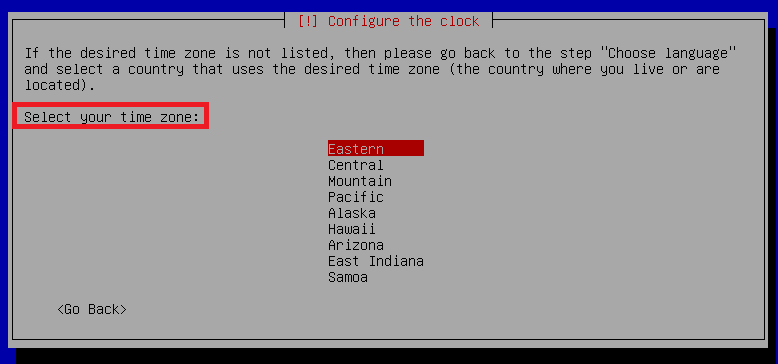
5. set the Time zone
6. And finally, the most important part is the partitioning of the disk.
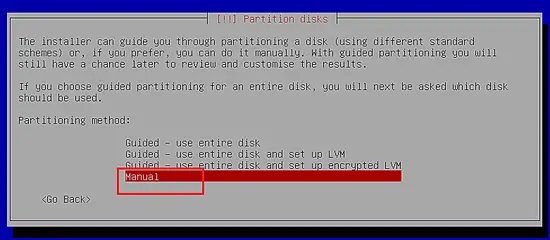
Manual partitioning of the hard disk is required for this article. Therefore, select the "Manual" option in the above prompt and select the desired hard disk to start the process.
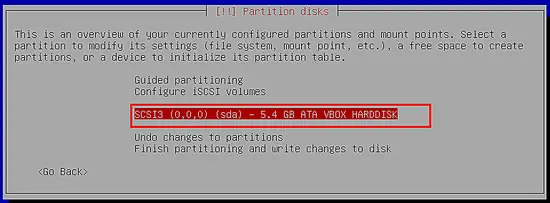
As shown in the above figure, Debian will be installed in the VM. Press enter to start partitioning of selected hard disk which is shown below.
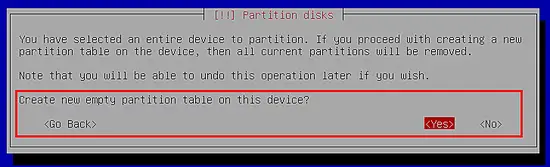
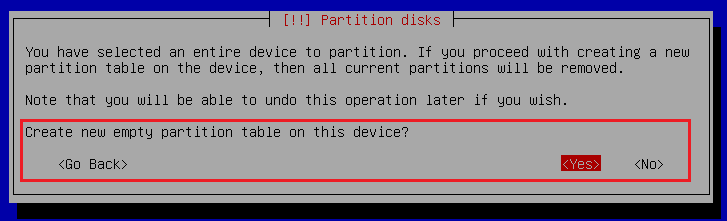
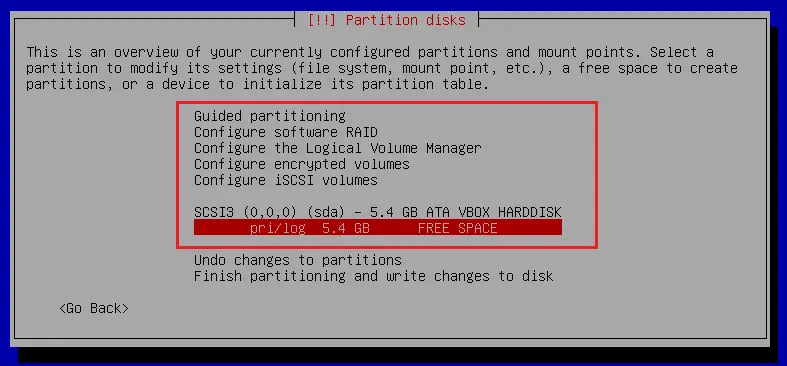
The following screen will show up after acceptance of above message. As shown in the following screenshot, currently there is no partition on the hard disk.
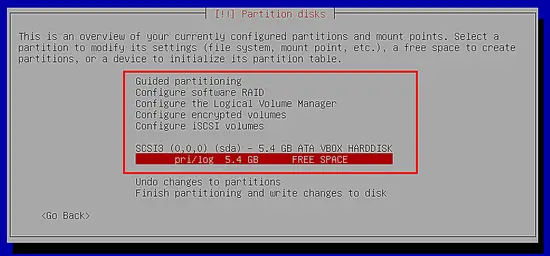
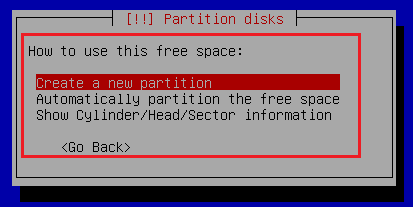
Press "enter" to create the first partition on the virtual hard disk.
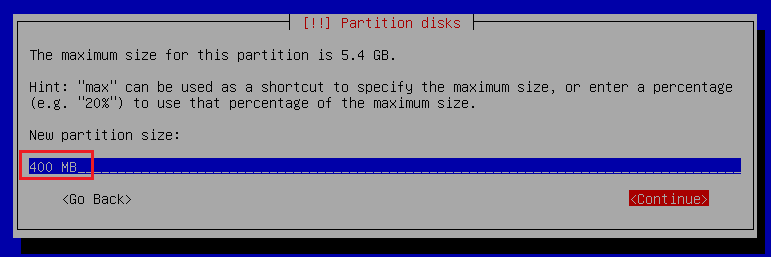
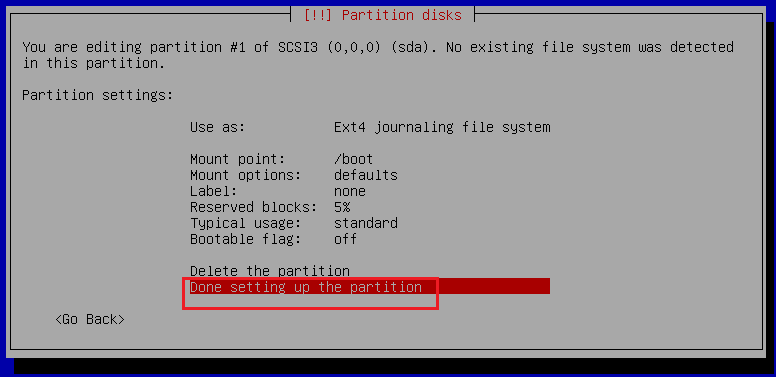
The first partition that we created on the hard disk is "/dev/sda1" for the "/boot" mount point.

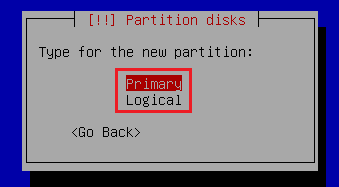
Primary or Logical type is selected for partition.
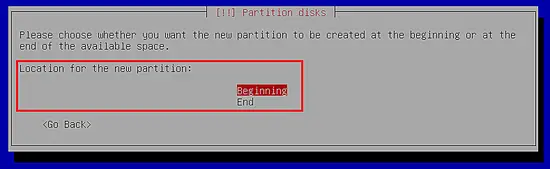
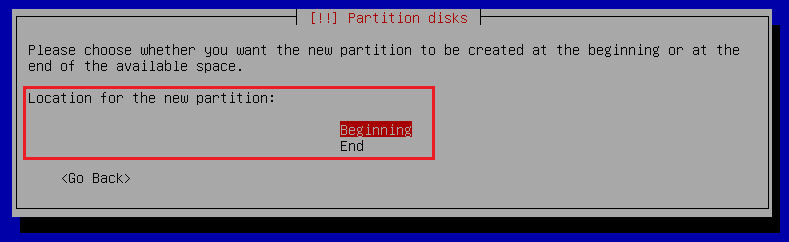
Location of the new partition is selected.
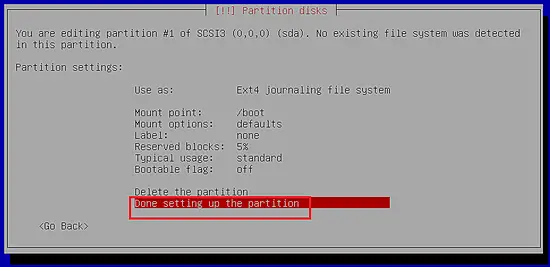
Mount point "/boot" is shown in the following screenshot.
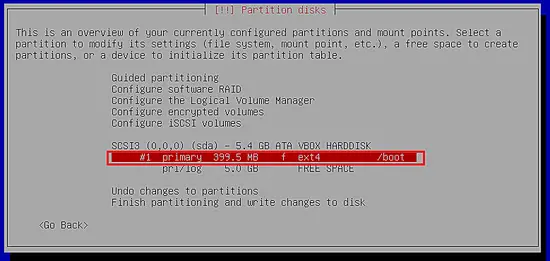
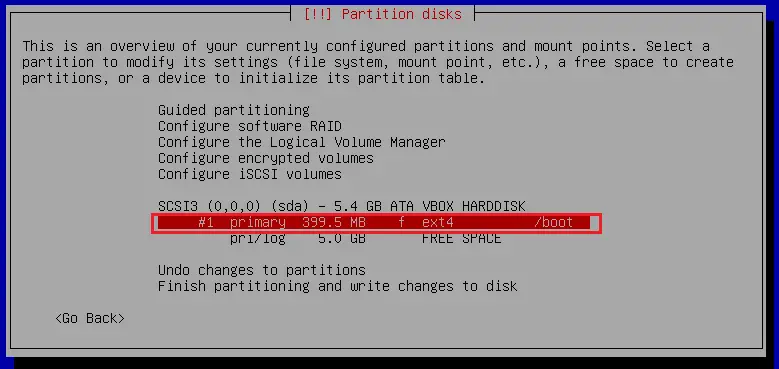
The first partition has been successfully created on the hard disk. The Linux kernel is later placed in the "/boot" partition.
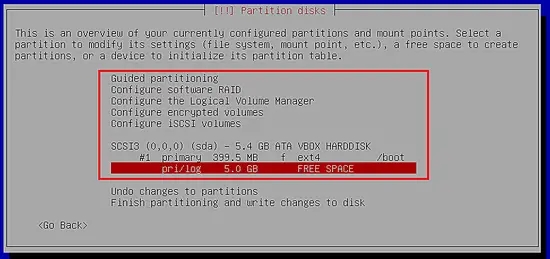
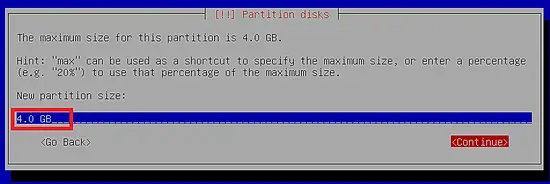
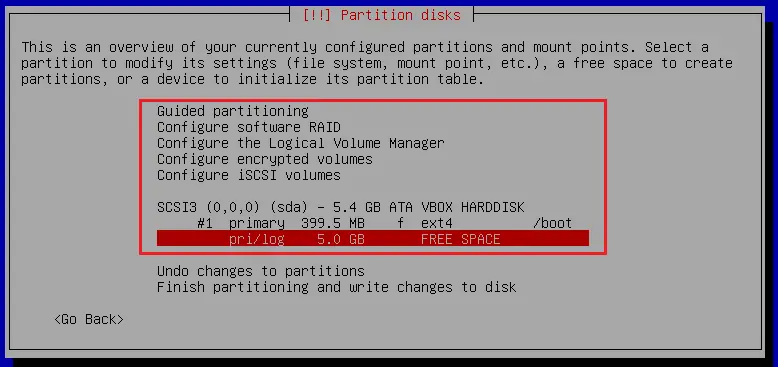
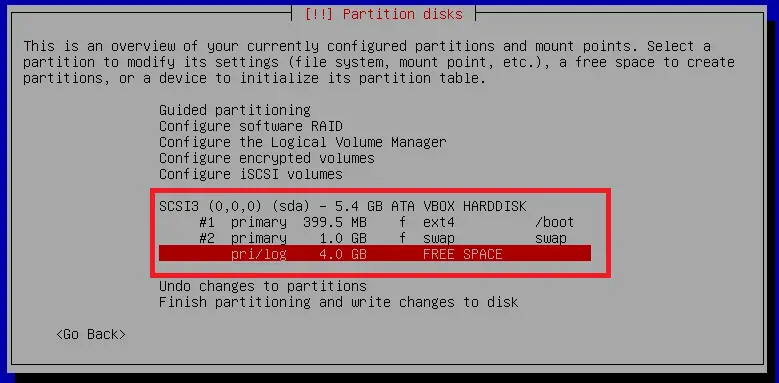
The second partition created on the VM hard disk is swap and the size of the swap partition should be double of the RAM size. As shown in the following screenshot, the remaining free space is selected for swap.
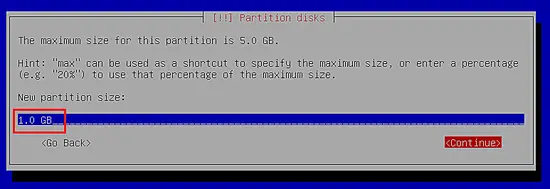
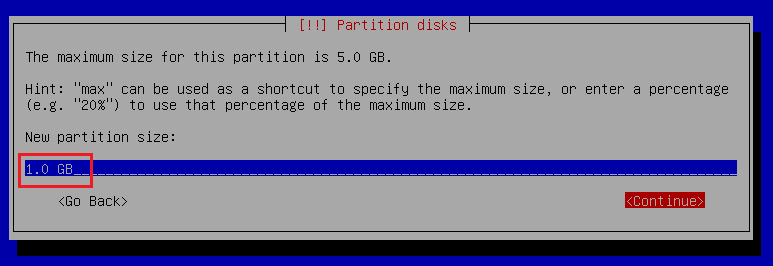
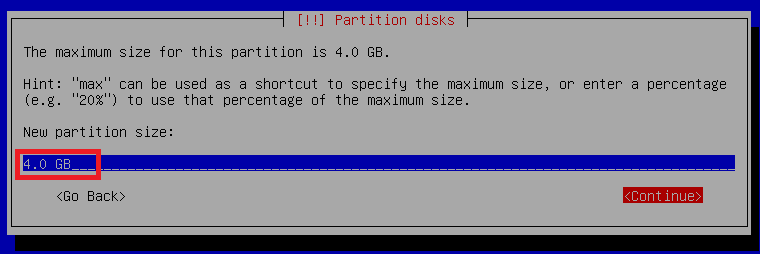
Set the size of the swap partition.
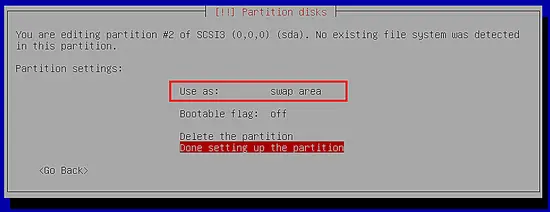
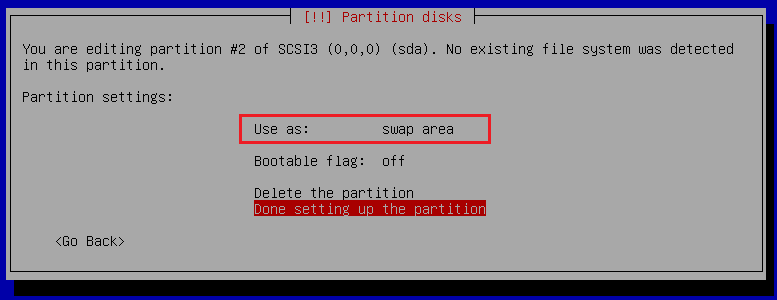
Following screenshot shows that the partition is selected as swap area.
Another partition is also created on the VM.
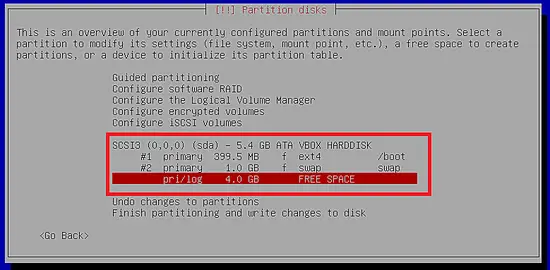
The core partition of the Linux platform is created on the remaining space for / (the "root" mount point). The following snapshot shows the size of "root" partition.
Select "physical volume of encryption" option for the new partition on hard disk.
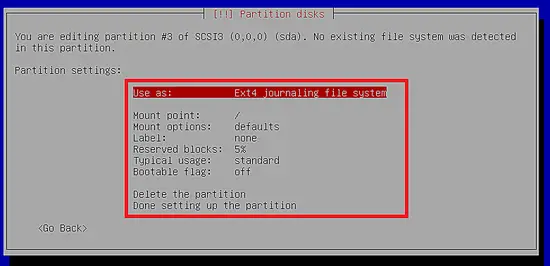
The highlighted option in the following screenshot is required to encrypt the partition on Linux platform.

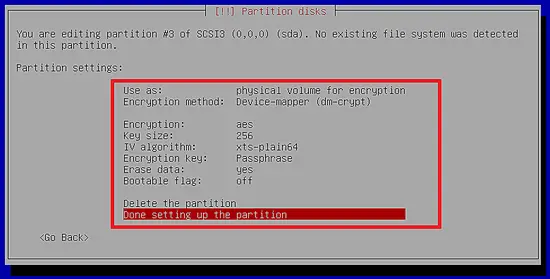
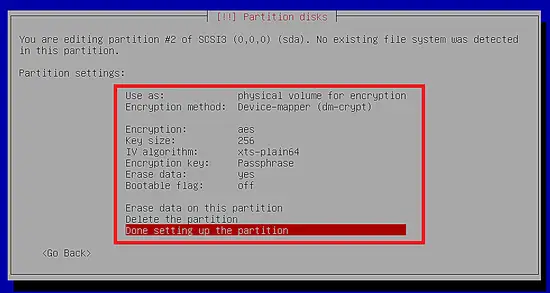
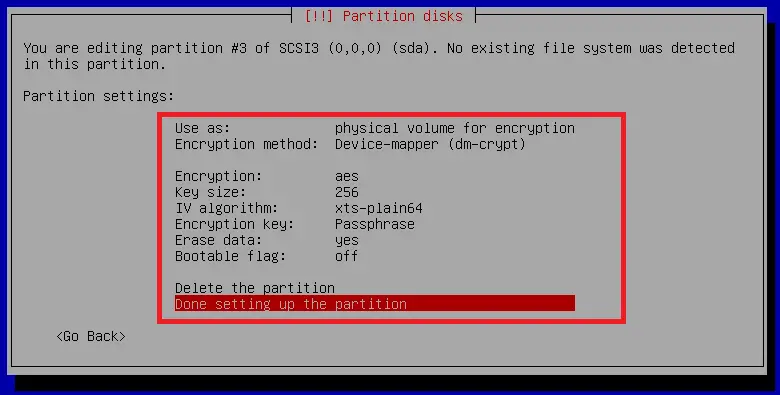
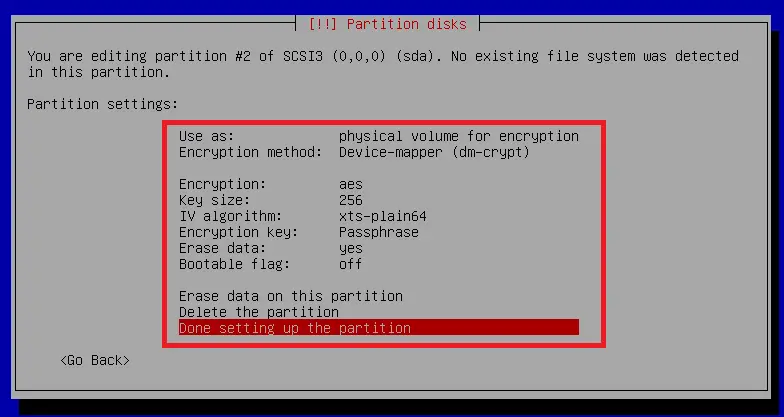
The partition setup after selecting "physical volume for encryption" is shown in the following figure. Default encryption method is device-mapper (dm-crypt), the encryption algorithm is AES with 256 key size.
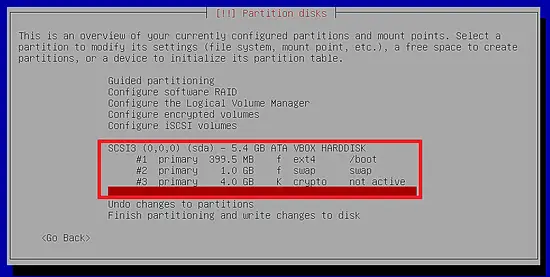
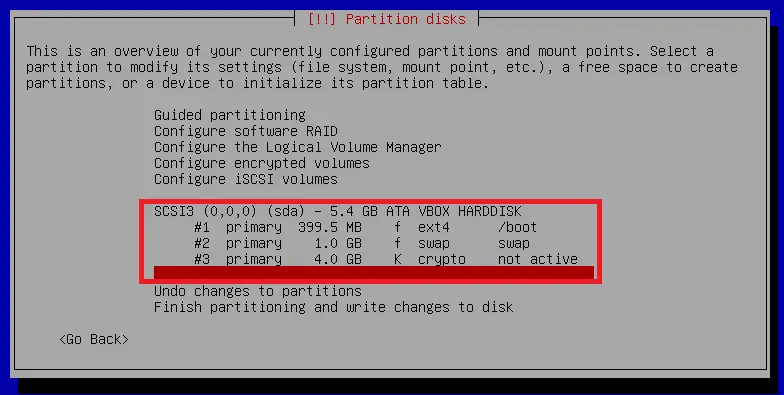
The successful creation of the partition on the virtual hard disk is shown in below figure.
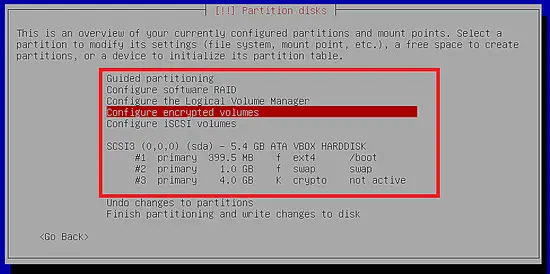
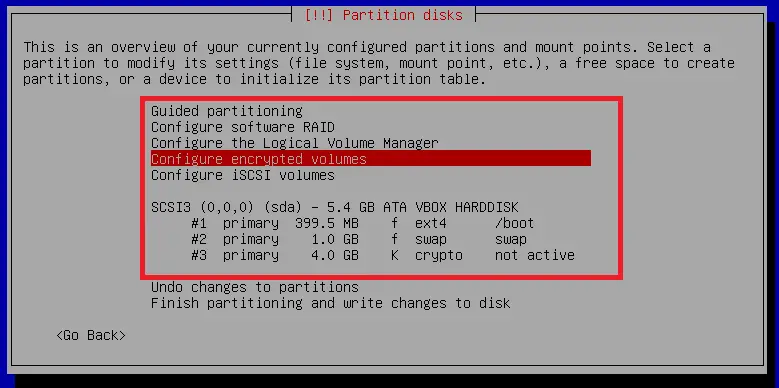
Here comes the advanced configuration of encrypted volumes on Debian which is selected in the following screenshot.
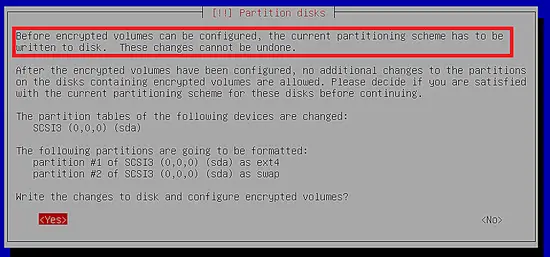
The following prompt shows that the current partitioning scheme needs to write on hard disk before we can start with the configuration of the encrypted volume.
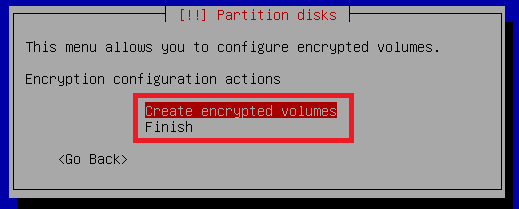
The following prompt shows the creation of the encrypted volume on the Debian platform.
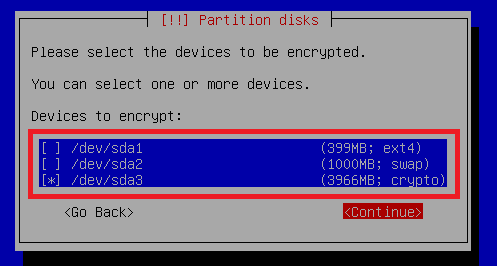
Select the devices for the encrypted volume. Don't select the boot device "/dev/sda1" for the encrypted volume because it is not allowed to encrypt the boot partition.
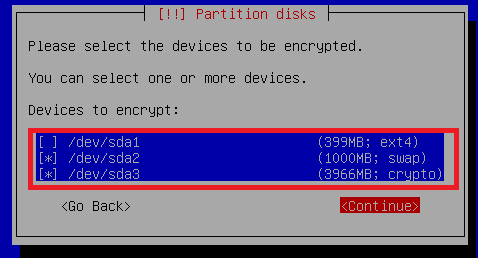
As shown in the following screenshot, only "/dev/sda3" is selected for the encrypted volume and this is the root partition of the disk.

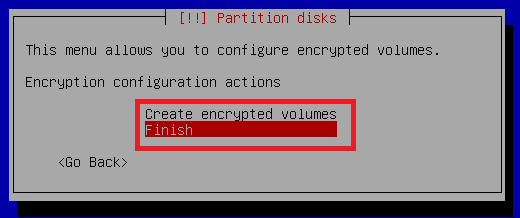
After the configuration of the encrypted volume , select finish to apply changes.
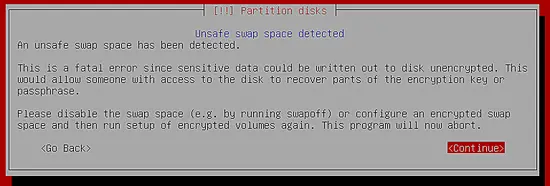
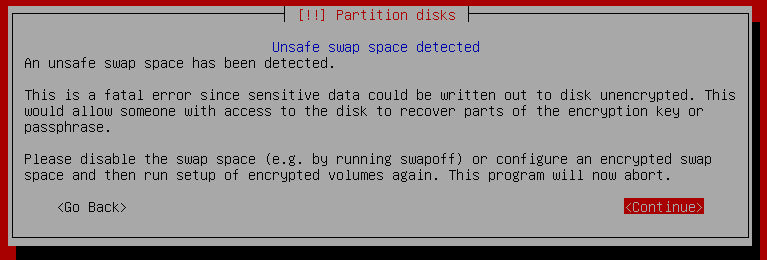
However, following error will prompt if swap partition is not selected for encrypted volume.
Therefore, we select both partitions for the encrypted volume.
Partition settings for swap encrypted volume are shown below.
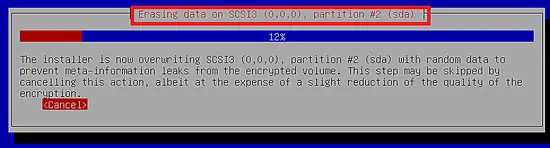
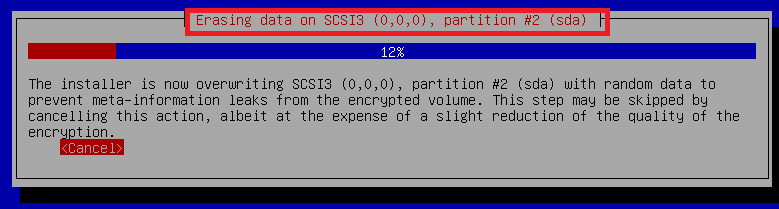
The following prompt shows that data will be erased on "sda2" (swap).
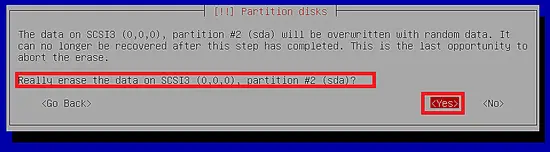
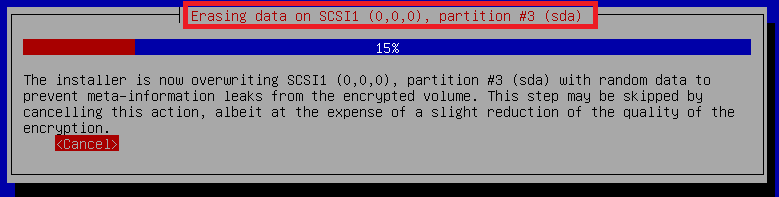
Erasing data on "sda2" & "sda3" is shown below.

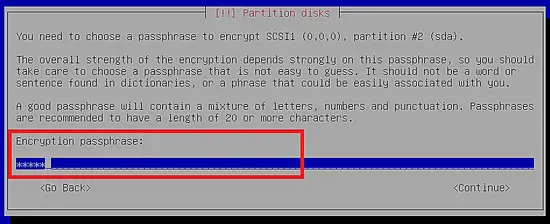
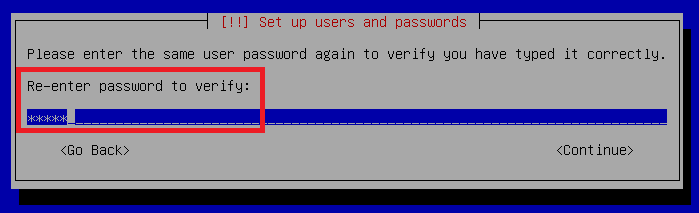
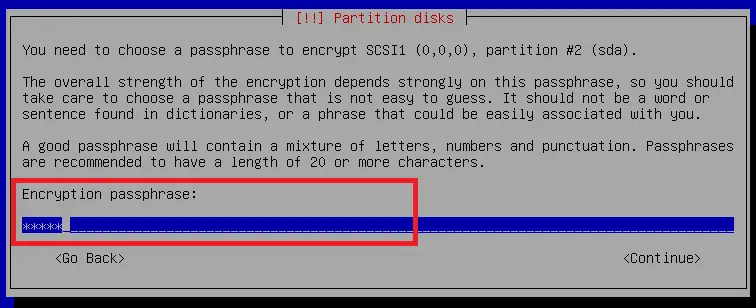
After the process finished, enter a passphrases for both encrypted partitions.
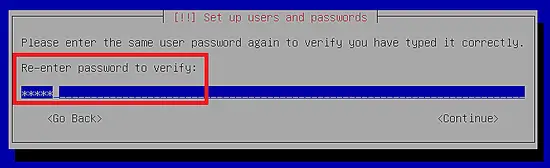
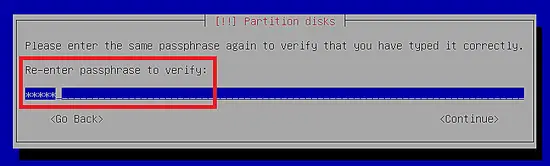
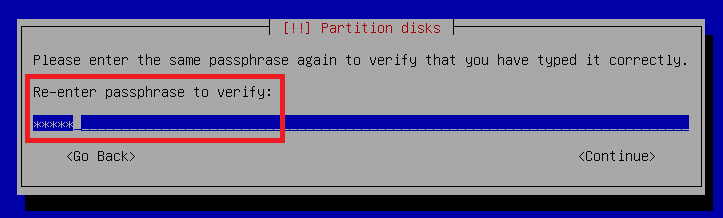
Re-entering same passphrase.
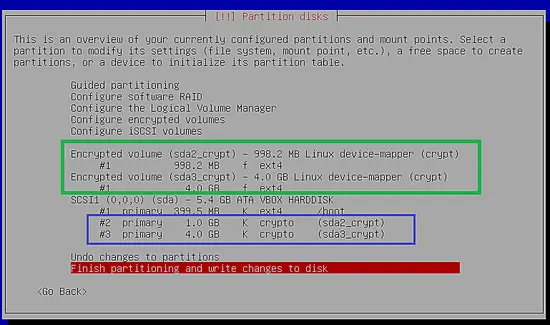
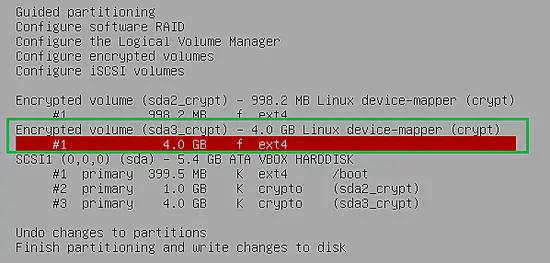
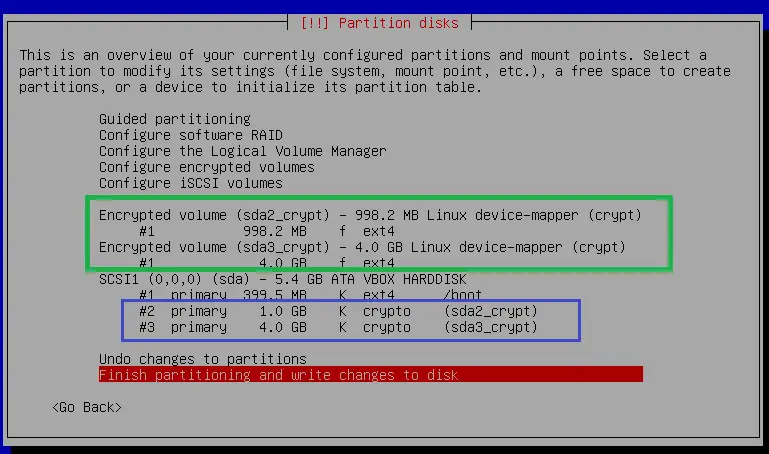
The partition table after successful configuration of the encrypted volumes on the disk is shown below.
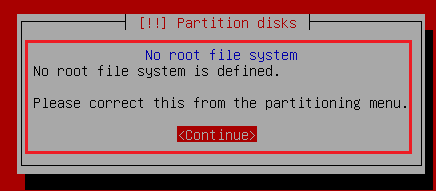
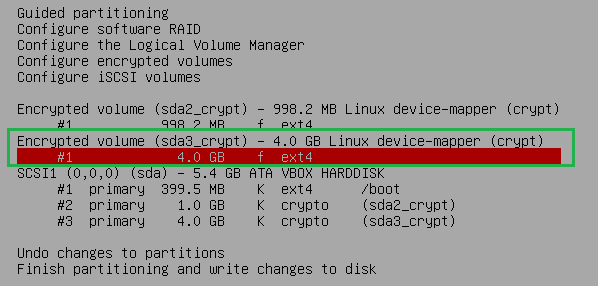
Finish the partitioning process to start the installation of the Debian OS. However, the following error prompt will appear because mount point "/" is not selected yet for any partition.
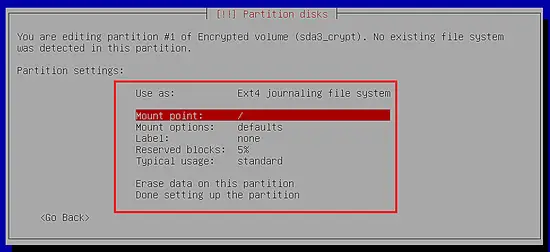
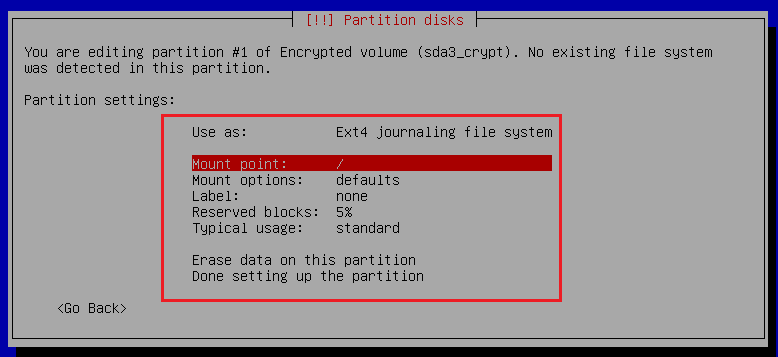
After the above error prompt, reconfigure the encrypted volumes to set the mount point. In this article, "sda3_crypt" is the root file system and "sda2_crypt" is the swap area.
Selecting mount point "/" for encrypted volume.
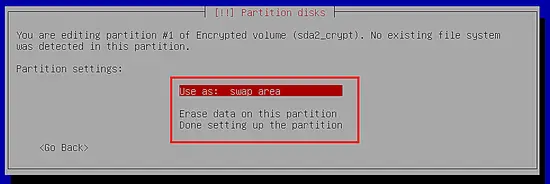
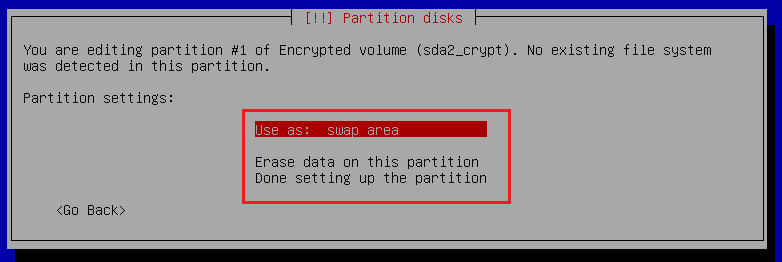
Selecting "sda2_crypt" encrypted volume as a swap area.
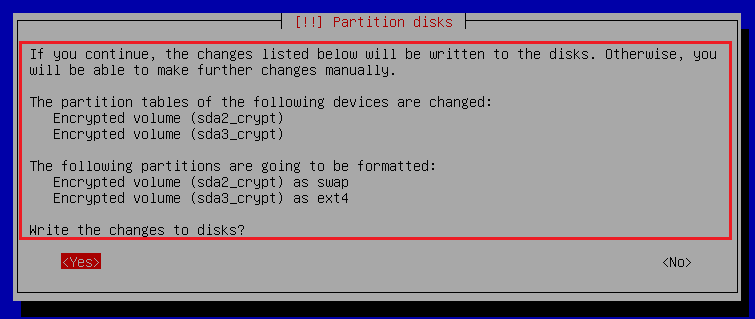
The following screenshot shows the final partition table for encrypted volumes.

Formatting of partitions is shown below.

After completion of the formatting process, base system will be installed.

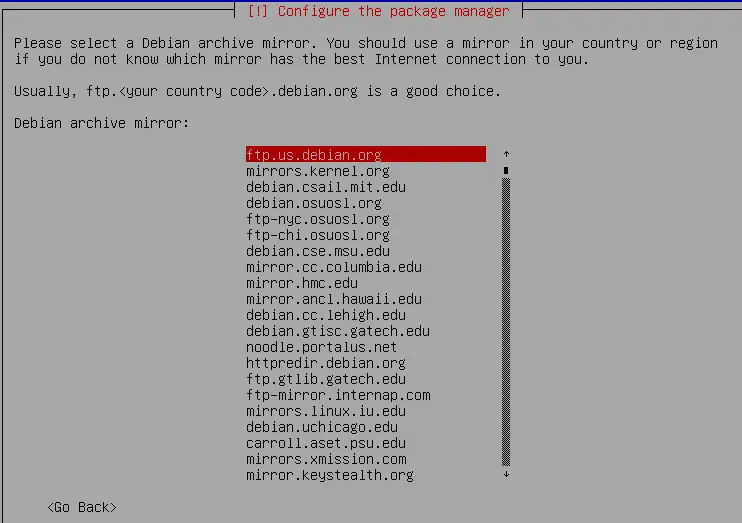
The following screenshot shows the selection of the archive mirror for the Debian packages.

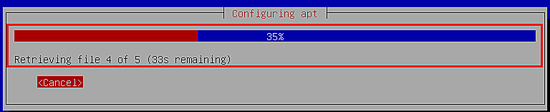
The package manager configuration is shown below.
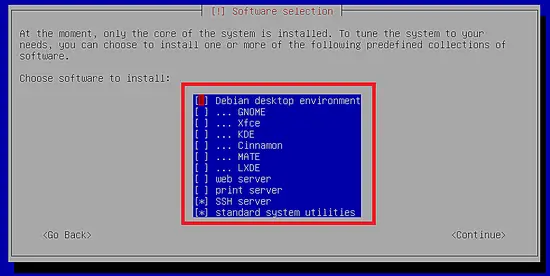
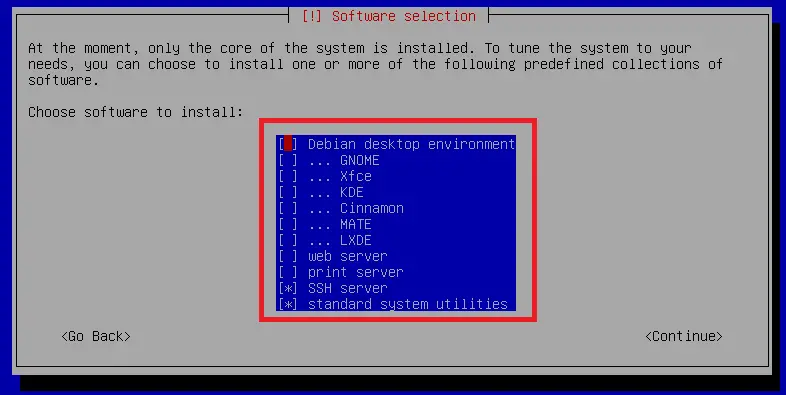
Only base or core system is installed yet and other packages can be install from the shown list.

Select desktop environment and other packages from the list.
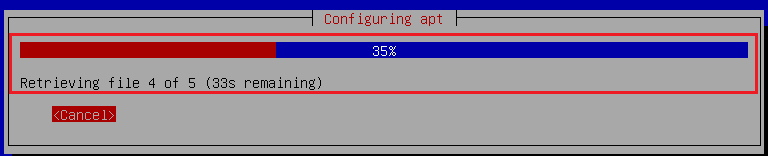
Installation of selected packages is shown below.

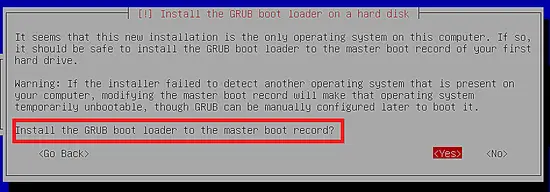
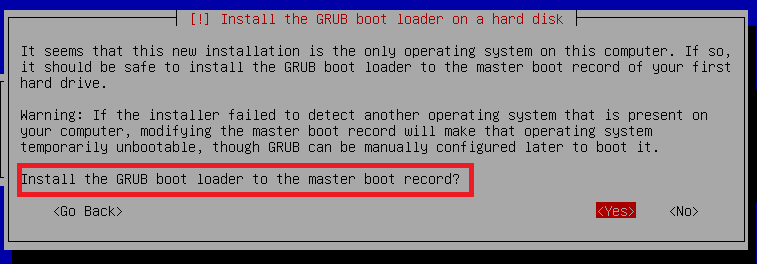
Installation of the Linux boot loader "GRUB" is shown in the following screenshot.
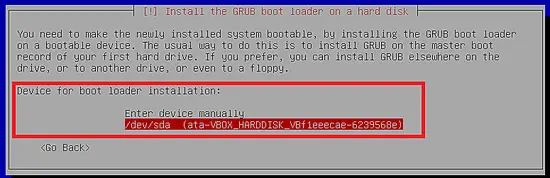
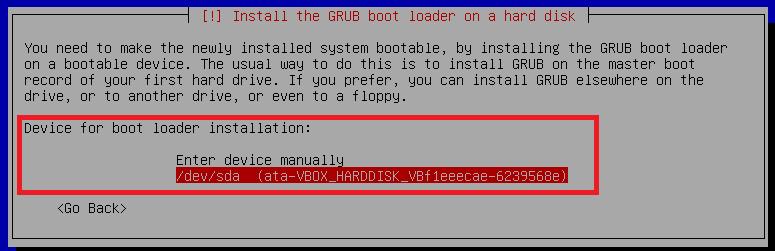
Device (sda) is selected for boot loader installation.
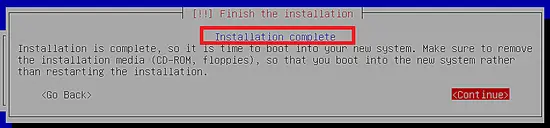
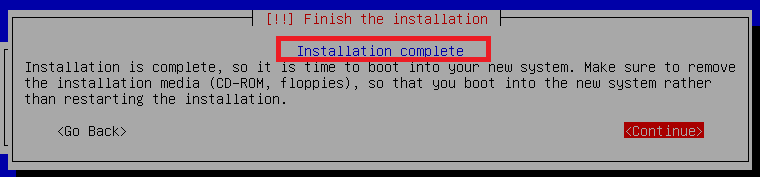
Finally, the installation process is complete.
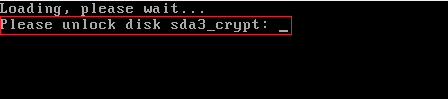
After reboot, enter passphrase to decrypt the sda3 disk.

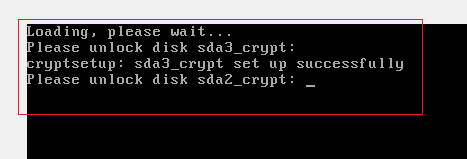
Enter passphrase to decrypt the sda2 disk which is swap area.

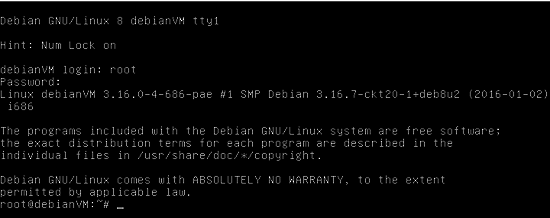
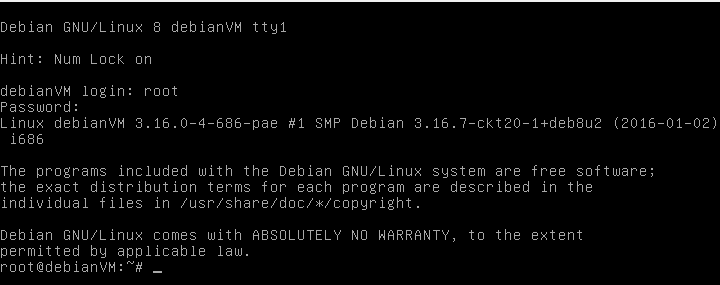
Successfully login on the installed system.
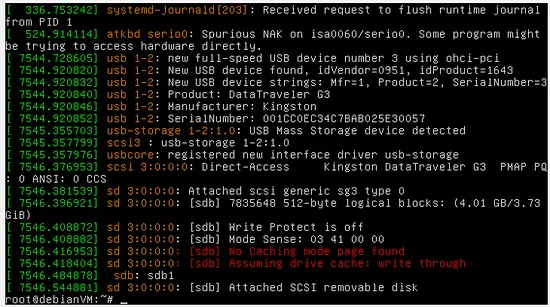
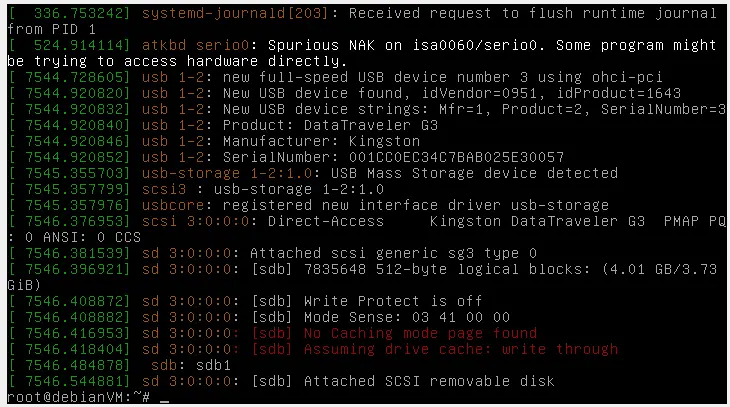
a passphrase , the secret key on the USB will decrypt the encrypted volumes. Connect an USB stick to the VM and locate it using the "dmesg" command. It is detected as "/dev/sdb" in my VM.
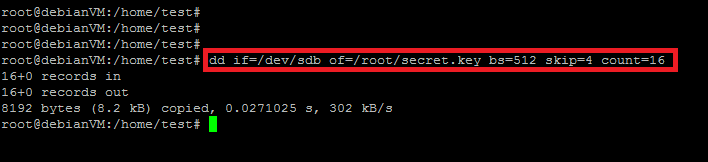
The secret key of 8192 random byte is extracted from the usb stick using the dd command.
The above generated secret key is added to the encrypted volumes
using the "cryptsetup" command. By default, the passphrase is kept in
the slot 0. Therefore, slot 1 will be used for the second secret key.
Run "blkid" command to get details of volume on the disk.
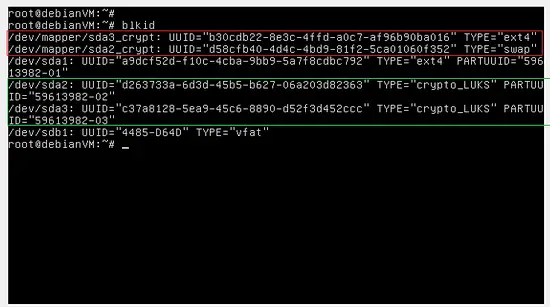
In this tutorial, the secret key for decryption of the volume is added in /dev/sda3 only. However, it can be added to "/dev/sda2" (swap) partition as well.

A simple udev rule is created for the USB device in the file /etc/udev/rules.d/99-custom-usb.rules, the symbolic link that we will use is /dev/usbdevice.

Reload rules using the following command.
Inseart the USB device to verify the custom rule.

A shell script is required to read the secret key from the USB device and provide it to cryptsetup at boot time. The script is created as "/usr/local/sbin/openluksdevices.sh" and taken from the http://www.oxygenimpaired.com/ site.
Similar to the fstab configuration file, the crypttab file contains the information about encyrpted volumes on the Linux platfrom. Add a shell script for the sda3_crypt encrypted partition. The content of configuration file "/etc/crypttab" for encrypted volume is given below.

Add the following line in the "/etc/initramfs-tools/conf.d/cryptroot" file.

Make sure the "usb_storage" is added in "/etc/initramfs-tools/modules" file.
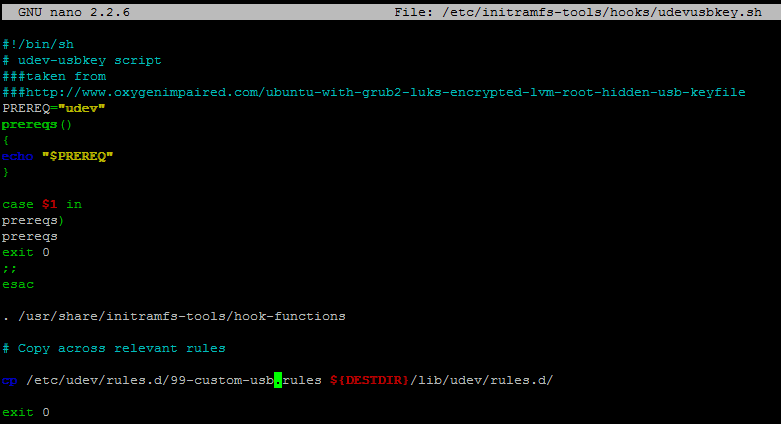
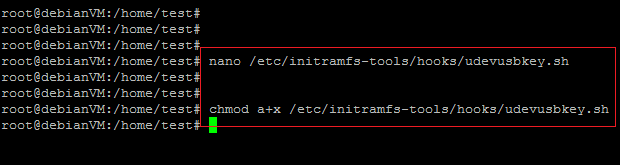
The following shell script (/etc/initramfs-tools/hooks/udevusbkey.sh) is also taken from an external source. It is used to add a custom udev rule in the temporary file system "initrd".
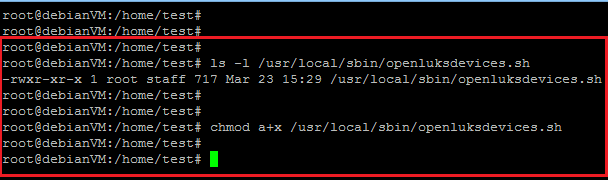
Change the permission of the script.
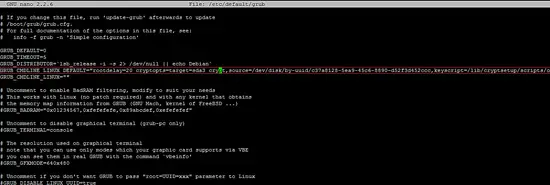
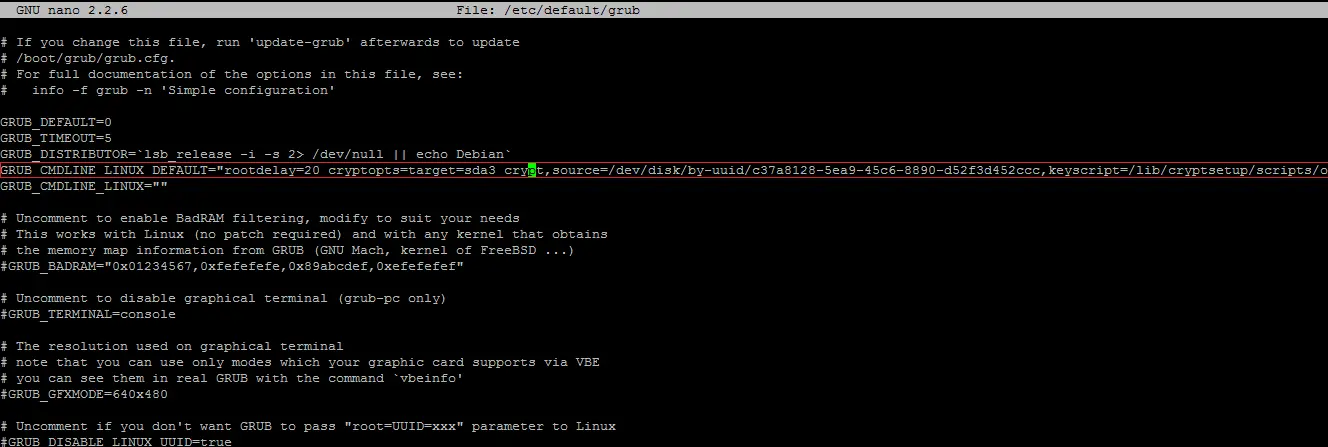
Some changes are required in the GRUB2 boot loader configuation.
However, direct changes in the configuration file "/boot/grub/grub.cfg"
are not allowed. Therefore, change "GRUB_CMDLINE_LINUX_DEFAULT"
parameter in the "/etc/default/grub" configuration file. As shown below,
"rootdelay" and "cryptopts" are included in the
"GRUB_CMDLINE_LINUX_DEFAULT" parameter.
GRUB_CMDLINE_LINUX_DEFAULT="rootdelay=20 cryptopts=target=sda3_crypt,source=/dev/disk/by-uuid/c37a8128-5ea9-45c6-8890-d52f3d452ccc,keyscript=/lib/cryptsetup/scripts/openluksdevices.sh"
GRUB_CMDLINE_LINUX=""
# Uncomment to enable BadRAM filtering, modify to suit your needs
# This works with Linux (no patch required) and with any kernel that obtainsConclusion
Run the "update-grub" command to apply above changes in the "/boot/grub/grub.cfg" configuration file.

After above command, the following changes got applied in the "/boot/grub/grub.cfg" configuration file.
Before reboot, unpack the newley generated "initrd.img" and verify that the keyscript has been copied to the "lib/cryptsetup/scripts" directory and the custom udev rule into "lib/udev/rules.d/" directory.
Keyscript is successfully included in the initramfs scripts.

Custom USB rule is also included in the udev rules.

Add USB device in the VM settings before testing the entire setup.
Finally, the secret key is successfuly loaded for encrypted volume.

Security of critical data on the storage device (hard disk, portable memory stick) is necessary so that an intruder can not steal sensitive information. In this tutorial, our focus is the security of Linux root filesystem and swap area. The default Linux encryption feature "LUKS" will be used, which requires a passphrase at boot time. Therefore, our next goal is to automatically provide the passphrase to an encrypted volume at boot time. There are already a few articles on the same topic for older releases of the Debian distribution available. However, in this tutorial the Debain 8 (Jessie) version is installed on a VirtualBox VM.
Debian OS Installation
In this tutorial, Debian Jessie is installed on a VM and details are shown in the following figure. The same procedure will work on a "real" server or Desktop as well.Add the Debian net installer iso file in the VM and start the vm, the installer prompt will appear. Select the "Install" option to start the installation process.
The following few screens will prompt for the basic settings of Debian. Select the desired language option from the given list.

Select country or area as shown in the following figure.
Configure the language for the keyboard.

Again, more base settings will be configured during the installation process.
1. Setting hostname
2. Configuring Domain name
3. Setting a password for "root" user.

4. Creating a new user other than root.

5. set the Time zone
6. And finally, the most important part is the partitioning of the disk.
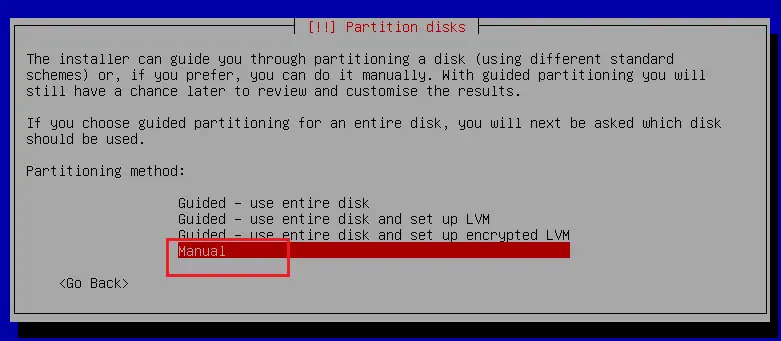
Manual partitioning of the hard disk is required for this article. Therefore, select the "Manual" option in the above prompt and select the desired hard disk to start the process.
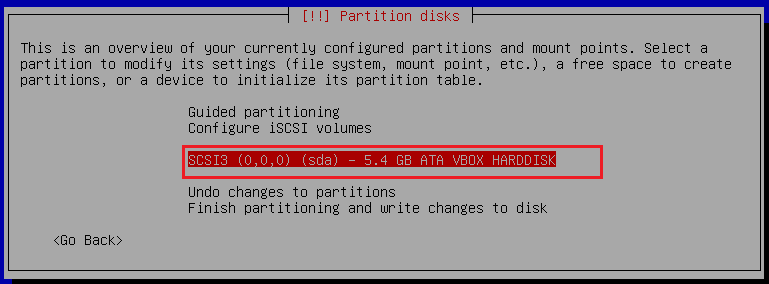
As shown in the above figure, Debian will be installed in the VM. Press enter to start partitioning of selected hard disk which is shown below.
The following screen will show up after acceptance of above message. As shown in the following screenshot, currently there is no partition on the hard disk.
Press "enter" to create the first partition on the virtual hard disk.

The first partition that we created on the hard disk is "/dev/sda1" for the "/boot" mount point.
Primary or Logical type is selected for partition.

Location of the new partition is selected.
Mount point "/boot" is shown in the following screenshot.
The first partition has been successfully created on the hard disk. The Linux kernel is later placed in the "/boot" partition.
The second partition created on the VM hard disk is swap and the size of the swap partition should be double of the RAM size. As shown in the following screenshot, the remaining free space is selected for swap.
Set the size of the swap partition.
Following screenshot shows that the partition is selected as swap area.
Another partition is also created on the VM.
The core partition of the Linux platform is created on the remaining space for / (the "root" mount point). The following snapshot shows the size of "root" partition.
Select "physical volume of encryption" option for the new partition on hard disk.
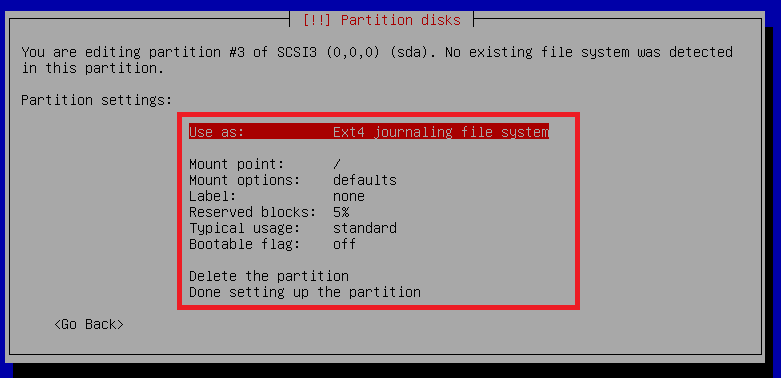
The highlighted option in the following screenshot is required to encrypt the partition on Linux platform.

The partition setup after selecting "physical volume for encryption" is shown in the following figure. Default encryption method is device-mapper (dm-crypt), the encryption algorithm is AES with 256 key size.
The successful creation of the partition on the virtual hard disk is shown in below figure.
Here comes the advanced configuration of encrypted volumes on Debian which is selected in the following screenshot.
The following prompt shows that the current partitioning scheme needs to write on hard disk before we can start with the configuration of the encrypted volume.

The following prompt shows the creation of the encrypted volume on the Debian platform.

Select the devices for the encrypted volume. Don't select the boot device "/dev/sda1" for the encrypted volume because it is not allowed to encrypt the boot partition.
As shown in the following screenshot, only "/dev/sda3" is selected for the encrypted volume and this is the root partition of the disk.
After the configuration of the encrypted volume , select finish to apply changes.

However, following error will prompt if swap partition is not selected for encrypted volume.
Therefore, we select both partitions for the encrypted volume.

Partition settings for swap encrypted volume are shown below.
The following prompt shows that data will be erased on "sda2" (swap).

Erasing data on "sda2" & "sda3" is shown below.
After the process finished, enter a passphrases for both encrypted partitions.
Re-entering same passphrase.
The partition table after successful configuration of the encrypted volumes on the disk is shown below.
Finish the partitioning process to start the installation of the Debian OS. However, the following error prompt will appear because mount point "/" is not selected yet for any partition.

After the above error prompt, reconfigure the encrypted volumes to set the mount point. In this article, "sda3_crypt" is the root file system and "sda2_crypt" is the swap area.
Selecting mount point "/" for encrypted volume.
Selecting "sda2_crypt" encrypted volume as a swap area.
The following screenshot shows the final partition table for encrypted volumes.
Formatting of partitions is shown below.

After completion of the formatting process, base system will be installed.

The following screenshot shows the selection of the archive mirror for the Debian packages.
The package manager configuration is shown below.
Only base or core system is installed yet and other packages can be install from the shown list.

Select desktop environment and other packages from the list.
Installation of selected packages is shown below.

Installation of the Linux boot loader "GRUB" is shown in the following screenshot.
Device (sda) is selected for boot loader installation.
Finally, the installation process is complete.
After reboot, enter passphrase to decrypt the sda3 disk.
Enter passphrase to decrypt the sda2 disk which is swap area.
Successfully login on the installed system.
Configuration for passwordless root filesystem
The process of entering the passphrase at boot time will now be automated using an USB memory stick. Instead of usinga passphrase , the secret key on the USB will decrypt the encrypted volumes. Connect an USB stick to the VM and locate it using the "dmesg" command. It is detected as "/dev/sdb" in my VM.
The secret key of 8192 random byte is extracted from the usb stick using the dd command.
dd if=/dev/sdb of=/root/secret.key bs=512 skip=4 count=16
blkid
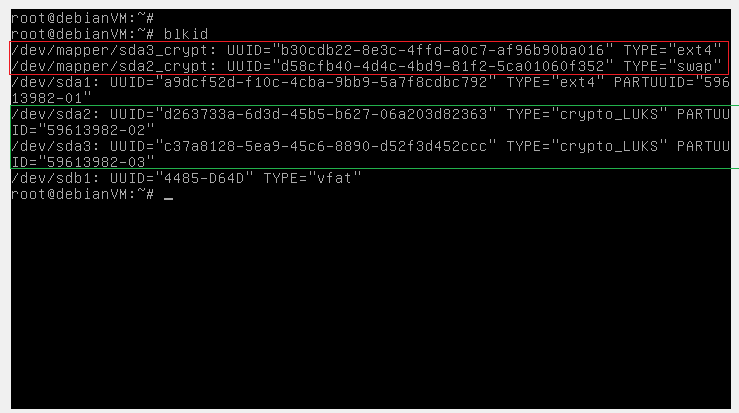
In this tutorial, the secret key for decryption of the volume is added in /dev/sda3 only. However, it can be added to "/dev/sda2" (swap) partition as well.
cryptsetup luksAddKey /dev/sda3 /root/secret.key --key-slot 1
A simple udev rule is created for the USB device in the file /etc/udev/rules.d/99-custom-usb.rules, the symbolic link that we will use is /dev/usbdevice.
SUBSYSTEMS=="usb", DRIVERS=="usb",SYMLINK+="usbdevice%n"
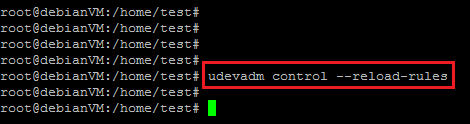
Reload rules using the following command.
udevadm control --reload-rules
Inseart the USB device to verify the custom rule.

A shell script is required to read the secret key from the USB device and provide it to cryptsetup at boot time. The script is created as "/usr/local/sbin/openluksdevices.sh" and taken from the http://www.oxygenimpaired.com/ site.
#!/bin/sh
############taken from following link#########
###http://www.oxygenimpaired.com/debian-lenny-luks-encrypted-root-hidden-usb-keyfile
TRUE=0
FALSE=1
# flag tracking key-file availability
OPENED=$FALSE
if [ -b /dev/usbdevice ]; then
# if device exists then output the keyfile from the usb key
dd if=/dev/usbdevice bs=512 skip=4 count=16 | cat
OPENED=$TRUE
fi
if [ $OPENED -ne $TRUE ]; then
echo "FAILED to get USB key file ..." >&2
/lib/cryptsetup/askpass "Try LUKS password: "
else
echo "Success loading key file for Root . Moving on." >&2
fi
sleep 2
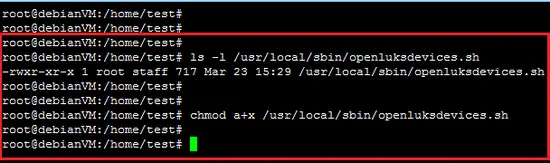
Set the permissions of script so that it can be executed.############taken from following link#########
###http://www.oxygenimpaired.com/debian-lenny-luks-encrypted-root-hidden-usb-keyfile
TRUE=0
FALSE=1
# flag tracking key-file availability
OPENED=$FALSE
if [ -b /dev/usbdevice ]; then
# if device exists then output the keyfile from the usb key
dd if=/dev/usbdevice bs=512 skip=4 count=16 | cat
OPENED=$TRUE
fi
if [ $OPENED -ne $TRUE ]; then
echo "FAILED to get USB key file ..." >&2
/lib/cryptsetup/askpass "Try LUKS password: "
else
echo "Success loading key file for Root . Moving on." >&2
fi
sleep 2
chmod a+x /usr/local/sbin/openluksdevices.sh
Similar to the fstab configuration file, the crypttab file contains the information about encyrpted volumes on the Linux platfrom. Add a shell script for the sda3_crypt encrypted partition. The content of configuration file "/etc/crypttab" for encrypted volume is given below.
sda3_crypt /dev/disk/by-uuid/c37a8128-5ea9-45c6-8890-d52f3d452ccc none luks,keyscript=/usr/local/sbin/openluksdevices.sh

Add the following line in the "/etc/initramfs-tools/conf.d/cryptroot" file.
CRYPTROOT=target=sda3_crypt,source=/dev/disk/by-uuid/c37a8128-5ea9-45c6-8890-d52f3d452ccc

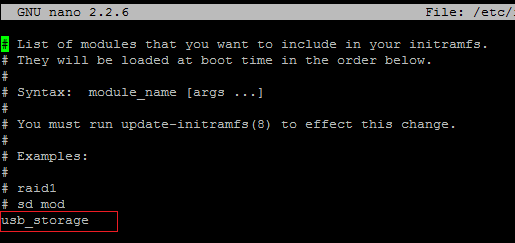
Make sure the "usb_storage" is added in "/etc/initramfs-tools/modules" file.

The following shell script (/etc/initramfs-tools/hooks/udevusbkey.sh) is also taken from an external source. It is used to add a custom udev rule in the temporary file system "initrd".
#!/bin/sh
# udev-usbkey script
###taken from
###http://www.oxygenimpaired.com/ubuntu-with-grub2-luks-encrypted-lvm-root-hidden-usb-keyfile
PREREQ="udev"
prereqs()
{
echo "$PREREQ"
}
case $1 in
prereqs)
prereqs
exit 0
;;
esac
. /usr/share/initramfs-tools/hook-functions
# Copy across relevant rules
cp /etc/udev/rules.d/99-custom-usb.rules ${DESTDIR}/lib/udev/rules.d/
exit 0
chmod a+x /etc/initramfs-tools/hooks/udevusbkey.sh
GRUB_CMDLINE_LINUX_DEFAULT="rootdelay=20 cryptopts=target=sda3_crypt,source=/dev/disk/by-uuid/c37a8128-5ea9-45c6-8890-d52f3d452ccc,keyscript=/lib/cryptsetup/scripts/openluksdevices.sh"
GRUB_CMDLINE_LINUX=""
# Uncomment to enable BadRAM filtering, modify to suit your needs
# This works with Linux (no patch required) and with any kernel that obtainsConclusion
Run the "update-grub" command to apply above changes in the "/boot/grub/grub.cfg" configuration file.
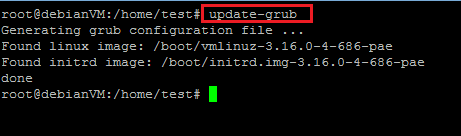
After above command, the following changes got applied in the "/boot/grub/grub.cfg" configuration file.
echo 'Loading Linux 3.16.0-4-686-pae ...'
linux /vmlinuz-3.16.0-4-686-pae root=UUID=b30cdb22-8e3c-4ffd-a0c7-af96b90ba016 ro rootdelay=20 cryptopts=target=sda3_crypt,source=/dev/disk/by-uuid/c37a8128-5ea9-45c6-8890-d52f3d452ccc,keyscript=/lib/cryptsetup/scripts/openluksdevices.sh
echo 'Loading initial ramdisk ...'
initrd /initrd.img-3.16.0-4-686-pae
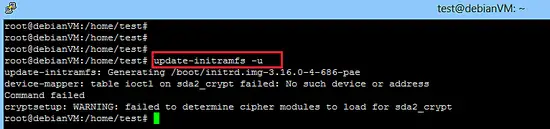
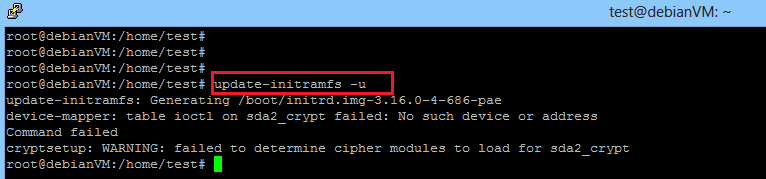
Run "update-initramfs -u" to update the temporary file system file for all kernels.linux /vmlinuz-3.16.0-4-686-pae root=UUID=b30cdb22-8e3c-4ffd-a0c7-af96b90ba016 ro rootdelay=20 cryptopts=target=sda3_crypt,source=/dev/disk/by-uuid/c37a8128-5ea9-45c6-8890-d52f3d452ccc,keyscript=/lib/cryptsetup/scripts/openluksdevices.sh
echo 'Loading initial ramdisk ...'
initrd /initrd.img-3.16.0-4-686-pae
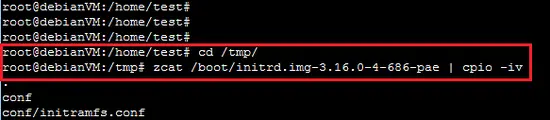
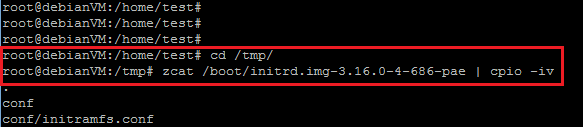
Before reboot, unpack the newley generated "initrd.img" and verify that the keyscript has been copied to the "lib/cryptsetup/scripts" directory and the custom udev rule into "lib/udev/rules.d/" directory.
cd /tmp/
zcat /boot/initrd.img-3.16.0-4-686-pae | cpio -iv
zcat /boot/initrd.img-3.16.0-4-686-pae | cpio -iv
Keyscript is successfully included in the initramfs scripts.

Custom USB rule is also included in the udev rules.

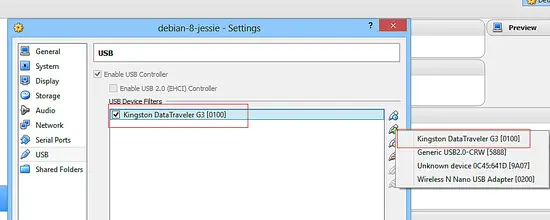
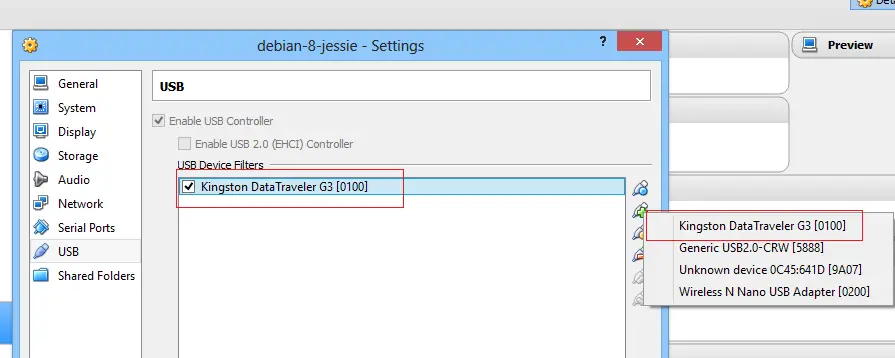
Add USB device in the VM settings before testing the entire setup.
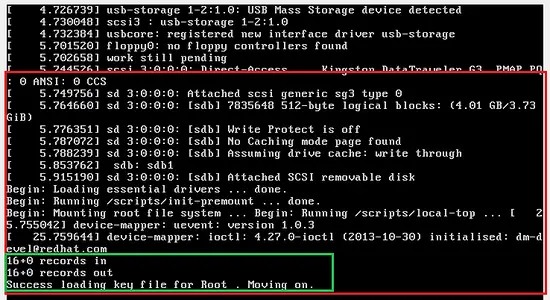
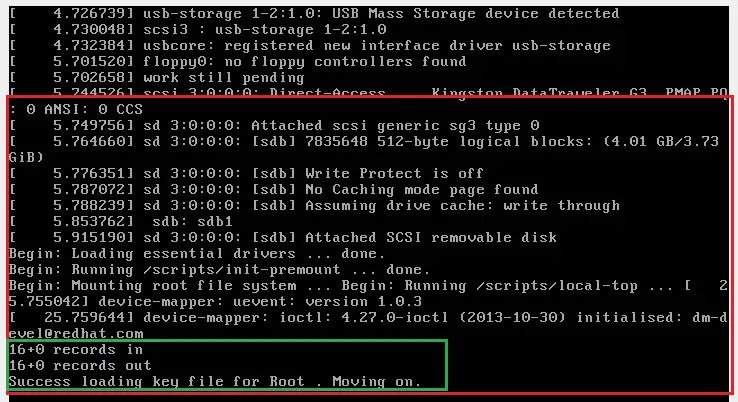
Finally, the secret key is successfuly loaded for encrypted volume.
Conclusion
In this article, an encrypted partition is opened using a secret key which is kept in an usb memory device. An automatic shell script is used to provide a secret key for encrypted volume at boot time.
No comments:
Post a Comment