https://opensource.com/life/16/5/netbeast

Image by :
opensource.com
When smart devices are closed, they're not smart at all.
Netbeast is an open source platform for developing Internet of Things (IoT) applications for appliances and other devices. It's an environment-agnostic platform that allows users to ignore details like wireless protocols, brand-specific public APIs, or device detection. One of Netbeast's main goals is to help foster and develop an open source community in IoT.
Netbeast applications allow you to control how devices interact each other. You don't have to worry about which brand of devices you're using, you only need to say what you want to control (lights, sound, sensors, etc.) and the value you want to give them (color, power, track, etc.).
Now you can visit http://localhost:8000 and you will see the dashboard running.
Of course, our system can also run on your laptop. All you need is Node.js and Git. You can get the source code on our GitHub repository or download the recently desktop version and the docker image.
You can take a look on our documentation site and see where we are running on currently.
If you want to become a part of our community, check us out on GitHub and join our Slack channel.
Netbeast is an open source platform for developing Internet of Things (IoT) applications for appliances and other devices. It's an environment-agnostic platform that allows users to ignore details like wireless protocols, brand-specific public APIs, or device detection. One of Netbeast's main goals is to help foster and develop an open source community in IoT.
The Netbeast basics
- Dashboard: Platform for users to install applications and control smart products
- API: Unique and simple interface to create applications and plugins that allow devices to communicate with each other.
Netbeast applications allow you to control how devices interact each other. You don't have to worry about which brand of devices you're using, you only need to say what you want to control (lights, sound, sensors, etc.) and the value you want to give them (color, power, track, etc.).
How to start controlling your lights with Netbeast
1. Install Node.js
Netbeast is based entirely on Node.js. The official site has installation instructions.2. Clone Netbeast dashboard on your computer and install dependencies
git clone https://github.com/netbeast/dashboard
cd dashboard
npm i #Install dependencies
3. Start the Netbeast dashboard
Run the following command and you will have the dashboard running on your local port 8000:npm start # Or run it as node index.js --port
Now you can visit http://localhost:8000 and you will see the dashboard running.
4. Installing plugins and applications
We will install a plugin and an application in order to control Philips Hue lights. We'll also show an example case with a plugin that simulates how a light works.4.1 Install plugins
- Click on the explore icon and then look for Philips Hue and light bulb plugins.
- Wait until the process ends. Philips hue plugin will start automatically.
- Be sure that you have the light configure on the same network as your computer.
4.2 Install an application
- Click on the explore icon and then look for light control application.
- Wait until the process ends.
5. Try it
With the plugin
Once you have all plugins and application installed, you can start trying the applications.- Open a browser and access the dashboard at http://localhost:8000.
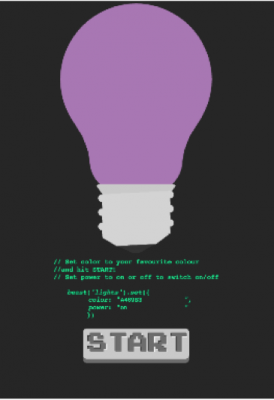
- Open the light bulb plugin. You will see a bulb like this:
- Open another browser and now open the light control application
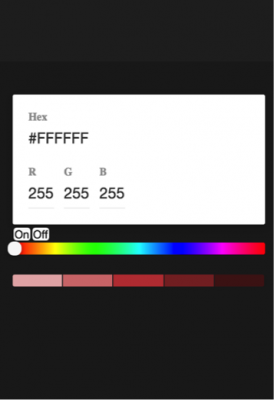
- Start changing the options on the application and you will see how the light changes its color.
Real case
If you have a Philips Hue at home, be sure that it is connected at the same network as your computer where you are running the Netbeast dashboard.- Open a browser and access to the dashboard http://localhost:8000.
- Open the light control application.
- Start changing the options on the application and you will see how the light changes its color.
More about Netbeast
Netbeast is based on Node.js and npm. Our system can run on Raspberry Pi 2 and Raspberry Pi 3.Of course, our system can also run on your laptop. All you need is Node.js and Git. You can get the source code on our GitHub repository or download the recently desktop version and the docker image.
You can take a look on our documentation site and see where we are running on currently.
If you want to become a part of our community, check us out on GitHub and join our Slack channel.

No comments:
Post a Comment