http://www.linuxtechi.com/install-and-configure-foreman-on-centos-7-x
Foreman is a free and open source configuration management and provisioning tool for physical and virtual servers. Foreman performs the repetitive and other configuration tasks using the tools like puppet, chef and Ansible. For provisioning, Foreman make the use of DHCP, DNS, TFTP and kickstart file.Though in this article we are going to use puppet tool with Foreman.
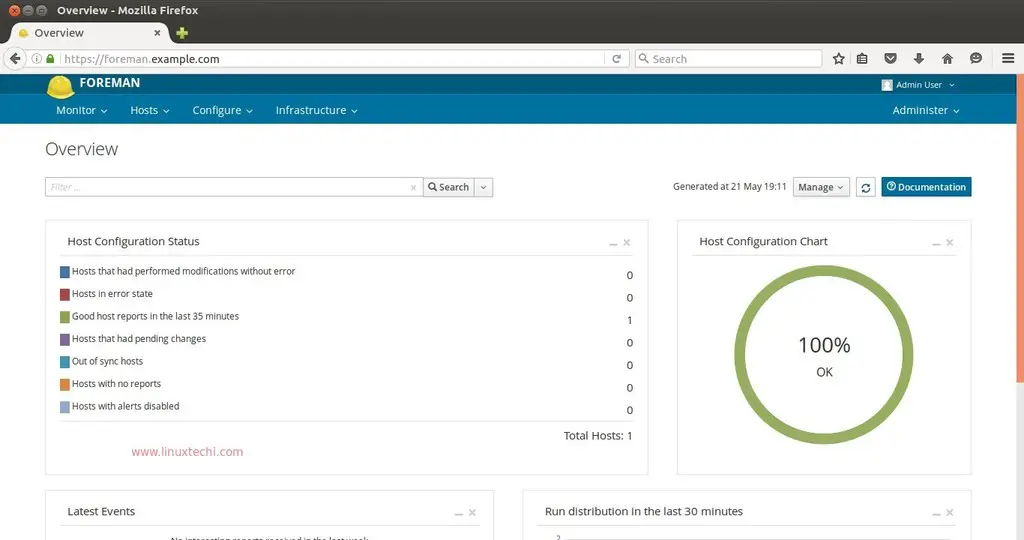
Foreman provides a dashboard from where system administrator can perform all configuration and audit task, we can also get the reports like how many nodes are managed by foreman and what configuration has been pushed on the nodes.
In this post i am going to demonstrate how to install and configure foreman 1.11 with puppet on CentOS 7.x
Below are details of my server on which i will install and configure Foreman.
We can see that initial credentials have been created for the foreman dashboard and moreover puppetmaster is also installed which is running in 8140 port.
Before Accessing the dashboard, it is recommended to open the required ports in the OS firewall. Execute the beneath commands one after the other.
”
In My Case dashboard can be accessed from the url : https://foreman.example.com
Use the initial credentials which is created during foreman installation
By default foreman server itself is registered in foreman dashboard. To check the host information,
click on Hosts options —> then all hosts.
Let’s install ntp module on the foreman server and import it from dashboard. NTP is very much required for puppet to work smoothly. Use the below command to download ntp module.

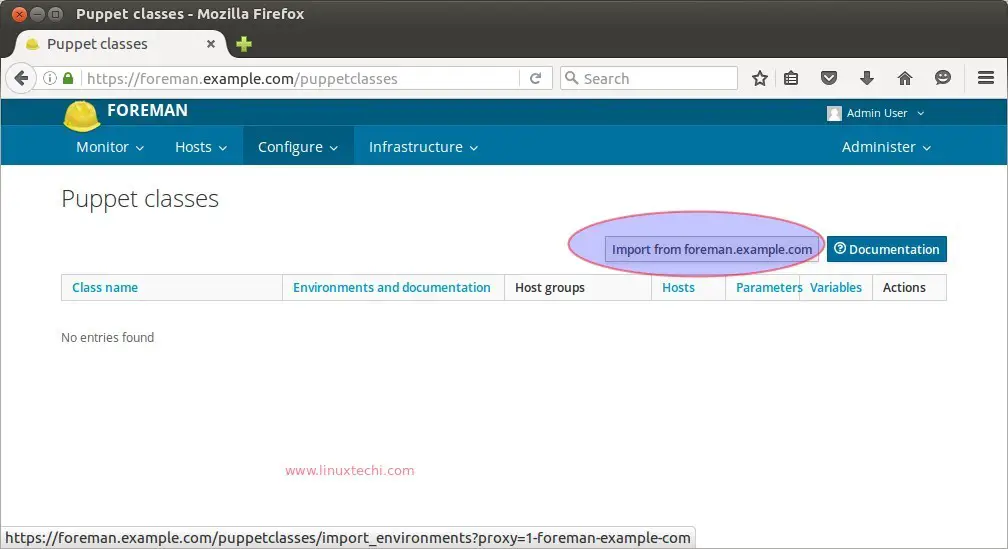
Click on Import option, it will import the NTP module in foreman dashboard, example is shown below :
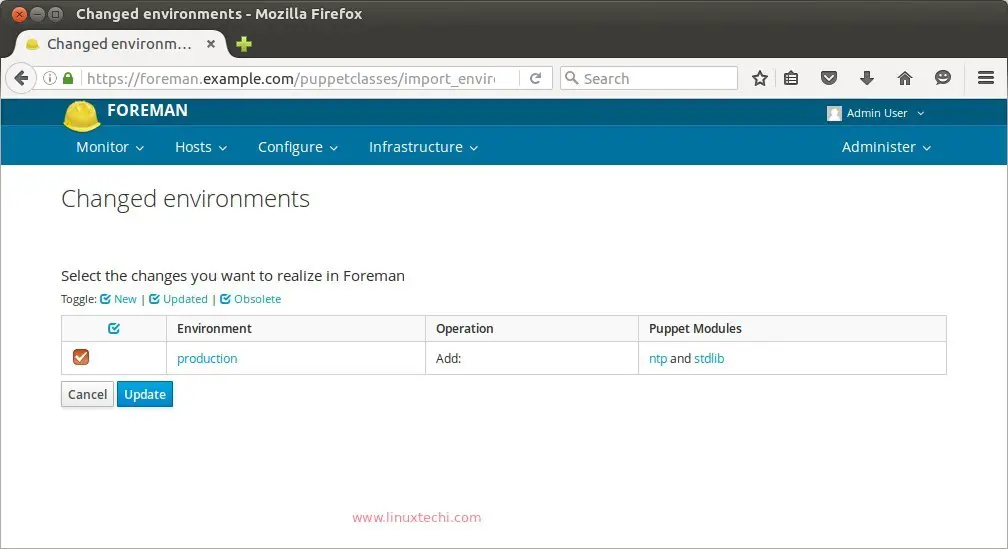
Select the Module and click on Update.
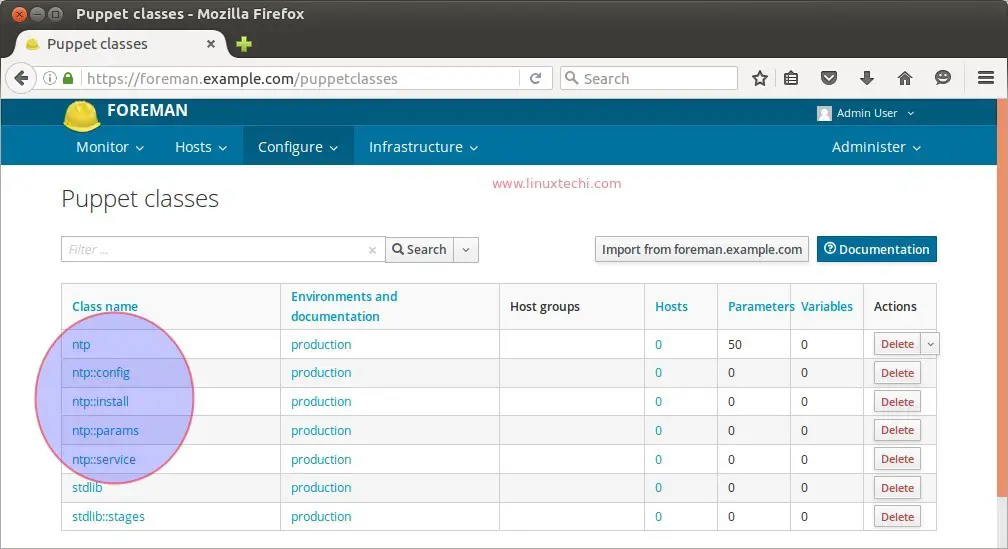
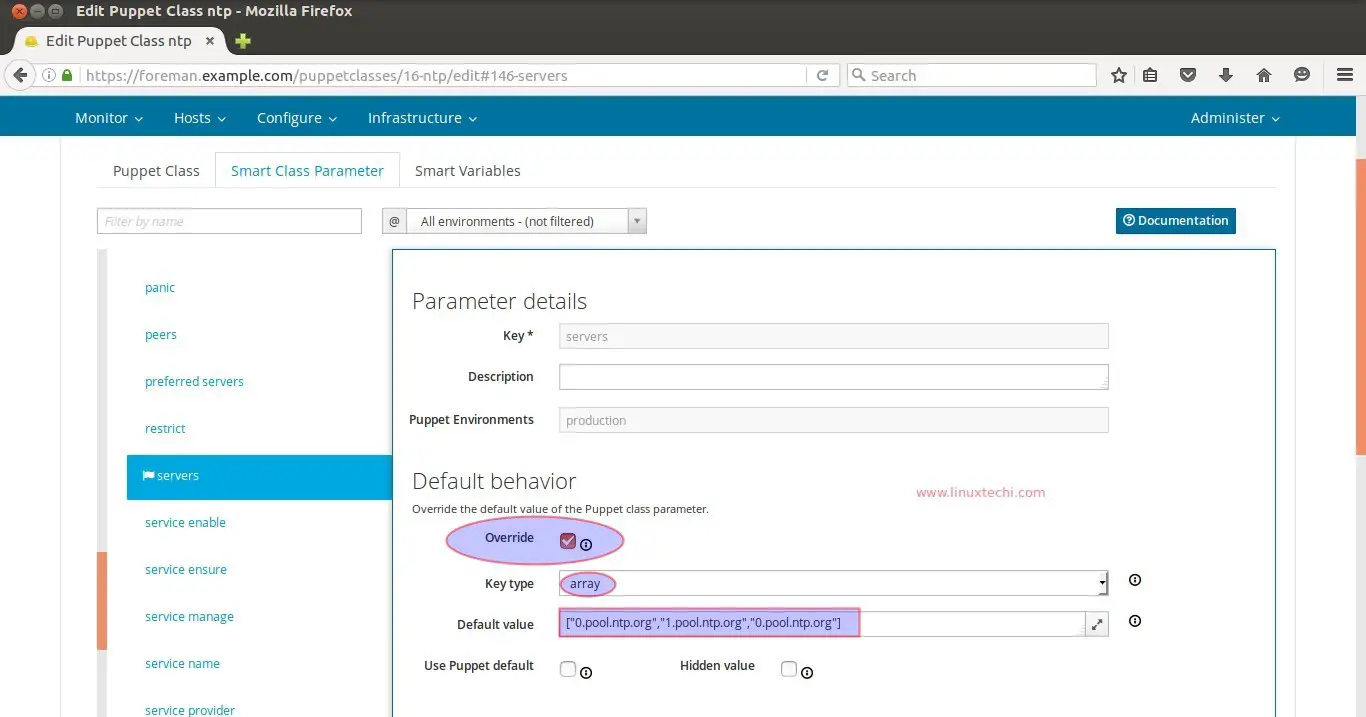
Click on ‘ntp’ class name and the select ‘Smart Class Parameter’
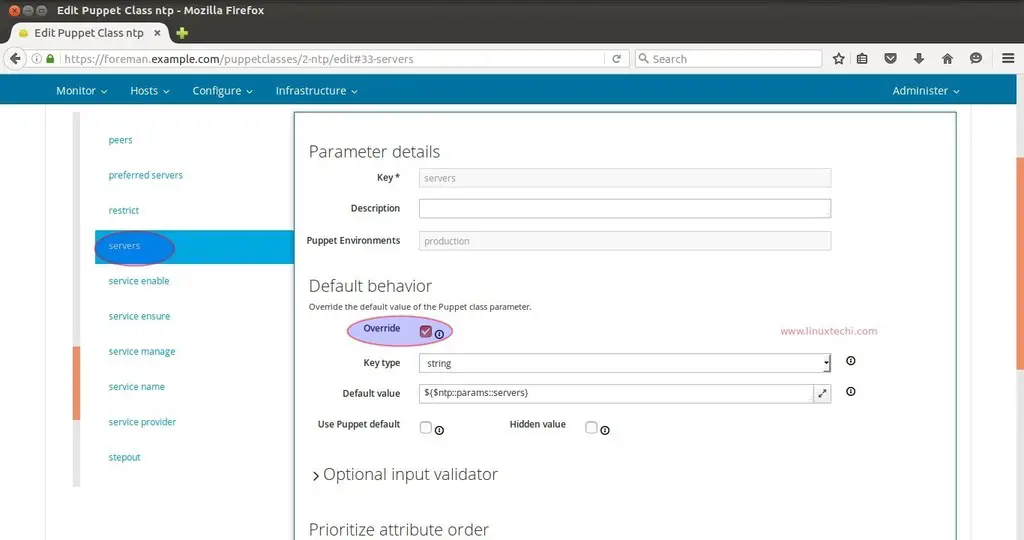
Select the override option in case you want to specify your own NTP Servers. Change the Key type Value from “String” to “Array” and Specify the NTP Server’s name in the Default value Box and then click on Submit. Example is shown below.

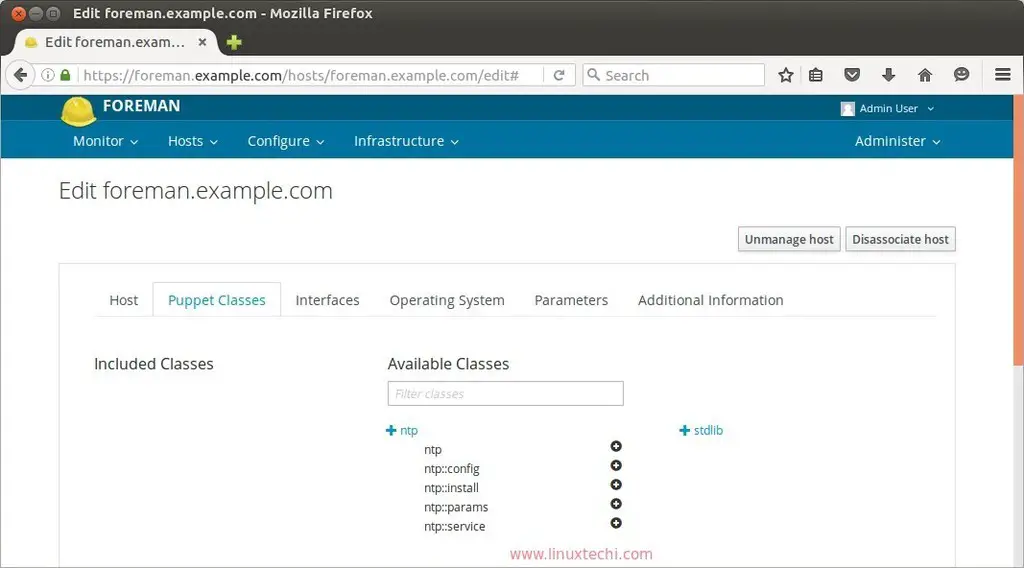
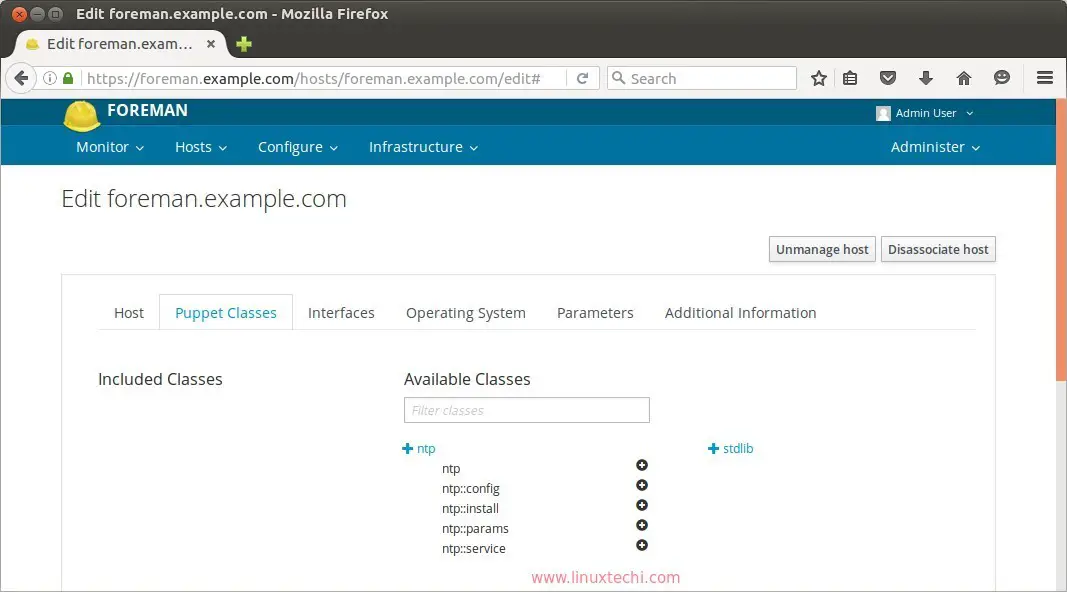
Now it’s time to add ntp class to the host, for that go to Hosts options and Select the host (foreman.example.com), Click on Edit. Go to the ‘Puppet Classes‘ Tab and Click on ‘+‘ option to add ntp class on the host and then click on submit
Now Run the following puppet command from the foreman server to configure the NTP Service automatically.
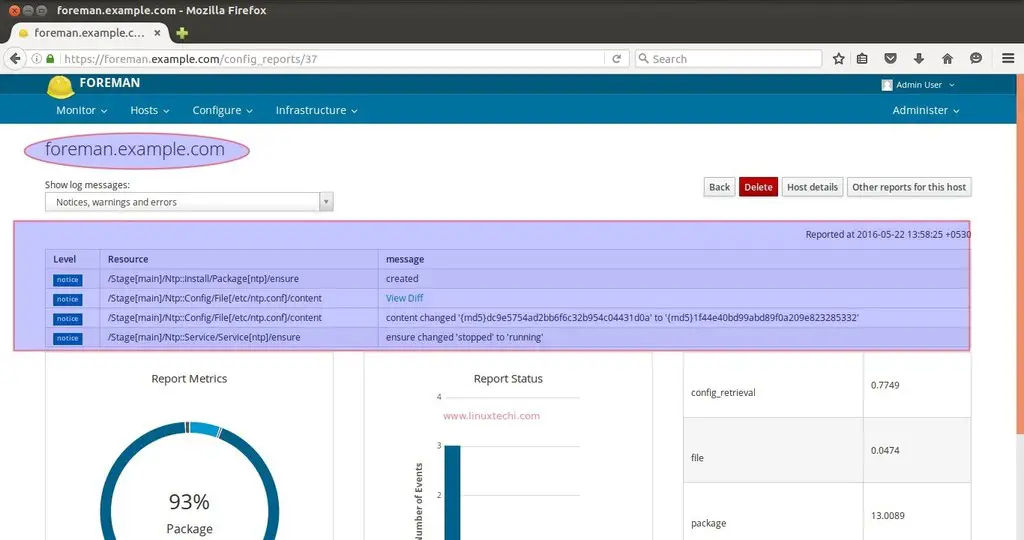
Go To Hosts—> Click on hosts{foreman.example.com}—> Click on Reports.
As we know that puppet makes the use of SSL Certificates to set up the secure communication between puppet server and its nodes. Once Puppet Server sign the certificates of its node, then only communication can occur.
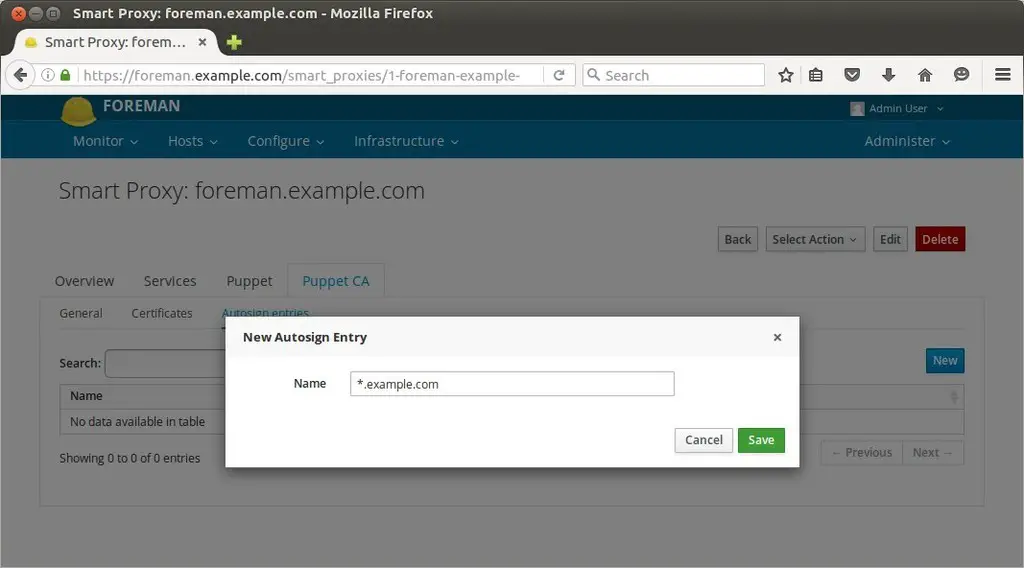
Let’s create a autosign entry for puppet nodes which are on the domain “example.com”
In the Forman Dashboard , Go To Infrastructure —> Select Smart Proxies —> Select Autosign under Action Tab
Click on New to create new ‘autosign’ entry. Specify the domain name and then click on Save.
At this point, now we can say that our foreman server is ready to manage servers.
Let’s suppose we want to add Ubuntu server { ubuntu-server.example.com – 192.168.1.14 }

Now Add puppet Classes to this host in the same way that we do for the host “foreman.example.com” in the above steps.
Reference : http://theforeman.org/manuals/1.11/index.html#2.Quickstart
Foreman is a free and open source configuration management and provisioning tool for physical and virtual servers. Foreman performs the repetitive and other configuration tasks using the tools like puppet, chef and Ansible. For provisioning, Foreman make the use of DHCP, DNS, TFTP and kickstart file.Though in this article we are going to use puppet tool with Foreman.
Foreman provides a dashboard from where system administrator can perform all configuration and audit task, we can also get the reports like how many nodes are managed by foreman and what configuration has been pushed on the nodes.
In this post i am going to demonstrate how to install and configure foreman 1.11 with puppet on CentOS 7.x
Below are details of my server on which i will install and configure Foreman.
- OS(Operating System) = CentOS 7.x
- IP Address = 192.168.1.5
- Hostname = foreman.example.com
- SeLinux = Disabled
- Firewall = Enabled
Step:1 Enable puppetlabs repo and install foreman installer
Open the terminal and run the following commands one after the other.[root@foreman ~]# rpm -ivh http://yum.puppetlabs.com/puppetlabs-release-el-7.noarch.rpm [root@foreman ~]# yum -y install epel-release http://yum.theforeman.org/releases/1.11/el7/x86_64/foreman-release.rpm [root@foreman ~]# yum -y install foreman-installer
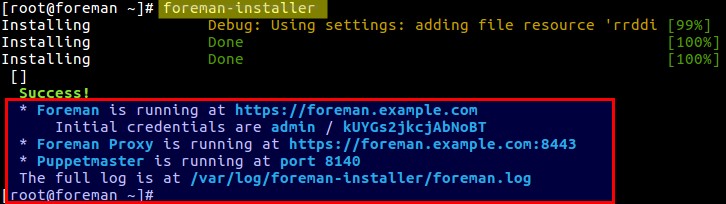
Step:2 Start the Installation using foreman installer
To start the foreman installation , run the command “foreman-installer” , it will be non-interactive installation. In case you want the interactive installation use ‘-i‘ option in the command like “foreman-installer -i”[root@foreman ~]# foreman-installerOnce the foreman installation is completed we will get the output like below :
We can see that initial credentials have been created for the foreman dashboard and moreover puppetmaster is also installed which is running in 8140 port.
Before Accessing the dashboard, it is recommended to open the required ports in the OS firewall. Execute the beneath commands one after the other.
[root@foreman ~]# firewall-cmd --permanent --add-port=53/tcp
success
[root@foreman ~]# firewall-cmd --permanent --add-port=67-69/udp
success
[root@foreman ~]# firewall-cmd --permanent --add-port=80/tcp
success
[root@foreman ~]# firewall-cmd --permanent --add-port=443/tcp
success
[root@foreman ~]# firewall-cmd --permanent --add-port=3000/tcp
success
[root@foreman ~]# firewall-cmd --permanent --add-port=3306/tcp
success
[root@foreman ~]# firewall-cmd --permanent --add-port=5910-5930/tcp
success
[root@foreman ~]# firewall-cmd --permanent --add-port=5432/tcp
success
[root@foreman ~]# firewall-cmd --permanent --add-port=8140/tcp
success
[root@foreman ~]# firewall-cmd --permanent --add-port=8443/tcp
success
[root@foreman ~]# firewall-cmd --reload
success
[root@foreman ~]#
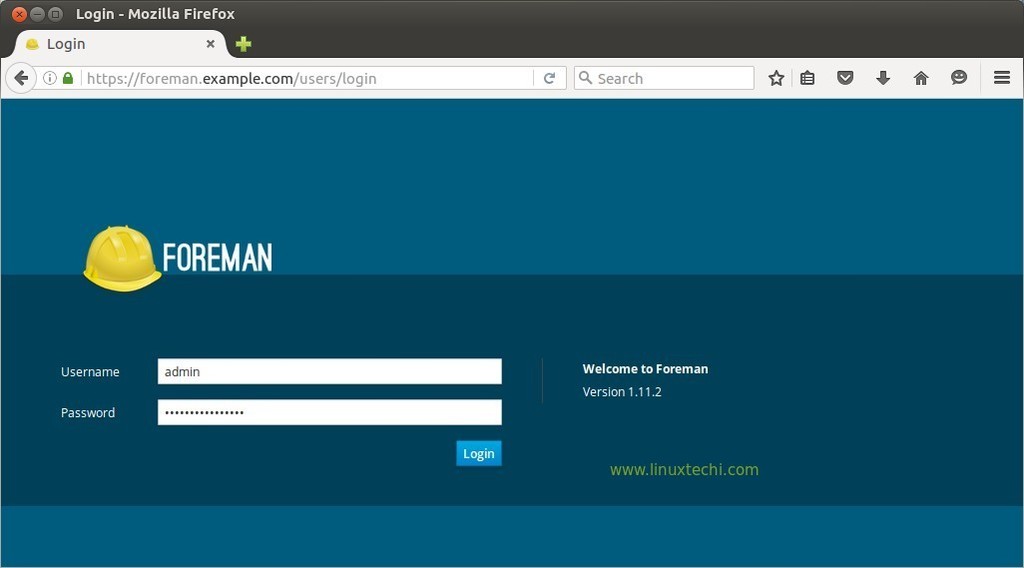
Step:3 Access Foreman Dashboard
To access foreman dashboard , type “https://In My Case dashboard can be accessed from the url : https://foreman.example.com
Use the initial credentials which is created during foreman installation

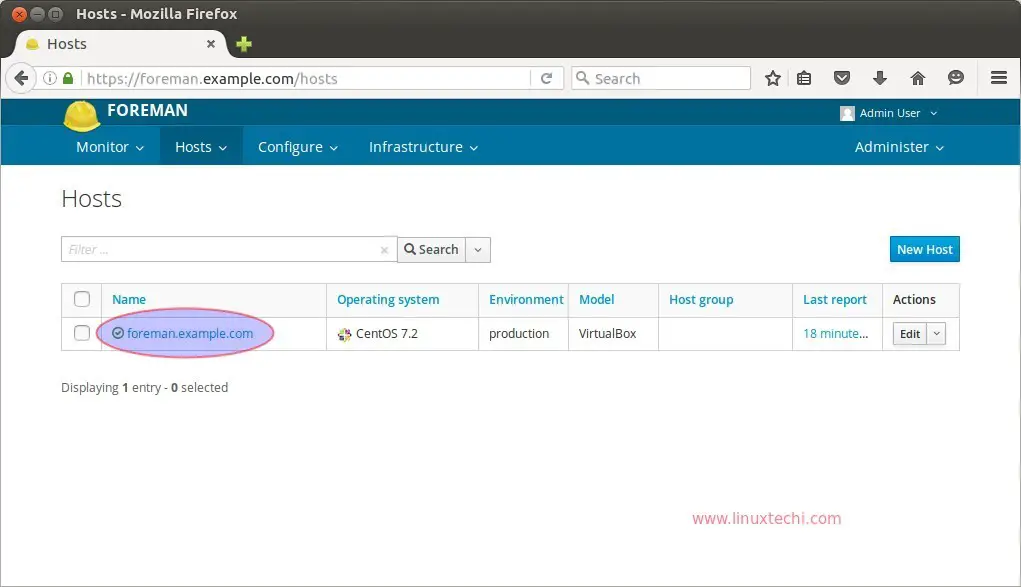
By default foreman server itself is registered in foreman dashboard. To check the host information,
click on Hosts options —> then all hosts.

Let’s install ntp module on the foreman server and import it from dashboard. NTP is very much required for puppet to work smoothly. Use the below command to download ntp module.
[root@foreman ~]# puppet module install puppetlabs-ntpNow import the NTP module from dashboard. Click on Configure —-> Classes


Click on Import option, it will import the NTP module in foreman dashboard, example is shown below :

Select the Module and click on Update.

Click on ‘ntp’ class name and the select ‘Smart Class Parameter’
Select the override option in case you want to specify your own NTP Servers. Change the Key type Value from “String” to “Array” and Specify the NTP Server’s name in the Default value Box and then click on Submit. Example is shown below.
Now it’s time to add ntp class to the host, for that go to Hosts options and Select the host (foreman.example.com), Click on Edit. Go to the ‘Puppet Classes‘ Tab and Click on ‘+‘ option to add ntp class on the host and then click on submit
Now Run the following puppet command from the foreman server to configure the NTP Service automatically.
[root@foreman ~]# puppet agent --testNow Check the reports from the Dashboard for the host.
Go To Hosts—> Click on hosts{foreman.example.com}—> Click on Reports.

As we know that puppet makes the use of SSL Certificates to set up the secure communication between puppet server and its nodes. Once Puppet Server sign the certificates of its node, then only communication can occur.
Let’s create a autosign entry for puppet nodes which are on the domain “example.com”
In the Forman Dashboard , Go To Infrastructure —> Select Smart Proxies —> Select Autosign under Action Tab
Click on New to create new ‘autosign’ entry. Specify the domain name and then click on Save.
At this point, now we can say that our foreman server is ready to manage servers.
Step:4 Add New hosts to Foreman Dashboard.
To add new hosts or servers in the foreman dashboard we have to install puppet agent on the hosts and execute the following puppet command from the host.Let’s suppose we want to add Ubuntu server { ubuntu-server.example.com – 192.168.1.14 }
linuxtechi@ubuntu-server:~$ sudo apt install puppet
linuxtechi@ubuntu-server:~$ puppet agent -td --server=foreman.example.com
Now verify the host in dashboard.
Now Add puppet Classes to this host in the same way that we do for the host “foreman.example.com” in the above steps.
Note : Command to remove puppet module.
[root@foreman ~]#  puppet module uninstall --environment=production puppetlabs-ntp
Notice: Preparing to uninstall 'puppetlabs-ntp' ...
Removed 'puppetlabs-ntp' (v4.2.0) from /etc/puppet/environments/production/modules
[root@foreman ~]#
That’s conclude the article, Please share your feedback and Comments
Reference : http://theforeman.org/manuals/1.11/index.html#2.Quickstart

No comments:
Post a Comment